


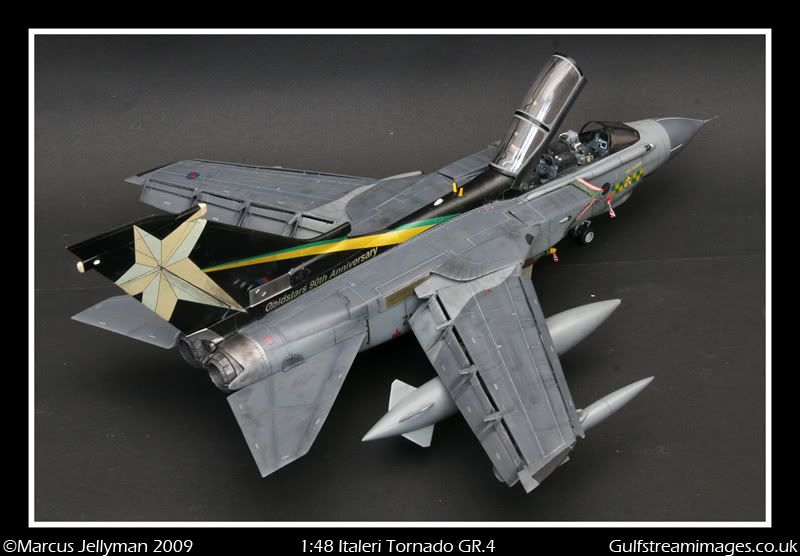
1:48 Italeri Tornado GR4 - RAF 2Sqn 'Shiny TWO' & 31Sqn 'Goldstars'
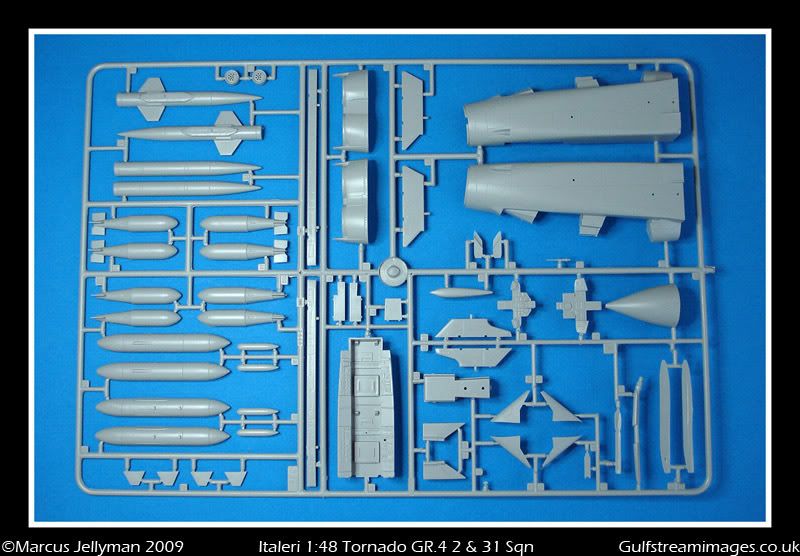
This is my latest build, Italeri's Tornado IDS.The model willdressed in the colourful anniversary markings of RAF squadron's 2 & 31. For the GR4 variant i will be usingthe Italeri IDS kit with a few minor modifications to bring it up to standard, these will included a few changes in the cockpit and a couple of external mods. Extra's for the build will be various resin parts from Paragon and Flightpath,the decals will form Model Alliance.
Build Info
Tools & Sundries used
Loctite Super Glue 3 Gel Cyanoacrylate
Tamiya Extra Thin Cement
ZAP-O Odorless Cyanoacrylate
Milliput - Fine
Squadron Green Putty
Tamiya Masking Tape
Evergreen Sheet Styrene and Strip
0.2 & 0.5 Lead Wire
5 AMP Fuse Wire
1200 Grit Wet & Dry Paper
Dental Tools for scribing
Olfa-P Cutter
Micro Sol & Set decal solutions
Johnsons Klear
Bare Metal Foil - Chrome
Paints and Weathering
Halfords Grey Primer
Xtracrylic XA1004 RAF Dark Sea Grey
Xtracrylic XA1036 RAF Dark Camouflage Grey
Xtracrylic XA1137 Light Gull Grey
Tamiya X-1 Black
Tamiya X-2 White
Tamiya XF-69 Nato Black (For Tyres)
Tamiya X-27 Clear Red
Tamiya X-25 Clear Green
Gunze Sangyo H-318 Radome
Gunze Sangyo H-76 Burnt Iron
Gunze Sangyo H-92 Clear Orange
ProModeller Dark Dirt & Black Washes
Tamiya Weathering Master Powders Set B
Inscride Soft Greystone Pastels
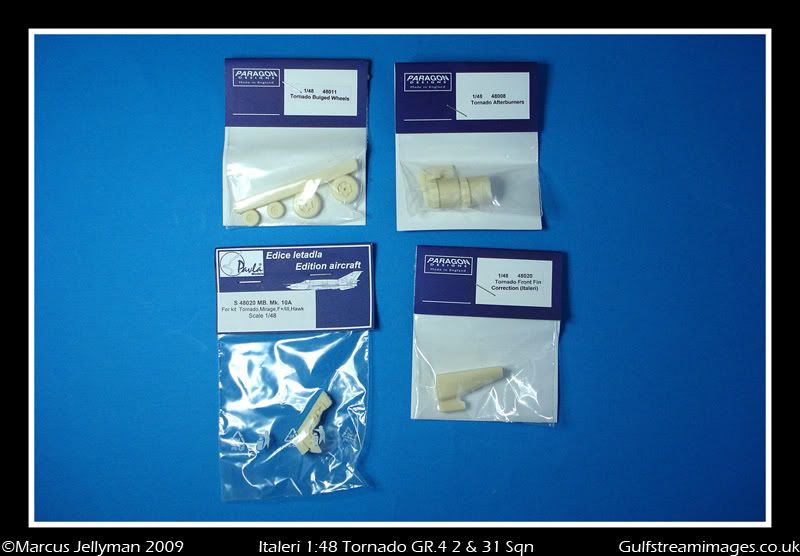
Aftermarket Parts
Model Alliance ML48128 RAF Squadrons 90th Anniversary
Model Alliance ML48154 RAF UK Air Arm Update 4
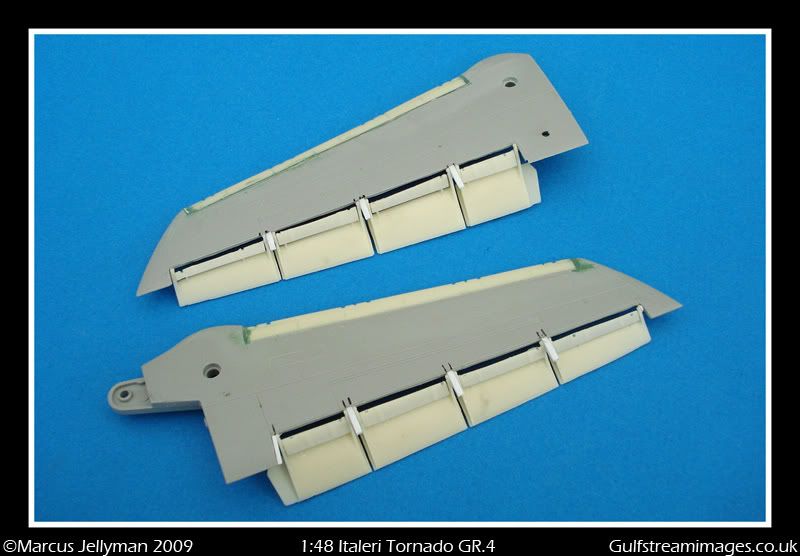
Paragon Designs PAR48007 Tornado Flaps& Slats
Paragon Designs PAR48008Tornado Burner Cans
Paragon Designs PAR48011 Tornado Bulged Wheels
Paragon Designs PAR48020 Tornado Fin Correction
Pavla Models PAVS4820 Martin Baker MK10A Seats
Flightpath CPU-123B Laser Guided Bombs
First up, the aircraft in question.
'Shiny Two'

'Goldstars'

On tothe kit. I have read a few negative stories about how this kit builds up but i have nothing but good things to say about it. This is the second one i have built and apart from a couple of area's that need changing, it builds up into a very nice model of the Tornado.


The excellent Model Alliance decals.


Resin goodies from Paragon.
The first job on the list was to add the Paragon Flap's & Slat's to the kit wings. I first cemented the wings together and using the instruction measured out what plastic needed to be removed. Fortunately the cuts were along existing panels line so i used my Olfa-p cutter to sribe through the wings.
Once removed from their casting blocks the flaps were separated and attached to the wings, making sure to get the angle correct.

Next was the cockpit, i added small stripes of plastic to build the LCD screens in the rear of the pit, everything was then painted and small details picked out with a tooth pick.

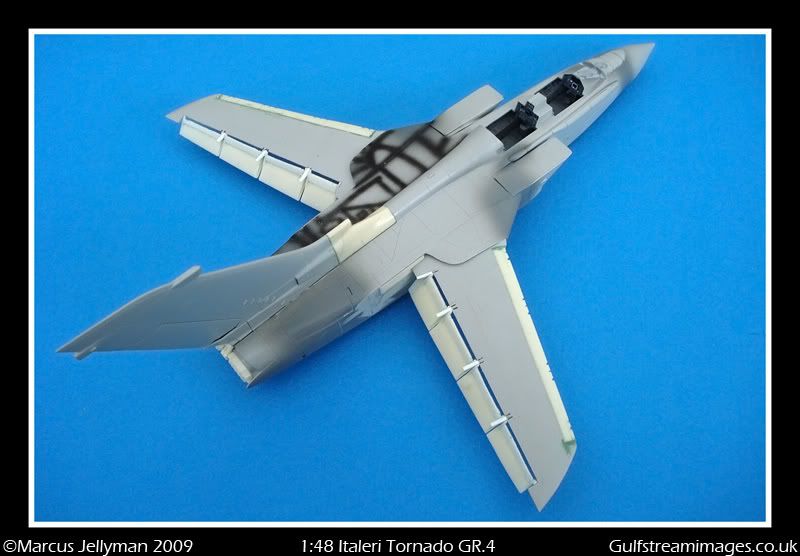
The fuselage has now been constructed, making sure to add enough weight in the nose to prevent a tail sitter. Filler was needed in a couple of area's but nothing to major, any lost detail was then re-scribed. The entire model was then primed with Halford grey primer.
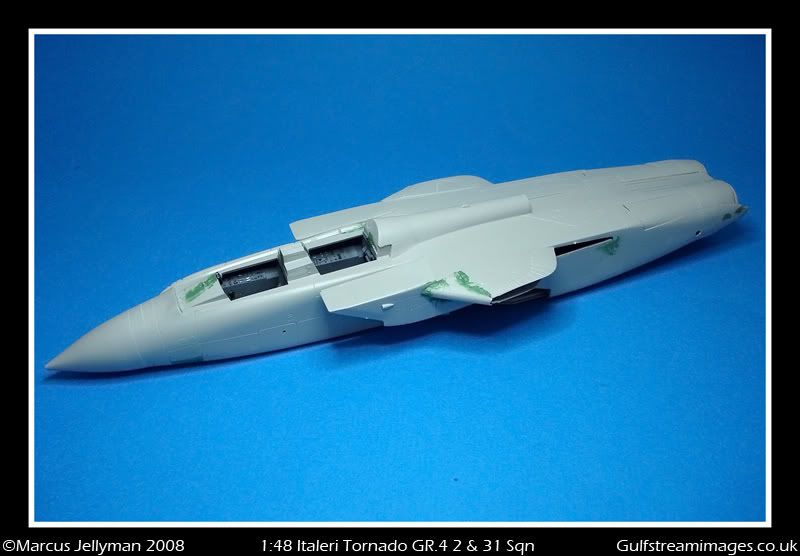


The port gun had to be filled as it's not on the GR4.
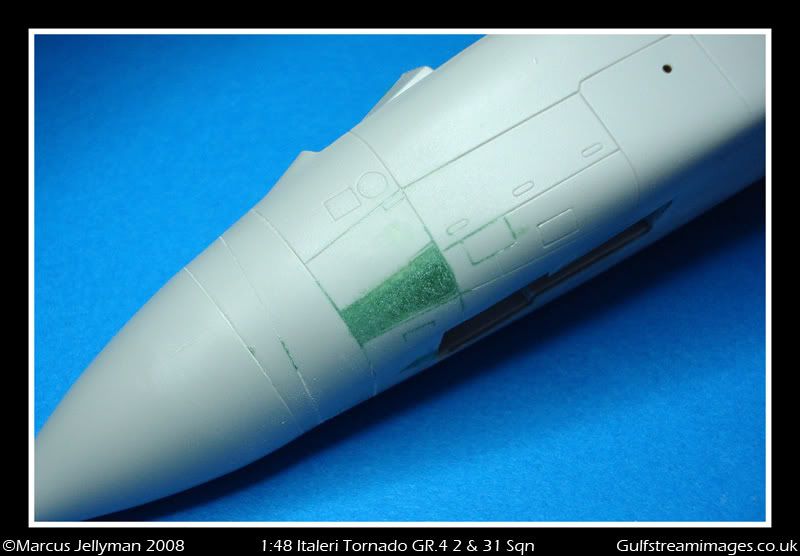
One of the pods under the GR4 nose is not included in the IDS kit so i built one from some old resin casting blocks. These were glued together and then whittled down to get the correct shape.


The flaps set also includes Wing Root Jacket that replace the non-exsistant one's in the kit.

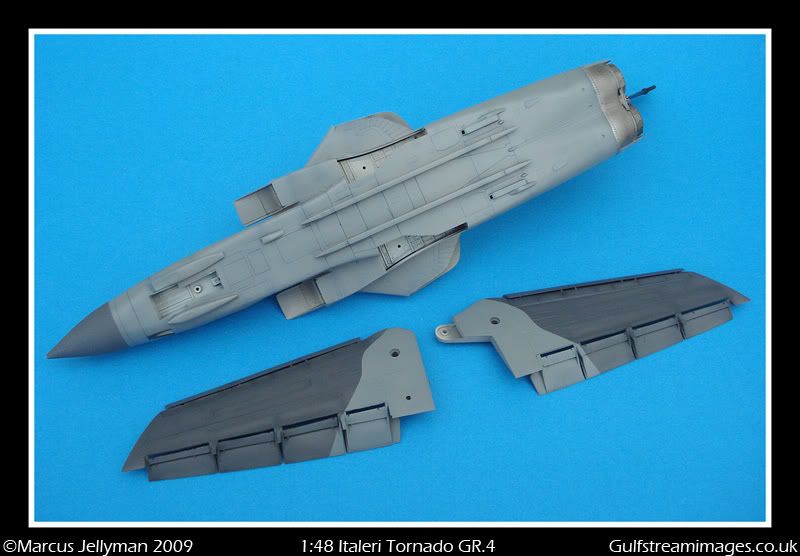
Burner cans installed.

One of the area's that need attention is the base of the tail, the kit verision is the wrong profile so a Paragon replacement was grafted on.

Themodel now ready for paint.


The landing gear and wheels were painted with Xtracrylic Light Gull Grey. Brake lines were added from fuse wire, and Bare Metal Foil used for the Oleo's.


The fuselage was painted with Xtracrylic XA1004 and 1036, the black spine and tail were painted using Tamiya Black.

Burner cans were paintedusing Citadel Acrylics, the area was then weathered with pastels.

Everything now ready for decals.

For this build i again used the excellent Model Alliance Decals, using Micro Sol & Set they went down very well indeed.

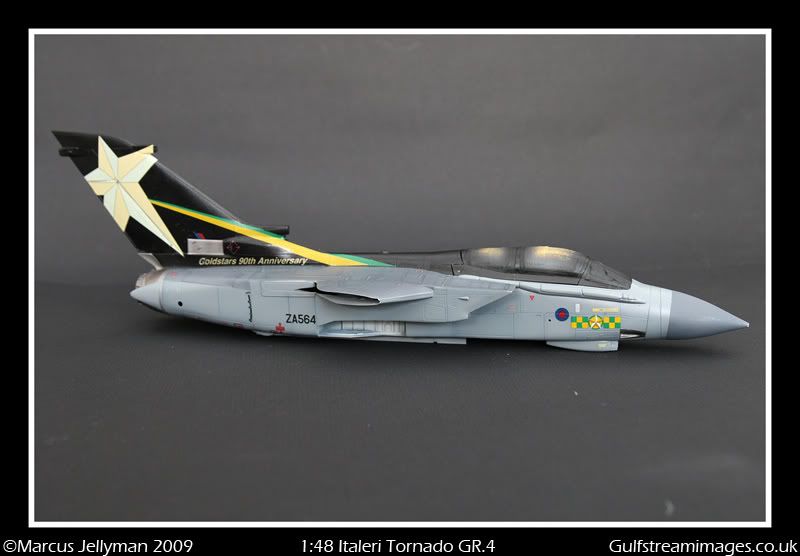


Once the decals has time to dry, the model was given a coat of Johnson's Klear before Promodeller's Dark Dirt wash was applied. Final weathering was added using pastels. The RBF tags and intake covers were home made.
Ithoroughly enjoyed building this one and will most deffinitly build another.


Marcus 