


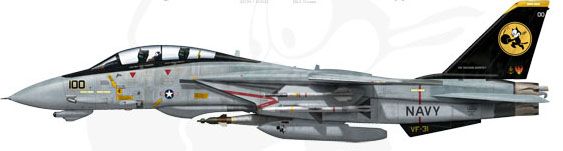
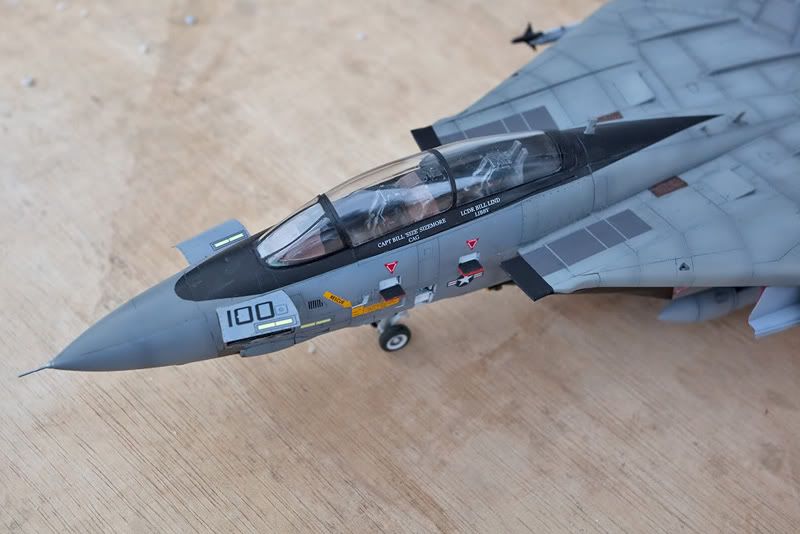
F-14D Super Tomcat
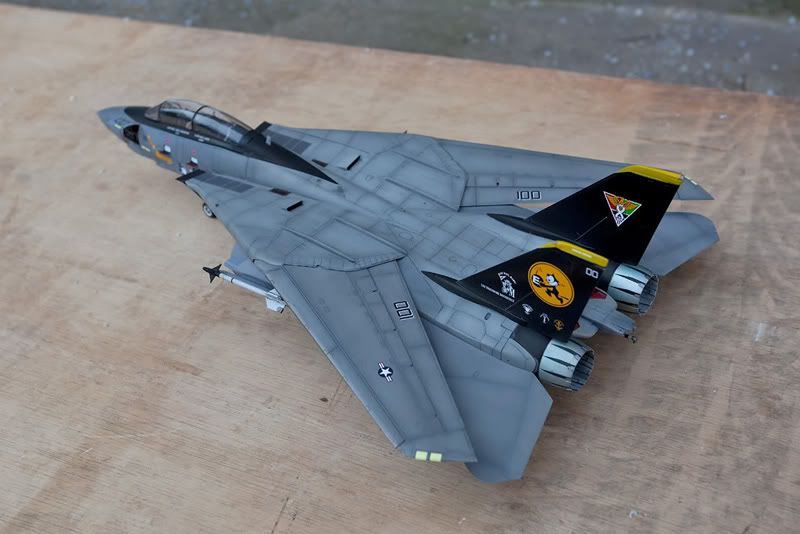
Tomcatters VF-31,#100, 2006 Squadron Air Show Bird
1/48 scale Hasegawa release. Kit number 07212. The kit will be modeled in the scheme of VF-31’s 2006 final flight airshow colours. BuNo:164342. The final flight being made at NAS Oceana Air Show 2006. I will be using the fine decal sheet from Crossdelta No DEC006 which has been printed by Cartograf.
Short History:
VF-31 “Tomcatters” are the second oldest continuously active USN squadron (The oldest being the VF-14 Tophatters), having first been activated as the VF-1B “Shooting Stars” in 1935 and, after several changes, being re-designated VF-31 in 1948. VF-31 is the only US squadron (USN, USMC, or USAF) to have confirmed kills in WWII, Korea and Vietnam.
VF-31 transitioned to the F-14 Tomcat in 1981, having previously flown the F-4 Phantom. Thet were the last Tomcat squadron operational in the Pacific Fleet and flew alongside the VF-213 “Blacklions” in the final carrier cruise with Tomcats aboard. The last ever Tomcat to launch off a carrier was from VF-31, as were the last Tomcats to fly. In 2006 the squadron transitioned to the FA-18E Super Hornet and were re-designated VFA-31
Comments about my planned build:
Not finalized which paints to be used at present but likely to be a mixture of Vallejo Model Air, Tamiya acrylics, and Gunze Mr Hobby. Will post up the finalized list on build completion.
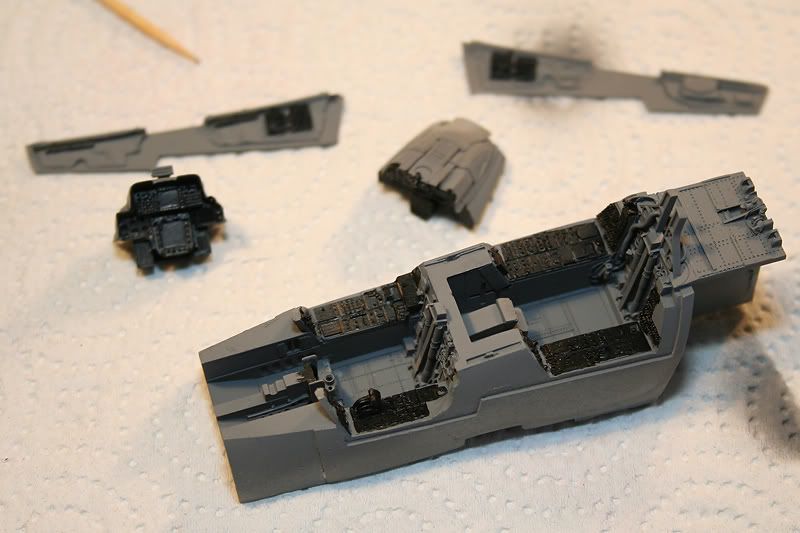
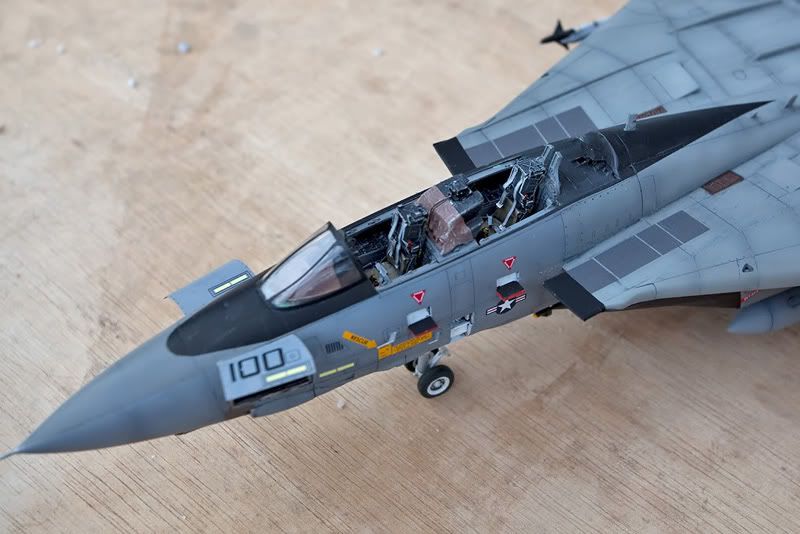
The kit cockpit will be replaced Aires Part number 4333. As with Hans’s build the bang seats will be super detailed with the ejection cord handles from JTGM. Thanks Joe, these handles look fantastic!
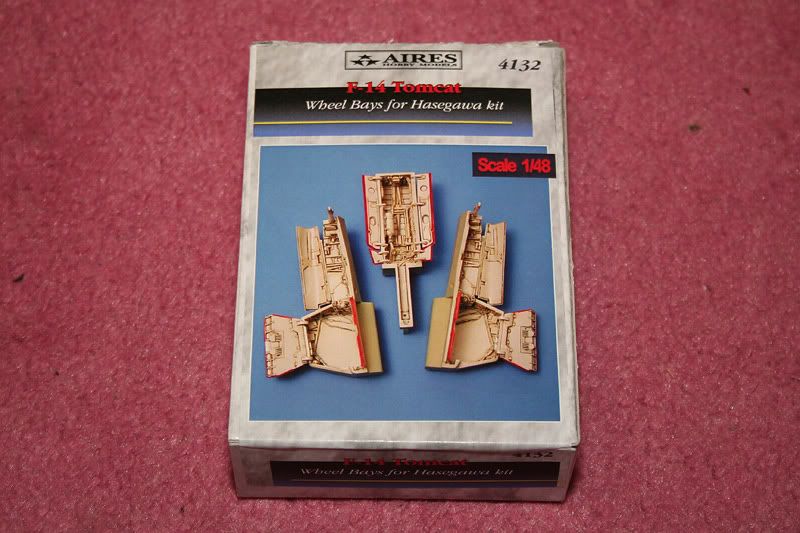
The kit wheel wells will be replaced by the Aires set and will be further detailed using fuse wire to simulate hydraulic/brake lines etc.
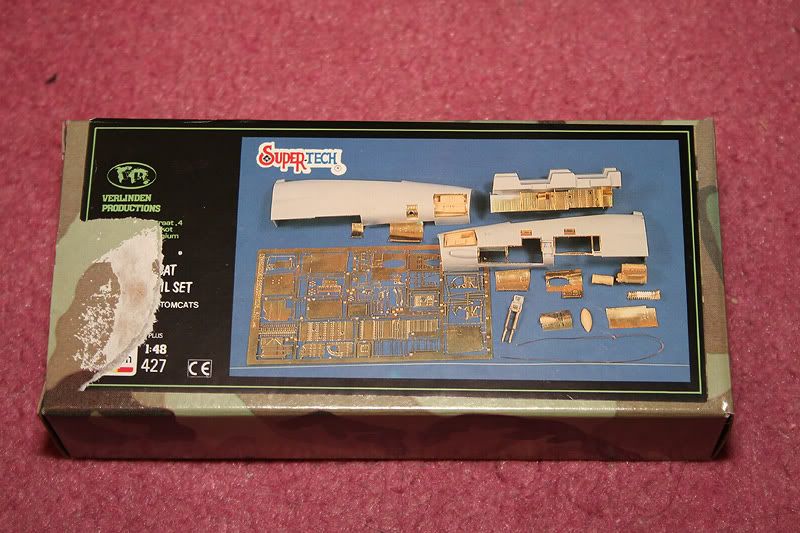
Various panels will be opened and detailed using the Verlinden “Tomcat Super Detail set Part number 427
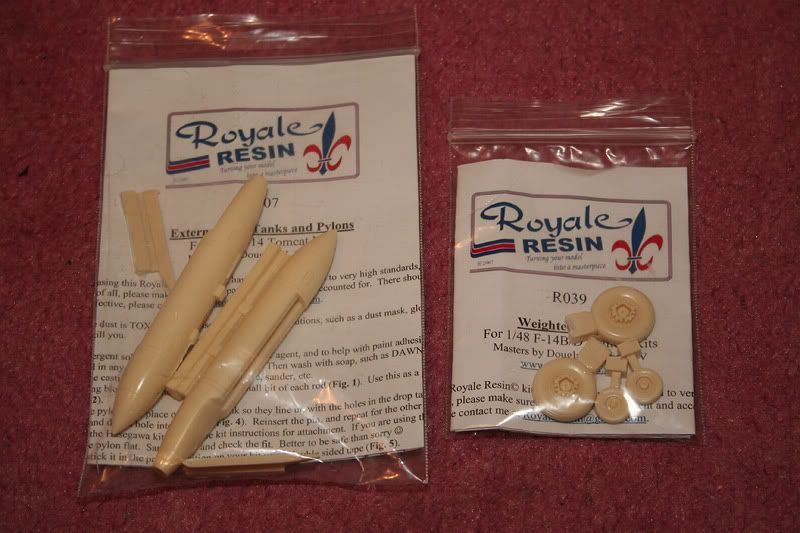
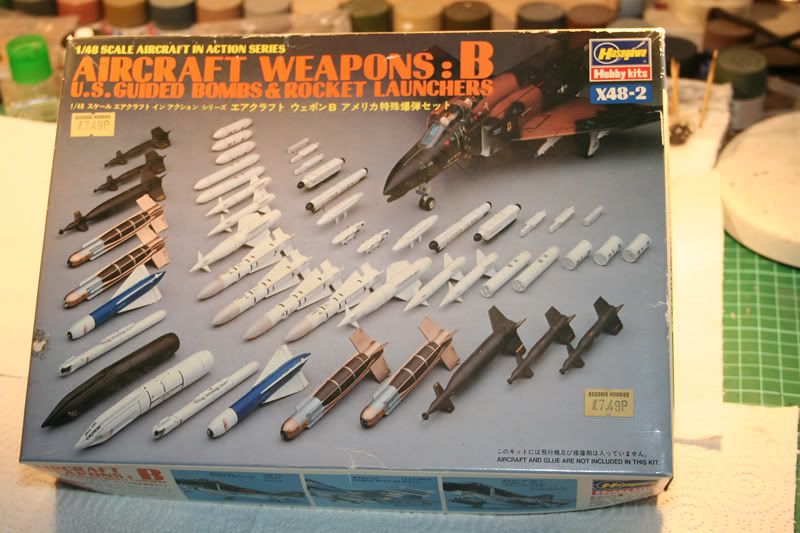
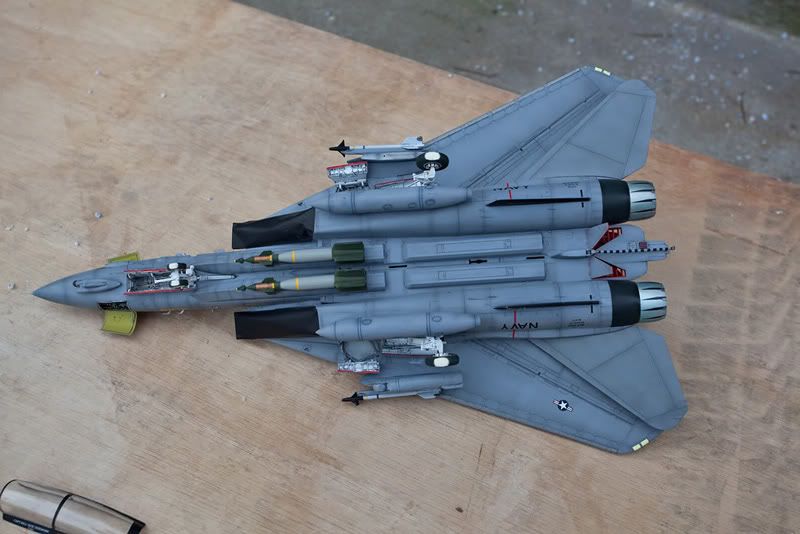
Loadout will come from the Hasegawa weapons set and will be decided nearer completion time. Fuel tanks will be replaced with those from Royal Resin
The included rubber kit wheels will be replaced with bulged/loaded resin parts from Royale.resin.com.
Kit used:
- Hasegawa Models of an F-14 D Super Tomcat kit number 07212
References & aftermarket products used:
- Federal Standards Guide: Color Guide
- Tactical Paint Scheme of the F-14: Grumman F-14D Tomcat TPS
- Modeling the Tomcat: Tomcat Web Site
- Reference Pictures of VF101 Grim Reapers Squadron: Fence Check - F-14 Tomcatters
- Applying faded Navy TPS Schemes: Navy TPS Schemes
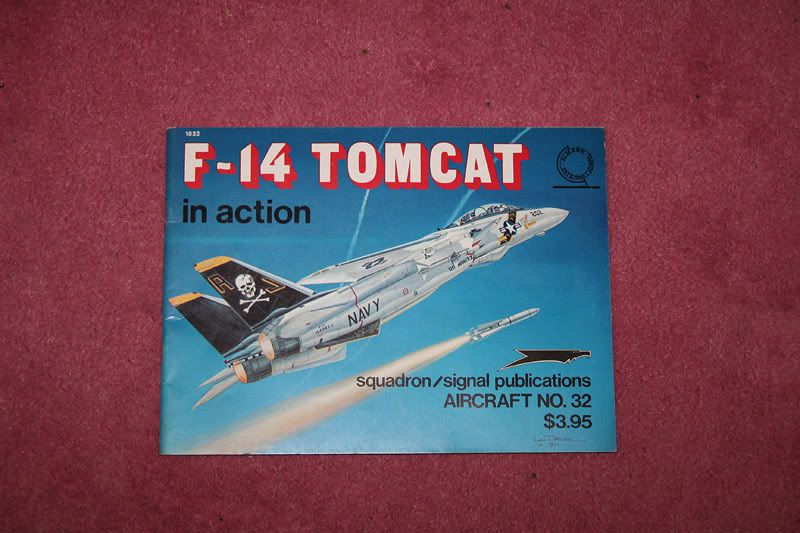
- Book – Squadron Signal F-14 Walk Around series #5503
- Book – Squadron Tomcat – Modern Military Aircraft
- Photo Walk Around: F-14D Walk Around
- Book – Tomcat-Bye Bye Baby!
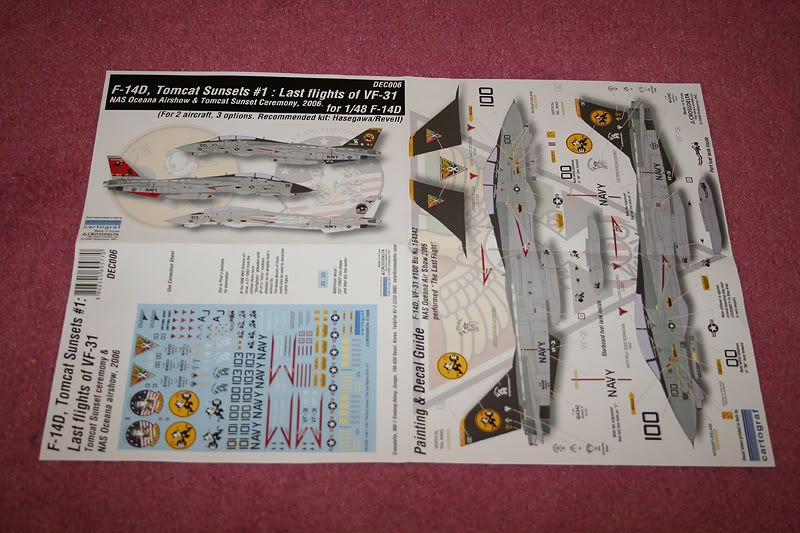
- Decals: Crossdelta sheet number DEC006
- Web article: Building the Tomcat
- Steel Beach FOD covers: SB Cover Review
- Aires Cockpit tub replacement: Cockpit Review
- Aires Wheel Well Replacement: Wheel Wells Review
- Hasegawa Weapons Set B&D: Weapons and External Stores
- Royale Resin: Bulged Wheels and External Tank Set
-
- A special thank you to Doug Smith by providing the pre-releases of these wonderful upgrades and letting us give them a test run.
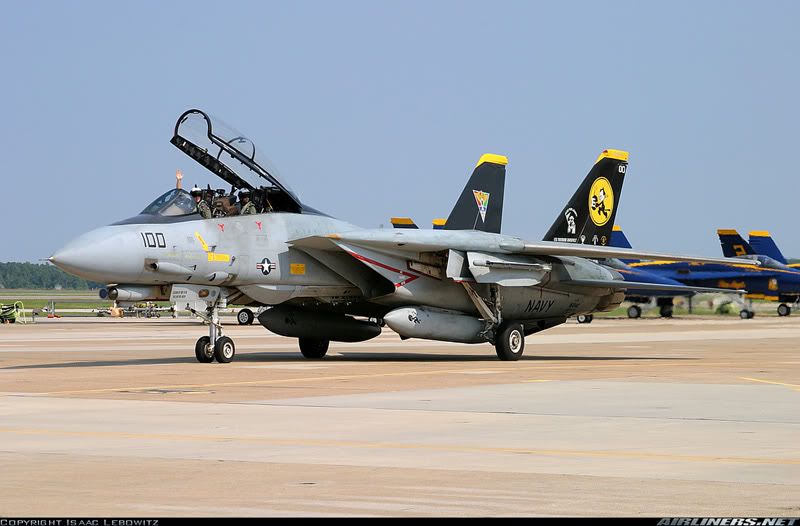
Reference Picture of BuNo: 164342:
Proverbial box shot of where i'm starting.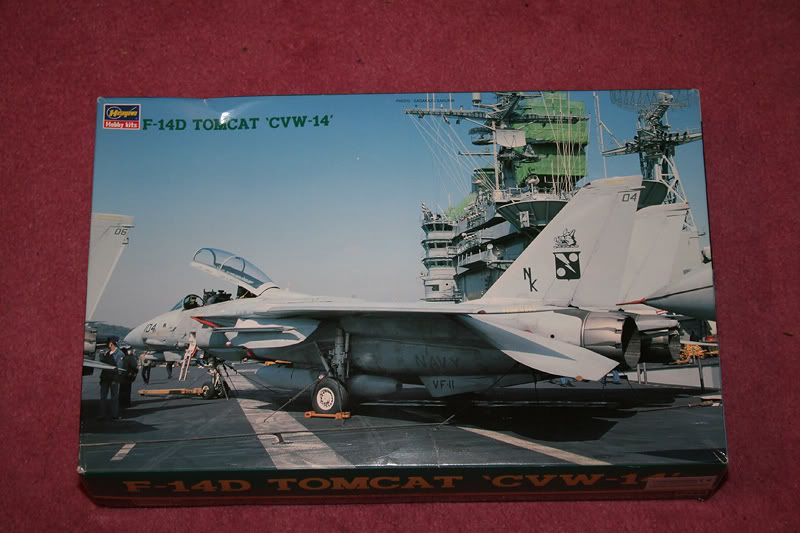
And
the decals I'll be using for the build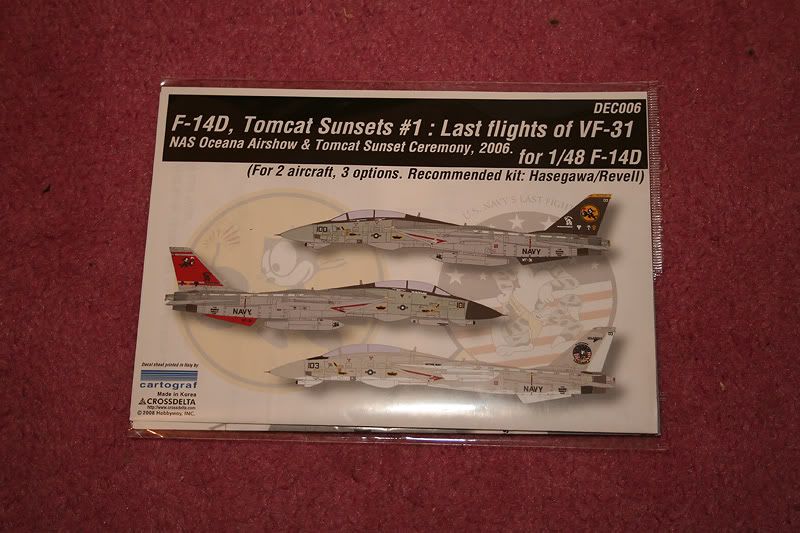
Some
of the references I'll be using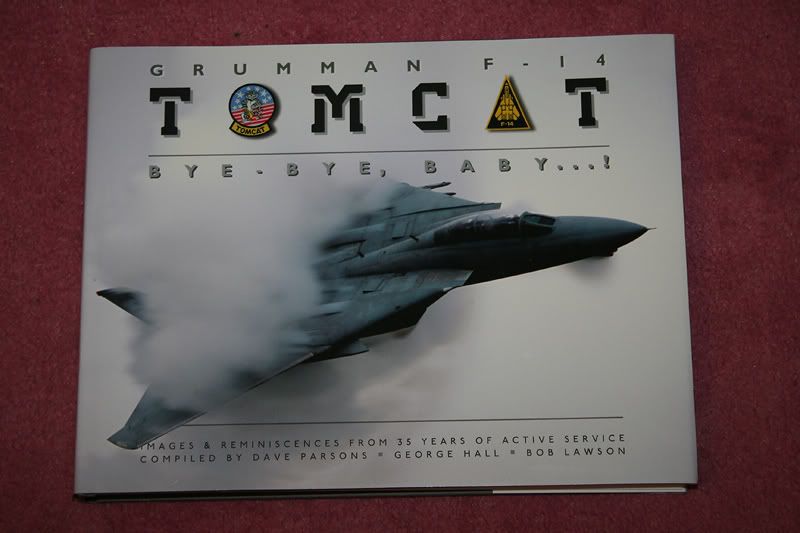
After
market details I'll be working with.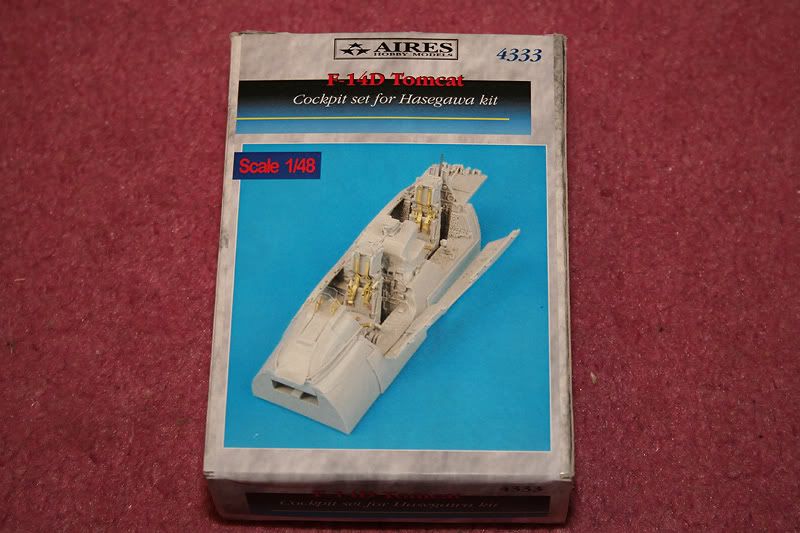
First progress. Got to work on getting the resin cockpit to fit the
fuselage
The parts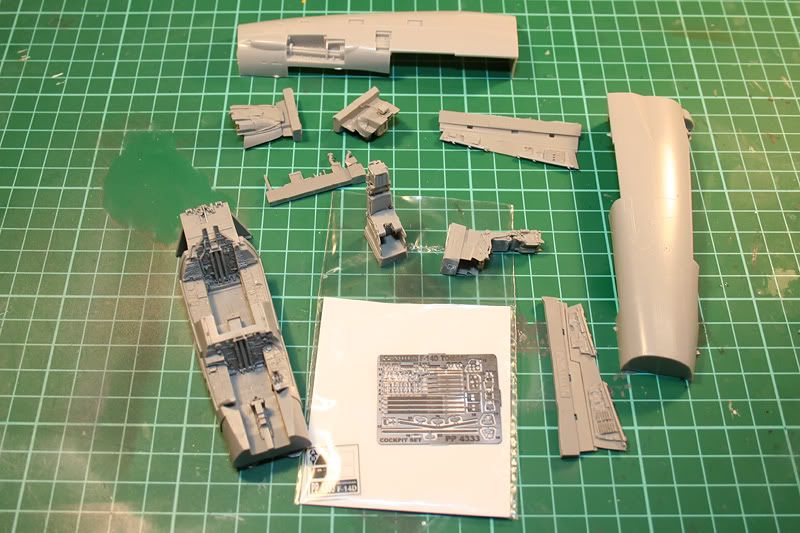
After
a lengthy session of sanding, cutting, dryfitting etc the pit roughly fits. Some
more fine tuning will be done when i finish painting the inside of the cockpit
and get the sidewalls glued in. I checked the fit was good by offering up the
canopy to the loose assembly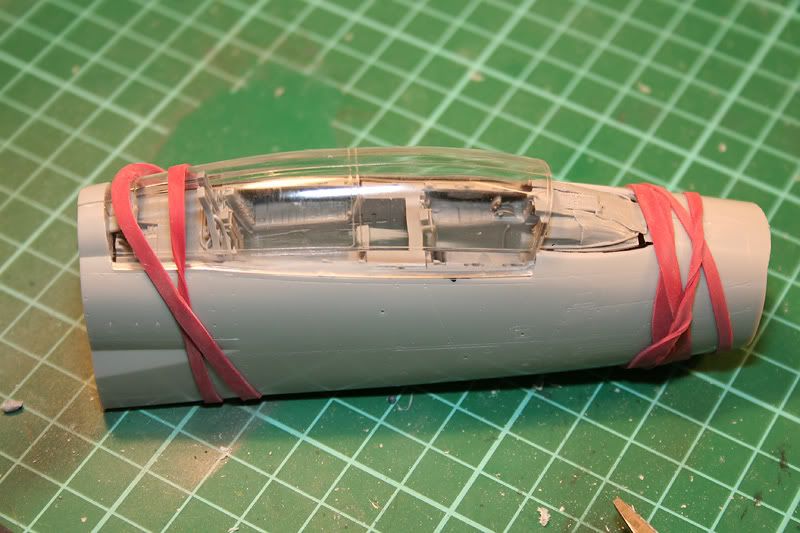
Started
the painting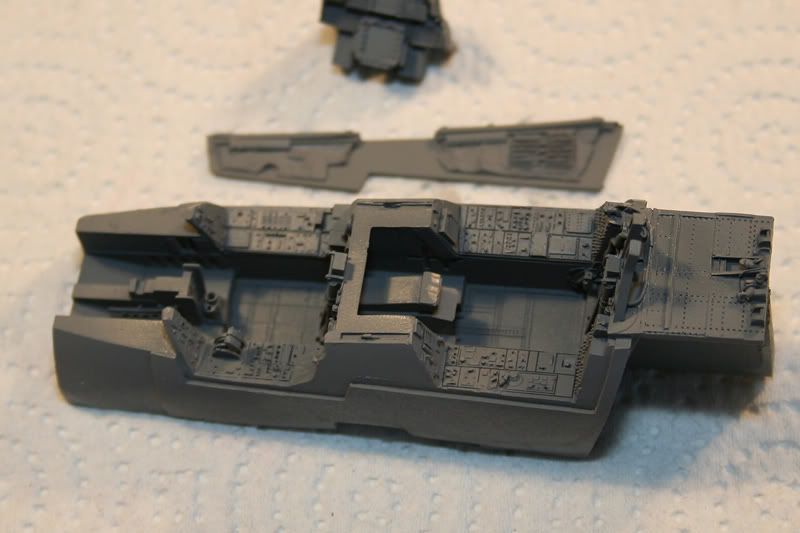
And
where i left it for the evening. 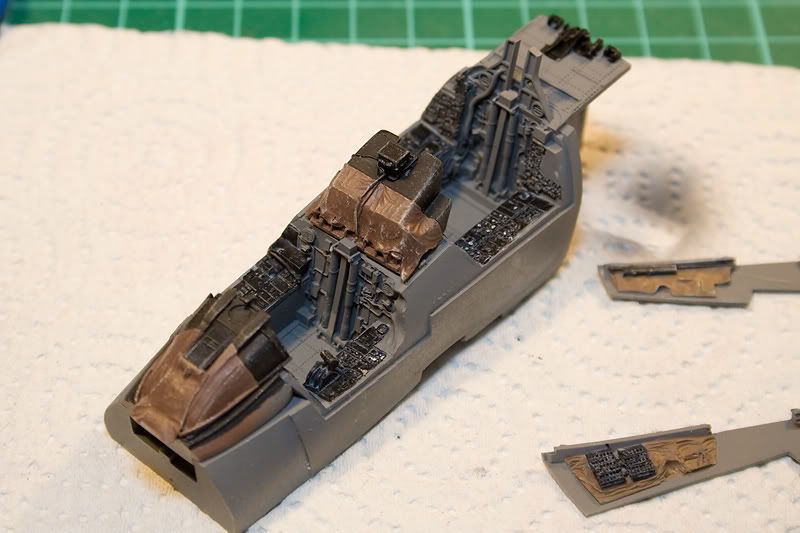
Got
the panel etches out of the box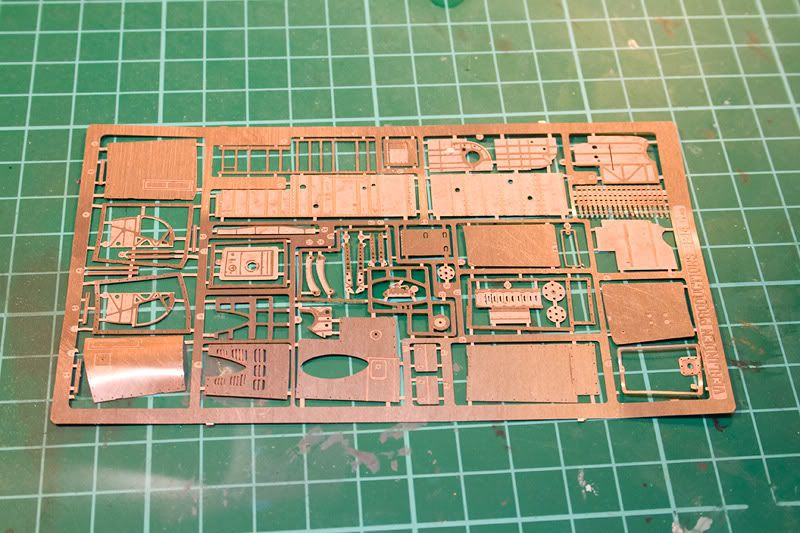
Marked
out a panel for removal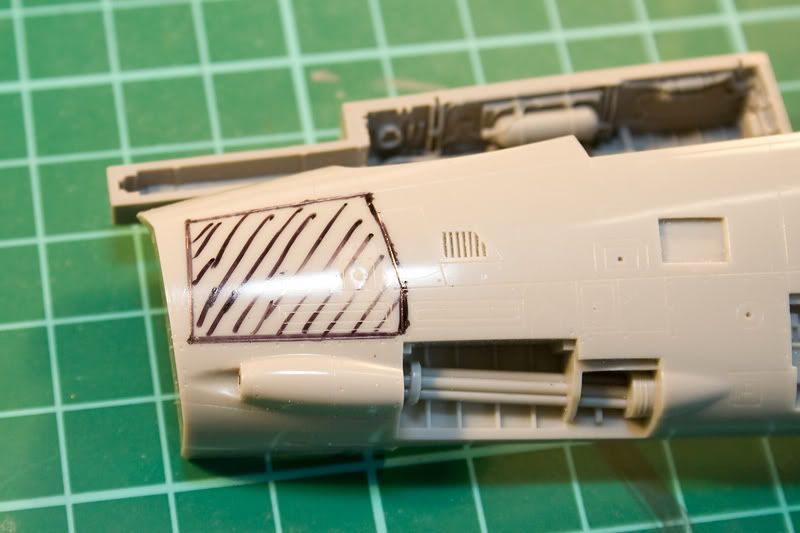
Drilled
around the edges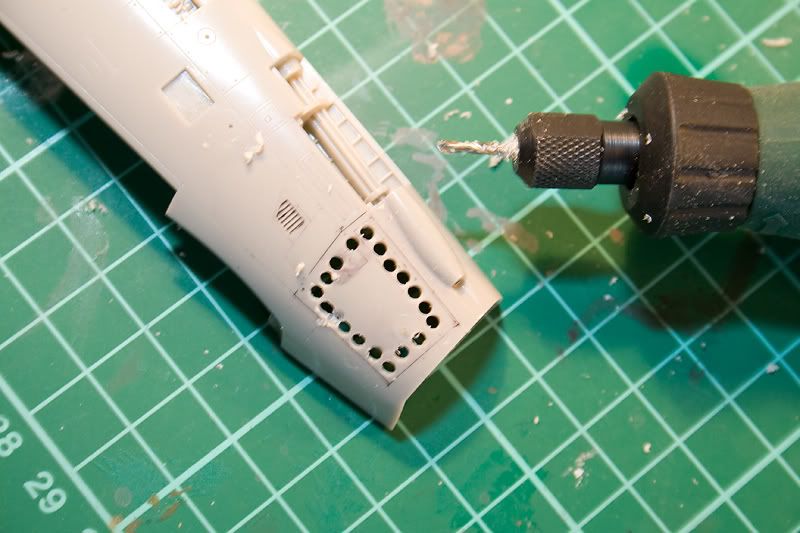
Removed
the scrap piece
Filed
and sanded back to the panel lines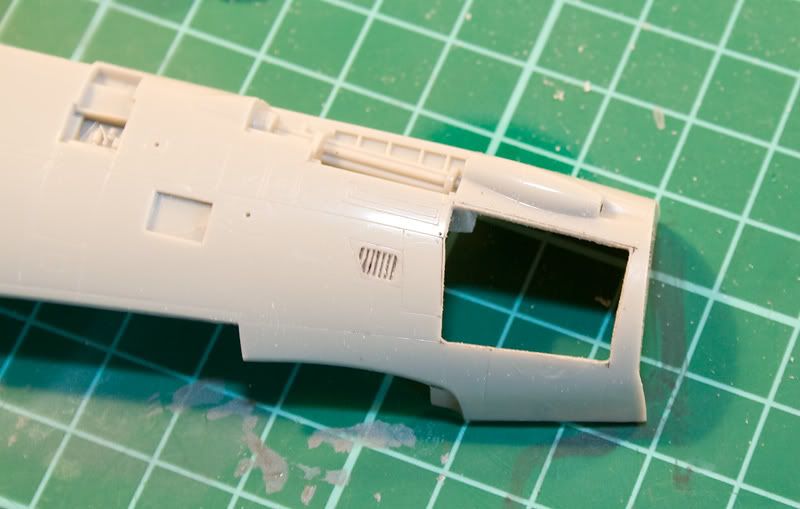
Fitted
the frame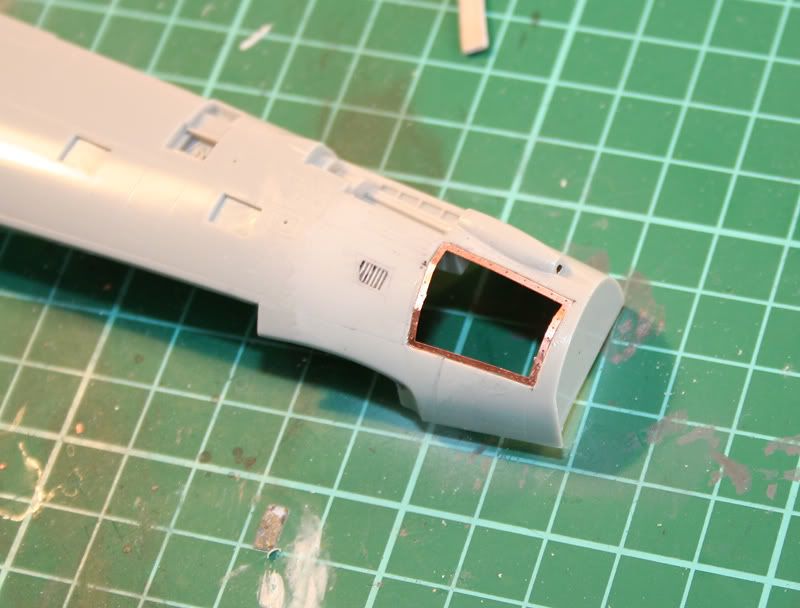
Parts
for the internals and the replacement panel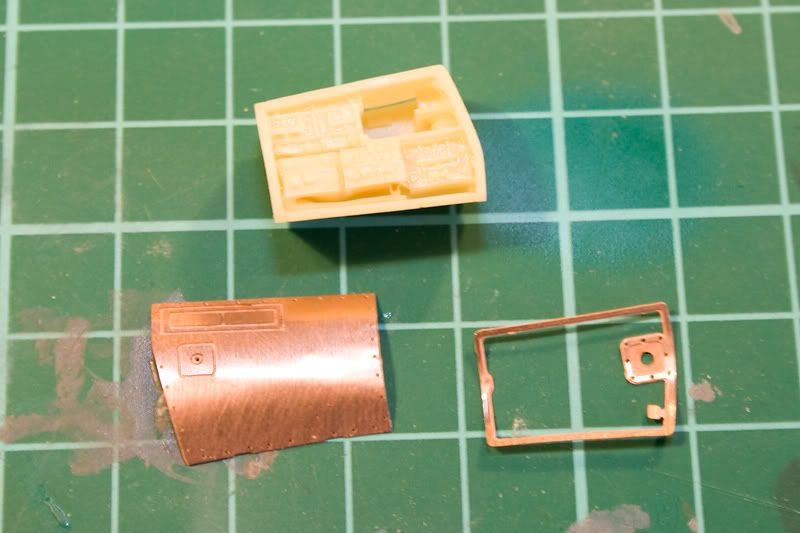
Avionics
bay fitted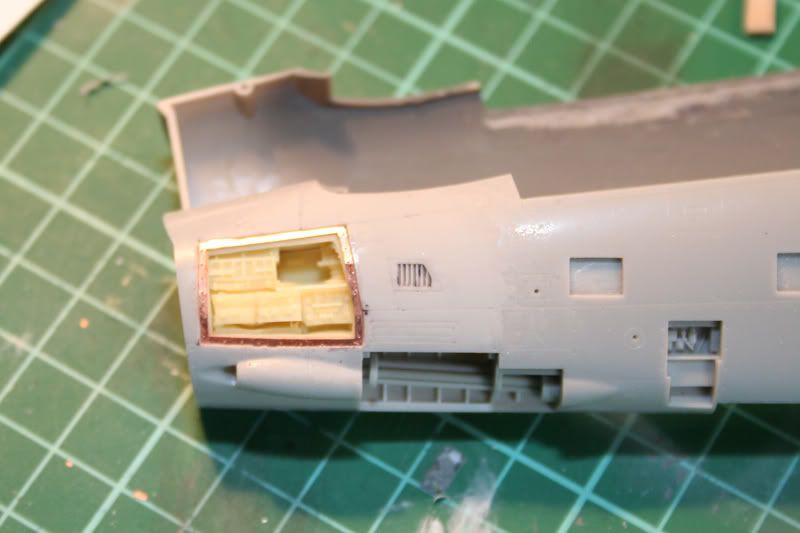
Replacement
panel bent and assembled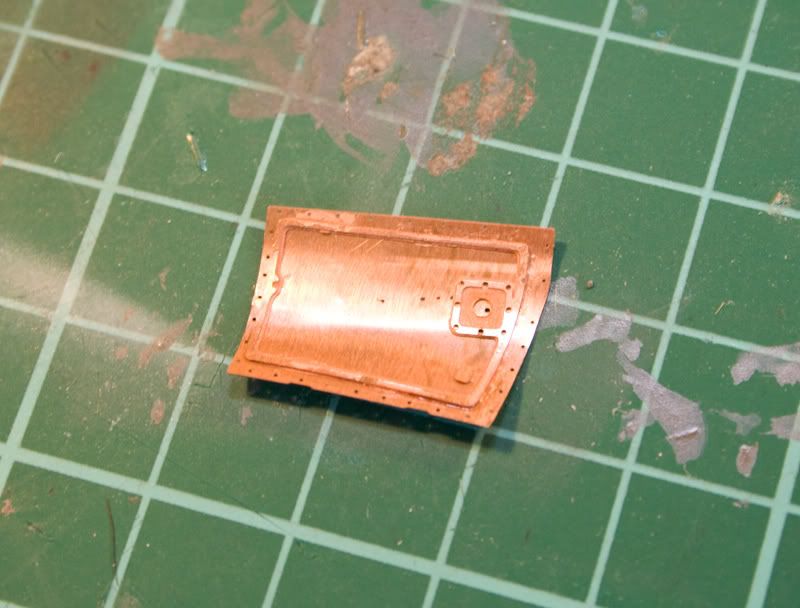
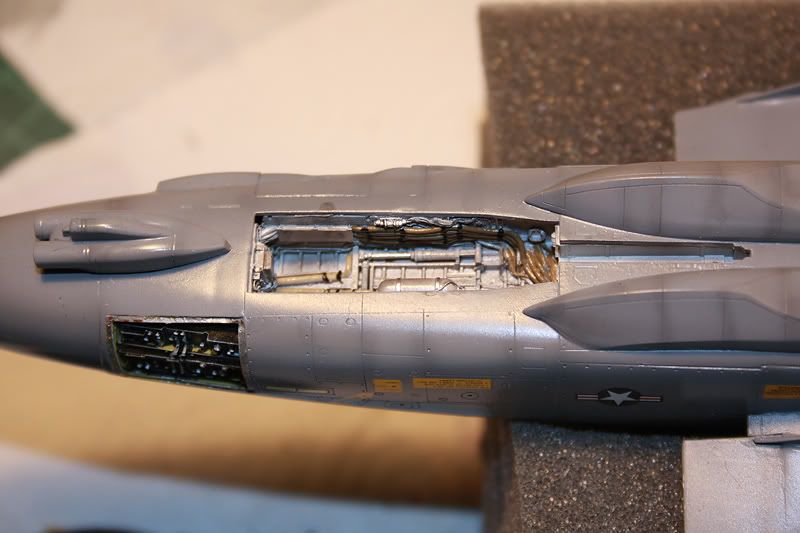
Marked
a panel on the opposite side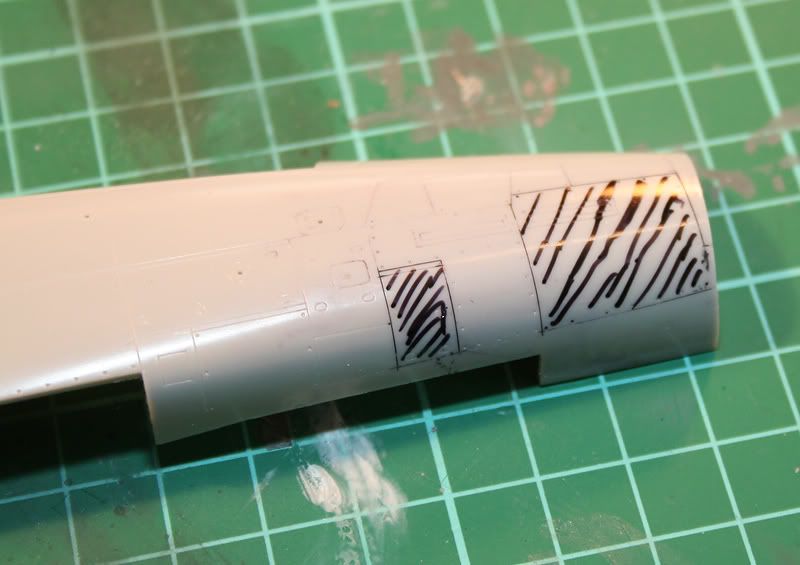
Drilled
edges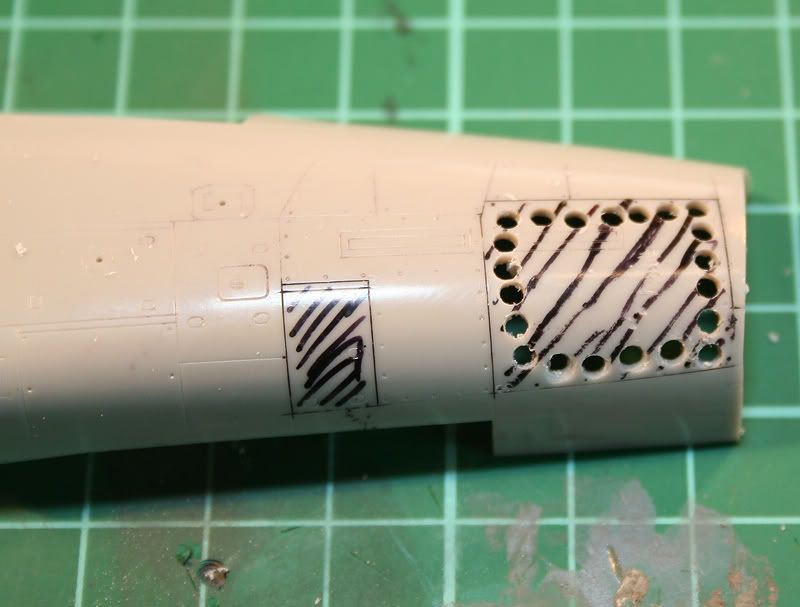
Filed
and sanded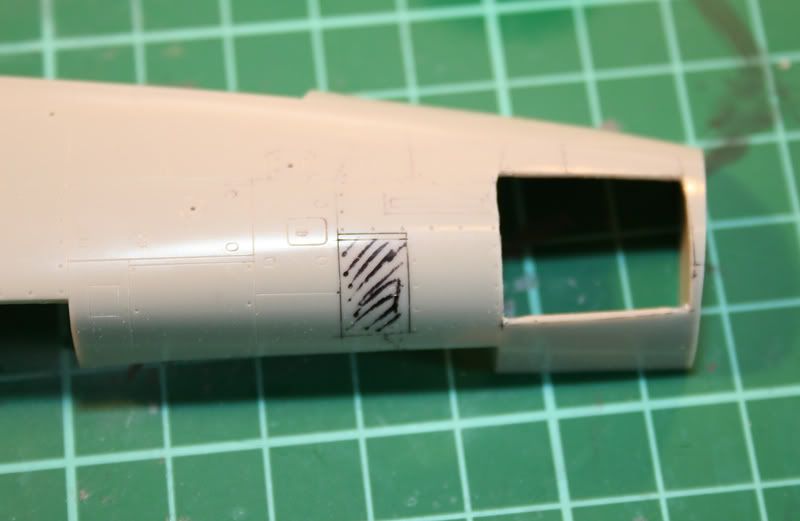
Got
parts ready
Framed
and panel fitted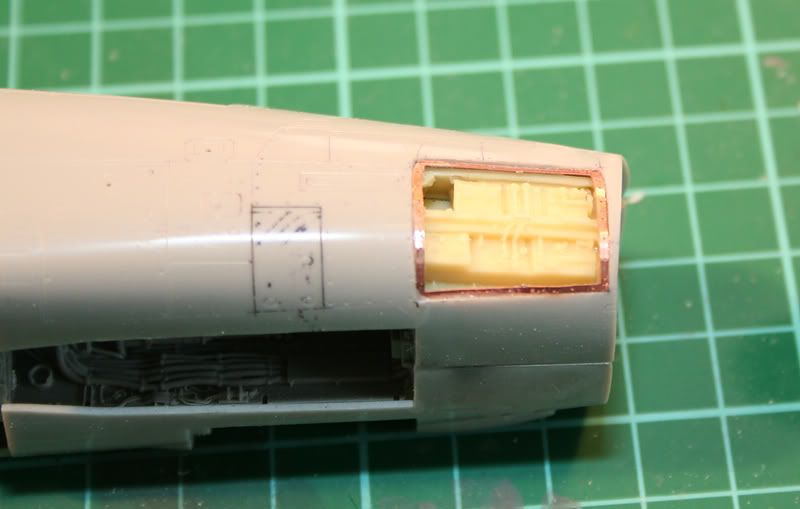
And
all together!!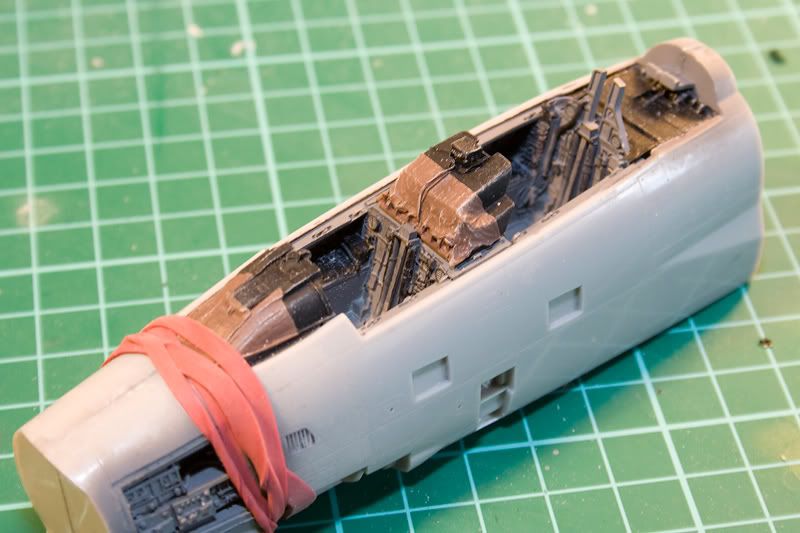
Next job was the fitting of the replacement main gear wells
so some cutting and sanding to do.
Here's the item to be fitted.(two off
obviously!)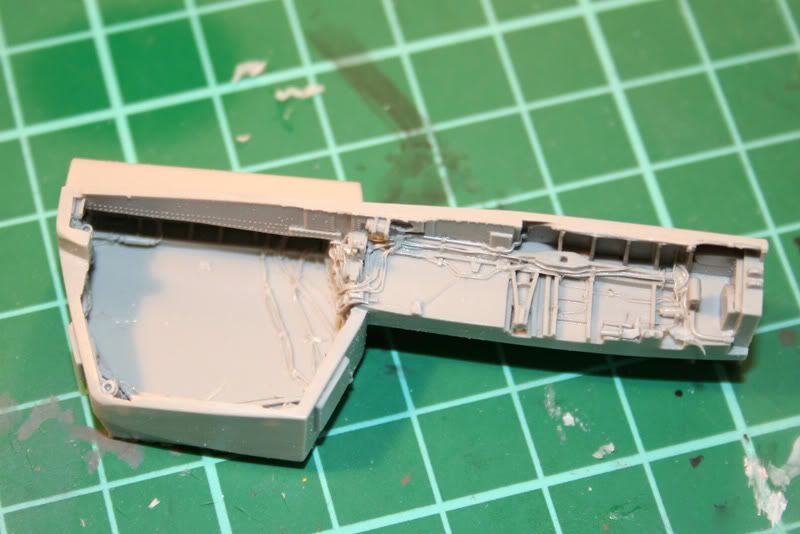
And
here's where it's going to go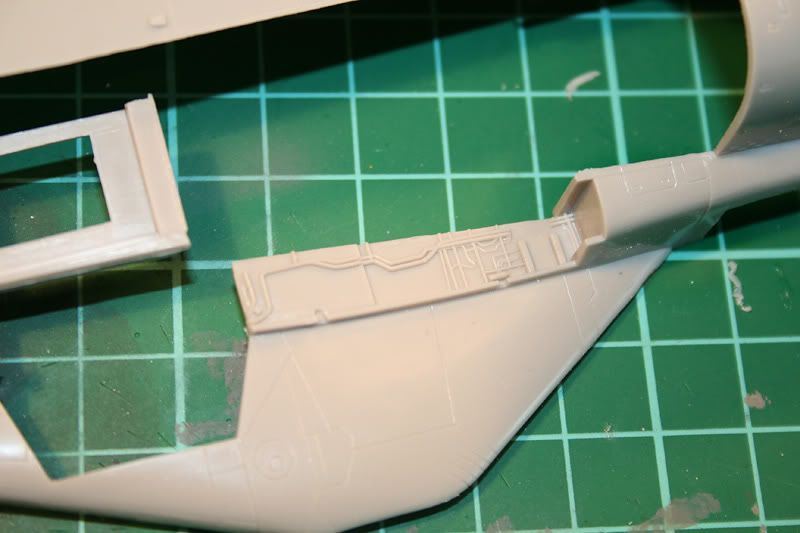
Area
to be romoved from the parent plastic marked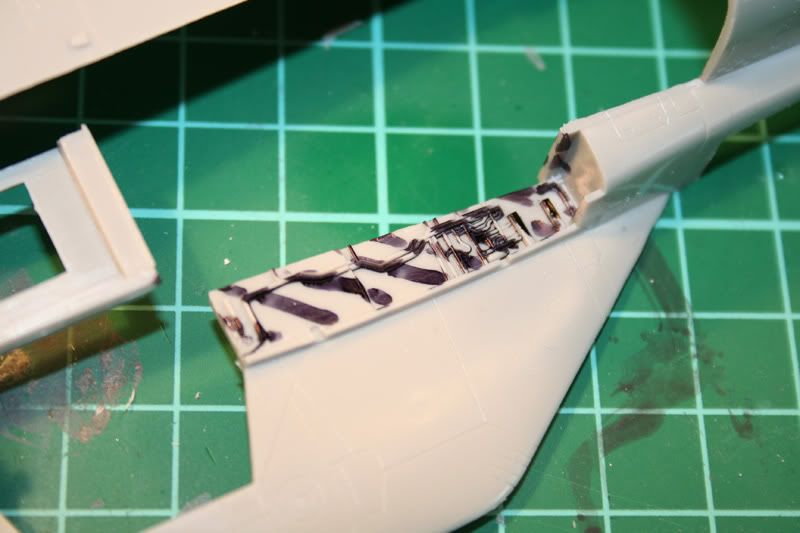
And
cut out(if it looks odd it's because it's the other side)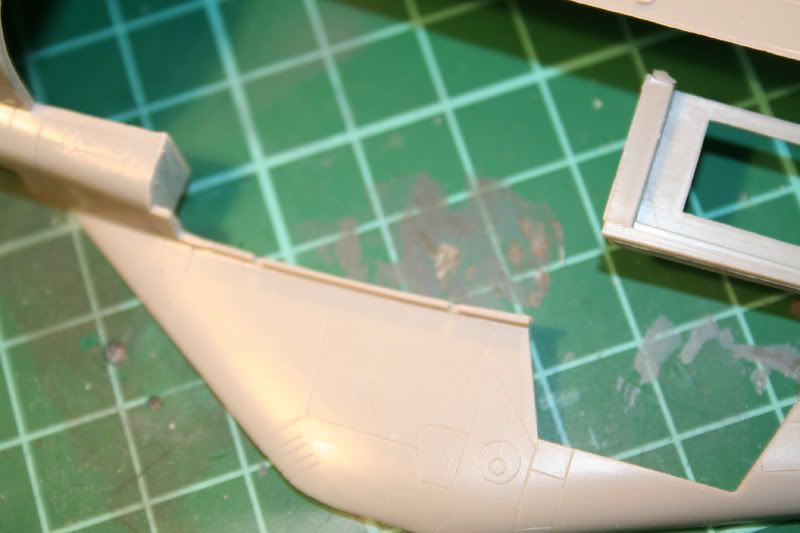
Some
plastic also required removal from the inside lip(shown marked in
black)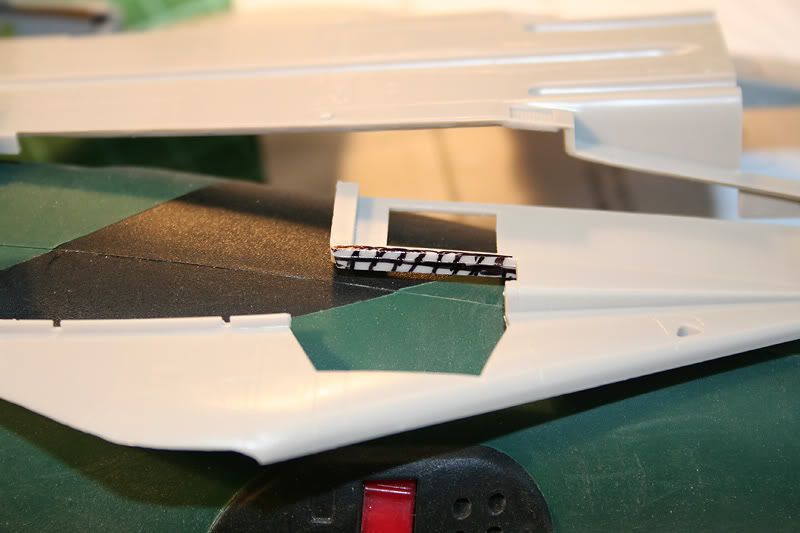
Excess
material was removed fron the cast stubs to allow them to be fitted inside the
wing roots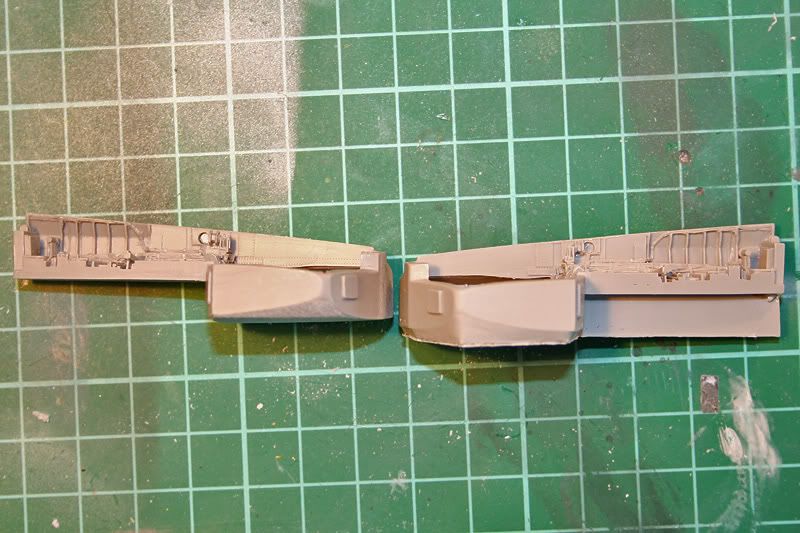
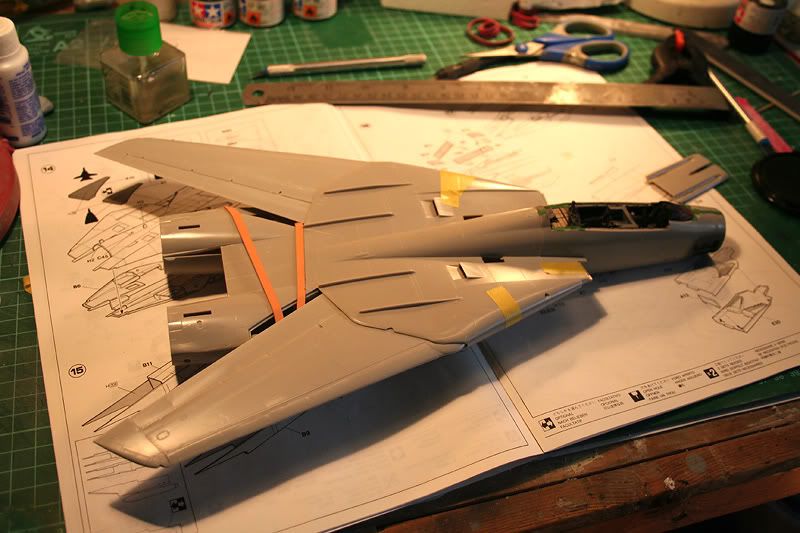
I
built the wings for test fitting at this stage(thanks to Hans for this heads up)
to see how much material required removing from the back fillet of the casting
stub. The whole fillet was removed to make sure.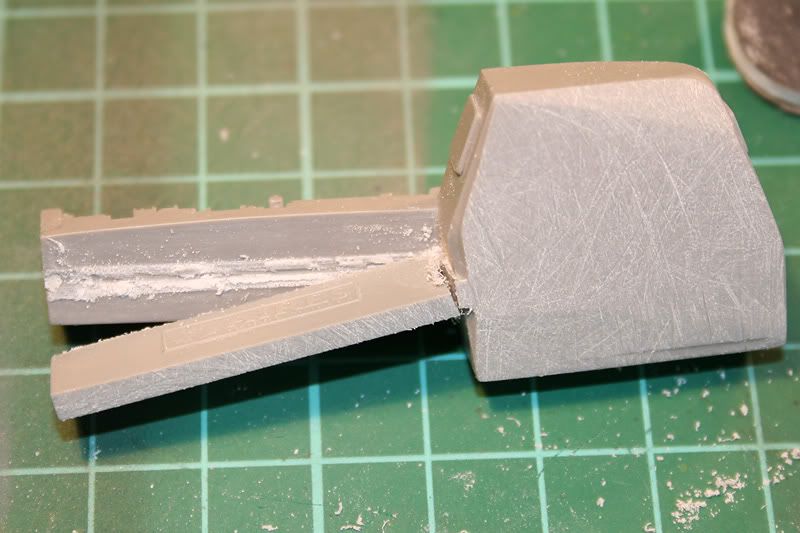
The
wells were dry fitted again and the wings tested and found to be ok. Then
started to cement the main body halves together.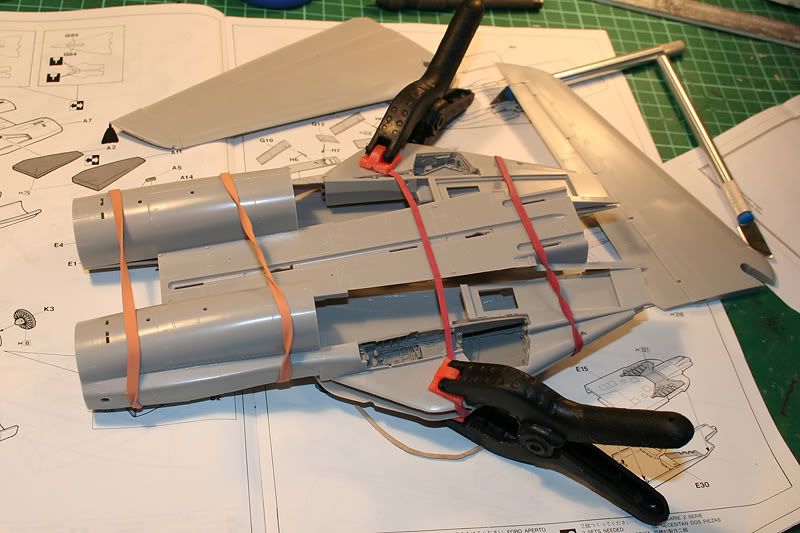
Dry fitted the wings to check for clearance under the resin
wheel wells and the nose section just to see how it looked.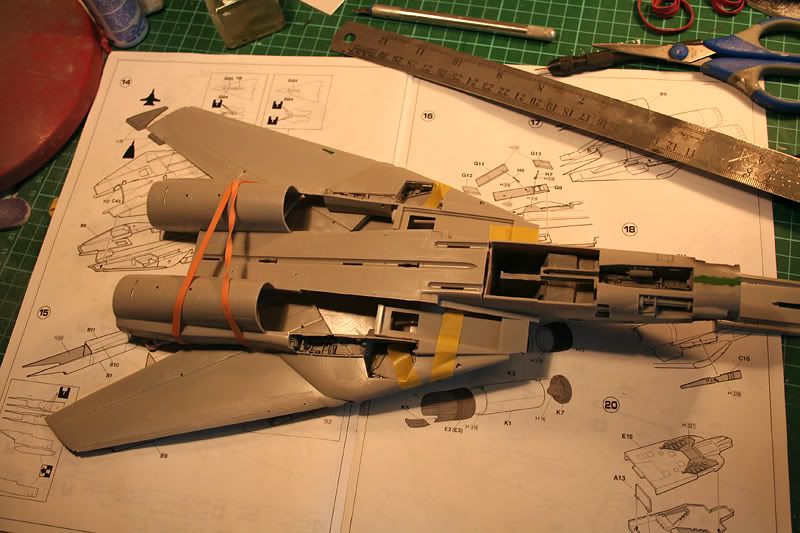
Got
the intake trunks joined and flowed some Tamiya glue in the seams to melt them a
bit. Will repeat this tomorrow to try and get them flush then finally sand them
in.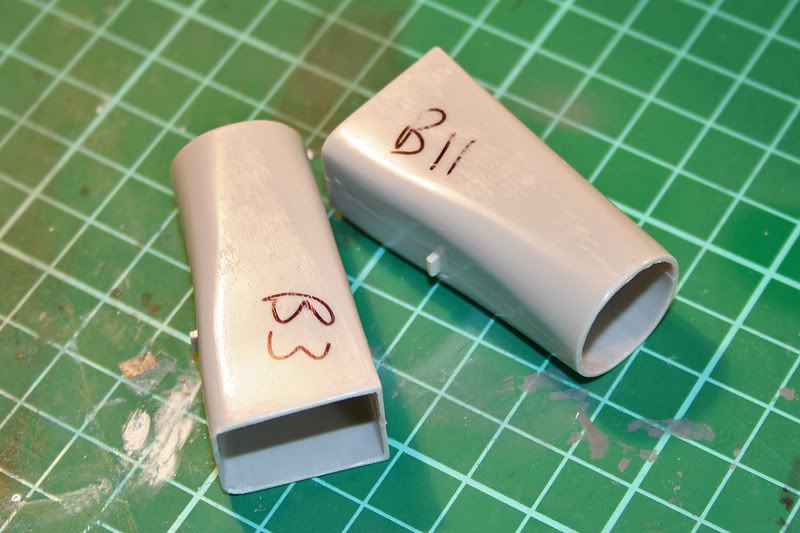
Next
up was the otter tail and brake housing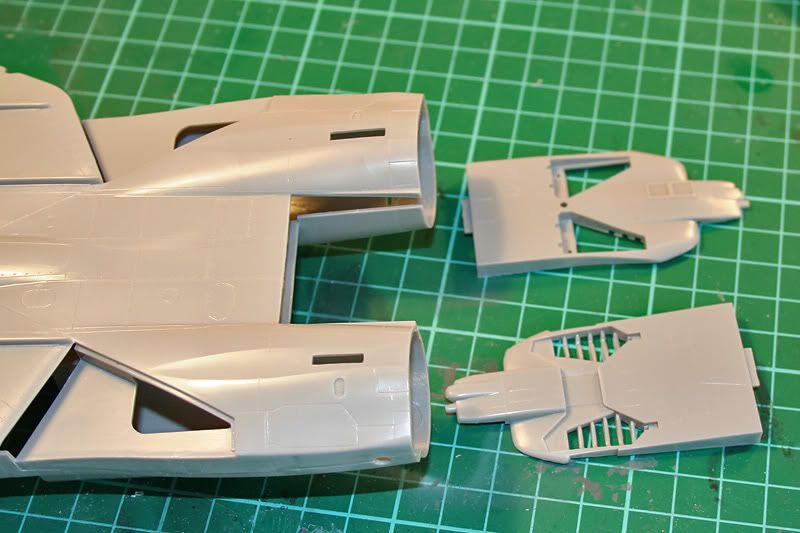
I
went the same way as Phil on this one and joined the top half to ensure a good
join where it would be seen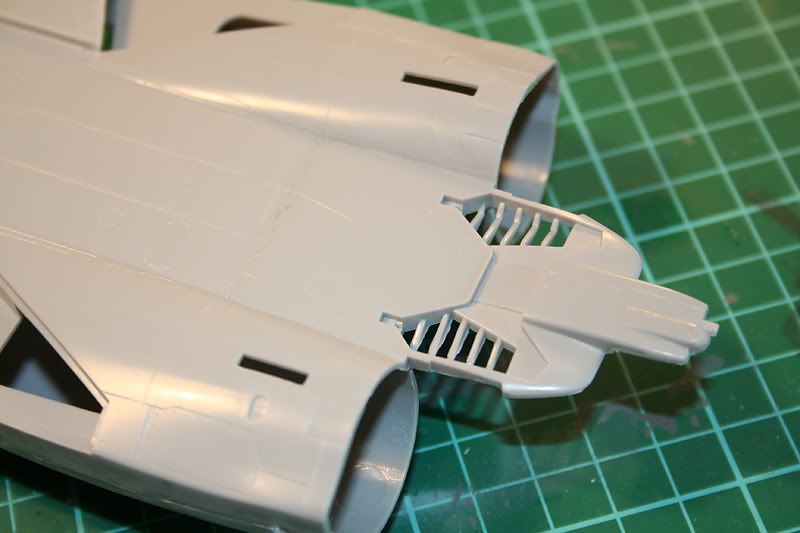
Then
the underside but just to the main fuselage join. I didn't glue the sides of
this and the engine shells are still free to move. This will make sure
(hopefully) the engines have a nice fit when their time comes.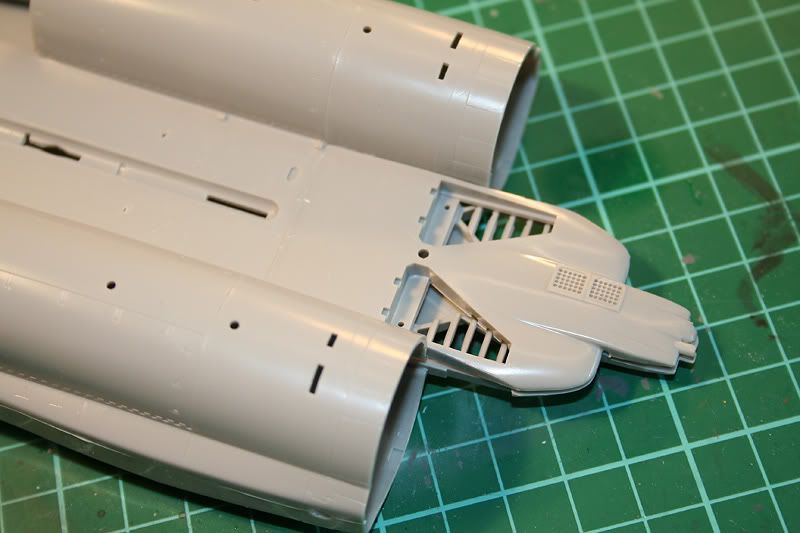
Next
i got the front fuselage joined to the rear assembly. A bit of fettling and dry
fitting was required here to ensure the best possible fit. It isn't too bad at
all and the little bits that weren't quite flush should just be a swipe or two
with a sanding sponge to bring it all in.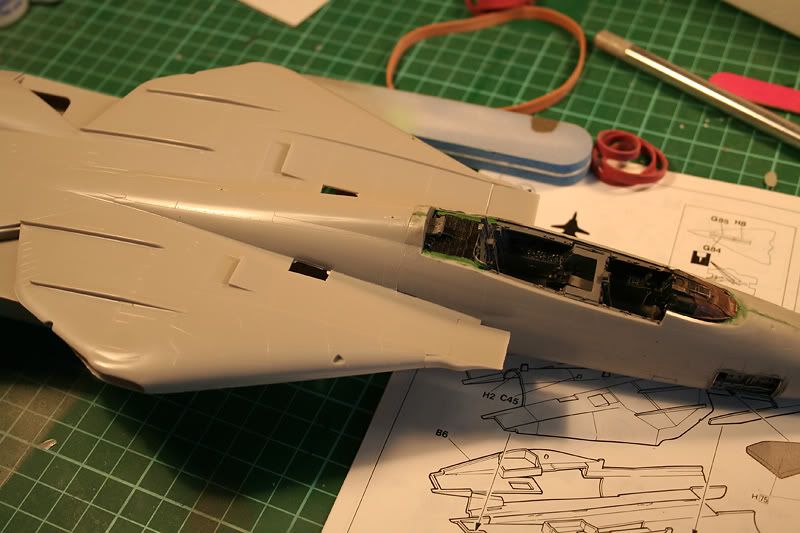
Nose
cone was fitted next and the fit is really good on mine. Managed to get the only
dodgy part (which is very slight) on the underside. But the top and sides are
flush.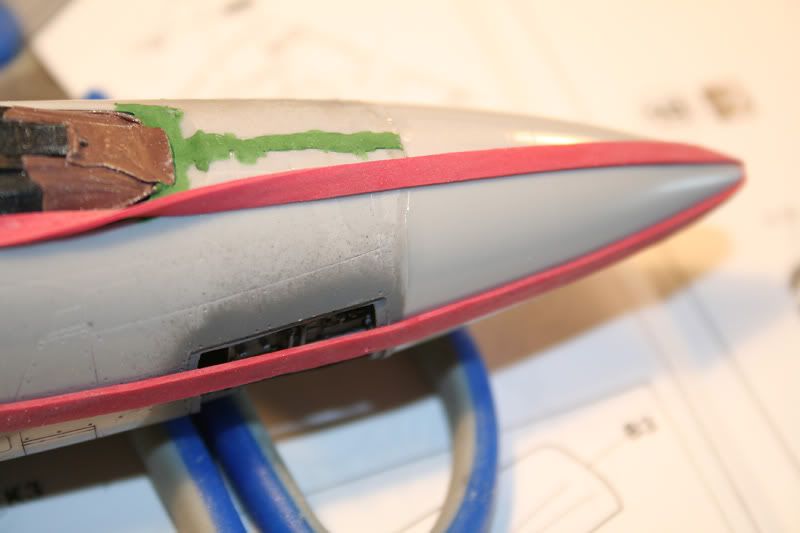

And
finally for today i put the wings back on for a look at where i am with
it.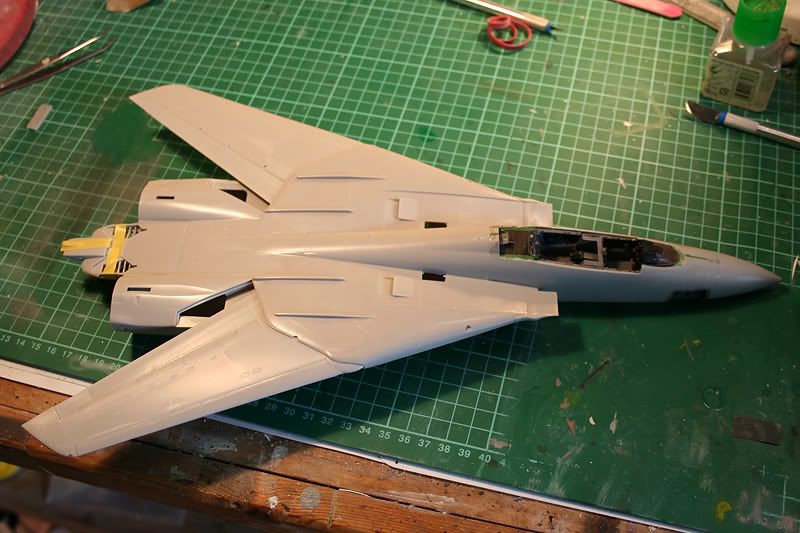
Here are the intakes all on and sanded in. Rear of the joints
were pretty good. Fronts need a little coaxing but went in eventually. It'll be
covered by the FOD covers anyhow so all work that is just practice for future
builds!
Here she is with the intakes on.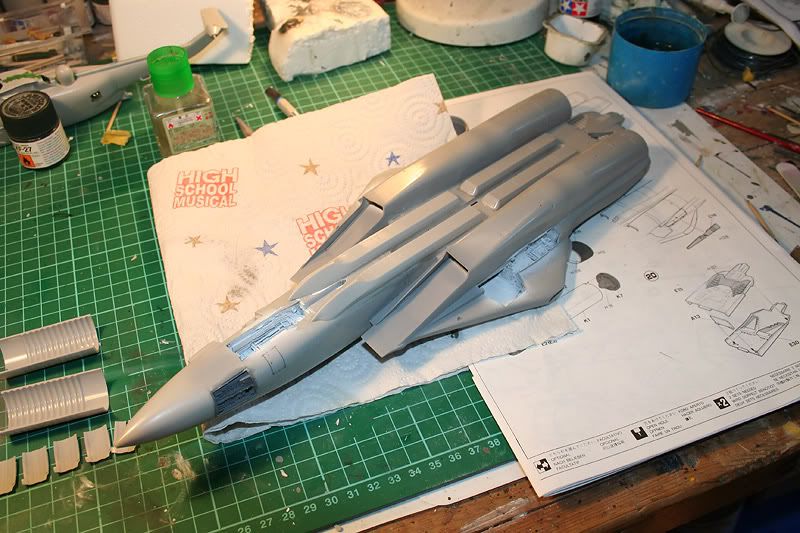
Made
a start to my exhausts next and got them together. Quite a number of parts and
they build up into quite nice items.
The parts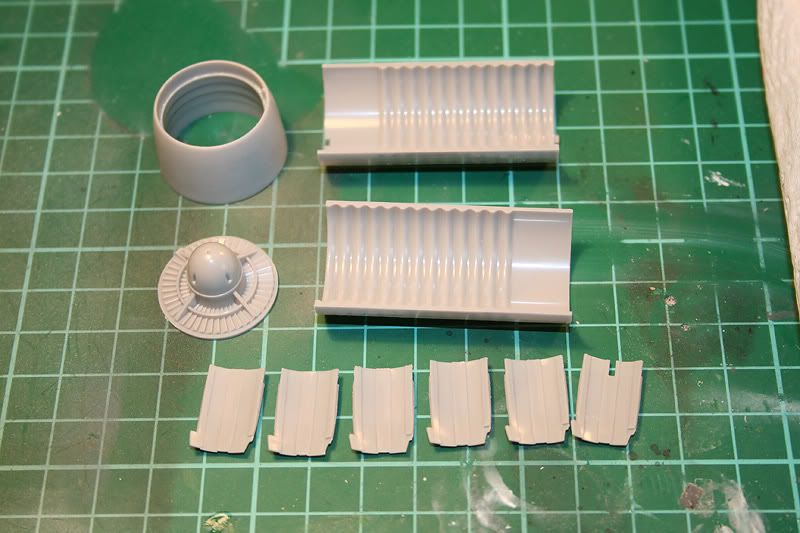
Fitting
the "petals"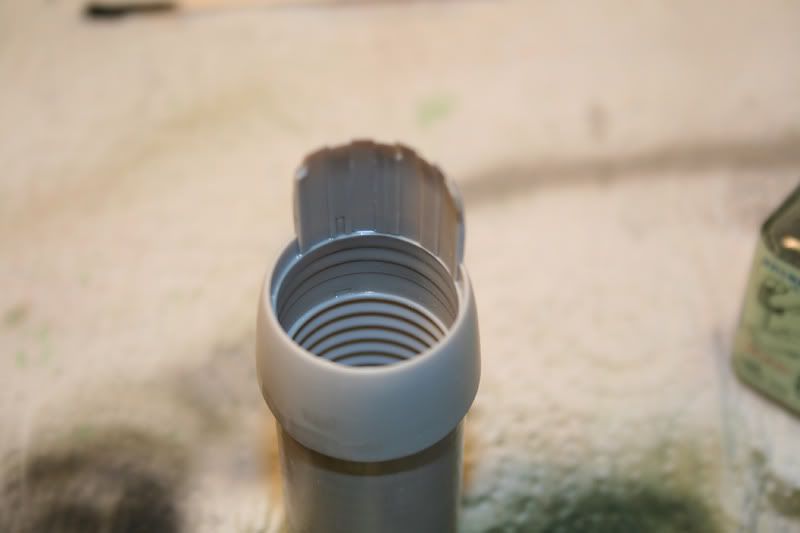
Together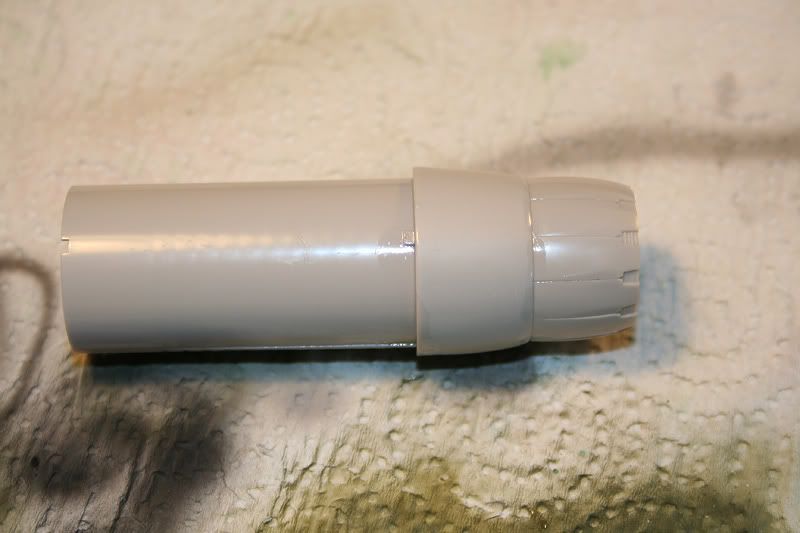
Internals
of exhausts were then sprayed with Tamiya X-1 gloss white and left to dry before
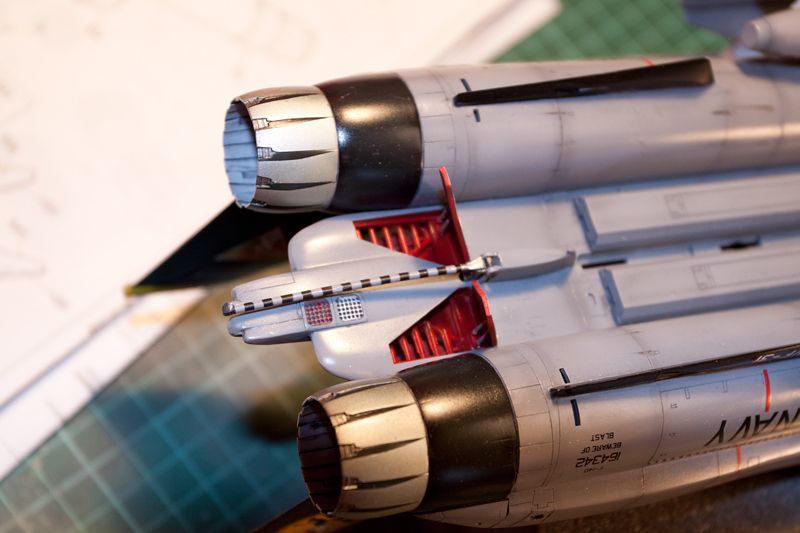
they get treated with some Promodeller Drak Wash.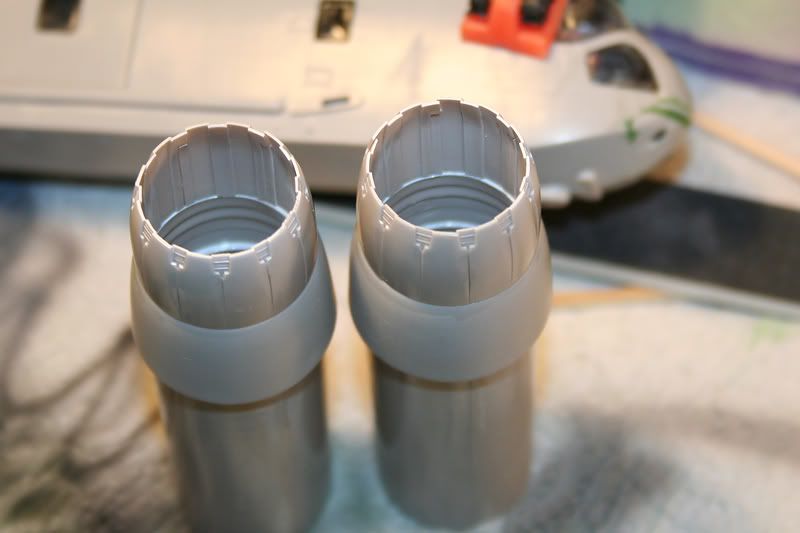
The
turbine faces were sprayed XF-1 black and then over sprayed with Alclad
Aluminium. The balck undercoat was left to "shine" through and i think has given
them some depth.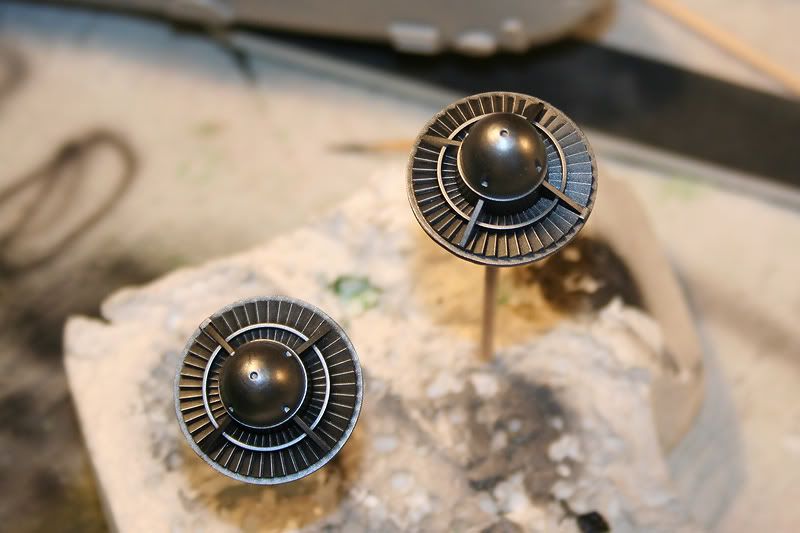
Marathon masking session tonight. I wasn't so lucky
with my decals of choice and didn't get the carbon fibre decals for the exhaust
nozzle petals. Had to mask it all off for spraying.
First strips
on.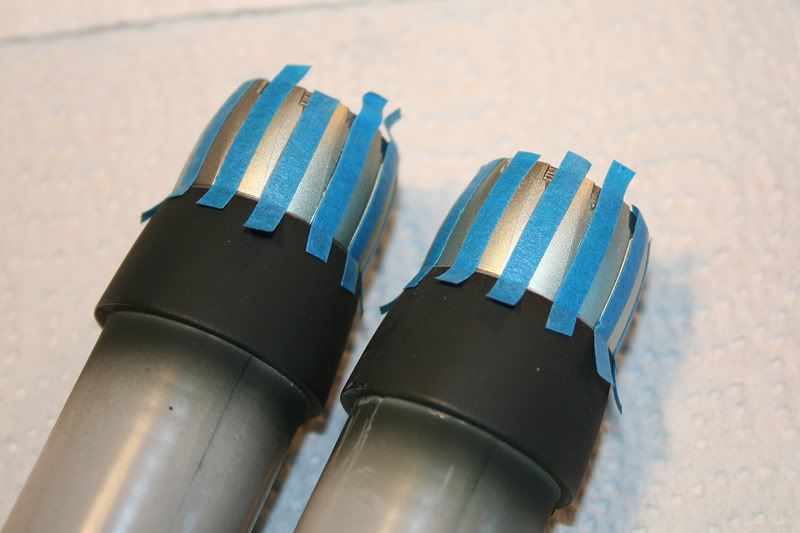
taped
off the angled part at the end of the nozzle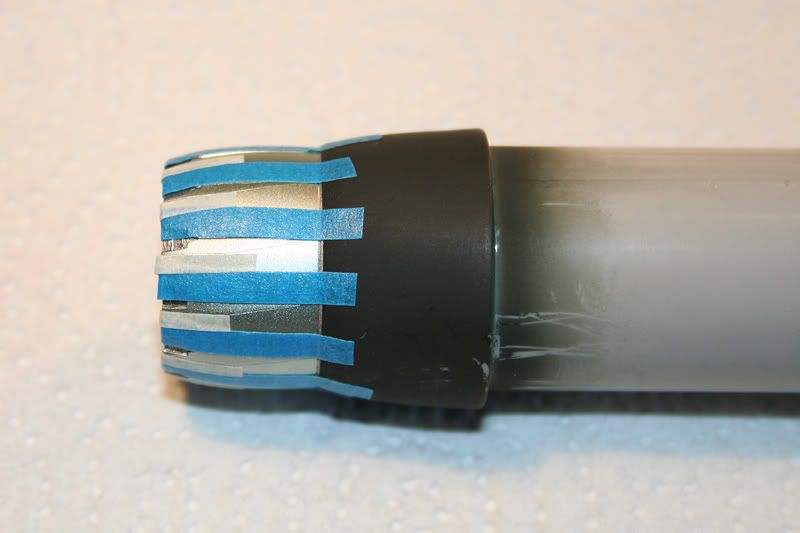
Then
the angle back to the front of the nozzle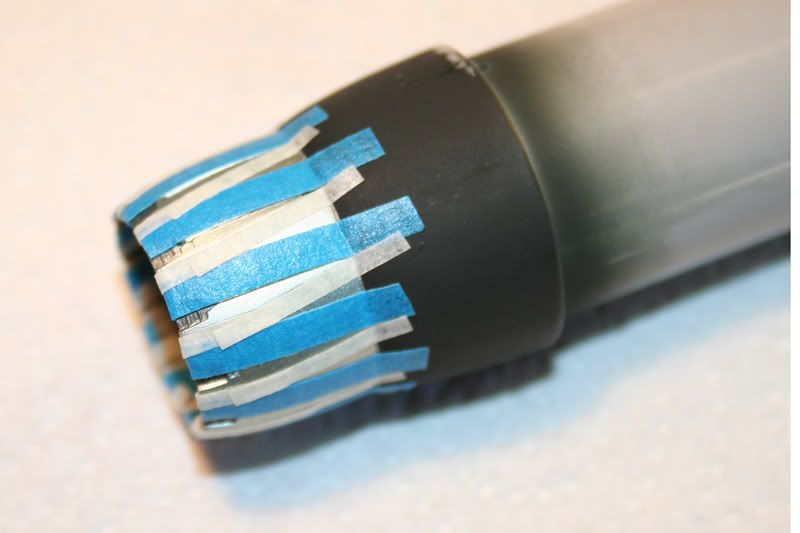
Then
a bit of in filling
Sprayed
with Tamiya Nato Black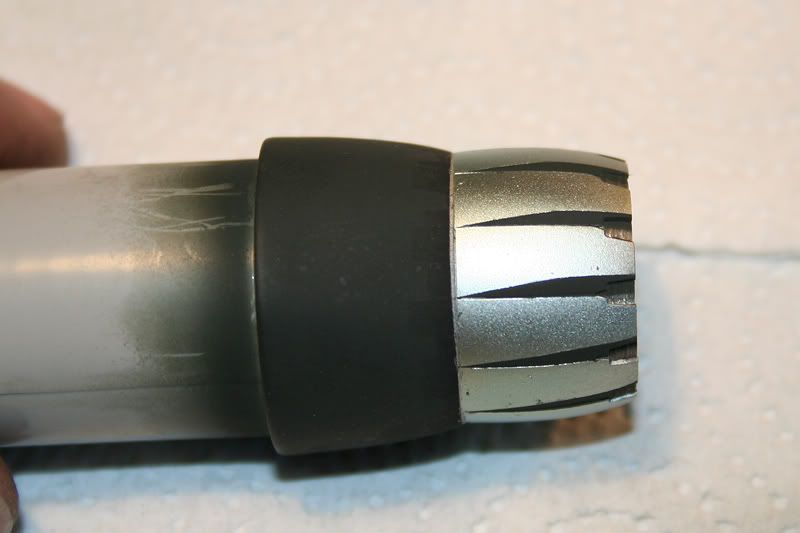
And
the end plates detail painted with Citadel Bolt Gun Metal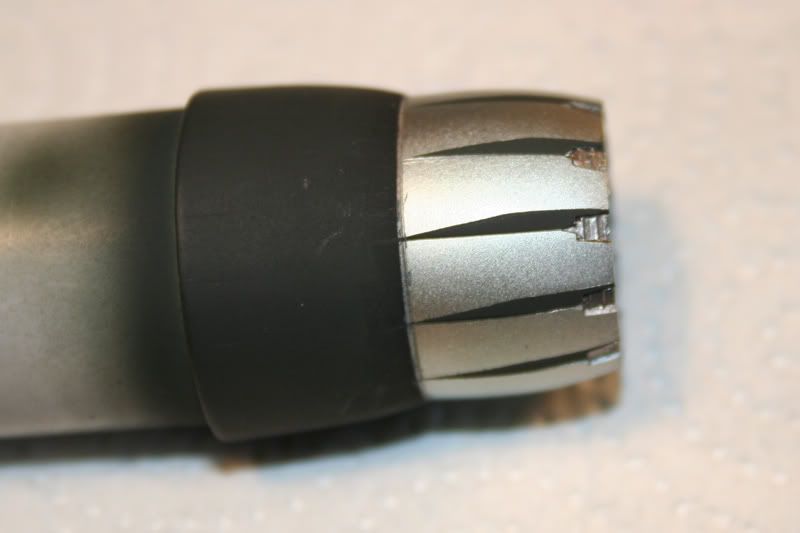
Fixed the exhausts on and the fairings to their
sides.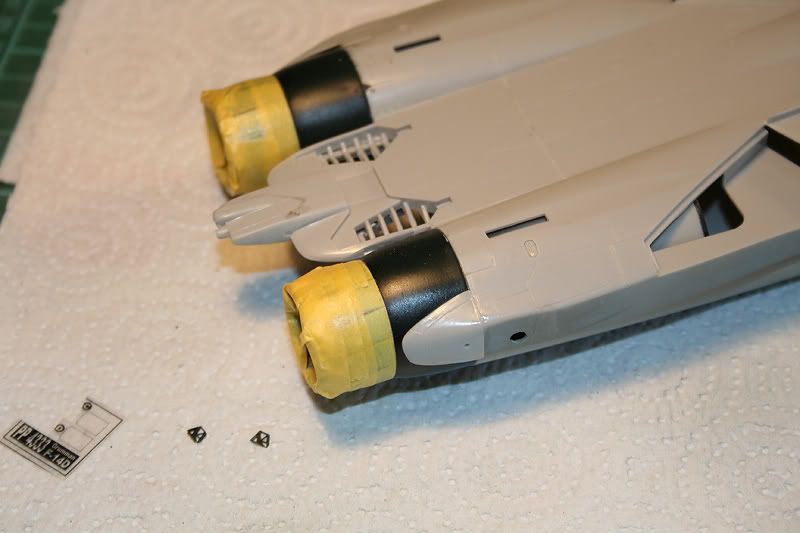
Made
a start on the glazing by getting rid of the seamline down the
centre.
First with the course sanding stick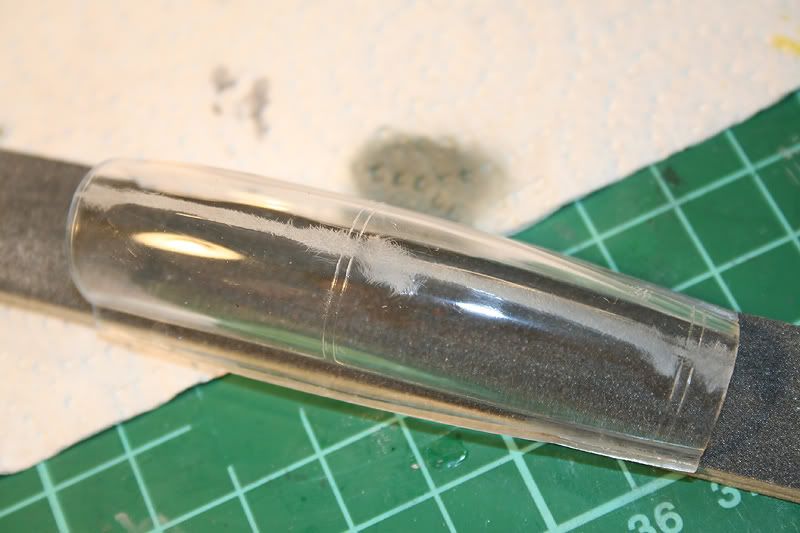
Then
through various stages of finers sanding sponges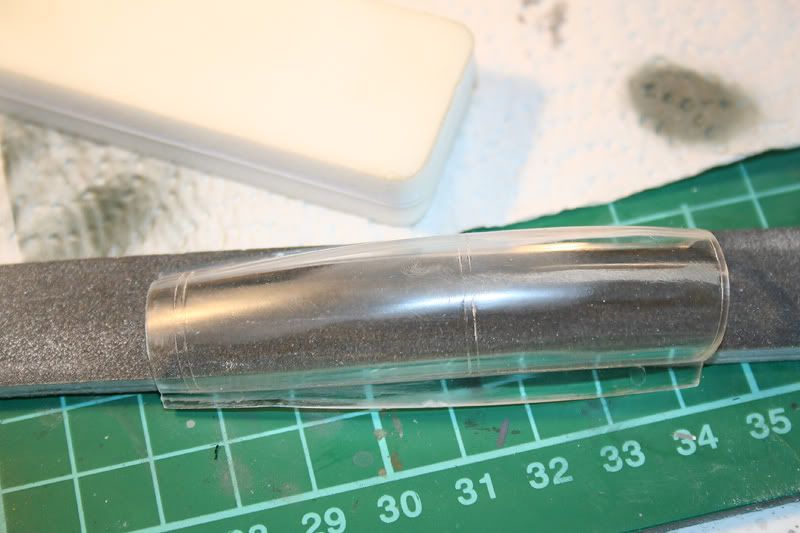
Seam
gone but so are the panel lines at the top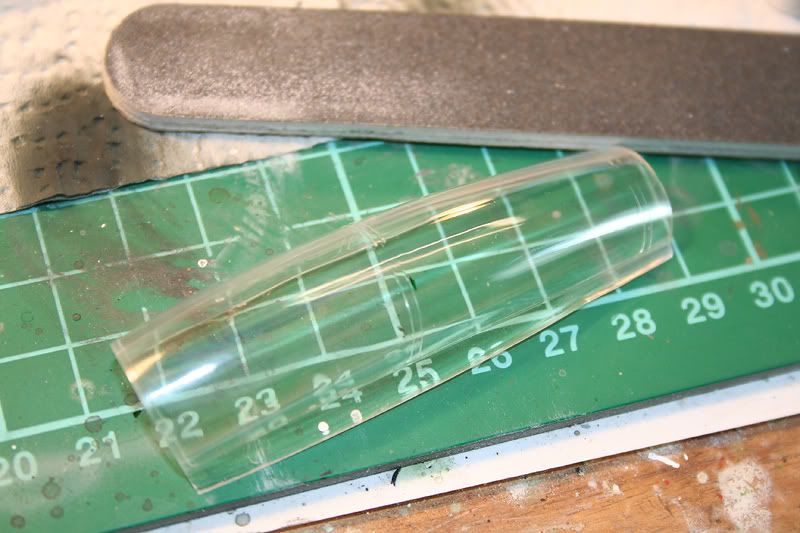
Panel
lines re-applyed using a scalpel blade and canopy done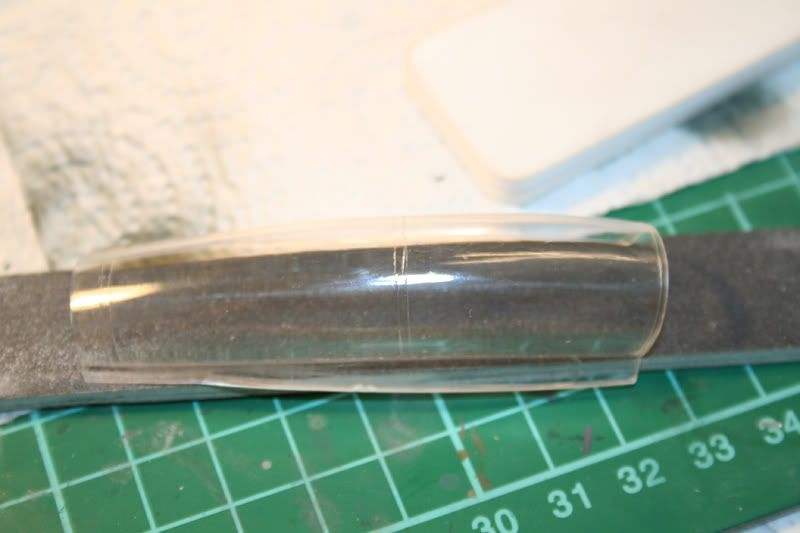
Made
a start to detailing the avionics panels. First the black has been applied. I'll
do some dry brushing etc when this is fully dry.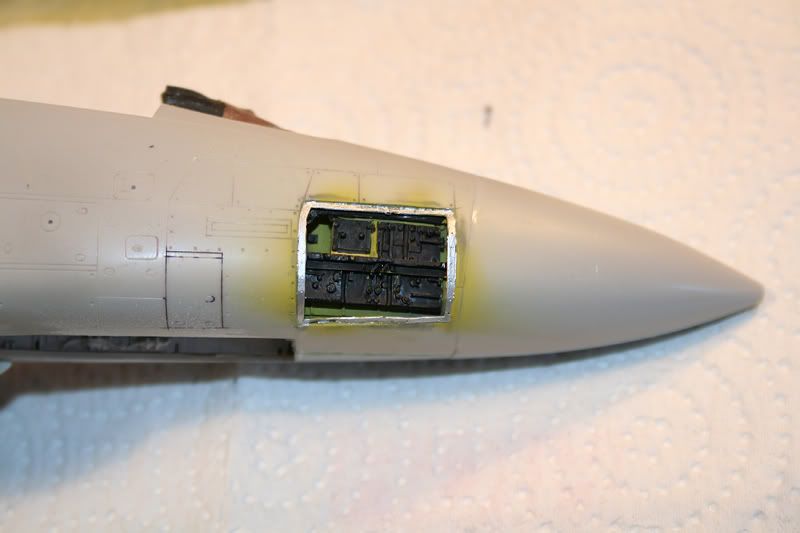
Front
windshield fitted and masked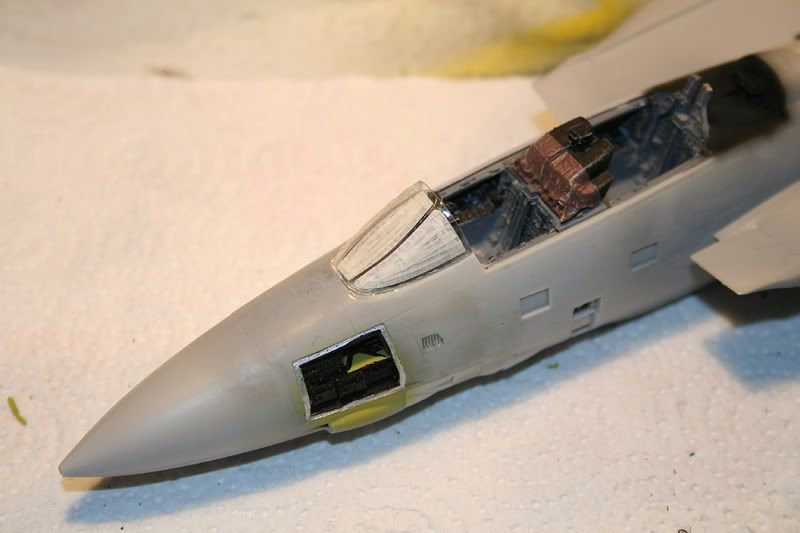
Main
canopy fitted using blu tak for the the painting stages and to protect the
cockpit whilst the avionics detailing is being done.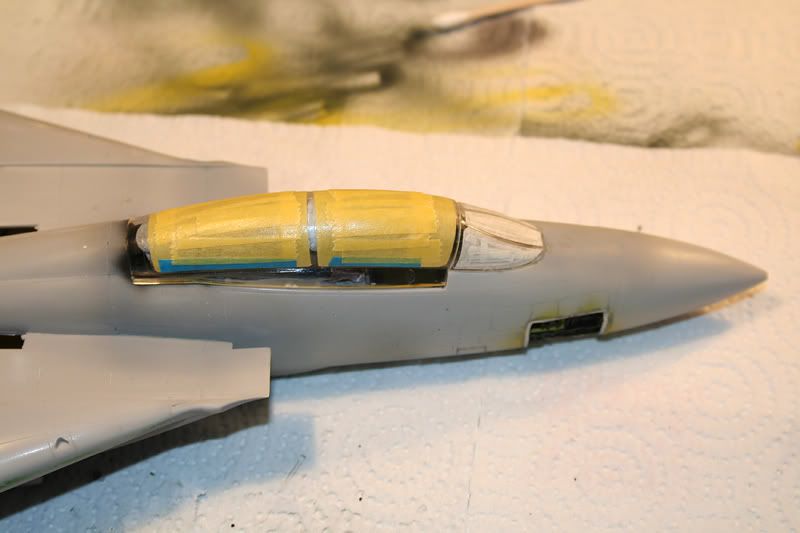
And
a quick shot of where we are with the wings fitted. Starting to come together
now.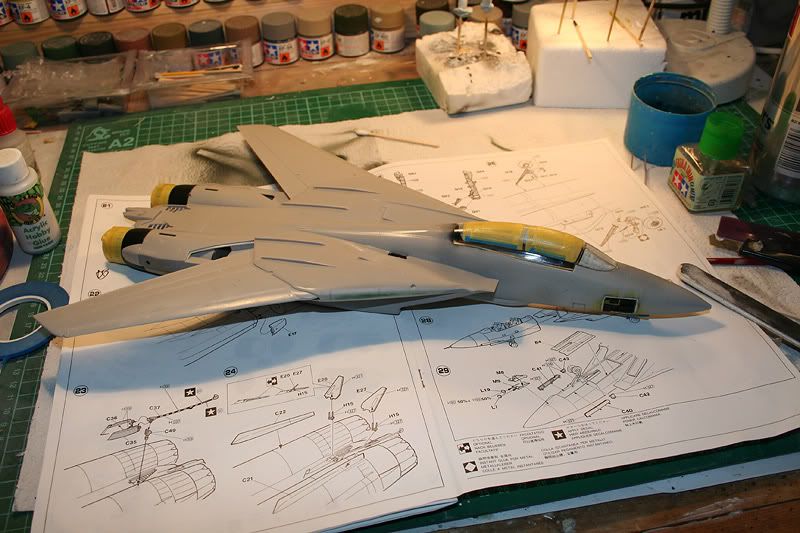
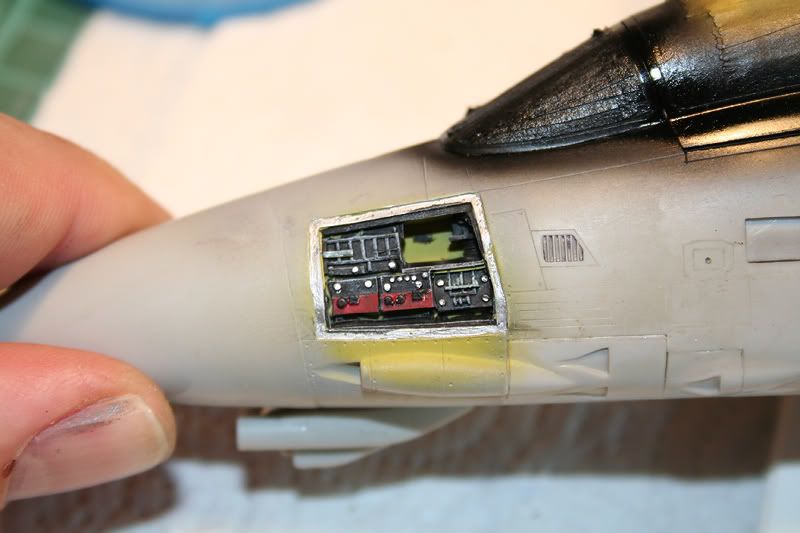
Got some detailing work done on the avionics panels.
With
some dry brushing first.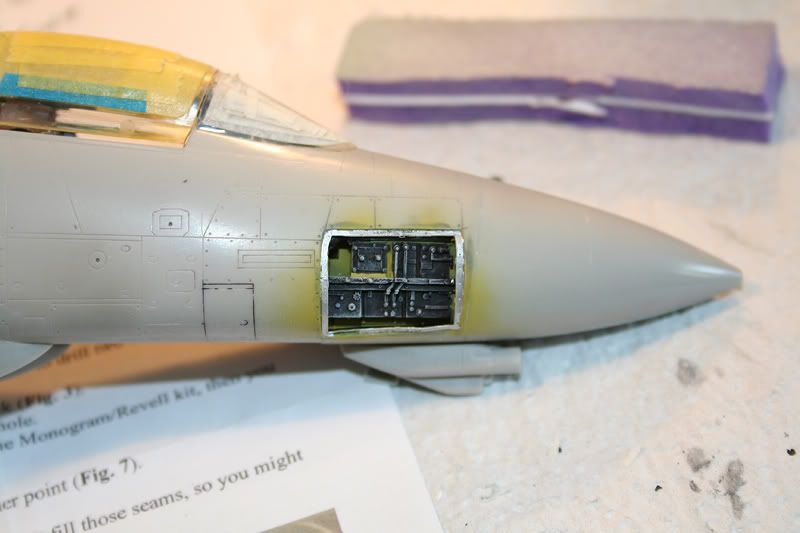
Then
some detail painting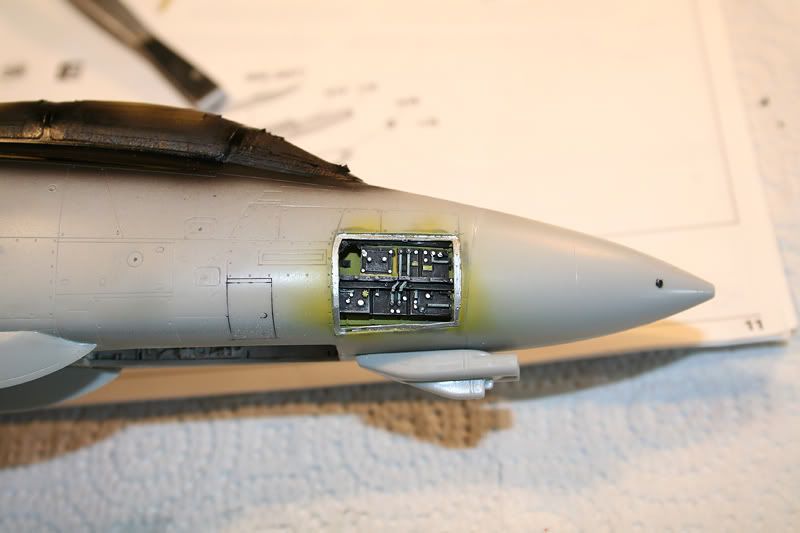
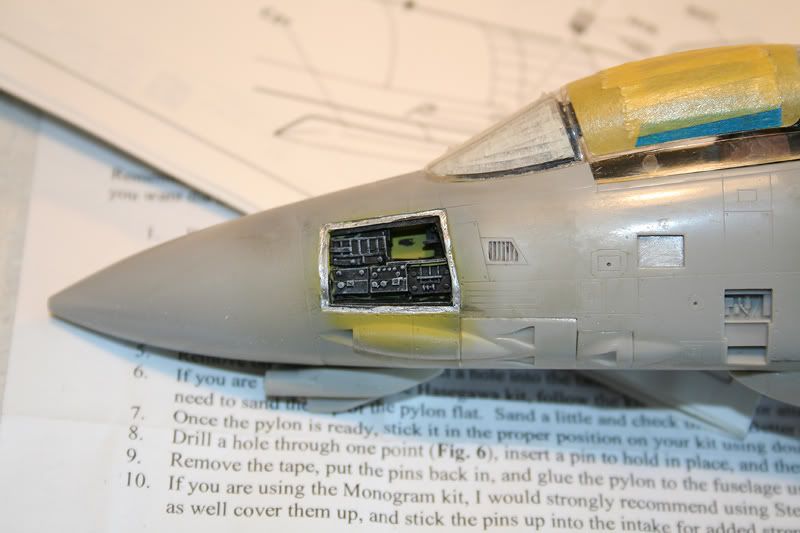
Made
a start on the Royale Resin Fuel Tank set.
The parts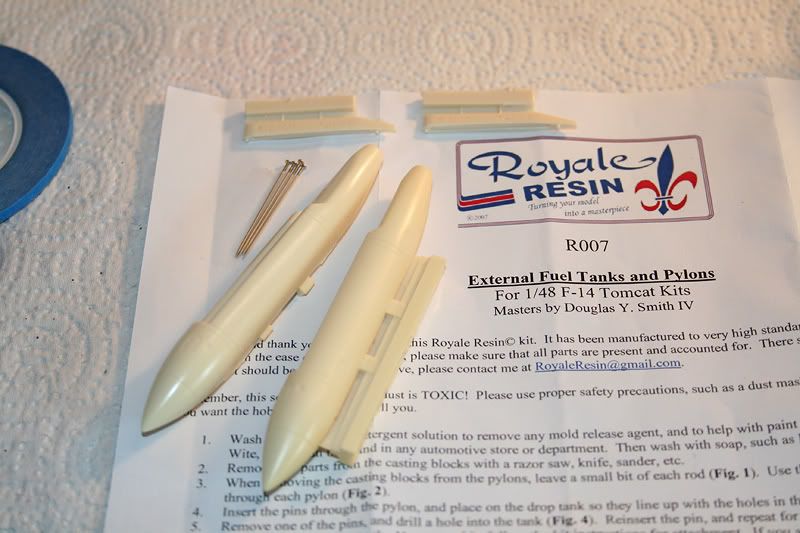
Driling
the pylon for the strengthening pins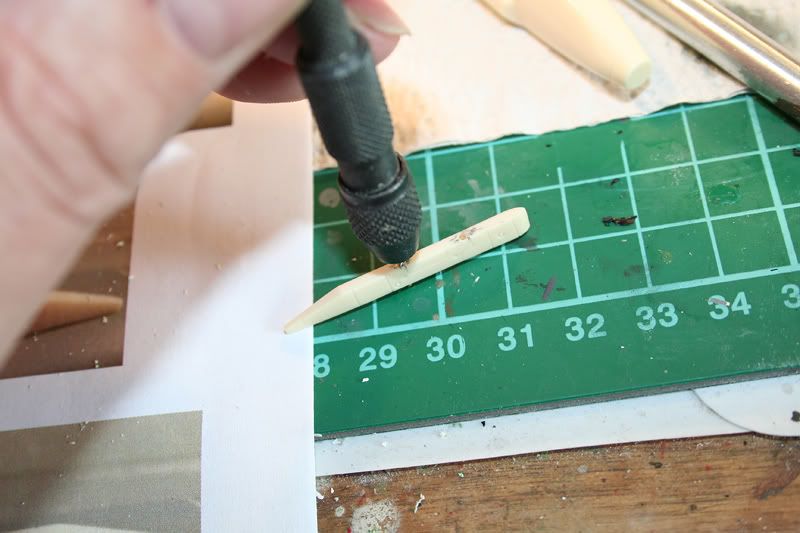
Pylon
fixed to fuselage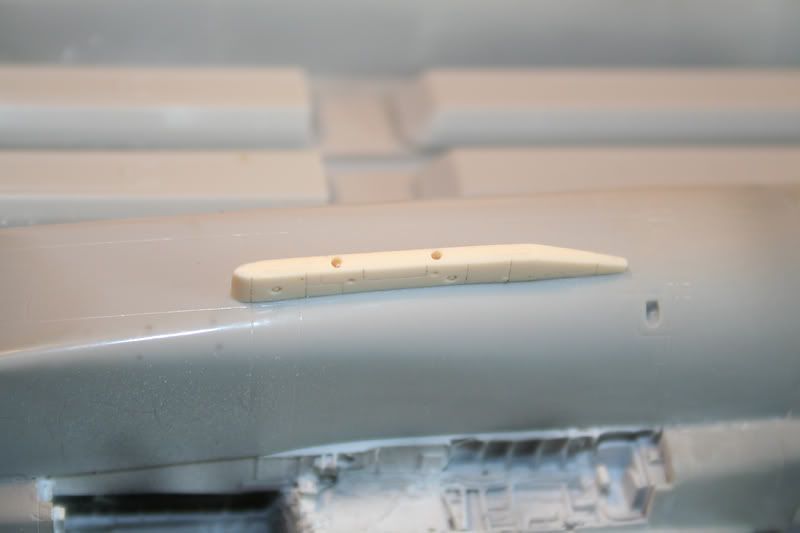
Gave
the canopy a coat of flat black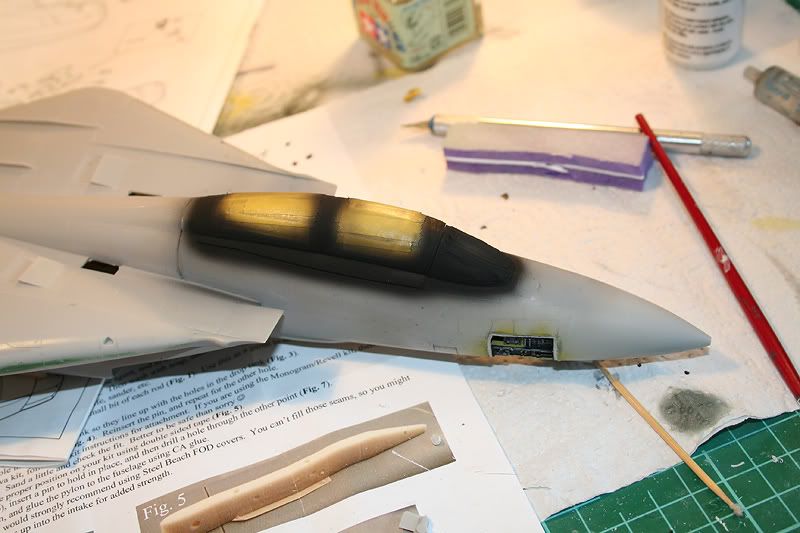
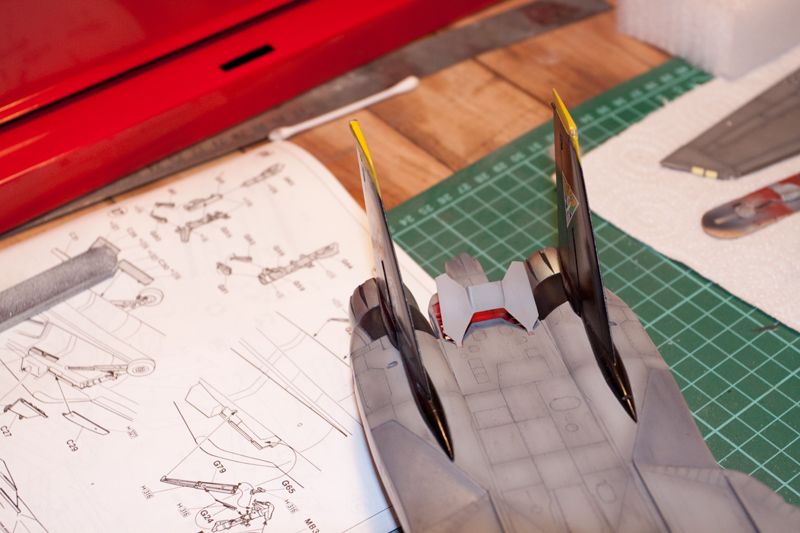
Gave
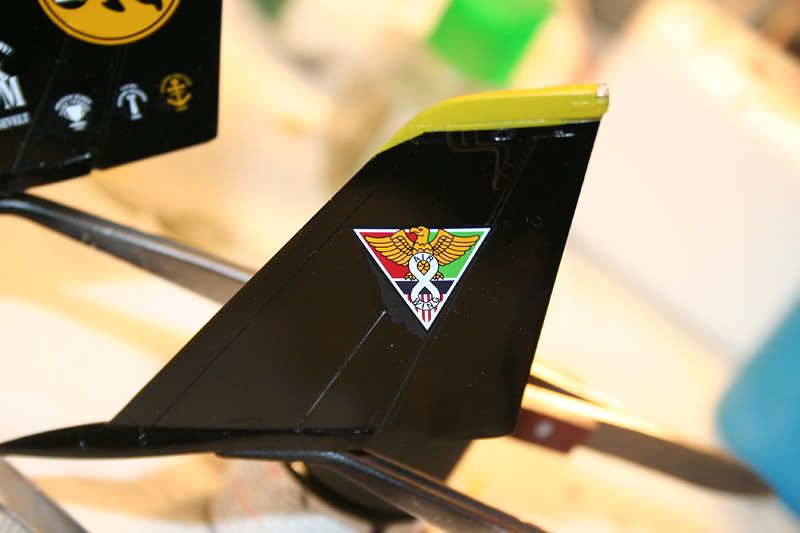
the tail fins a coat of Tamiya X-1 gloss black. Really love the quality of the
finish this paint gives you straight on to bare plastic!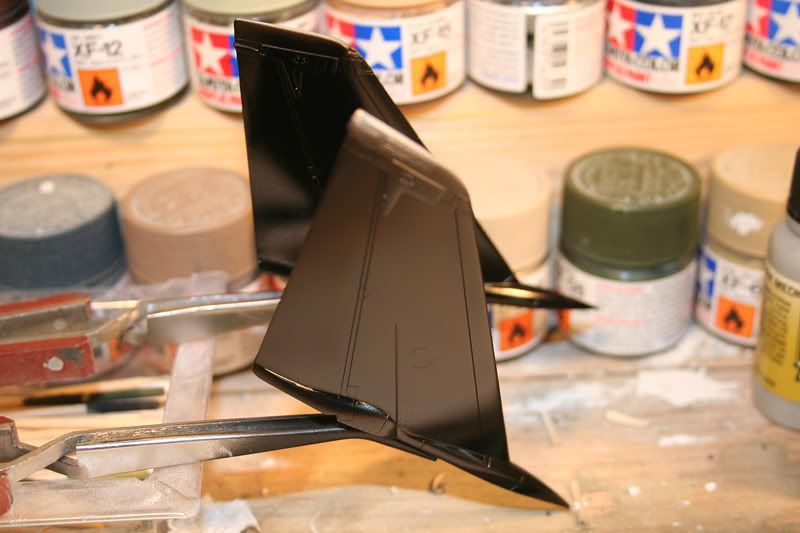
Then
finished with the yellow fin caps.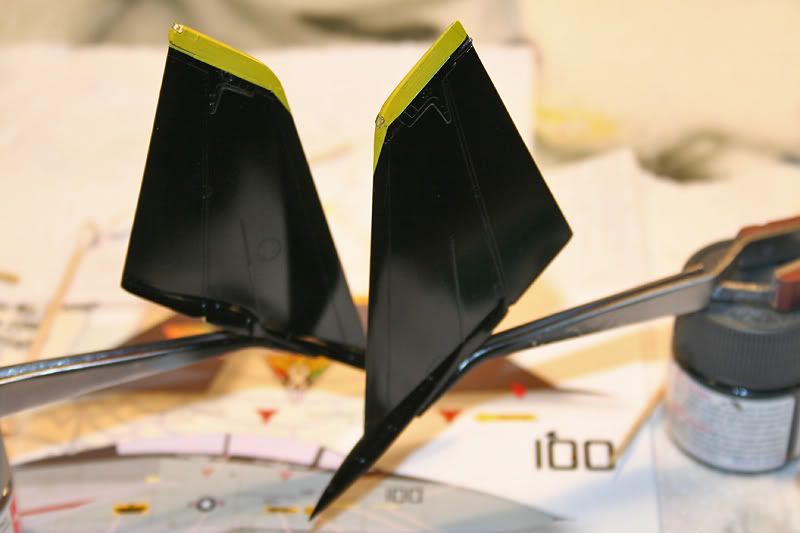
Started
on the pre shading work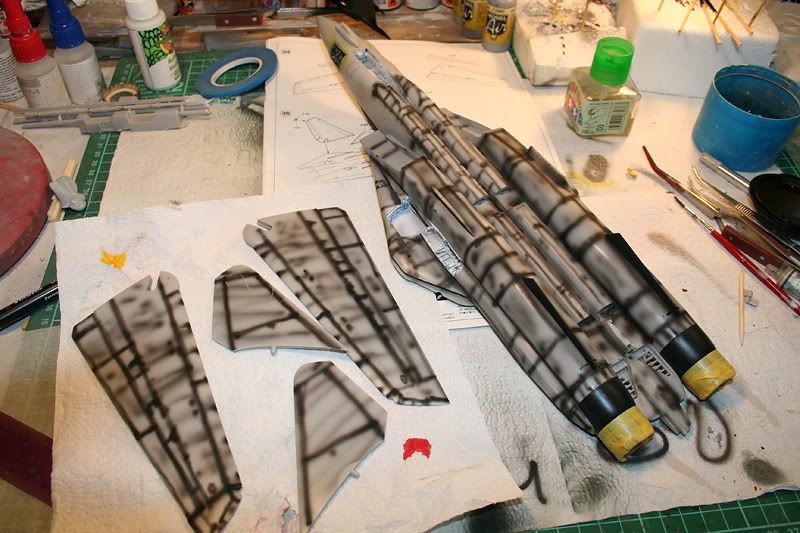
Had some fun with the build. Starting to get to the stage where
things start to come together quickly.
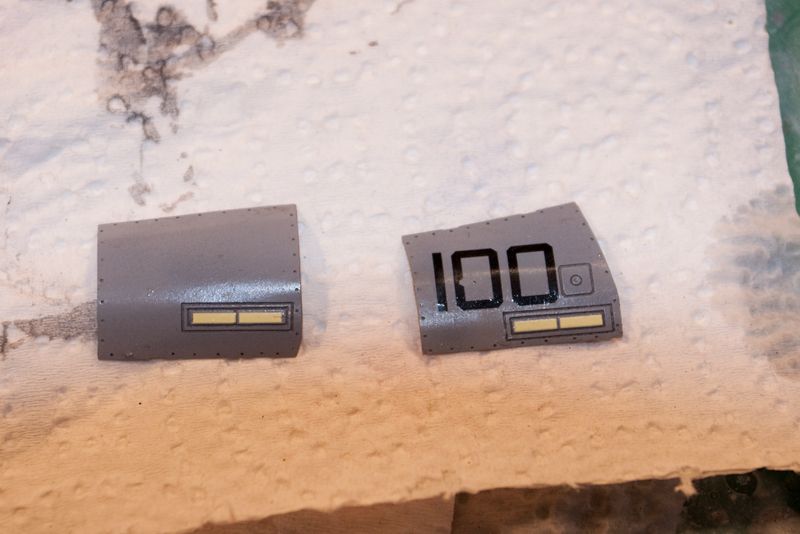
Decalled the
tails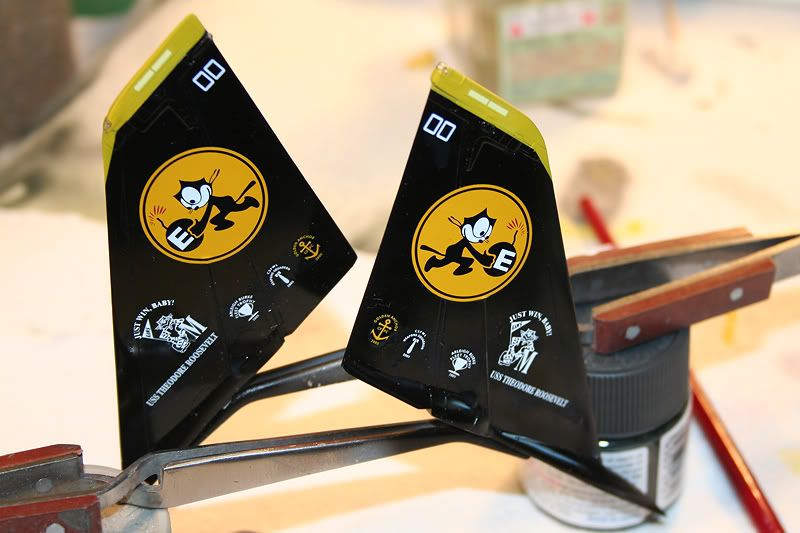

Then
got started with the painting.
First the underside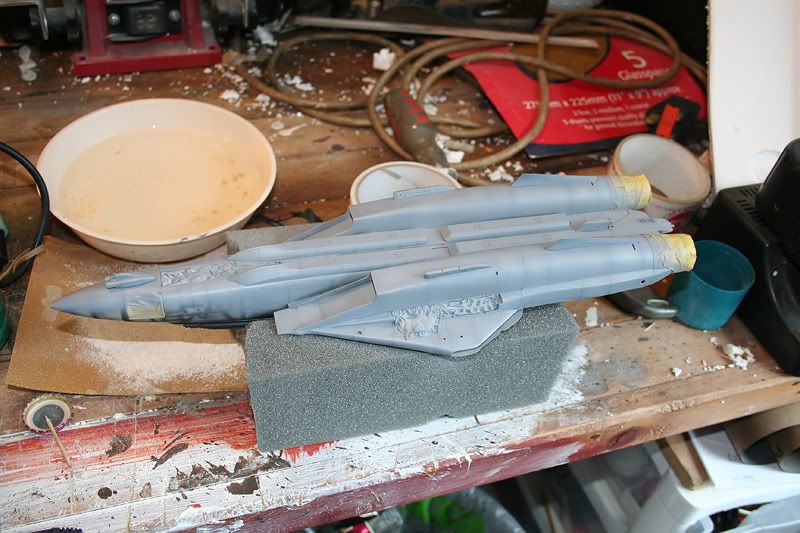
Then
the top. I've also started to stress the paintwork a little. Trying to get that
sun bleached, worn look on her. 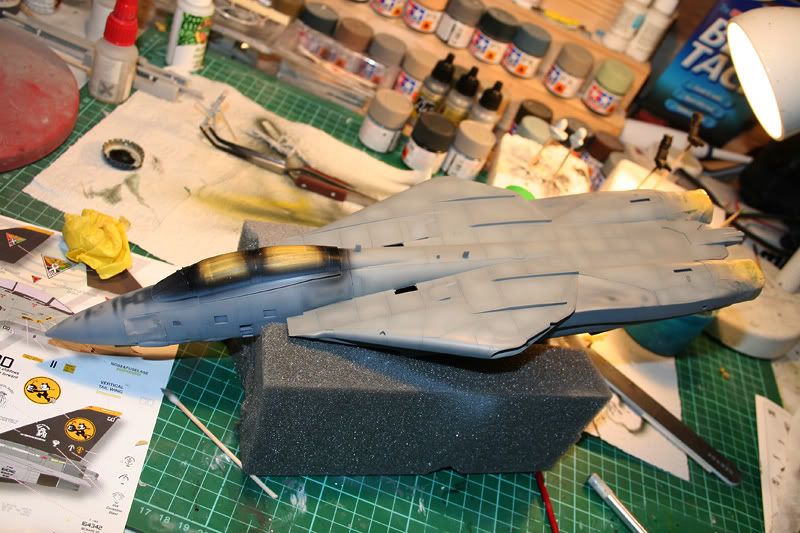
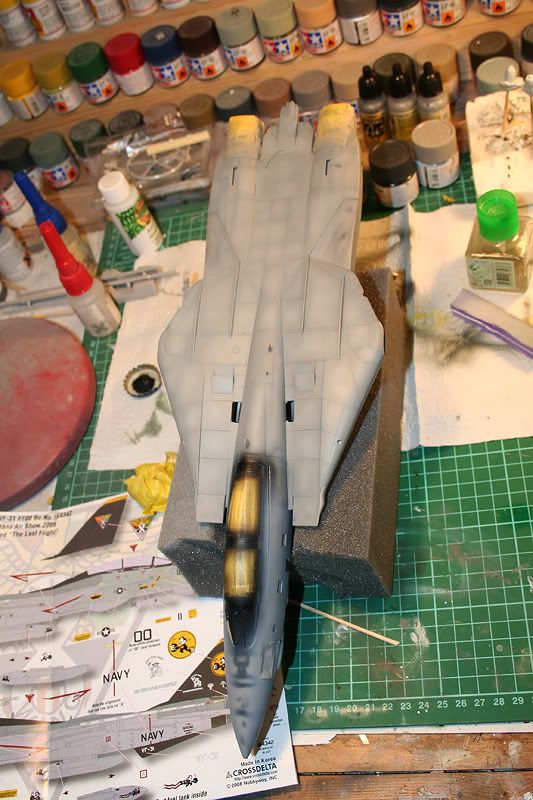
Had another session of stressing the paintwork tonight. Starting
to get where i want it to be. Couldn't resist trying the wings and tail surfaces
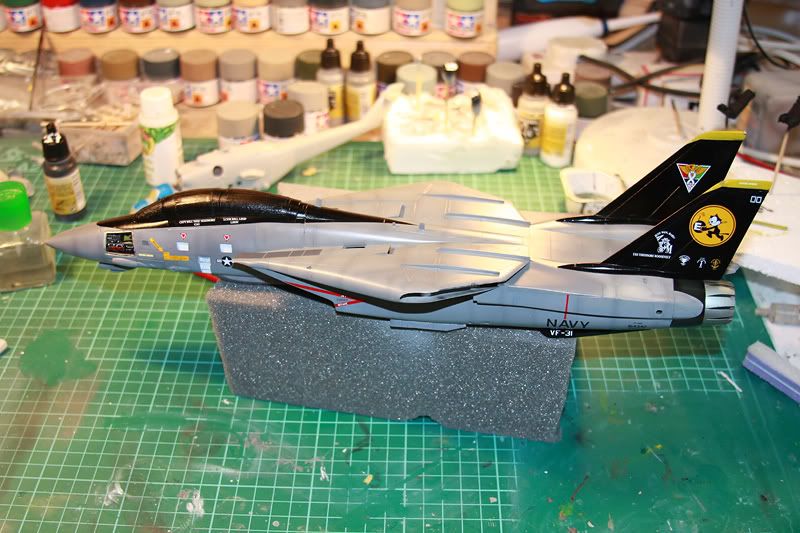
on and seeing what she looks like. See what you think.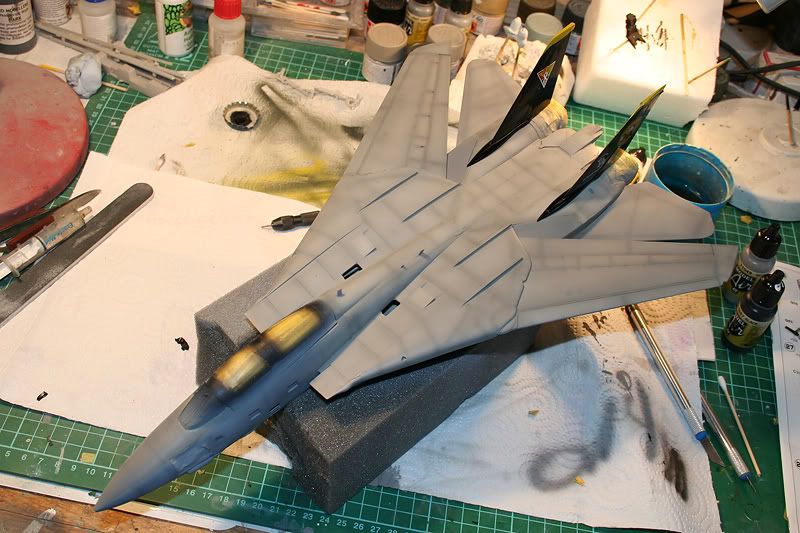
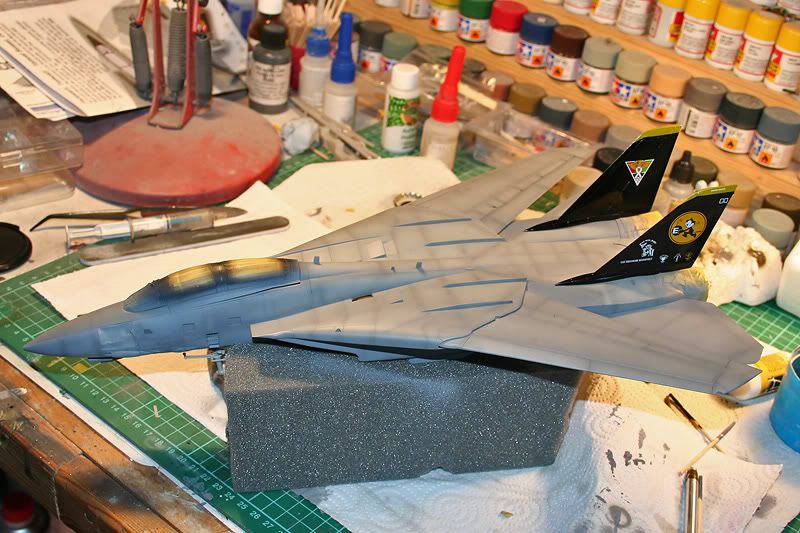
And
underneath. 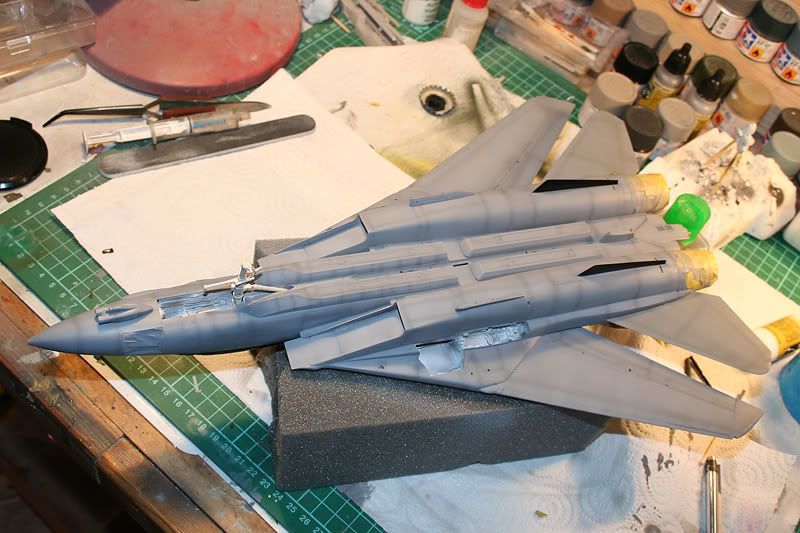
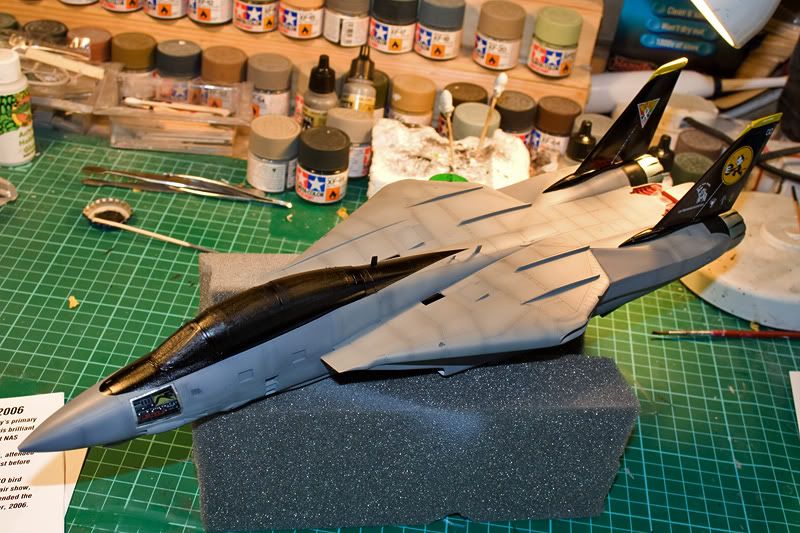
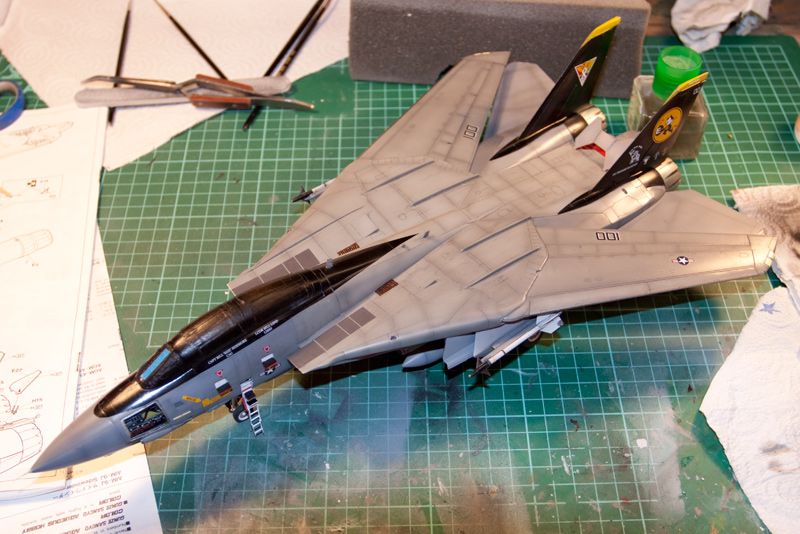
Managed to get the skunk line painted. The tails are now fixed
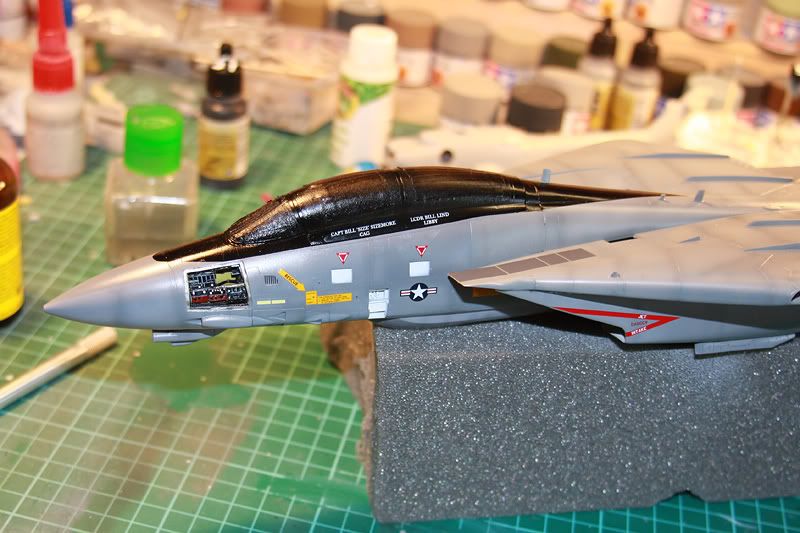
too and she's been glossed ready for decals.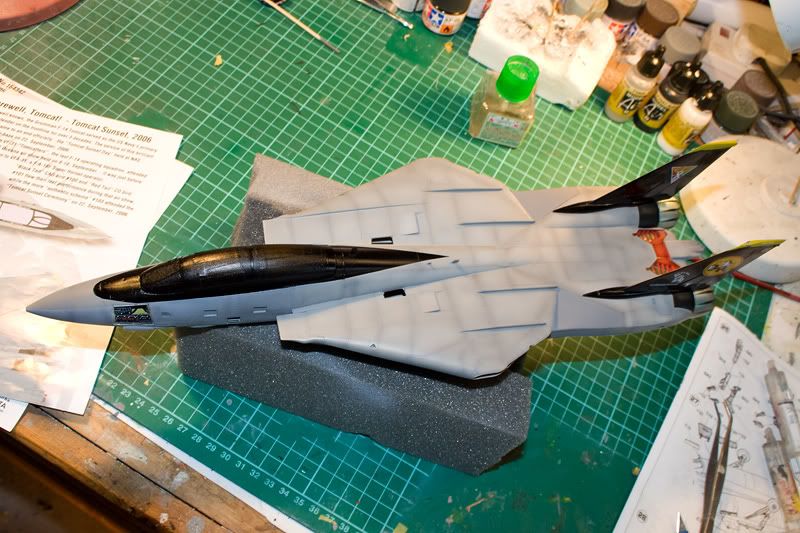
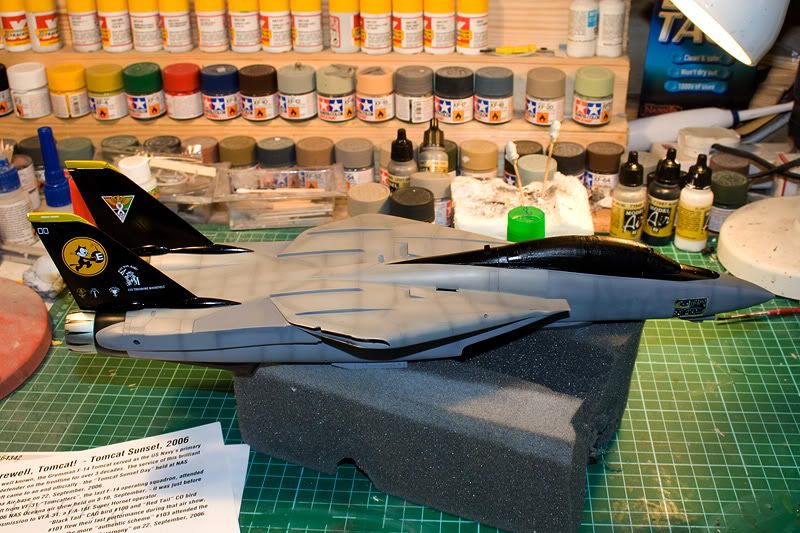
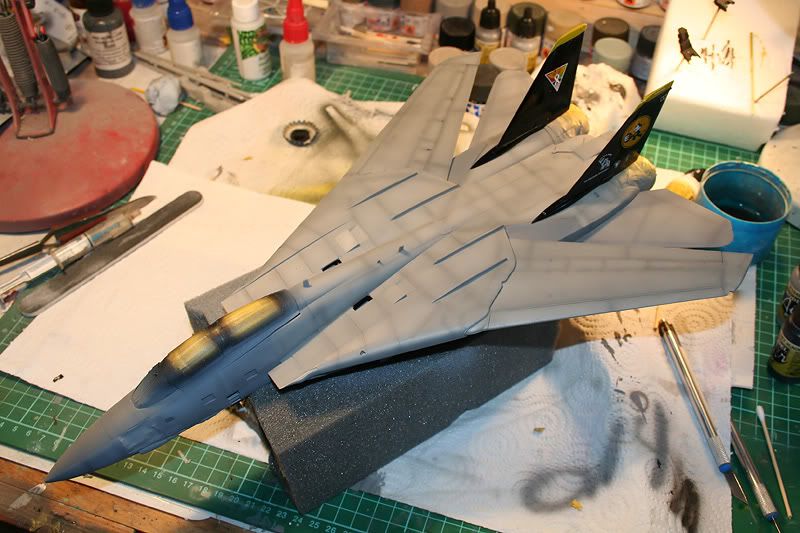
Had a bit of fun adding some of the decals. These sat down
brilliantly and only had one coat of Micro Sol just to make sure they sat down
ok.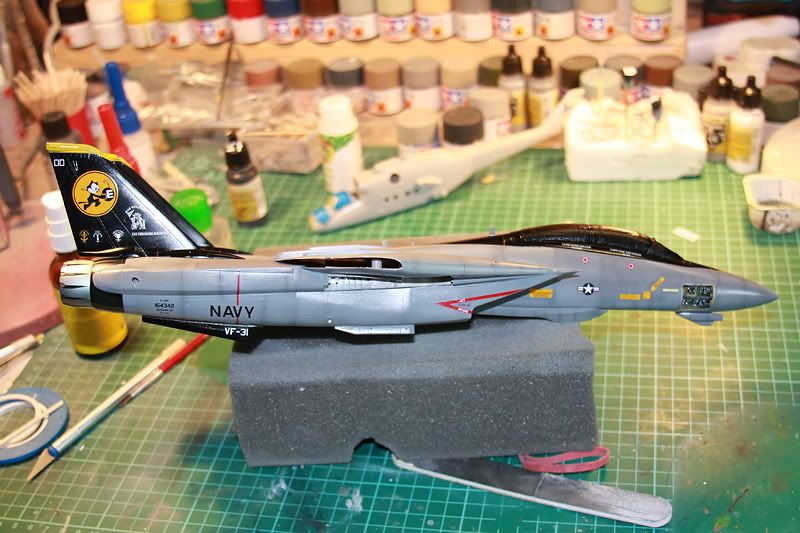
Was
going to fit her out with a couple of Phoenix missiles but have since learned
that these were taken off the inventory before this paint scheme so a plan "B"
was required.
Got on the internet and found me a Steel Beech Lantirn
set which included the Rack which is later used for carrying most of
the weapons carried on the Phoenix racks.
I'll now be kitting her out
with a couple of Paveway LGB's from the Hasegawa weapons set.
Here's the
Lantirn set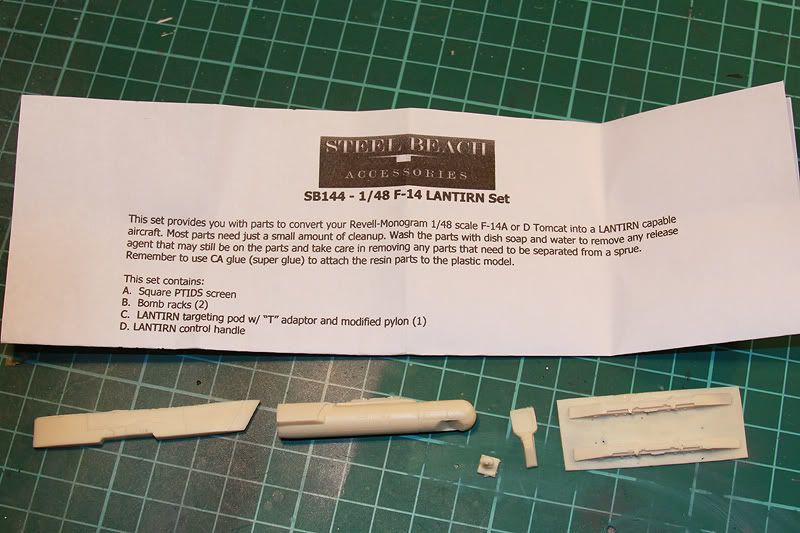
And
the racks fitted.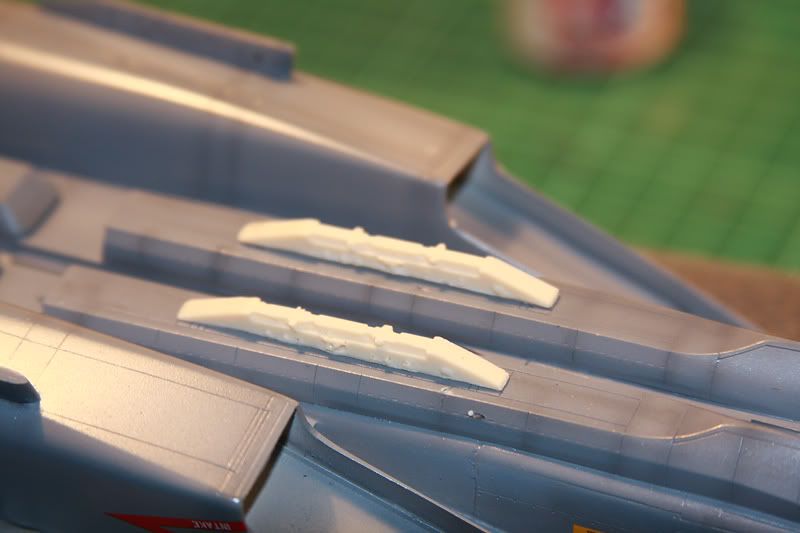
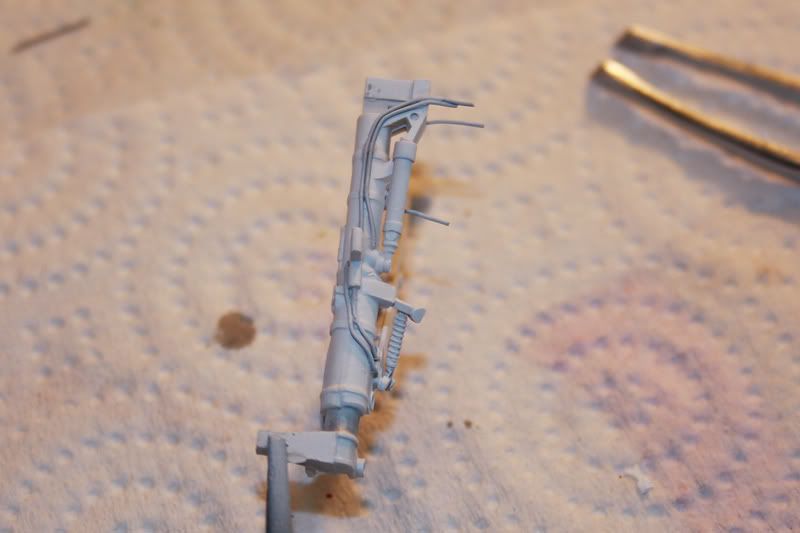
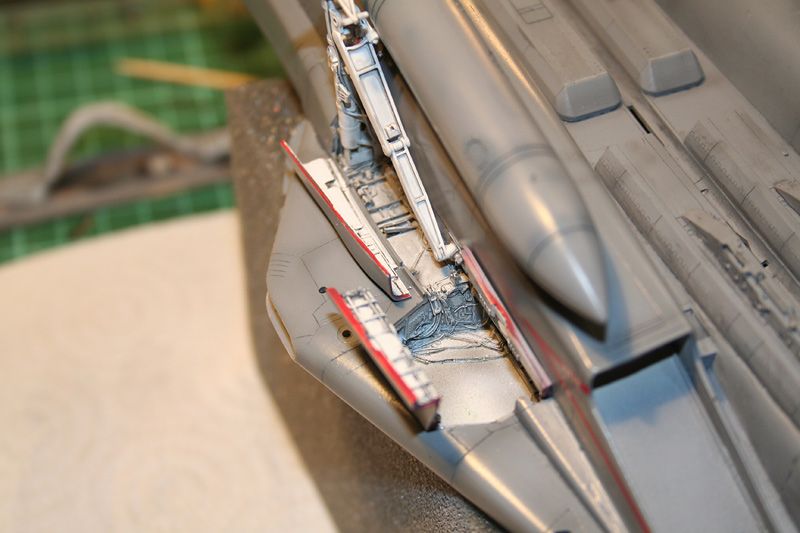
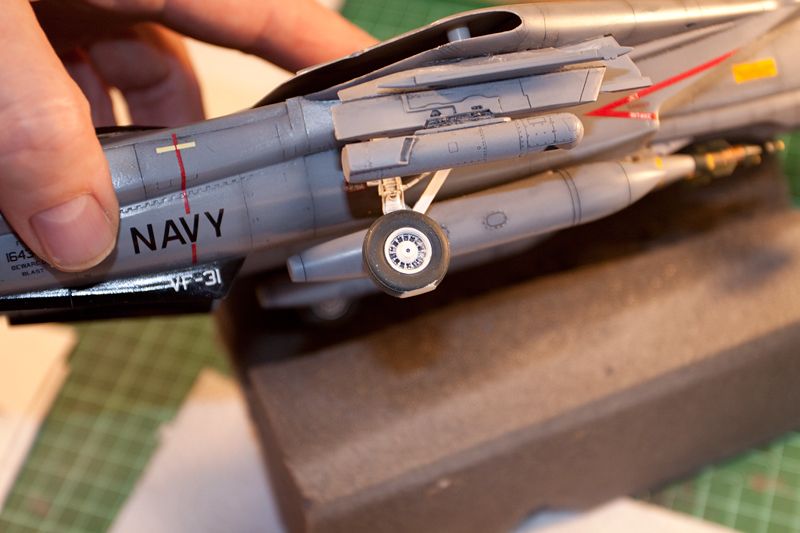
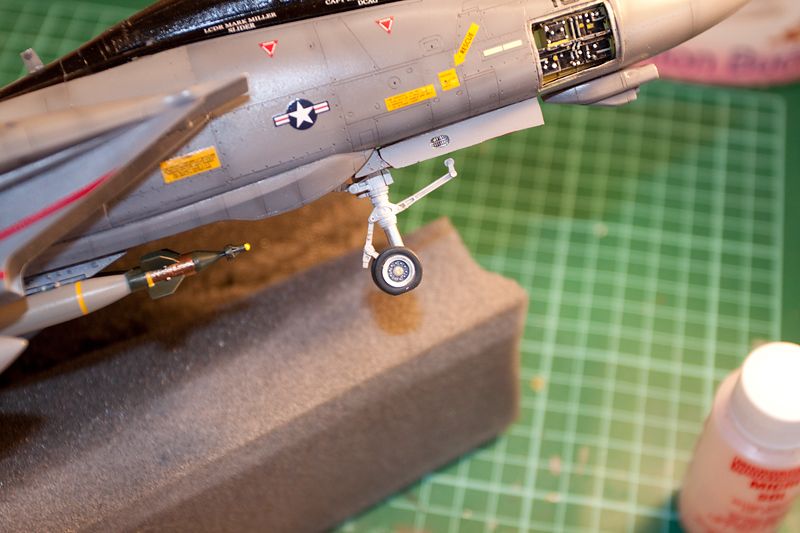
Managed to sort out the wheelwells and have detailed the gear
with hydraulic lines using 0.4mm lead wire. They turned out pretty good i
think.
Front wheelwell detail painted.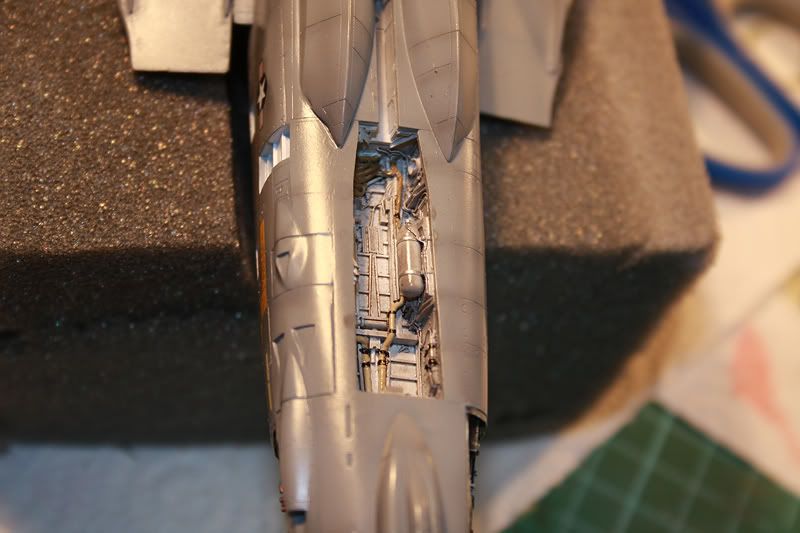
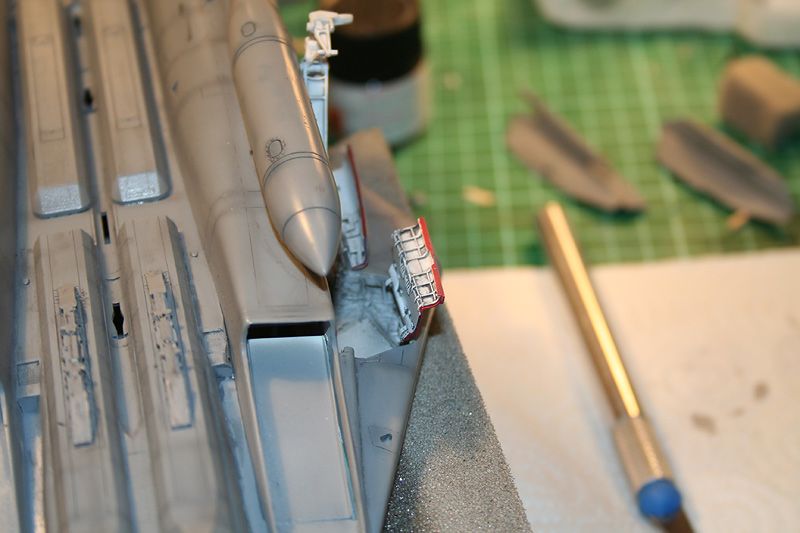
Main
gear having some pipework fitted
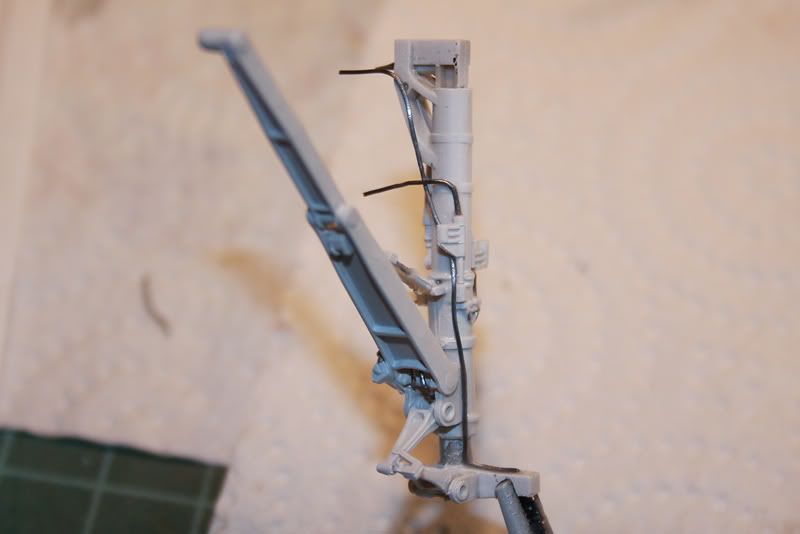
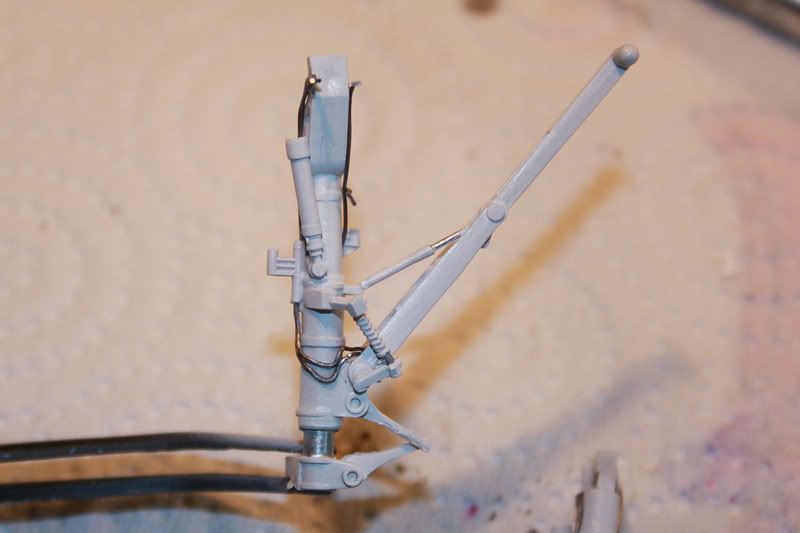
And
painted white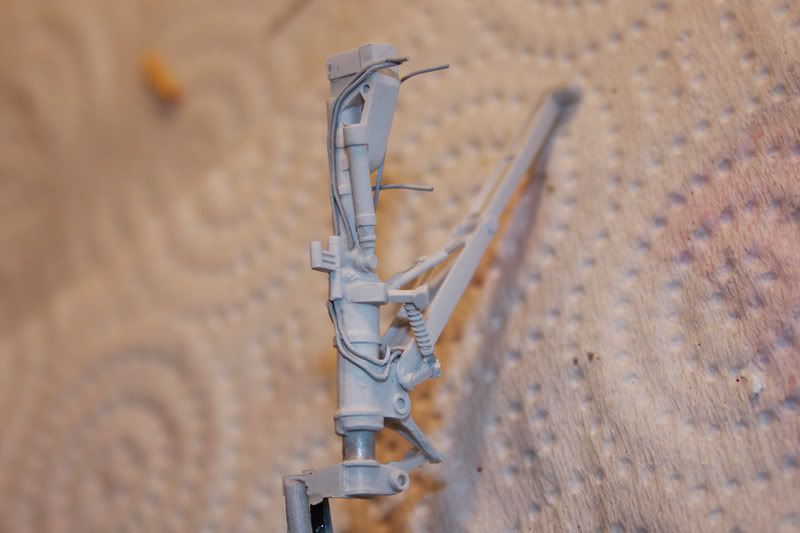
I
painted up and fitted the Royale Resin drop tanks and fitted them to the
fuselage before getting some Promodeller Dark wash on her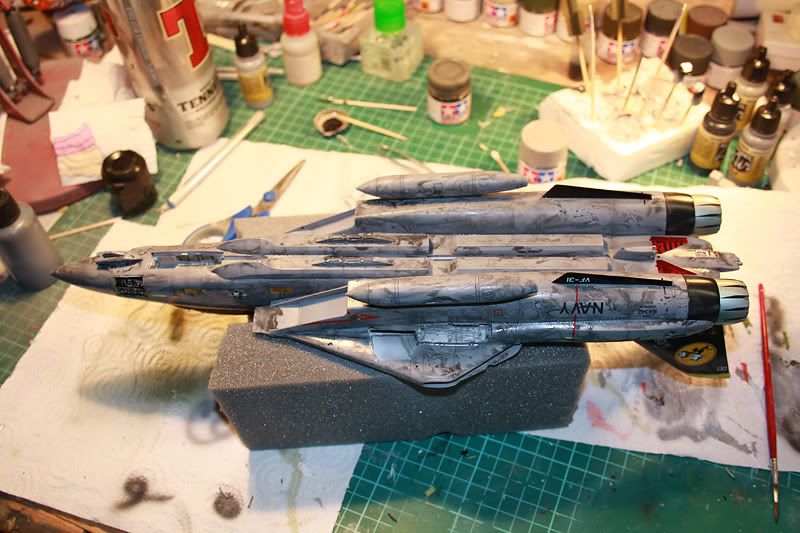
Then
back off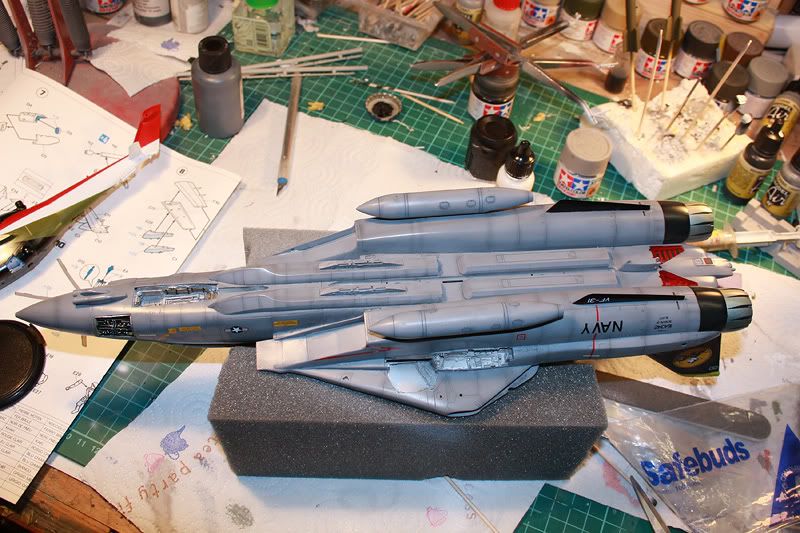
I've
given the gear a wash with some thiined down Tamiya smoke with a drop of black
in it and will coat it in satin varnish once dry.
Gear doors painted and on
Also have the wing glove pylons fitted

Airbrakes done
Resin wheels fitted
Paveways painted and fitted
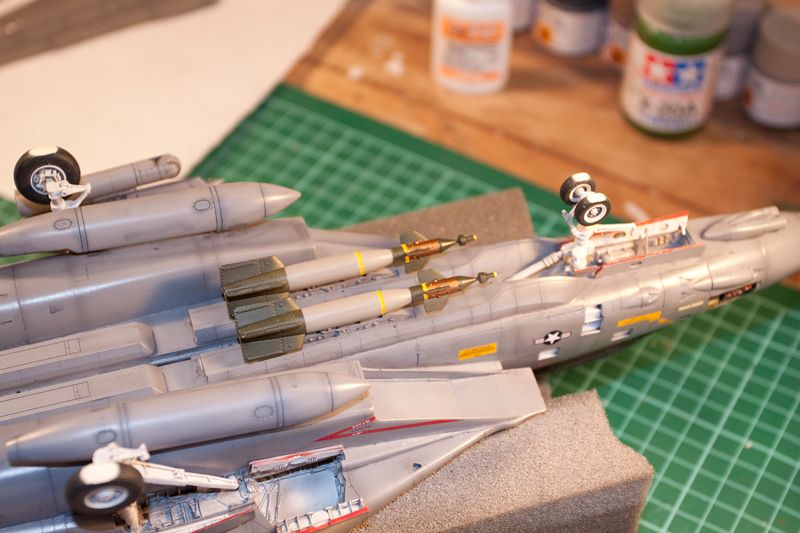
Arrestor hook on
Replacement etch panel doors finished
Aim9l Sidewinders on

Started on seats

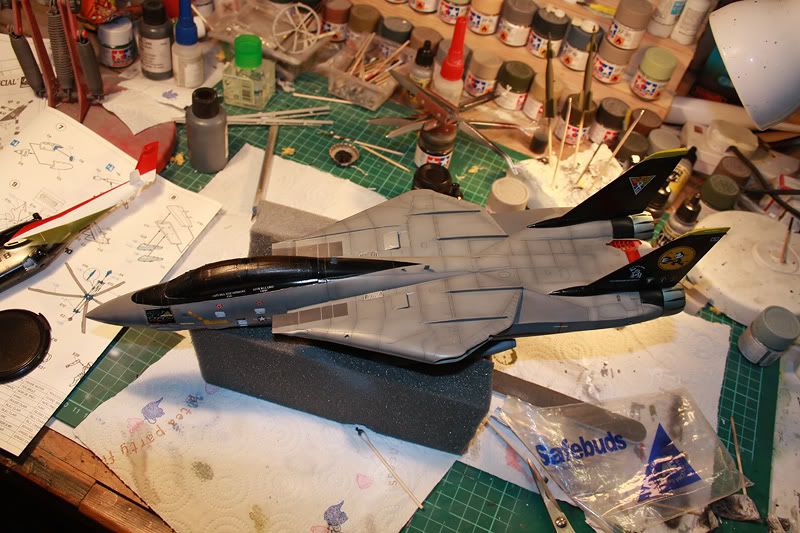
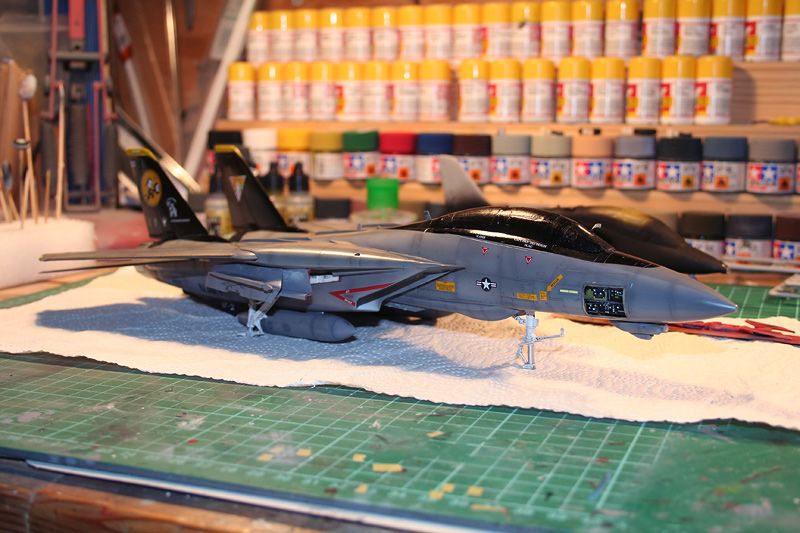
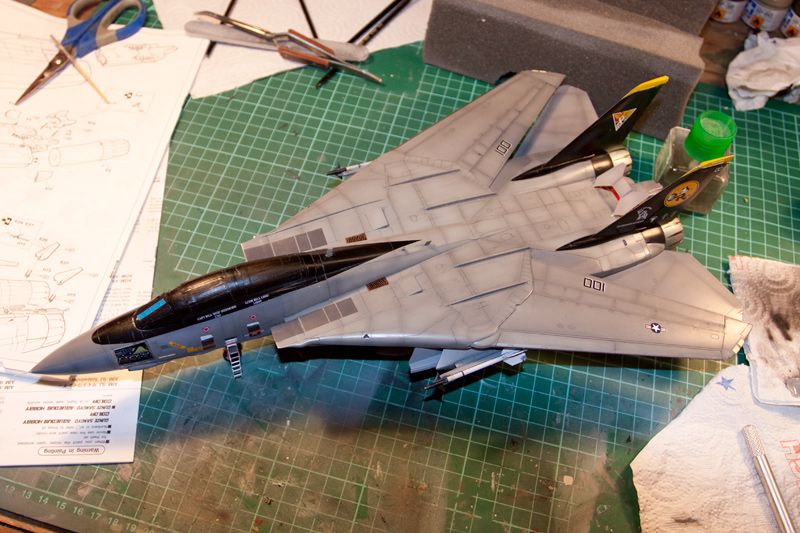
And where we are today
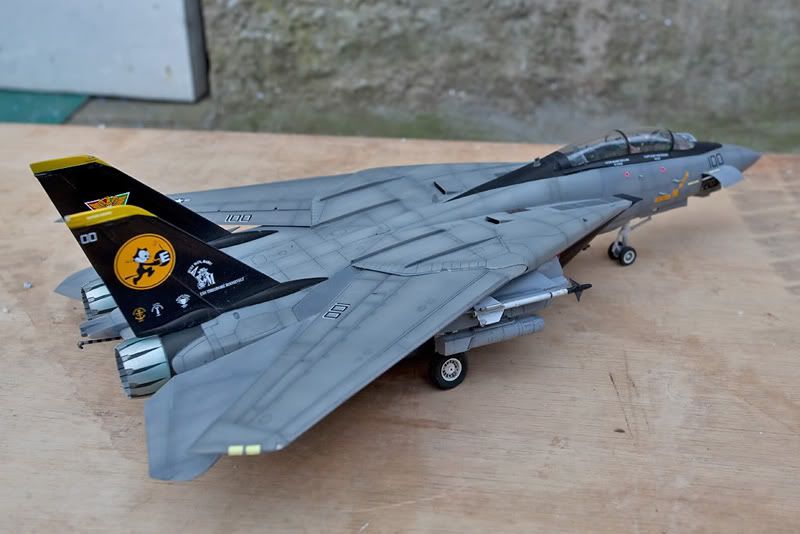
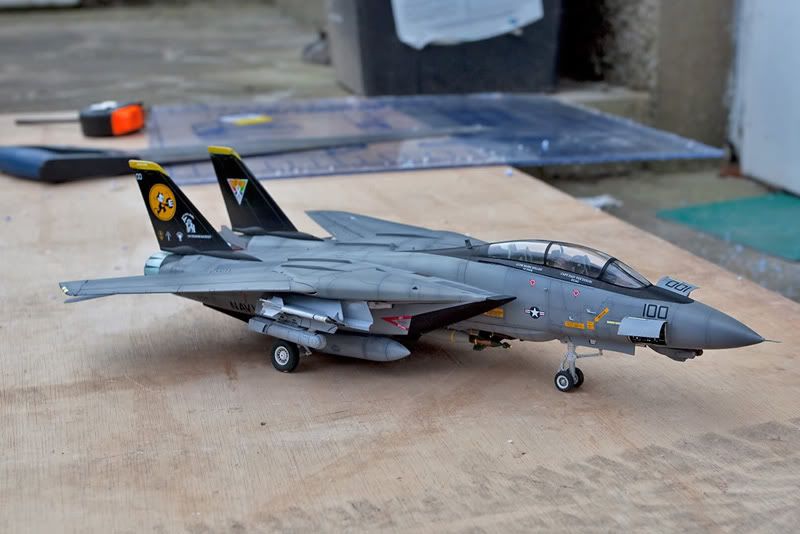
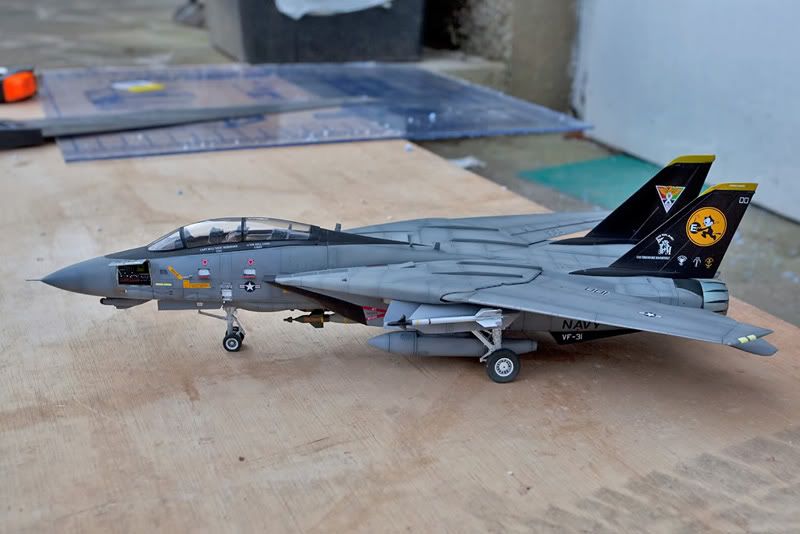
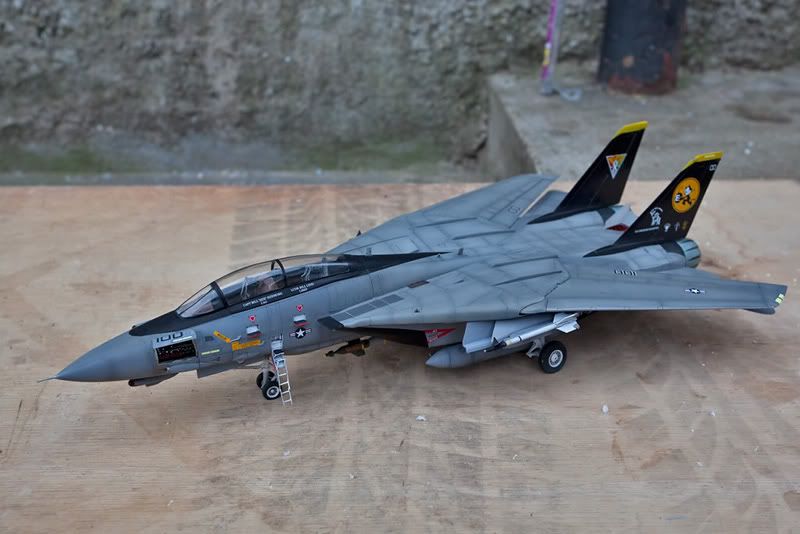
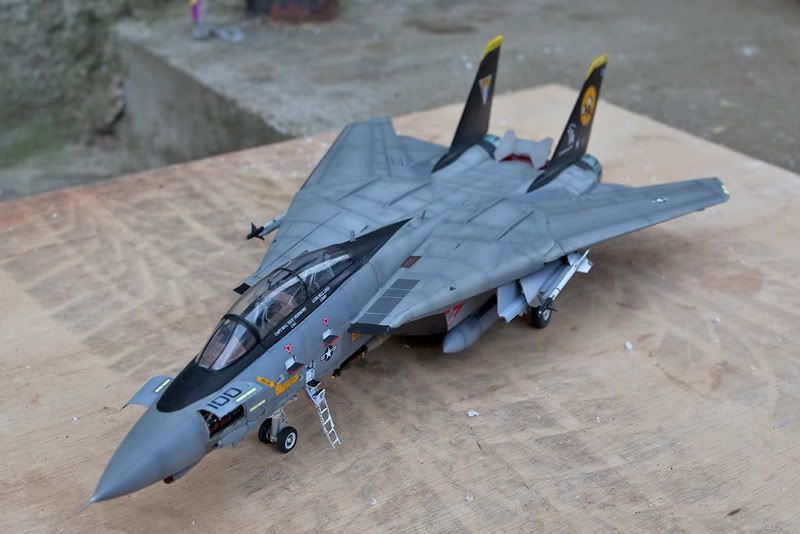
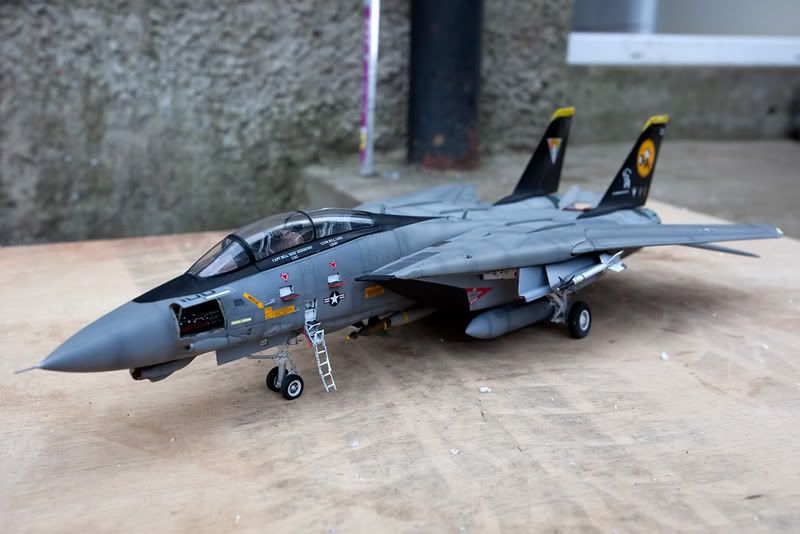
Well here she is finally finished. Was an excellent experience getting all the extras crammed into this one and i'm very happy with the end result.
Thanks for the company and the help from Hans, Marcus and Jeff on this one.
My Build
Kit:-
Hasegawa 1:48 F-14A Tomcat #07212
Scale:-
1:48
Extra's:-
Aires F-14D Cockpit Update # 4333
Aires F-14 Wheelwell set # 4132
Verlinden Super Detail Set # VL0427
Decals: Crossdelta sheet number DEC006
Royal Resin F-14A Wheels
Royal Resin External Fuel Tanks
Steel Beach FOD covers
Reference:-
Tomcat, Bye bye baby
Squadron/Signal Publications F-14 Tomcat in action.
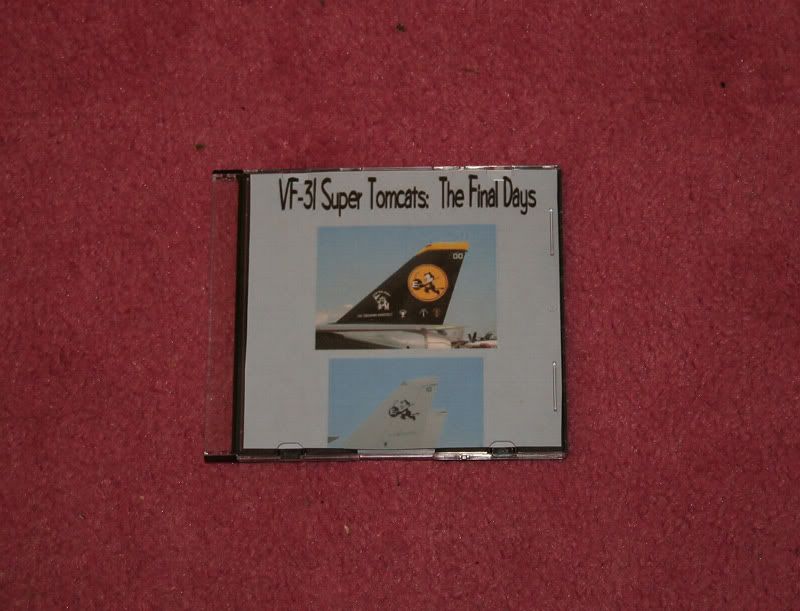
VF-31 Super Tomcats- The final days.
Paints:-
Xtracrylic
Tamiya
Gunze
Citadel
Materials:-
Evergreen Styrene
800 grit wet & dry
Lead wire
Copper wire
PVA Glue


Thanks
Tom 