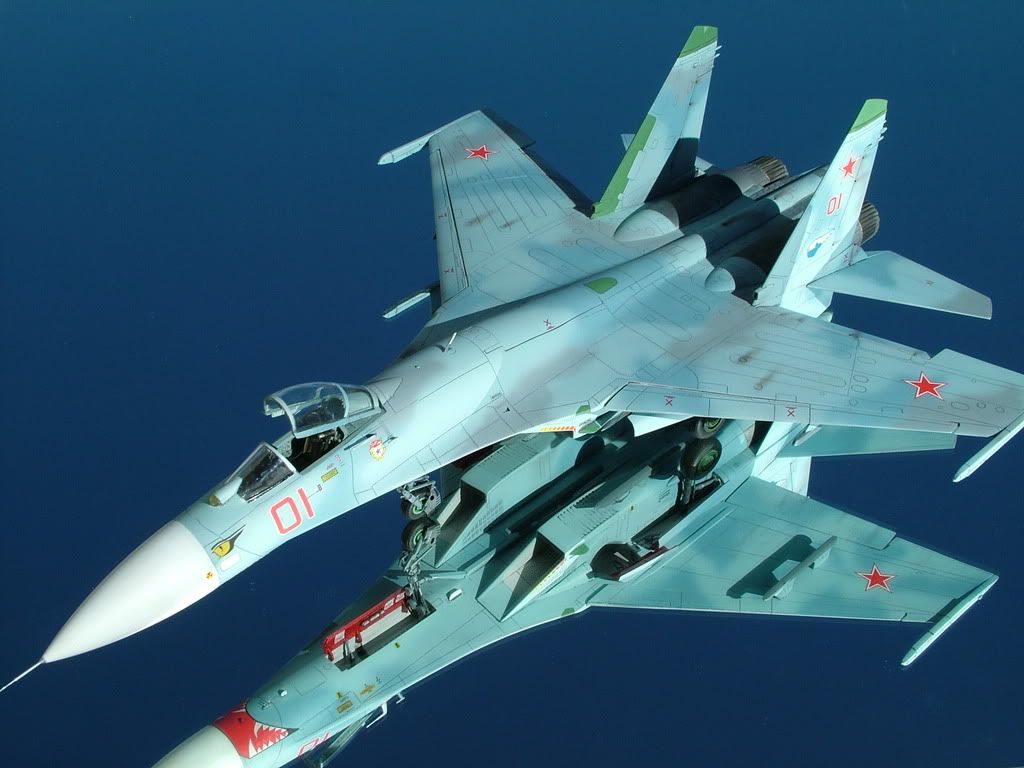
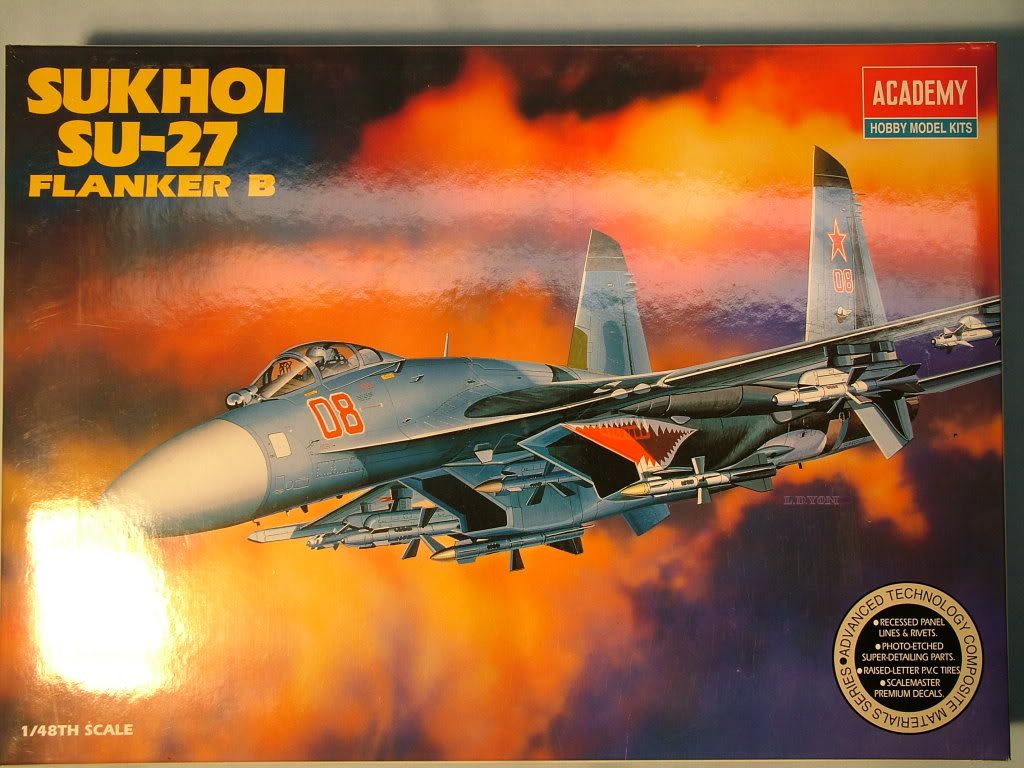
Sukhoi SU-27Flanker
689th Baltic Fleet, Chkalovsk AB Bort Red 01 – aka: “Snake Face”
1:48 scale release from Academy of a Sukhoi SU-27 Flanker. I will be modeling the scheme of the 689th Baltic Fleet based out of Chkalovsk AB, Bort number Red 01, known as The Snake Face. This particular Flanker underwent several re-paints and has some interesting history behind its service life in northern Russia.
Comments about the build:
Will utilize Model Master enamel custom blendsto approximatethe haze Blues.
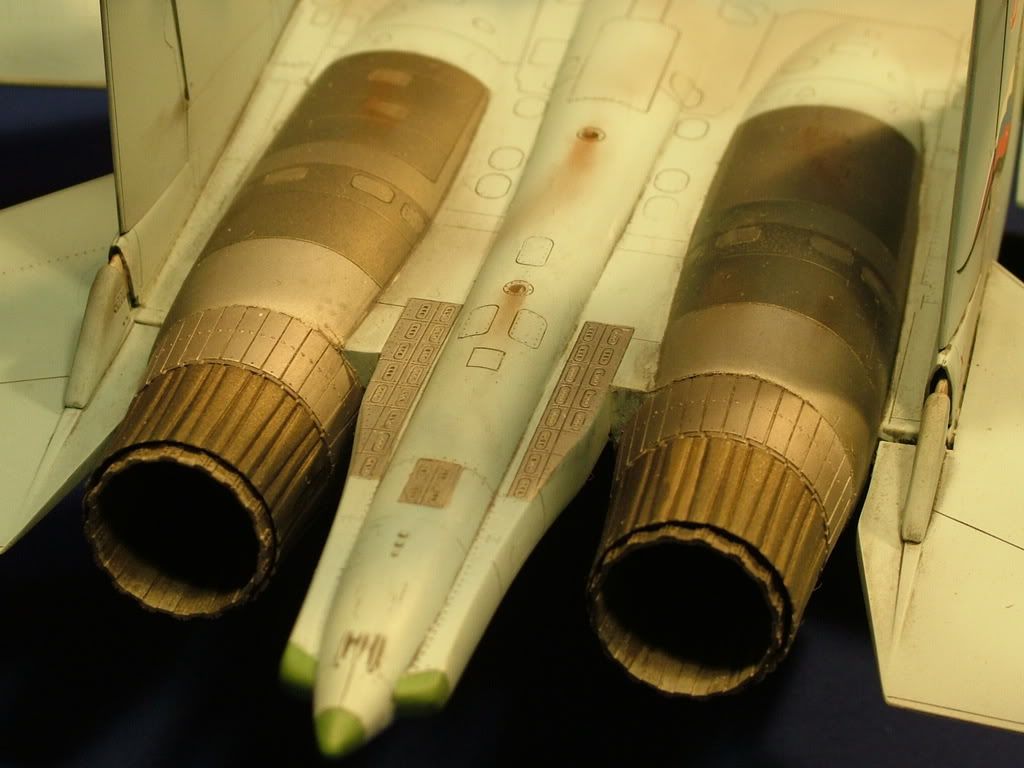
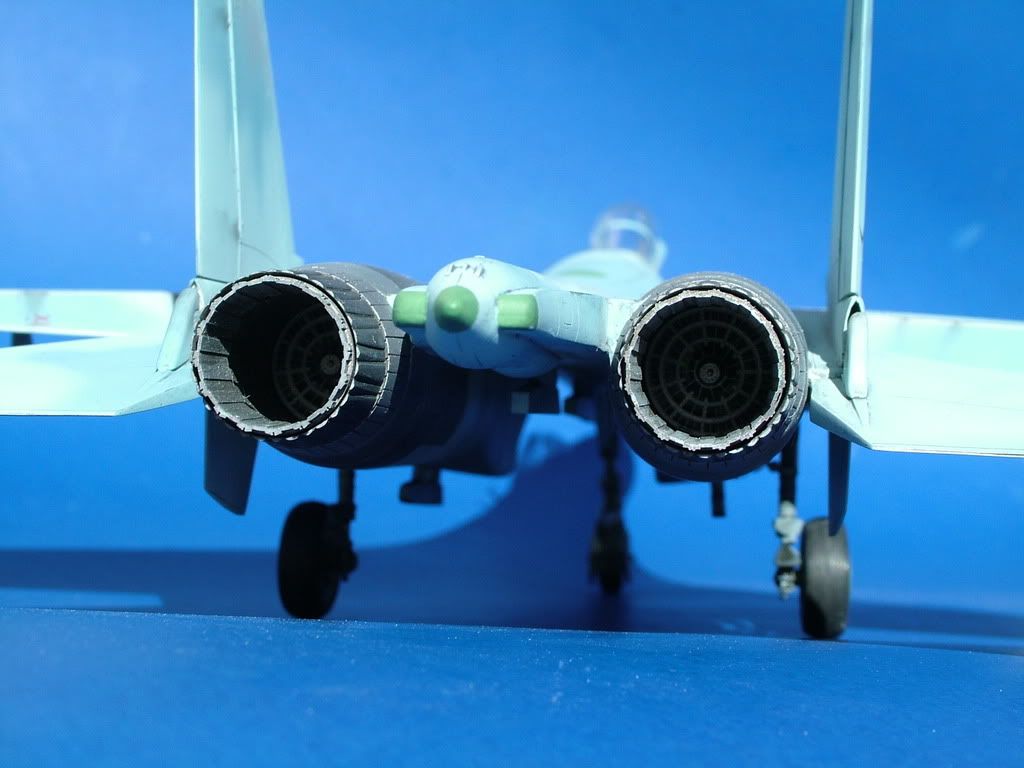
Pre-shading to be performed utilizing a Tamiya Flat White as a primer coat, XF-2 and Dark Grey XF-24 for pre-shading. The engine nozzles will be detail painted to simulate heat distortions by using various shades of Alclad II and Alclad Clear Blue plus stains of Tamiya Clear Yellow and Red.
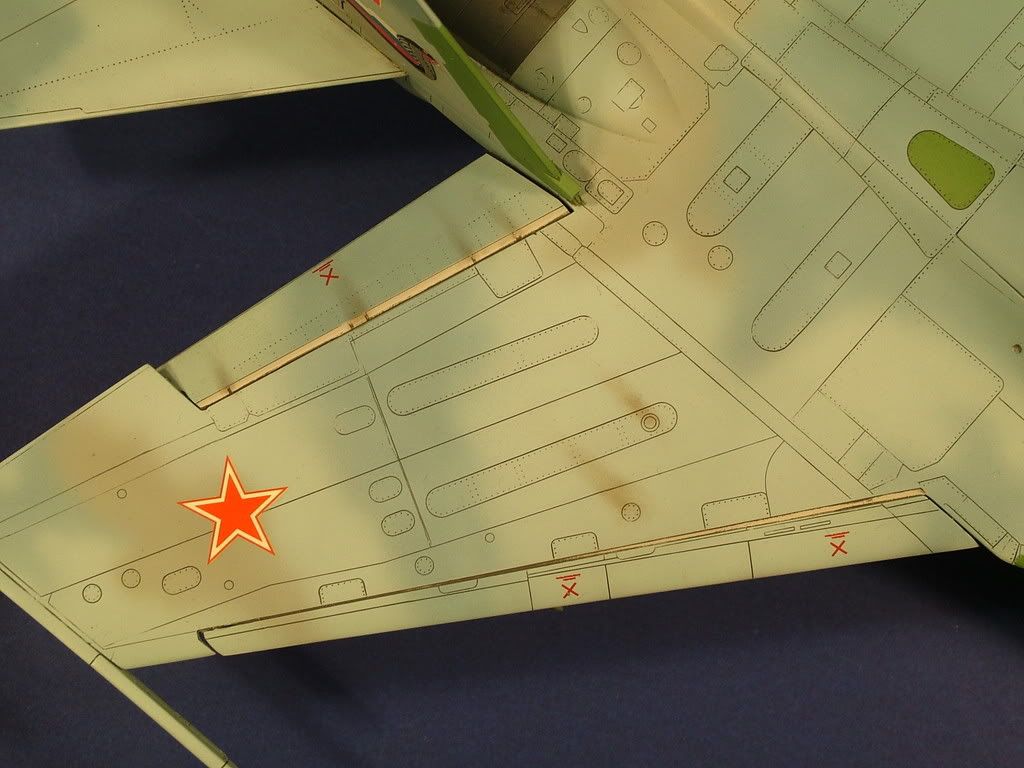
Bits of worn surfaces to be picked out with a silver artist pencil, some boot scuffs on the LERX will be simulated with black artist pastels, fuel stains etc on the wings will be simulated with artists’ pastels of burnt umber.
Clear coat of Future floor polish to be applied in preparation for the decals, they will be snuggled down with solve- a-set. Once dried another layer of Future to seal all details and decals in.
The next step will be then be to follow with Pro-modeler clay based washes (Dark Dirt, Light Dirt, Brown and Black) to accentuate the various panel lines and general weathering of the three tone haze blue camouflage.
Finally a Testors acrylic semi-gloss coat will be applied to seal in all details.
I will be using the following aftermarket products:
1. Aires cockpit set as well as the Exhausts Nozzles, to replace the kit version.
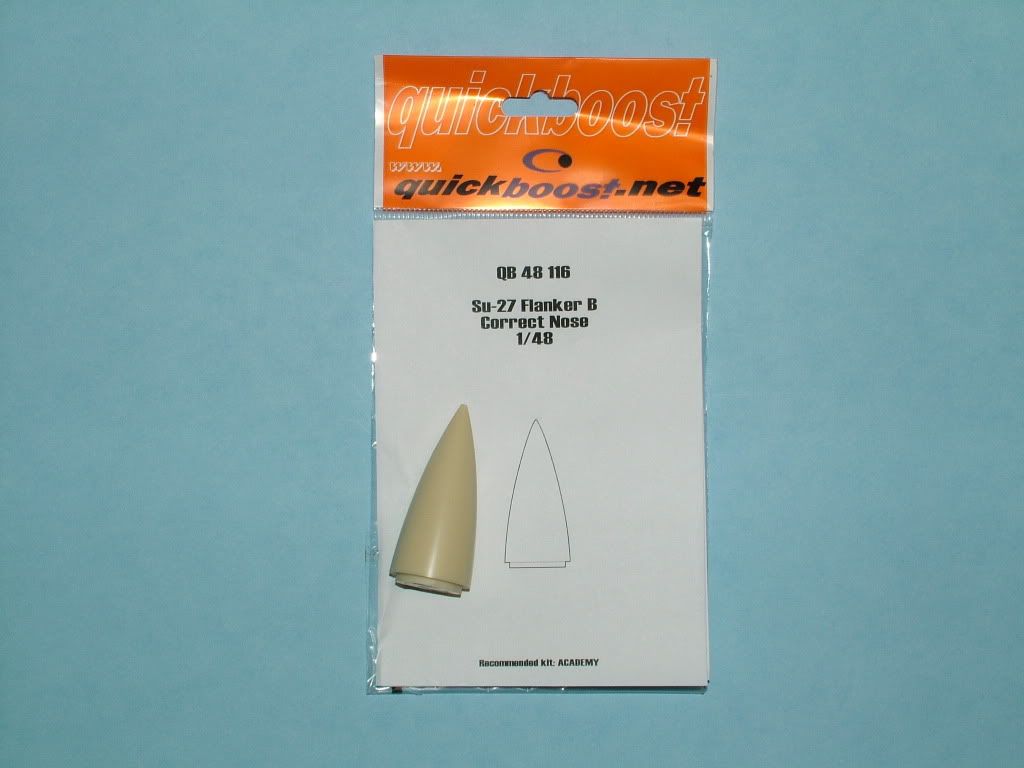
2. Quickboost corrected nose cone
3. Decal sheet from Begemot of Russia
References used:
· Federal Standards Color Guide
· How to Paint Realistic Exhaust Nozzles
Box Top shot:
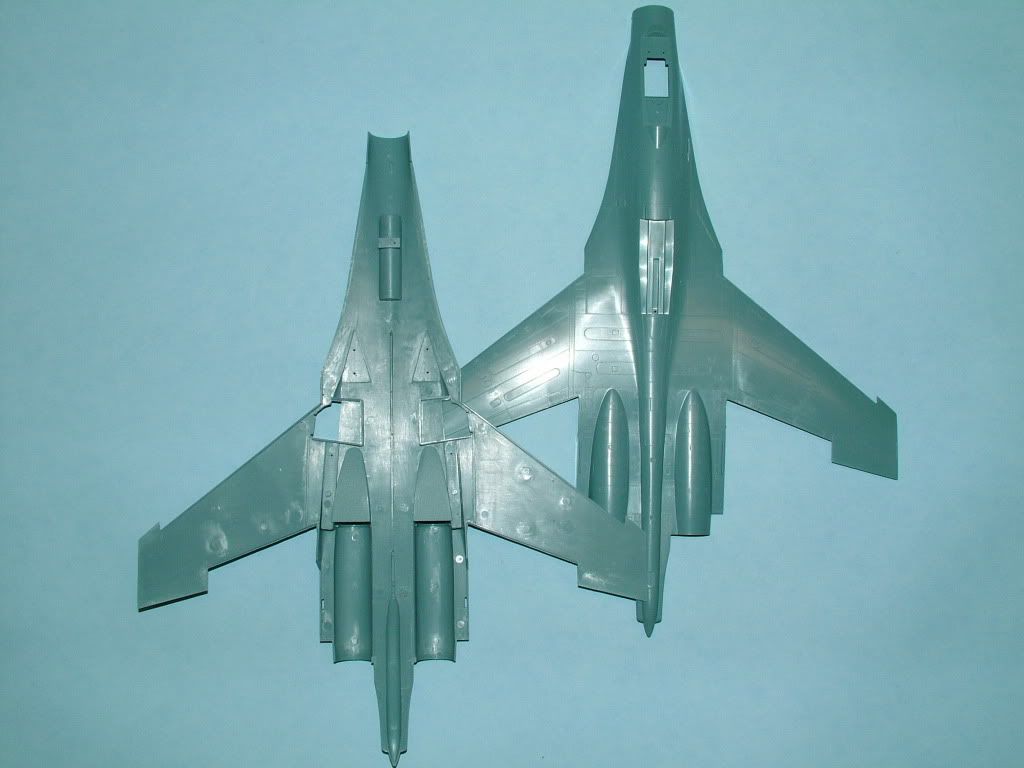
Main Fuse Parts:
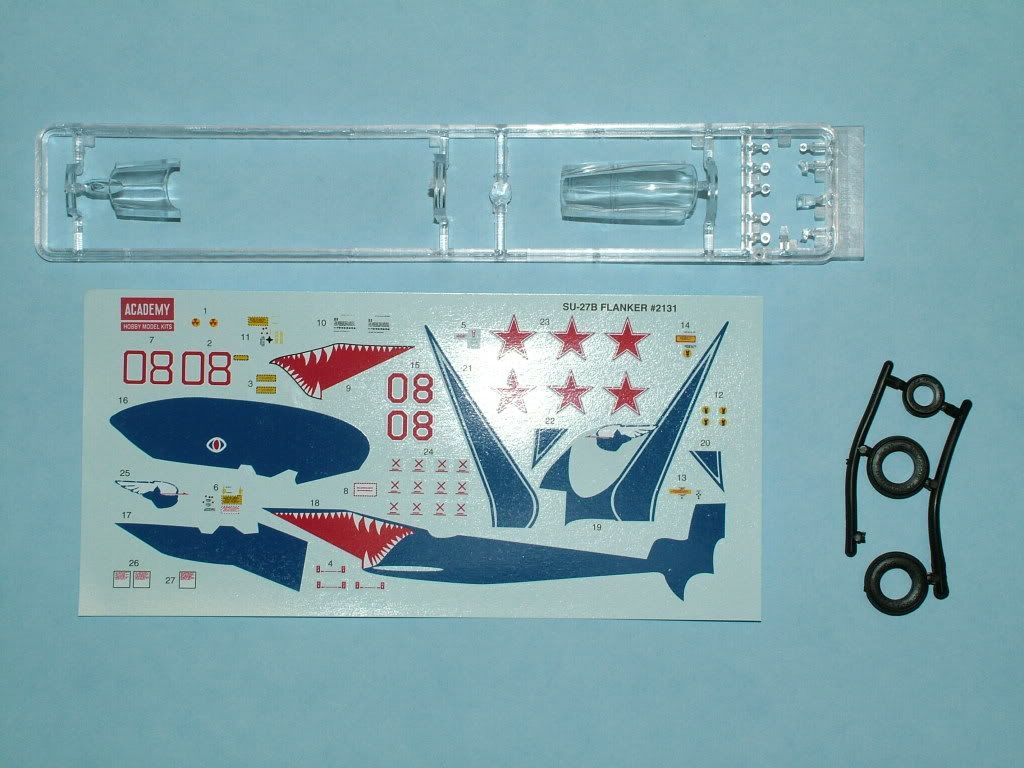
Clear parts, Rubber wheelset, included decal sheet:
Sprue Parts:
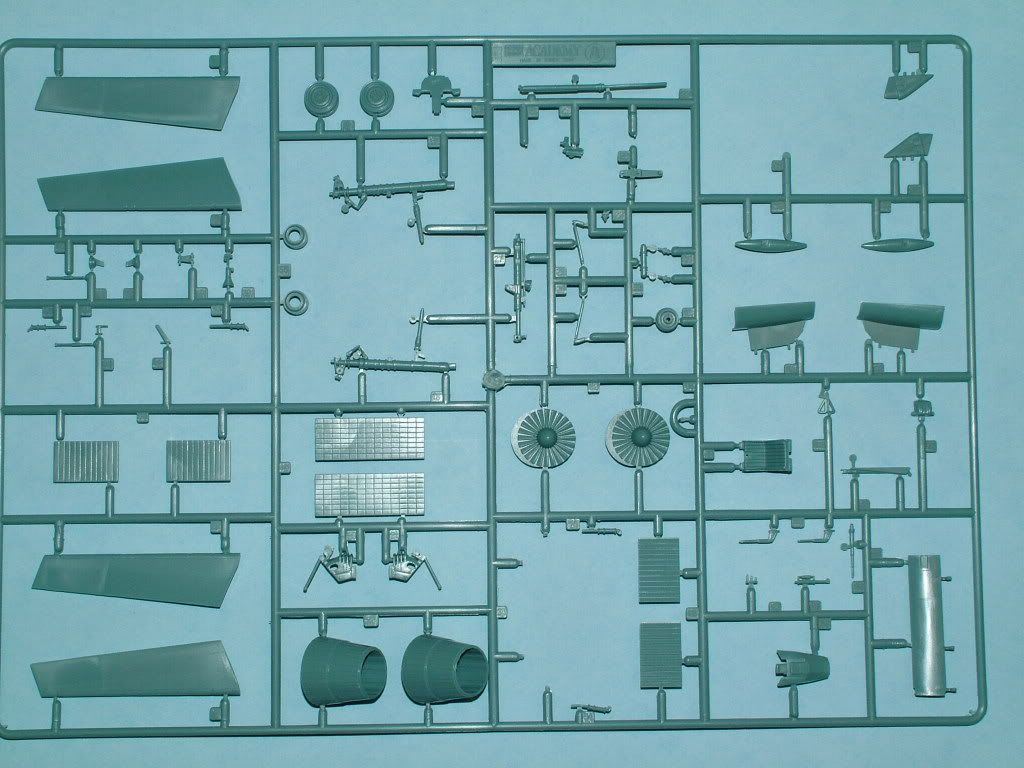
Sprue Parts:

Sprue Parts:

Sprue Parts:
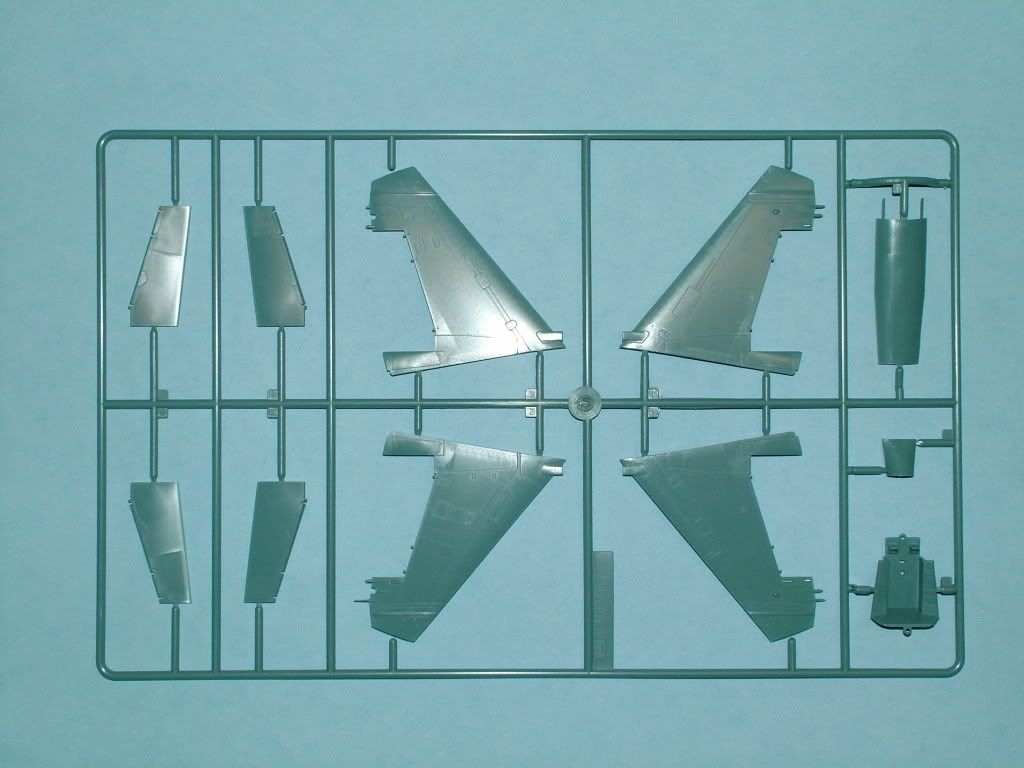
Photo Etch Parts Included in the kit:

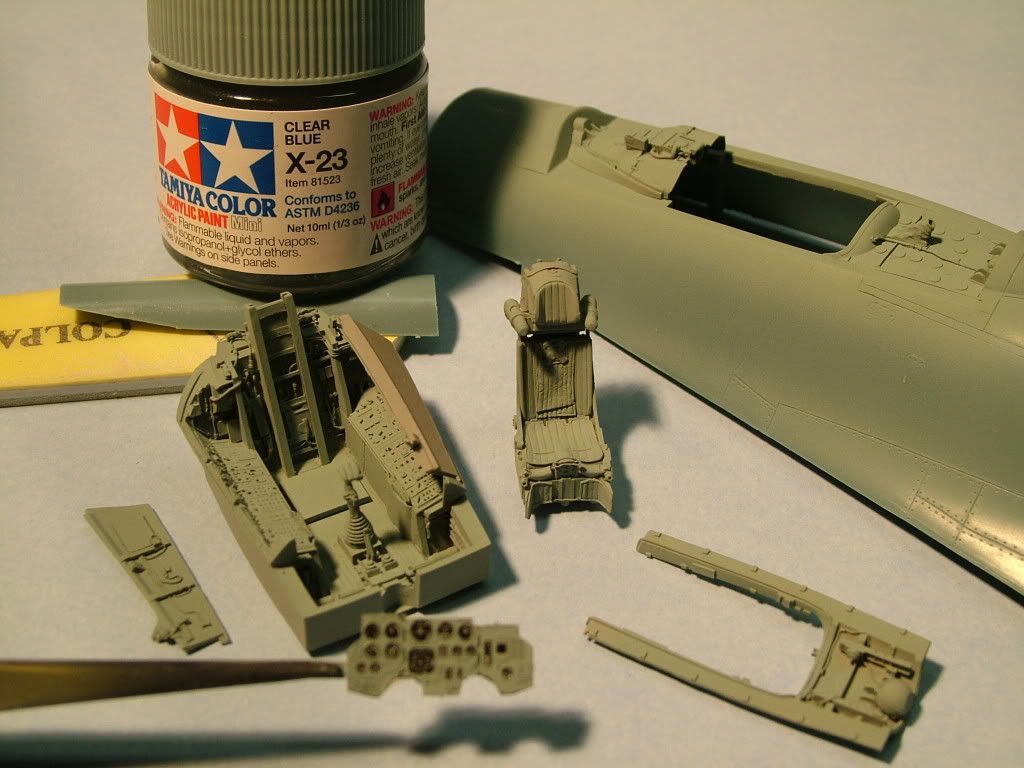
Aires Cockpit Parts:
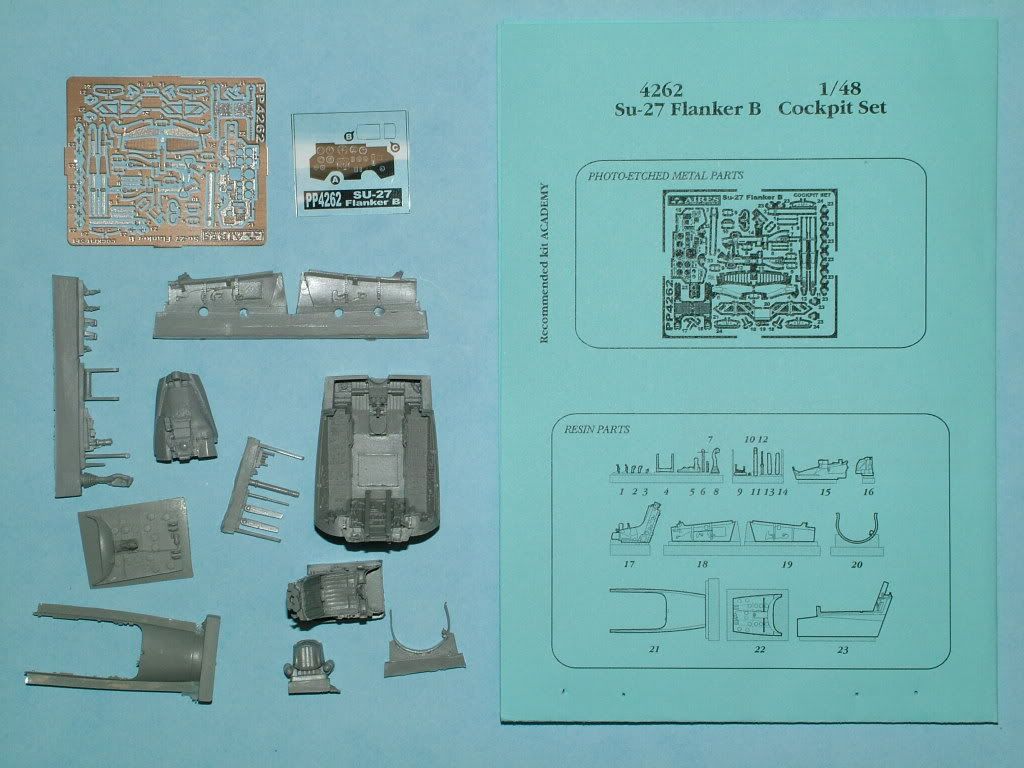
Detail shot of the Aires included PE set:

Quick Boost Corrected Nose Cone:
We start by modifying the cockpit area and make room for the extra details the Aires kit provides:
Kit part vs. Aires Detail: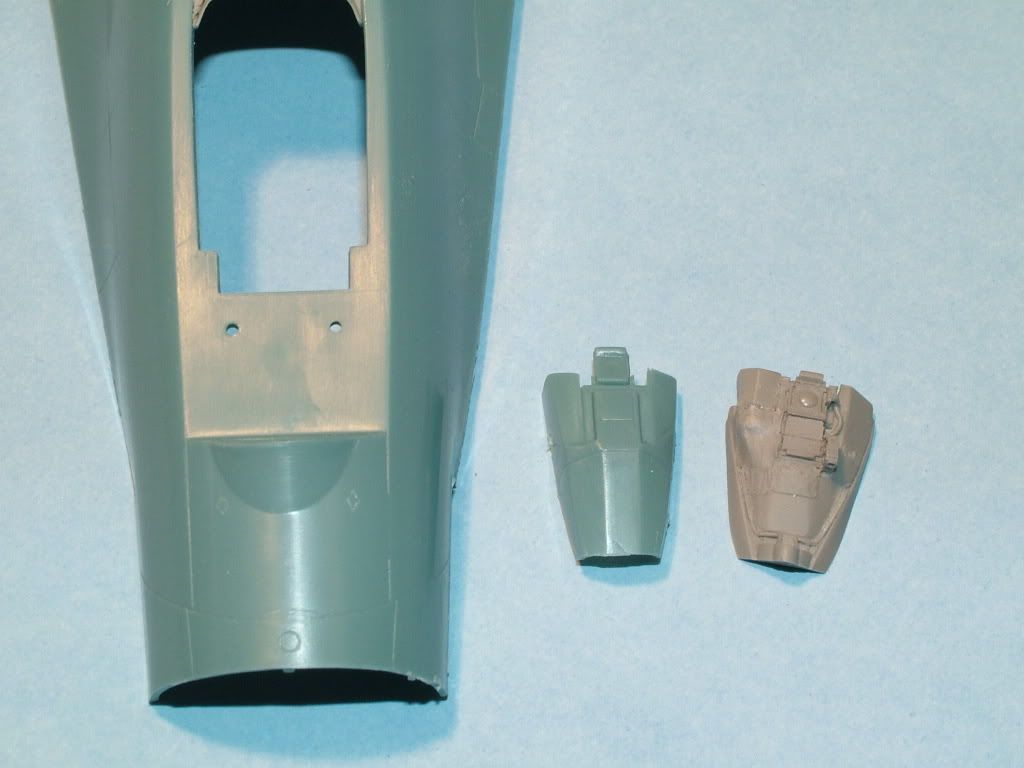
Couple minutes worth of cutting, sanding and here we are: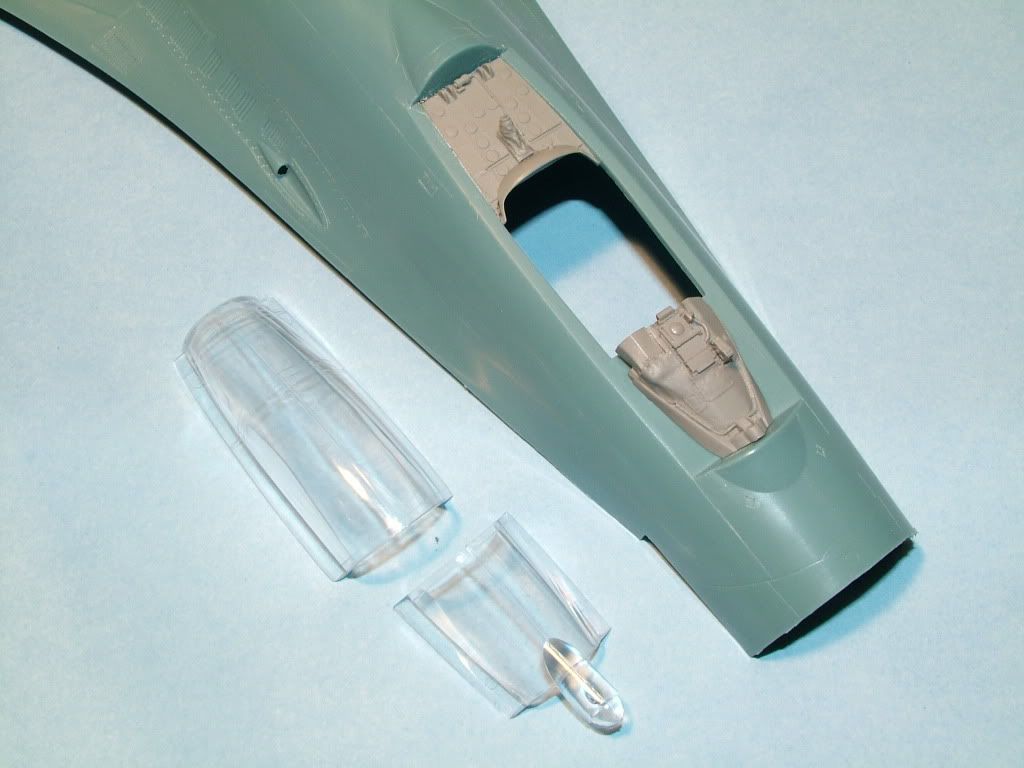
Checking to see if we didn't get anything out of wack and ensure the cockpit glass still fits: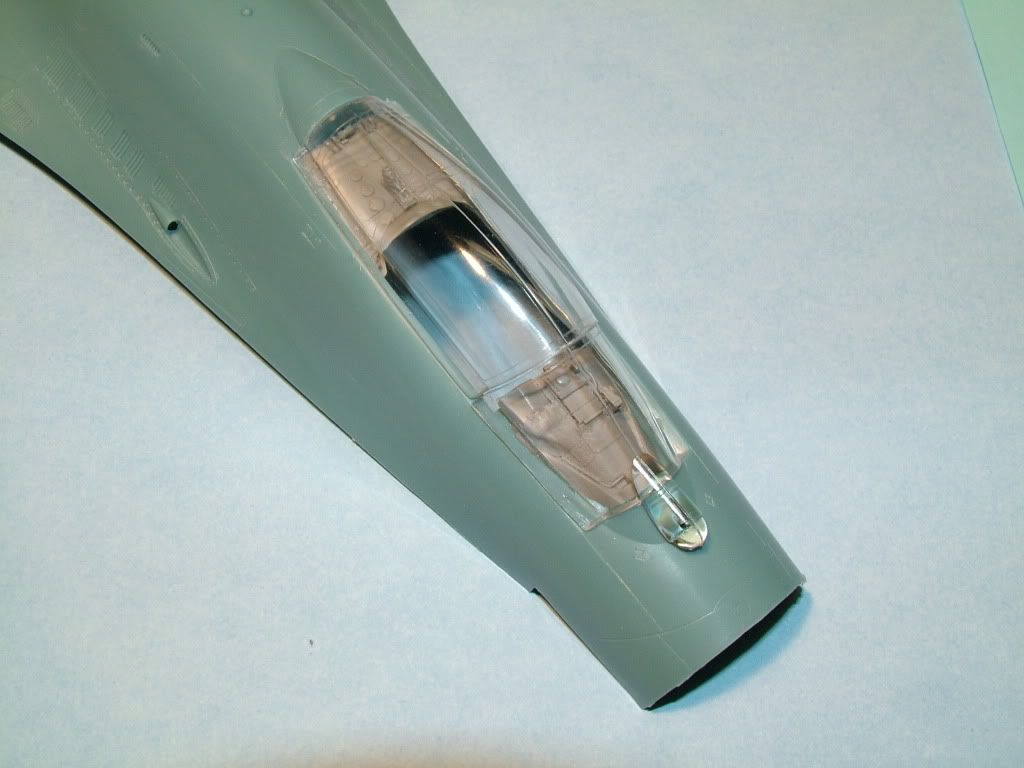
Ready for final fitting (EJ seat and side panels sanded):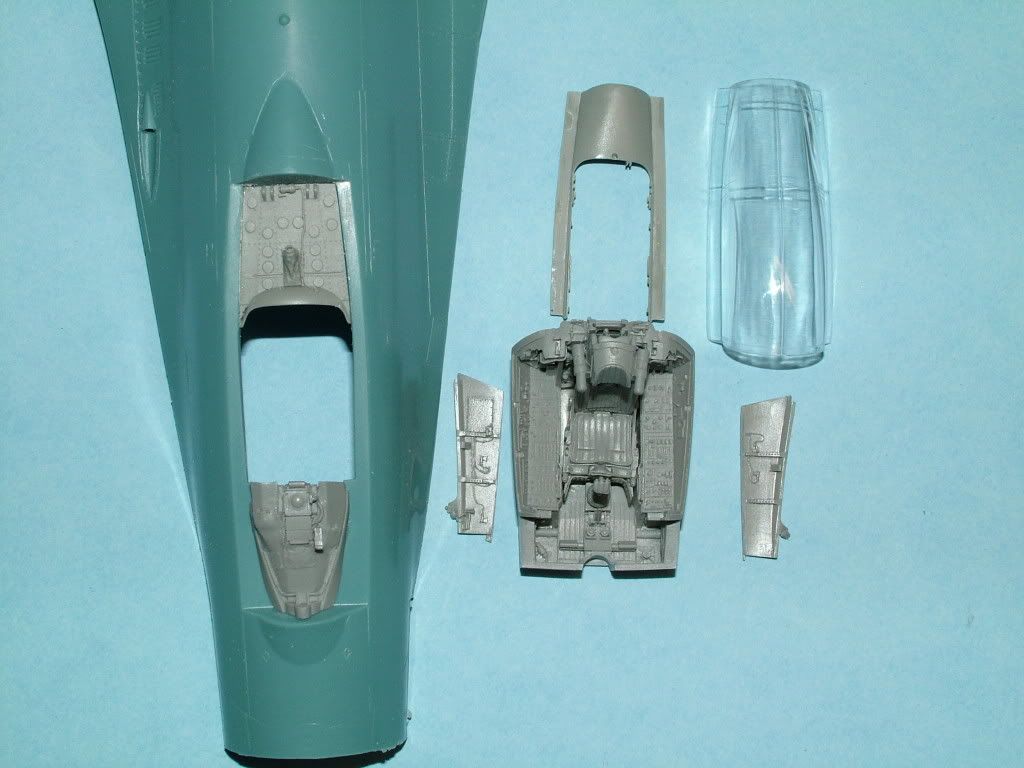
Close up of the Aires resin parts completed:
Using Tamiya "Clear" Blue X-23.
I posed the left side wall onto the cockpit tub so you can see the curvature of the planes sidewallsPhil talkes about in his video as it nearly encloses the cockpit detail.
Here is the result:
Alayer of XF-2 White to the back side of the clear acetate willmake the dials stand out and glued the "dials" to the PE set.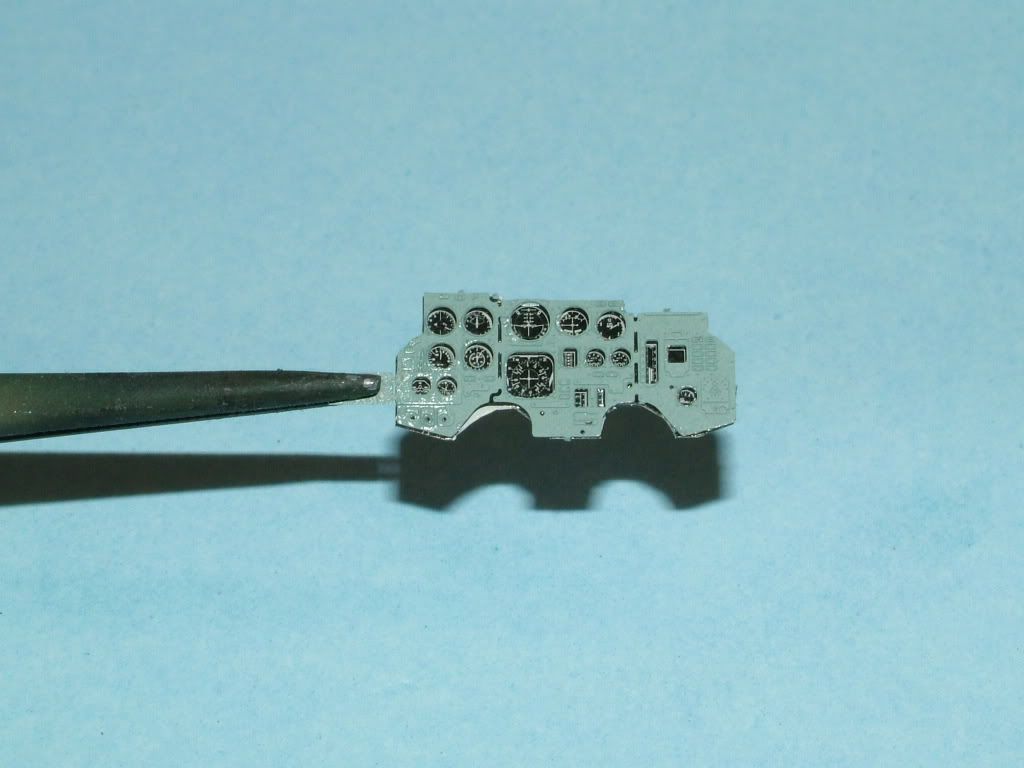
I'll have to trim the acetate sheet just a little on the bottom but we have a start.
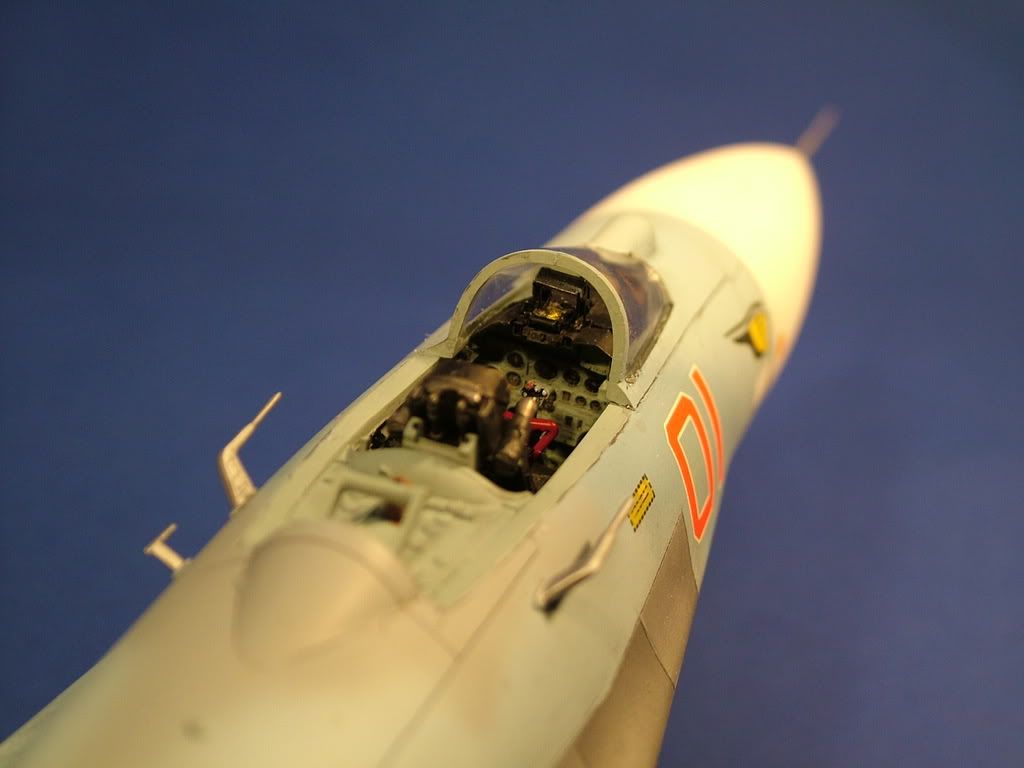
Completed dry brushing the cockpit, picked out a couple switches, painted the control stick boot black as well asthe grip, then picked out the firing buttons on the stick (Black/Red/White/Black).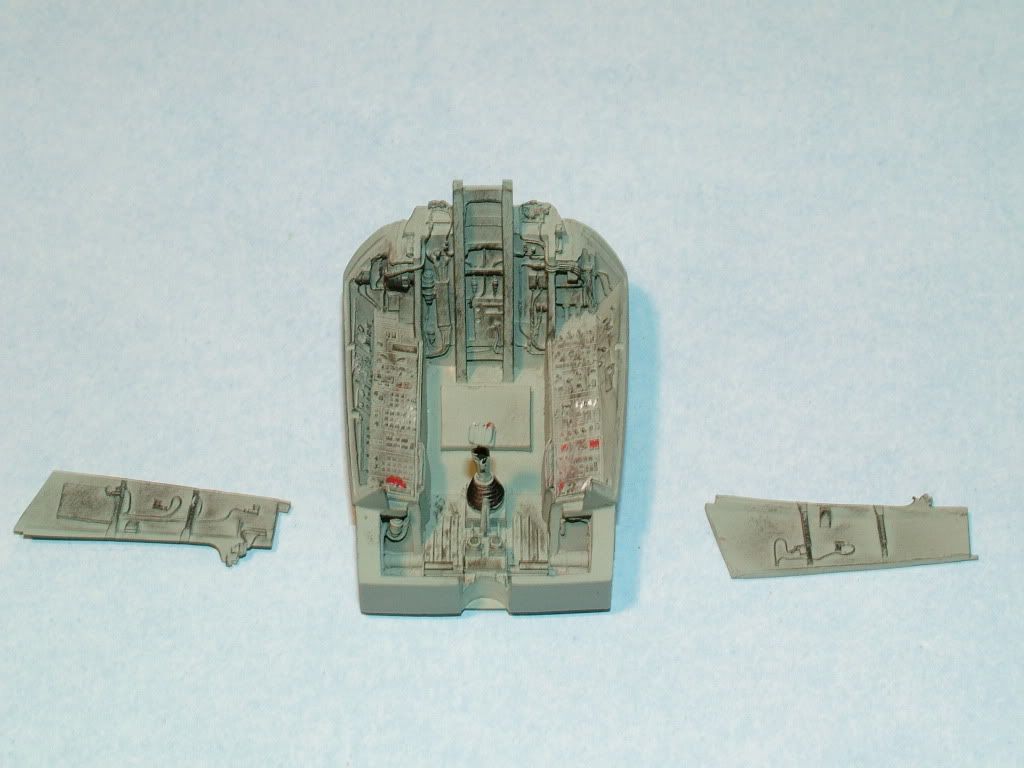
Glued on the side walls and sanded them flush with the outside walls: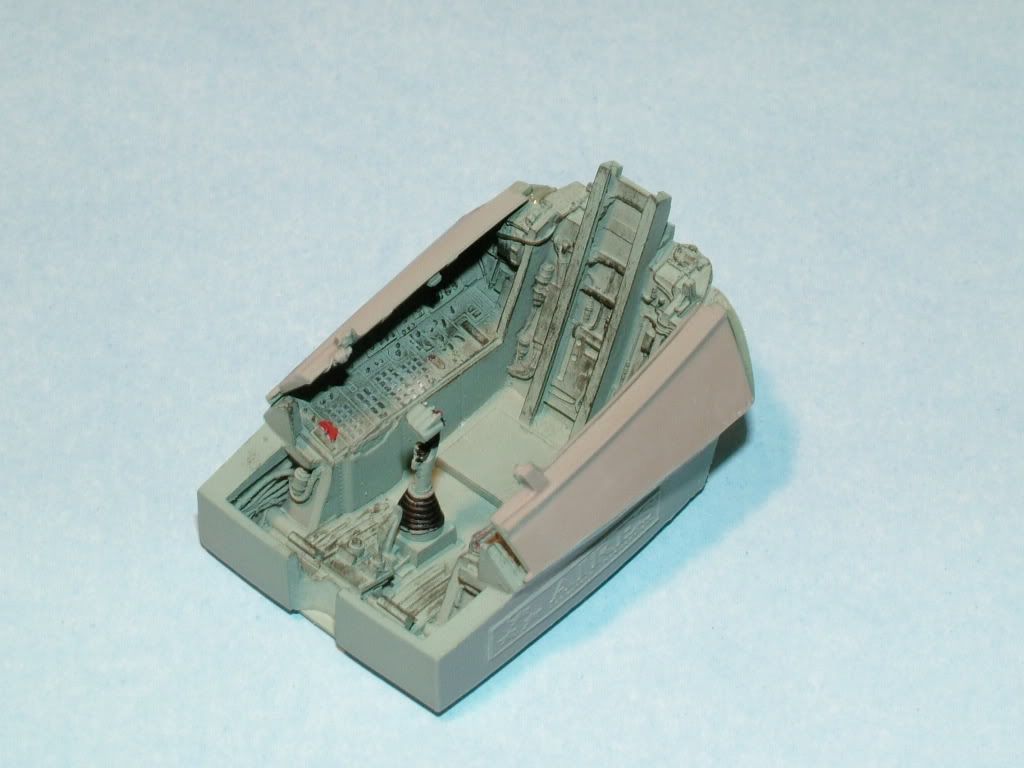
Glued in the PE dials and gage panel, dry brushed the back rest, and glued in the cockpit tub to the inside of the top main fuse part.
Might need to tone down my dry brush a little.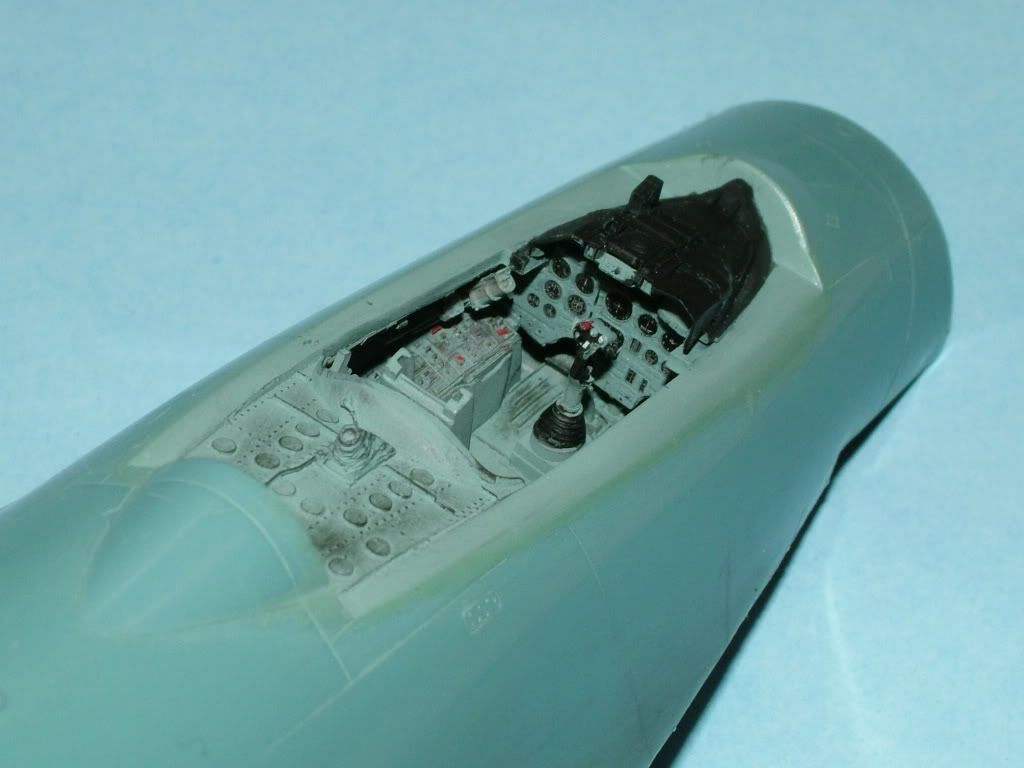
Ended up with a great fit, without too much trouble and major sanding as I normally have, when working with the Aires set. This one fit like a charm 
Just a small hairline gap on one side which we will fill carefully after the glue has completely set.
The dials were treated with small drops of Future to simulate the glass, placed with a cocktail stick ever so carefully on each individual dial.

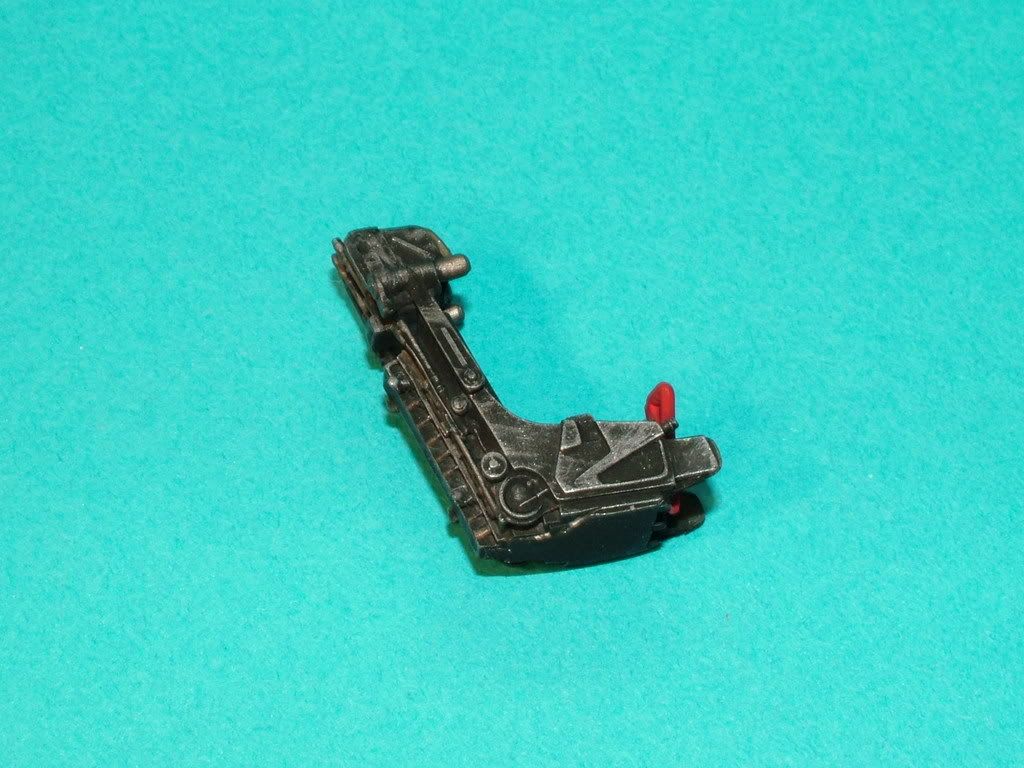
Aires kit EJ seatpainted up: Still need to get the PE seat belts installed.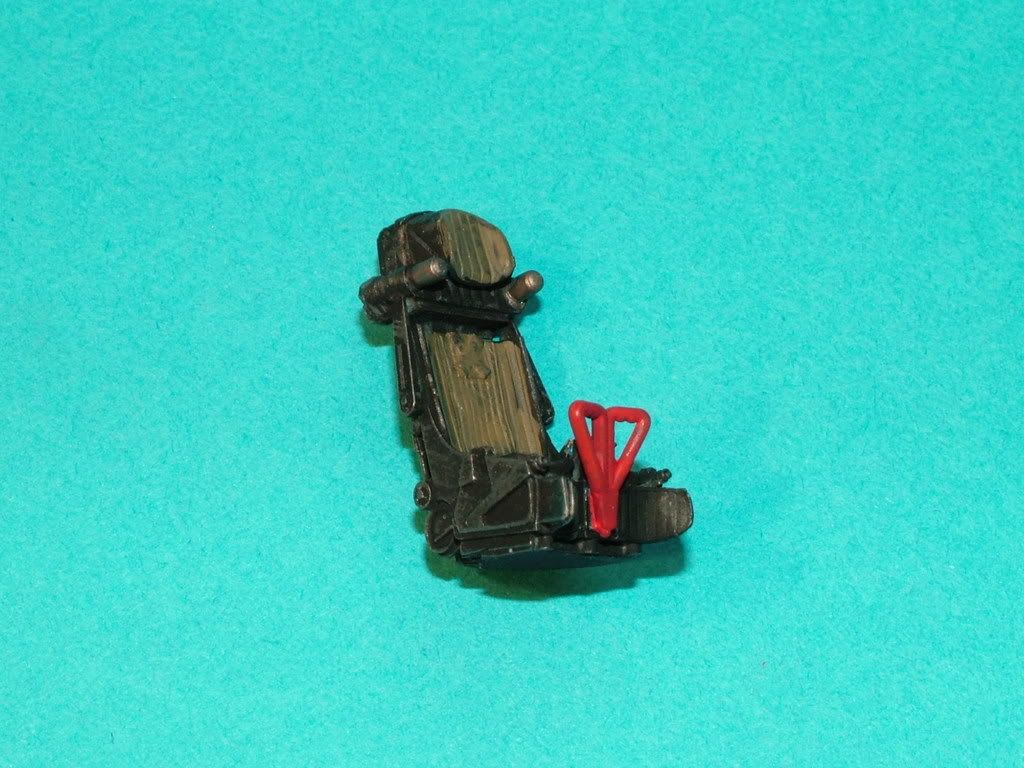
On to the cockpit glass, there is a fairly large seam running right down the middle on both the main and the front.
First I scraped the seam with a brand new blade. Then used Master Casters polishing block and polished her up.

Dipped the cockpit glass into Future. I did this three times in a time span of about 3 hrs as to build it up just a little.
Drying off under a small plastic container to prevent any dust particles settling down onto the soft Future. The tissue paper is there to pull away any excess that drips off the sides. 
Lining up the two main fuse parts: I checked first to see if there were any major area's of concern and sanded a couple places along the fuse to get a better fit.
Completed some of the larger sub-assembly's such as the elevator halves with actuator tabs and the flaps, & the slats, cleaned up the Quickboost Nose cone of flash.
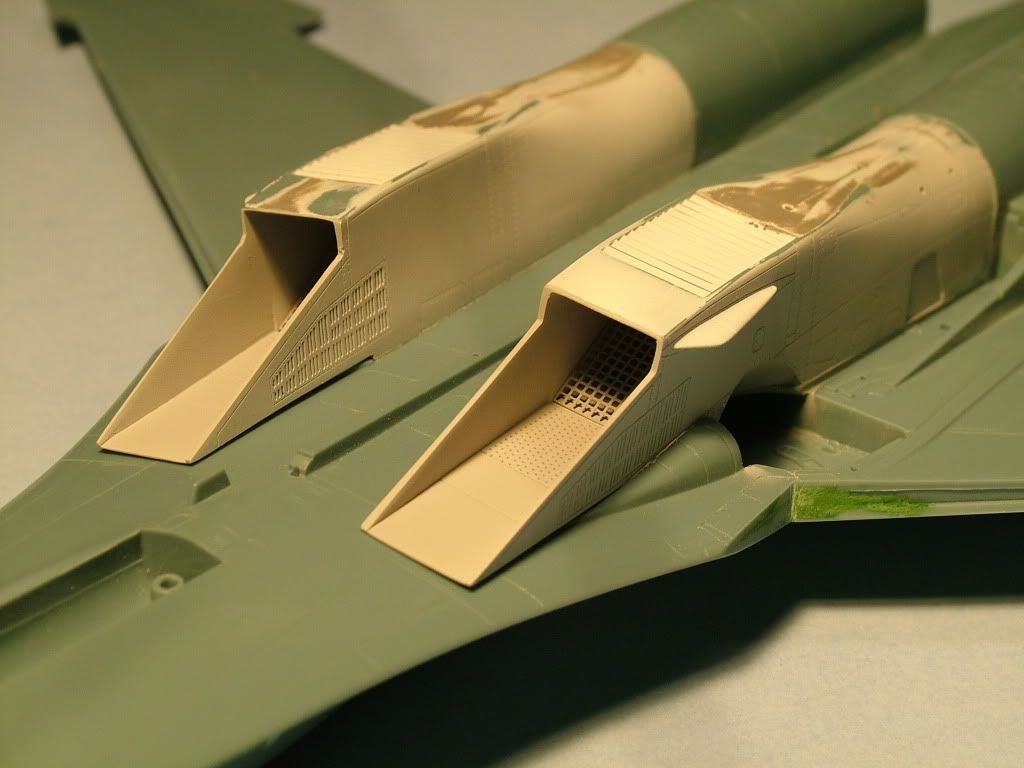
Did quite a bit of sanding on the inside to get rid off the ejector pin marks. The top engine intake is almost final sanded and the seam is just about gone, still needs re-scribing. I left the bottom "As Glued" so you have a comparison of the initial join.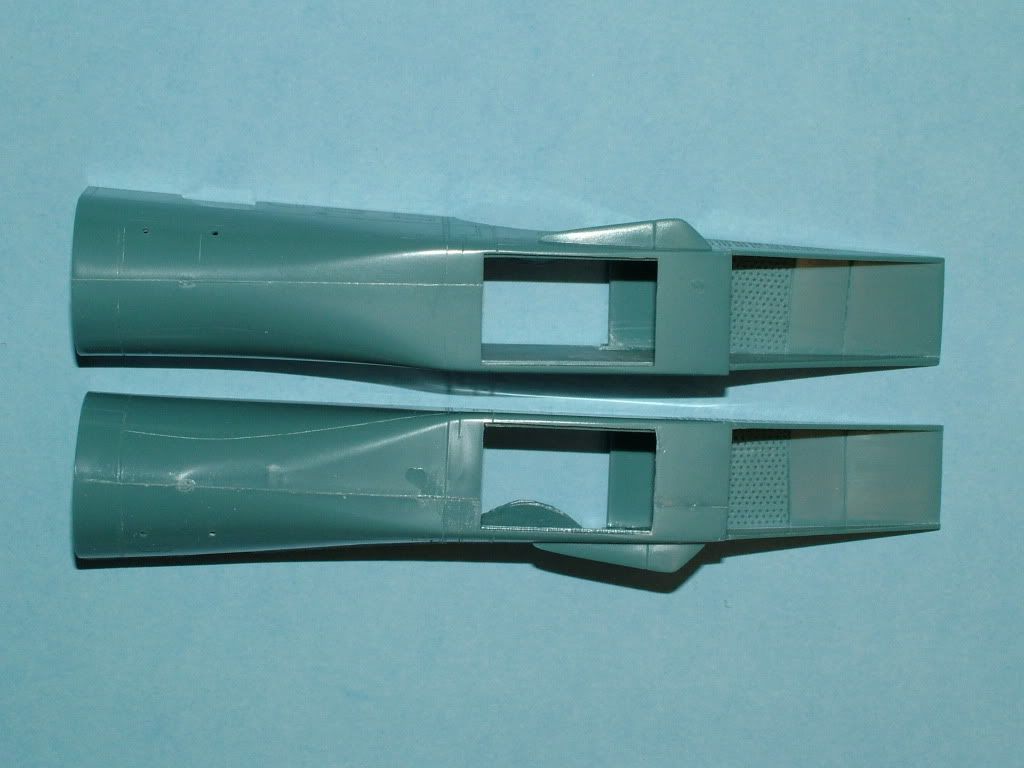
Worked some more on sanding,Tamya greyfill coat, sanding and filling one more time of the main seam on the engine intakes.
Getting close though to looking great:
On to correcting the Main Wheel Bay "lip" that shouldn't be there:

One side complete:
Here the 2 wheelbays are finished, pretty simple fix and all of 30 minutes with a scalpel blade and a couple swizzle sanding sticks to smooth it all out.
Then all was lined up again and wrapping rubber bands around starting from the back working towardsthe front, I ended up with a really good fit considering what I started out with.
Used Tamiya Thin cement and welded along all seams starting from the back being careful not to let glue get in-between the rubber band and the plastic...
Just skipped here and there and will fill those with glue when we make a second pass.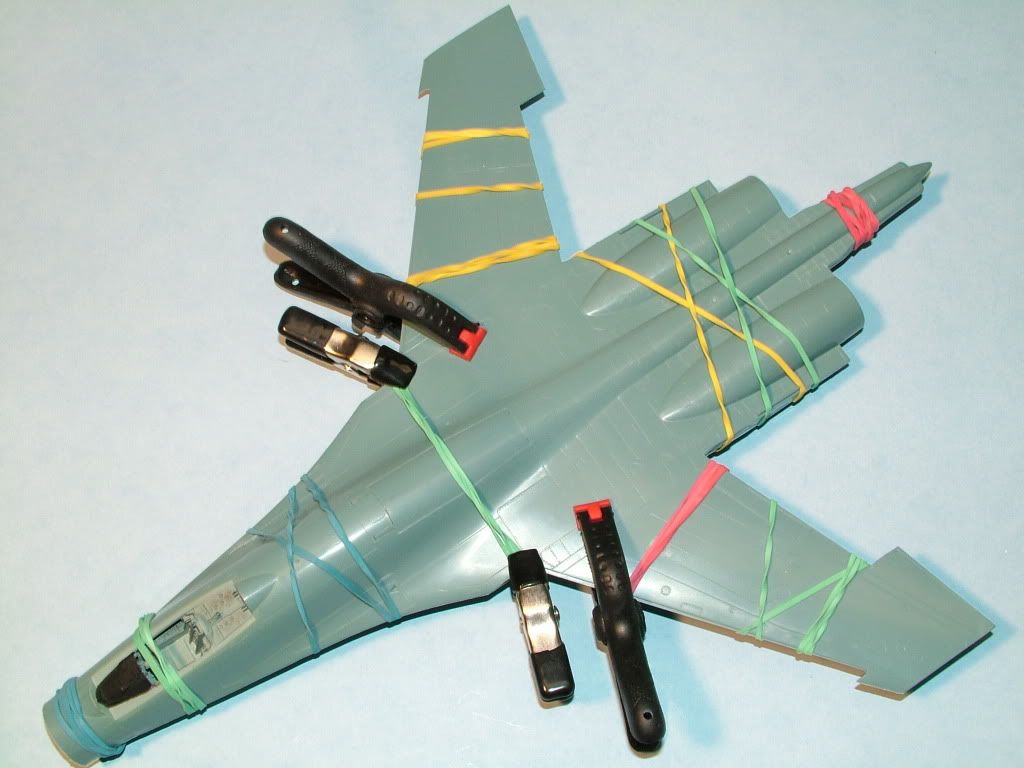
Using four clamps to squeeze the top halves to the main gear wheel "bulk heads" as to fill in the gap that would otherwise exist. 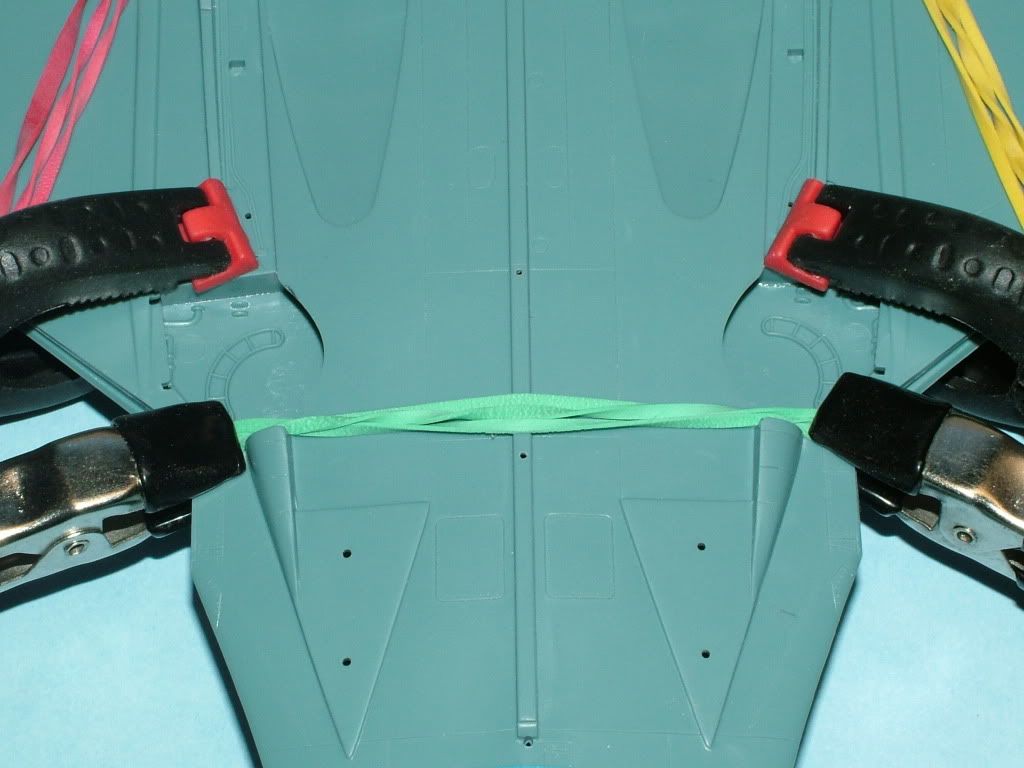
Back onto the main intakes,shot a light White primer coat to check my work, and a little heavier coat on the inside.
This has been set aside to dry again. Final color for the inside, most likely a Tamiya light Grey XF-19 cut down somewhat with Tamiya XF-2 Flat White, once that is dry I will shoot a clear gloss coat.
Painted up the Turbine Fans with some Model Master Metalizer paint.
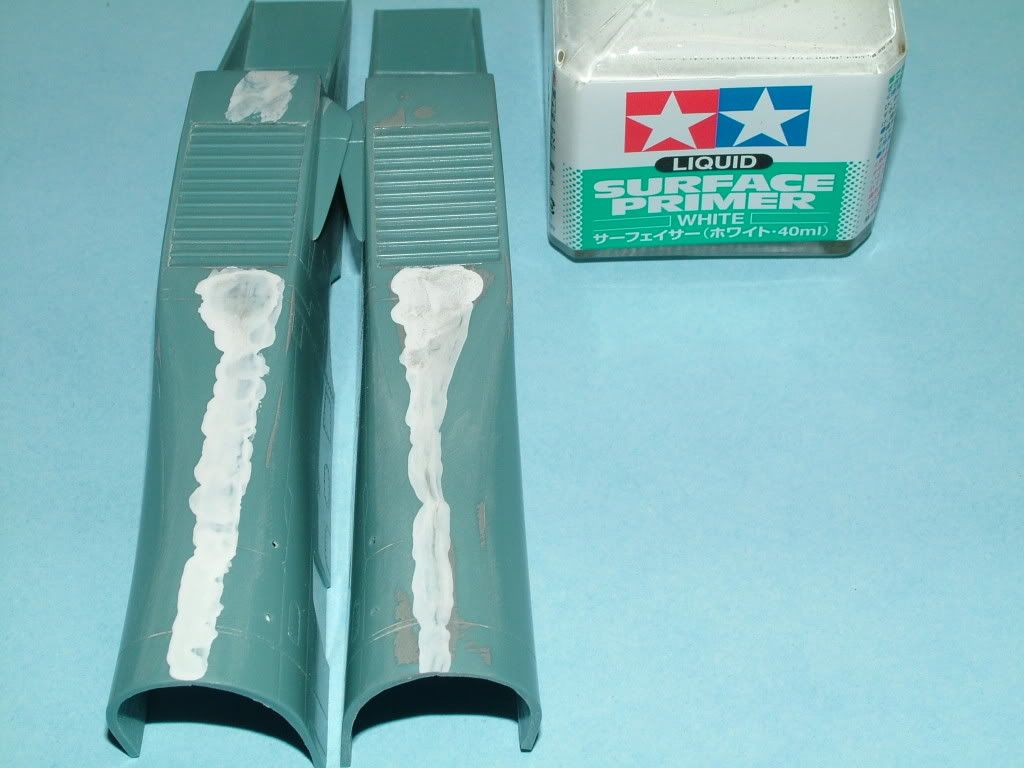
Sanded all the seams down as far as I could without destroying too much surface detail.
Then taped off various sections as not to have the Squadron Green Putty spill over where I don't need it and keep sanding to a minimum.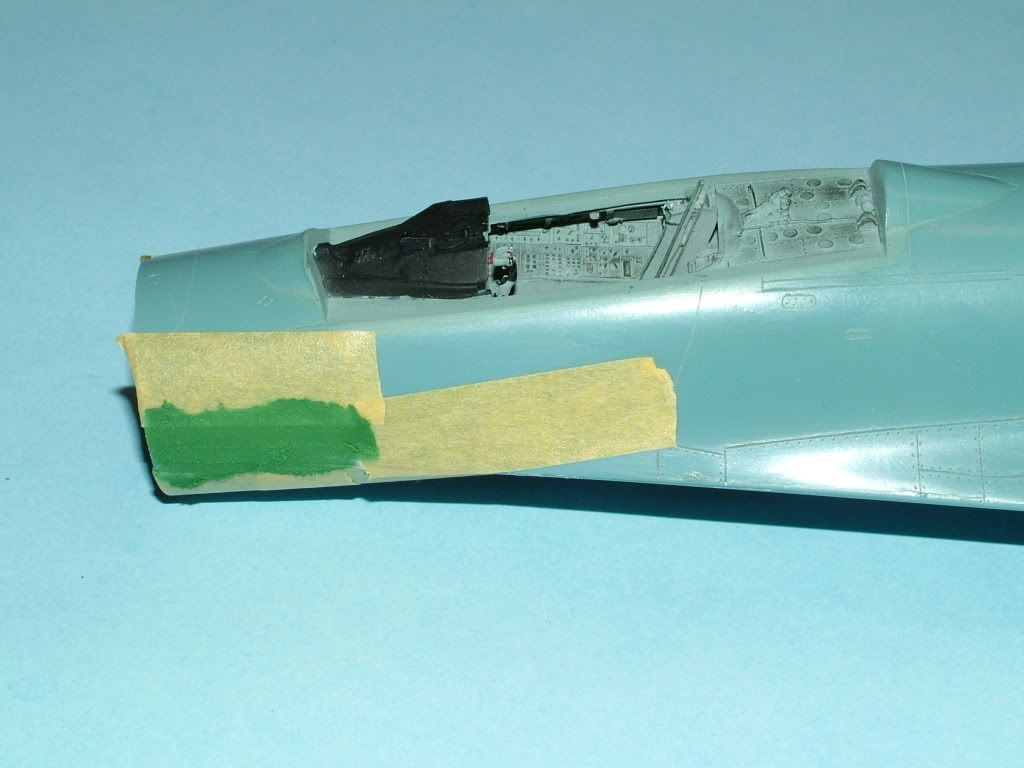
Quite a few areas needed filler:
Especially around the tail area:

After all the filler dried, pealed off the Tamiya tape and did some vigorous sanding with various grit sizes.
Not quite all the way the way there yet. But I am very pleased with the results thusfar.
Decided to fit the resin "corrected shape nose cone" andfit is excelent, very little if any sanding will need to be done.
Tail surfaces are just "posed on", Also made up the slats and filled in the ends with some Green Putty.
I used thick super glue to mate up the two dissimilar material. Startedto check the seam gap "if any" with some Tamiya Light Grey XF-19.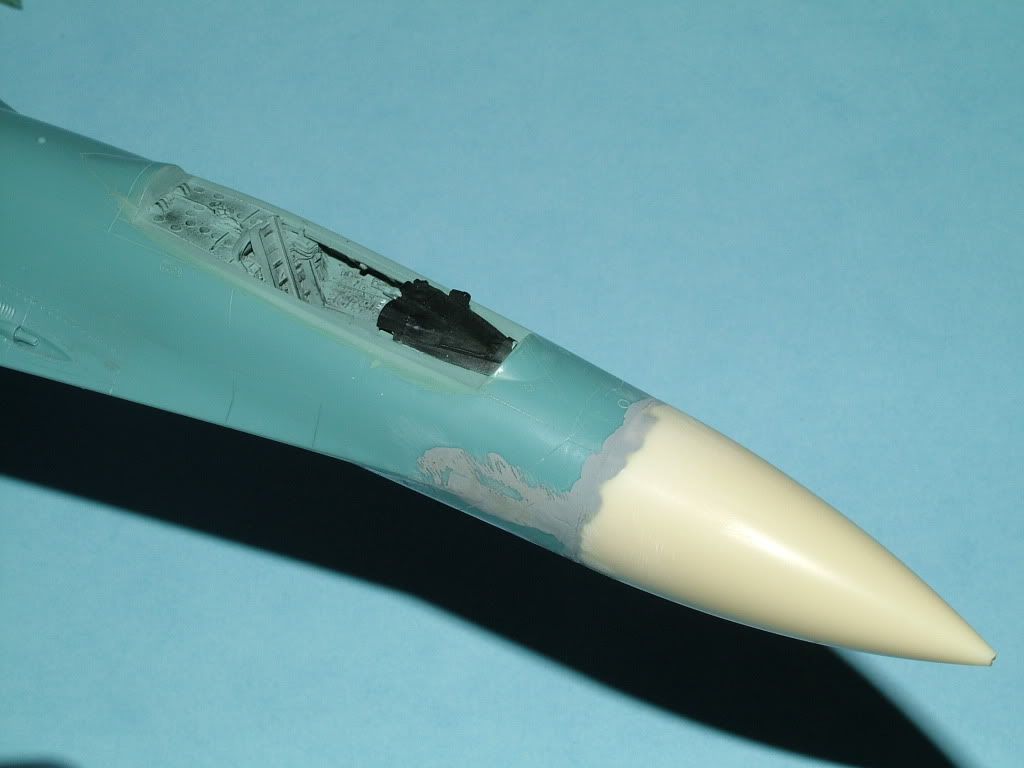
The Canon was drilled out with a pin vise drill bit.Mixed up a "special" batch for the intake trunking color, Using Tamiya XF-2 flat White and Tamiya SkyGrey XF-19 at an approximate ratio of 60% White to 40% Grey to create a very light "Ghost Grey"
From all the pictures and various research that is the best of approximation I can make.
Taped off the area to be painted and placed some blue tack on the turbine fans:
Here is the result of the efforts, also sprayed the FOD screens at the same time:
One bad Russian Boy unmasked:
One thing to mention is that before I airbrushed everything, I have been spending a significant amount of "fiddling" around with dry fitting the engine intakes to the main body. There is quite a bit of chatter regarding the fit of these intakes, and to a certain extend justified.
Doing some very careful fitting, sanding, checking, fitting, and sanding again, I was able to get a great fit to my surprise.
I did heat up the plastic on occasion in very warm water and did a little "bending" and shaping with some light pressure which truly assisted in making everything line up quite well. Also in the prior posts the clamping of the two main body parts to ensure a good weld and fit with the inside wheel well area in my mind is critical.
Here the one intake is "posed on" and as you can see the fit is looking promising:
Another note on the following picture. I significantly thinned the side walls and top / bottom of the intake to get a better "scale" look: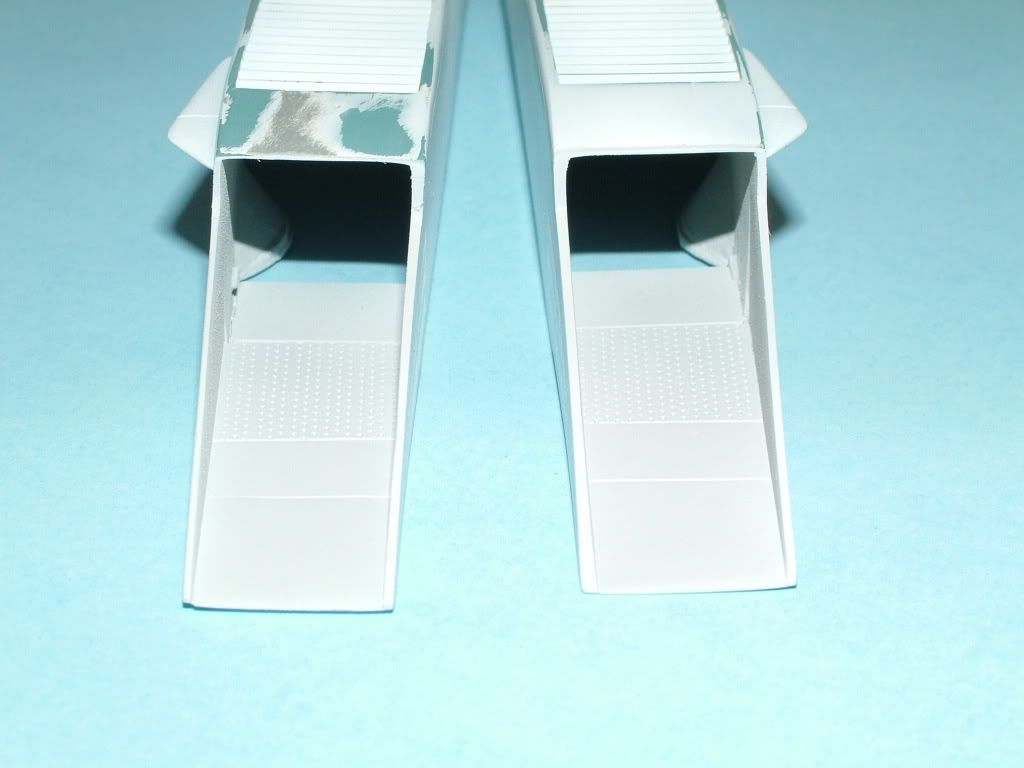
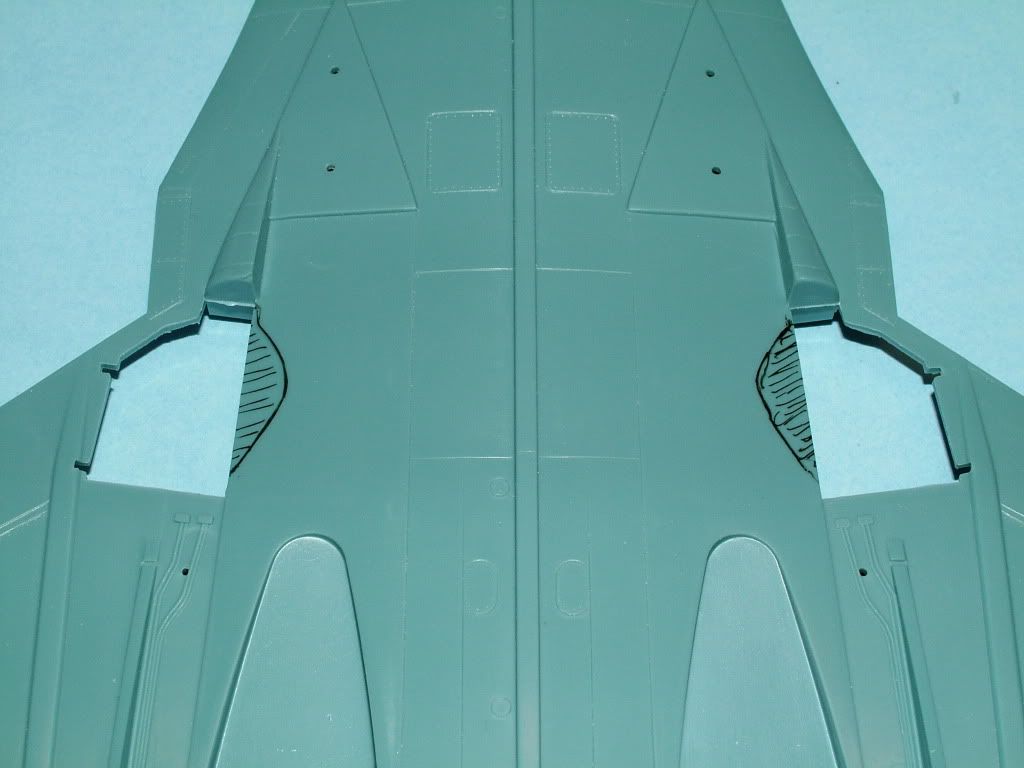
FOD Screens installation:
I followed an Internet article, as it took me a while to visualize this step from the included instructions. Once you read through it and then "dry run" the steps, it works great.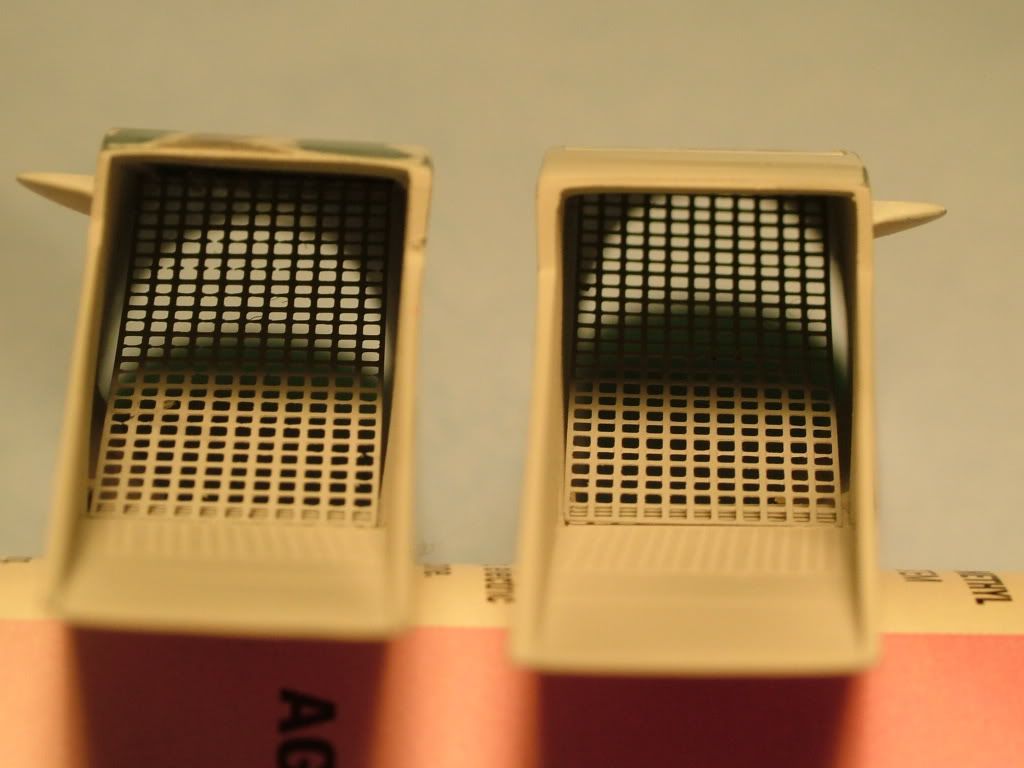
Extract of the article:
"
After all the paint had dried I scraped away the paint in a strip immediately behind the engraved holes in the intake 'roof' (parts B19 & B20). This was to give an unpainted surface onto which the etched intake ramp would later be cemented.
The intakes parts were then cemented together as per the instruction sheet. The etched screen is added after assembly and proved to be a bit fiddly. The first thing to do is remove some of the shine by gently rubbing on fine wet and dry, then bend the part following Academy’s instructions. Note that the anti-FOD screen is retracted on a Flanker at rest and normally lies flush with the bottom of the intake. It is hinged at its rear and rises into position when the engines are running. However, there must be some manual override because there are one or two shots of the intake in the raised position with the engine stopped (at least I presume they are stopped - either that or the photographer was taking extreme risks !).
Not wanting to waste the excellent etchings, I decided to depict my screens raised, so with the intake the right way up, I inserted it from the rear of the assembled intake and rested it along the bottom of the intake over the louvre insert with its rear edge in line with the rear of the insert. The rear edge was then carefully taped in place using low-tack tape, thus allowing the screen to pivot about its rear end just like the real thing. Super-glue was then applied from the front of the intake to the bent leading edge of the screen and the whole intake turned over. The screen, pivoted about its rear, flopped down into place, cementing itself to the section of 'roof' where the paint had been scraped away earlier. Once the glue had set the intake was turned the right way up, the tape was removed and the rear edge was glued to the bottom of the intake. A wordy explanation for a simple foolproof method of assembly !"
Onward we went and glued on the intakes with super results, I couldn't be more surprised and happy how it all came together.
I placed each intake on the lower body and used Tamiya Thin Cement, then pressed the intake "backwards against the engine part" while simultaneously pressing down. Then ran the glue carefully "spot joining", checking the fit, align and final gluing the complete joint.
I used my "handy" fingers as clamps and held the joint for a good 20 minutes. Yes boring ... but worth the results....
Here are some various angles of the engine intakes.
Bottoms Up: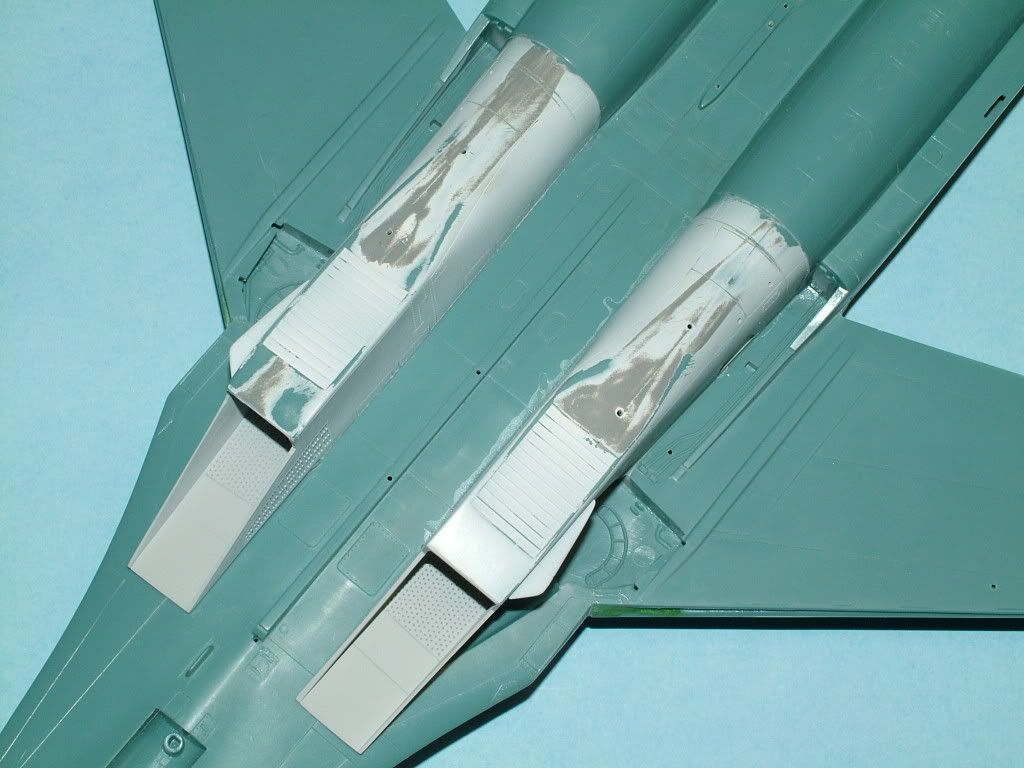
Side Shot:
Another one: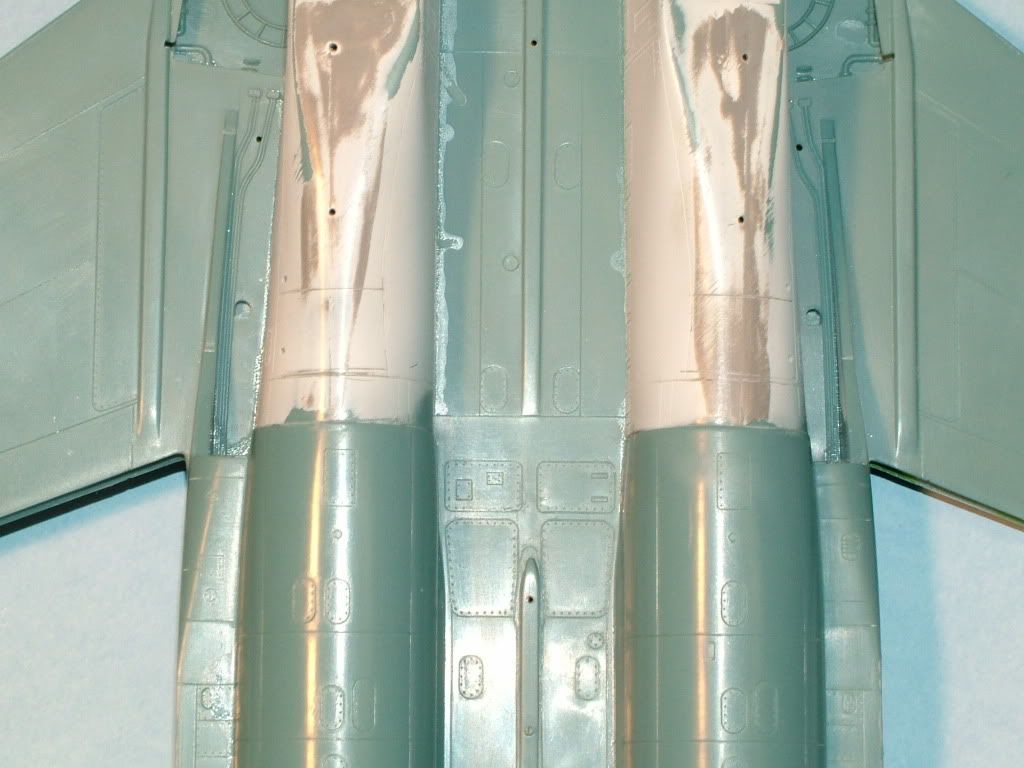
Started the re-scribing of the affected areas:
Ended up with a very nice joint here:
And here....Flaps are installed now too: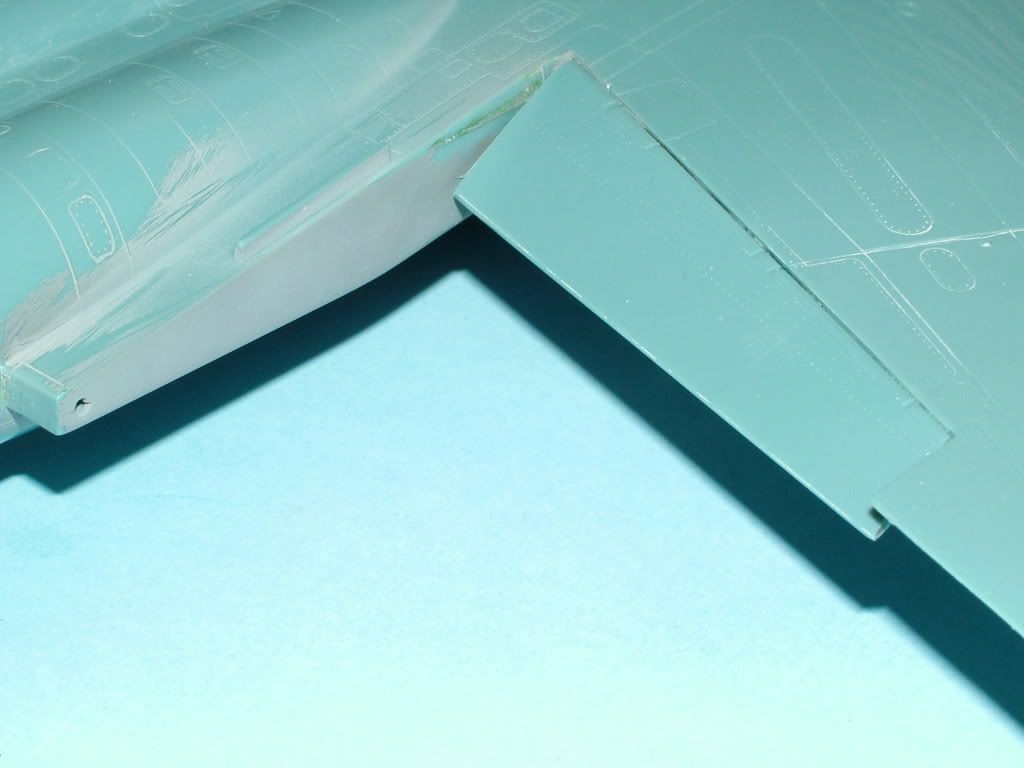
Aires Exhaust kit:
Left side are the un built kit parts, then the un built Aires parts --- Then Built Airesand Built Kit Part ---for comparison sake.
Aires vs. Kit Part:
Aires vs. kit Part:
This little hack saw: Makes quick work with cutting those casting blocks off.
Pretty simple construction: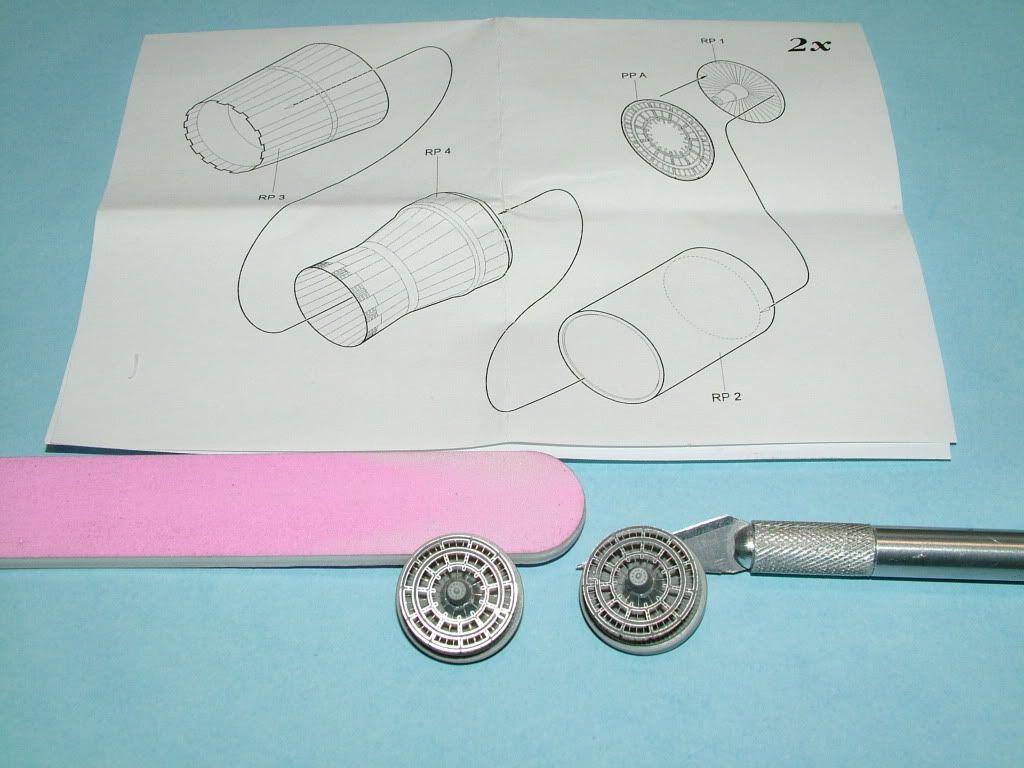
CompletedBlades: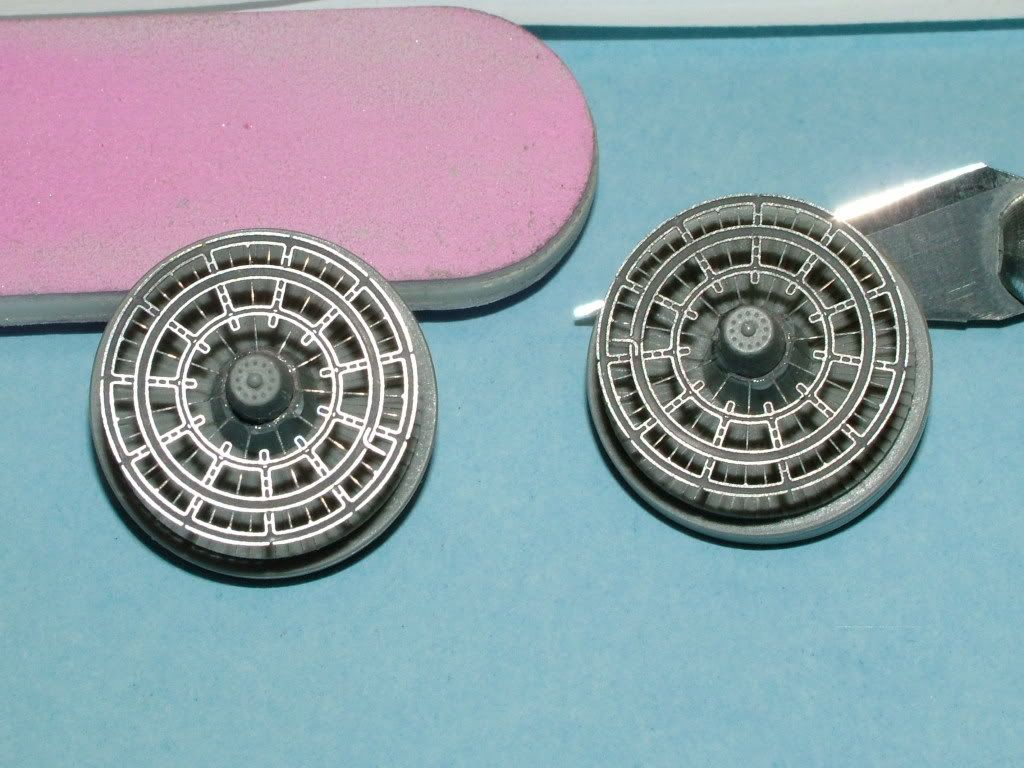
Used Model Master Metalizer and Alclad II, Blue and Yellow:

They are just posed on, I had to do a little sanding to match the exhausts to the "wider" kit back end. No major problems encountered though.
Further progress:
Opposite Side:
Flat White coat of Tamiya XF-2. This should give me an excellent background to check my flaws and also will serve as a very "light" background to spray the weathered "HazeBlues" onto and not darken it up.
Outer Wing rocket Pilon Station where glued on and sanded to correct size.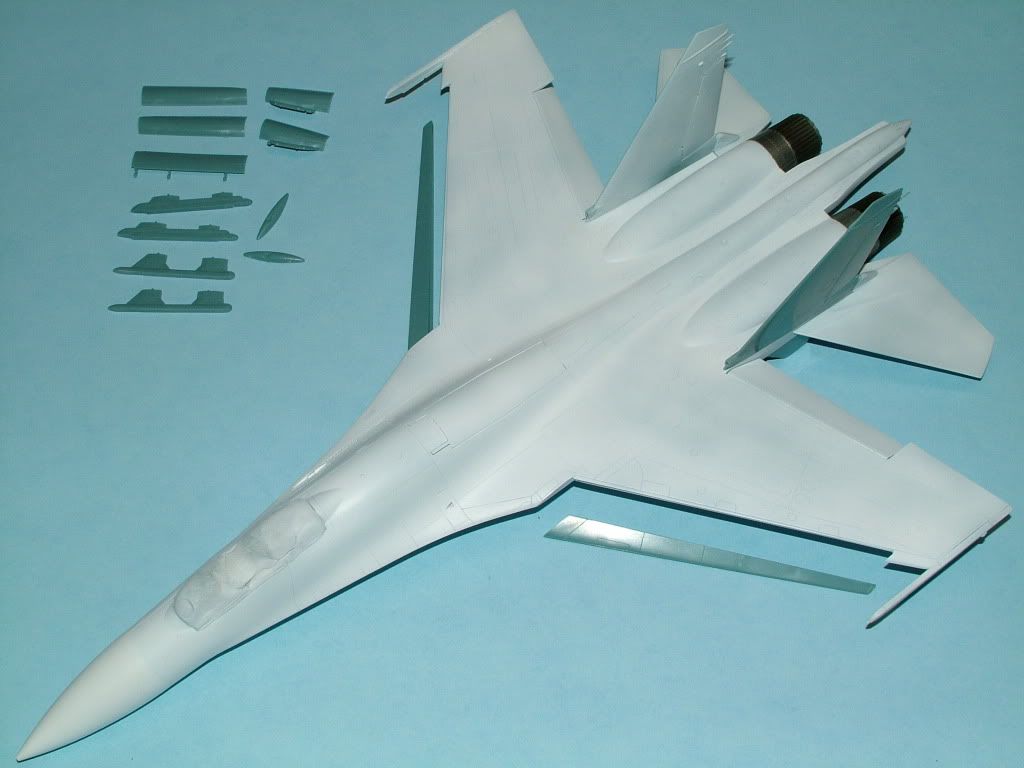
Checked my reference material and decided to work the tail end: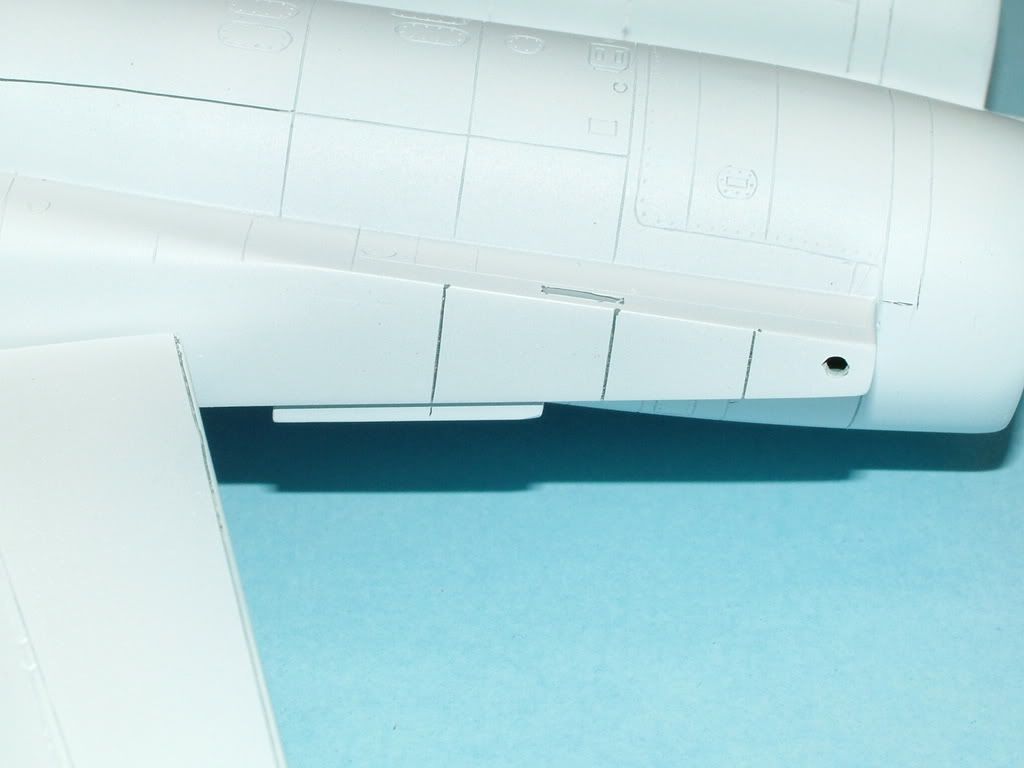
Finalized: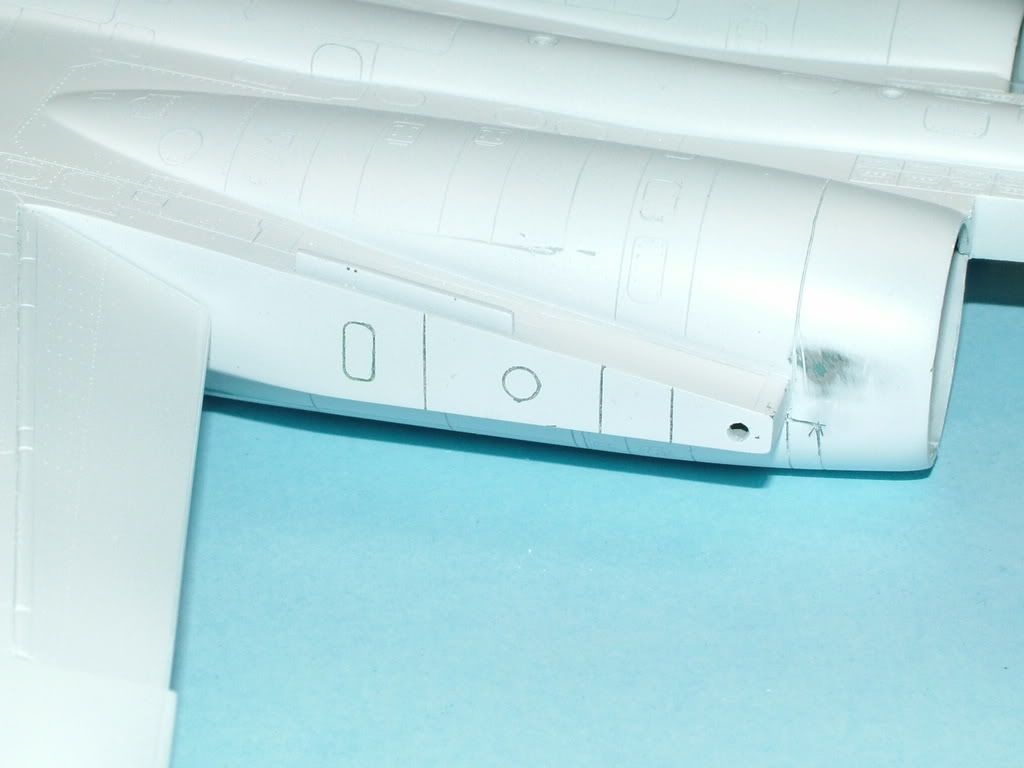
And the center-boom with added inspection panels:
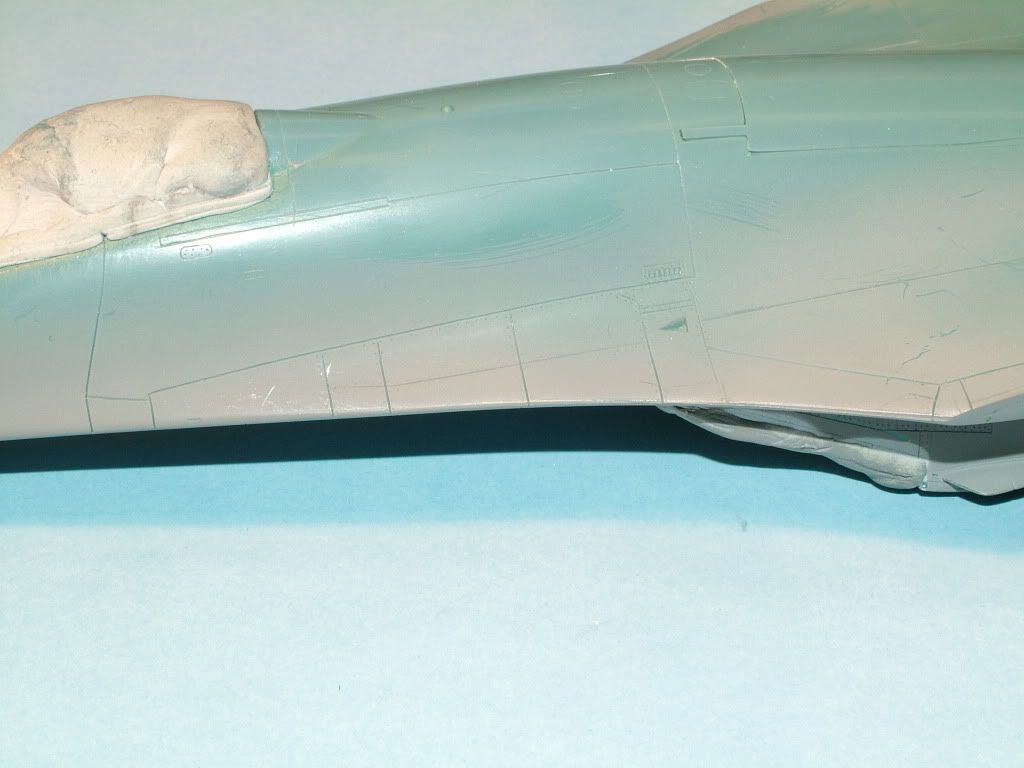
Nose area re-scribed and added some small details not found on the kit panel lines: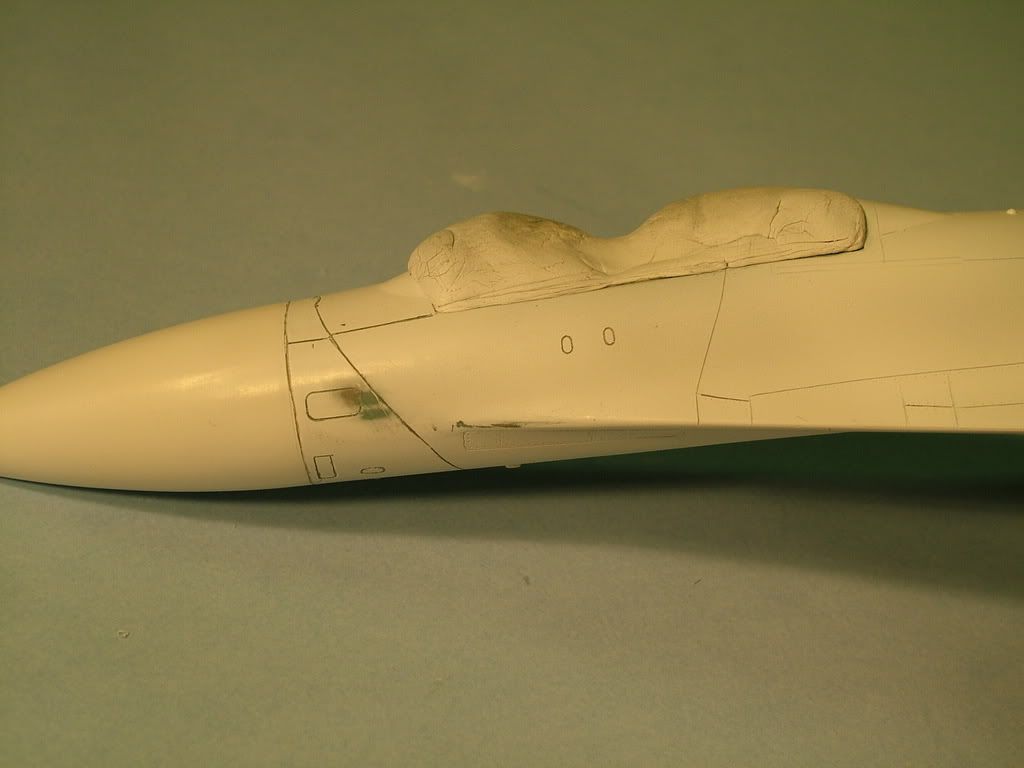

Wet-sanded -- more like polished -- with 3200 grit sanding sponges, very lightly using circular motion, and cleaned up all small imperfections, cleaned up some of the paint (gobbins) and some of my cratches, Thenanother thin white primer layer.
The canopy has now been masked and front screen is glued on. I used some Tamiya Clear Yellow, and once dry placed a tiny amount of Tamiya Silver on the underside of the Guidance Tracker ball to simulate the optics glass. Then masked it off for final painting.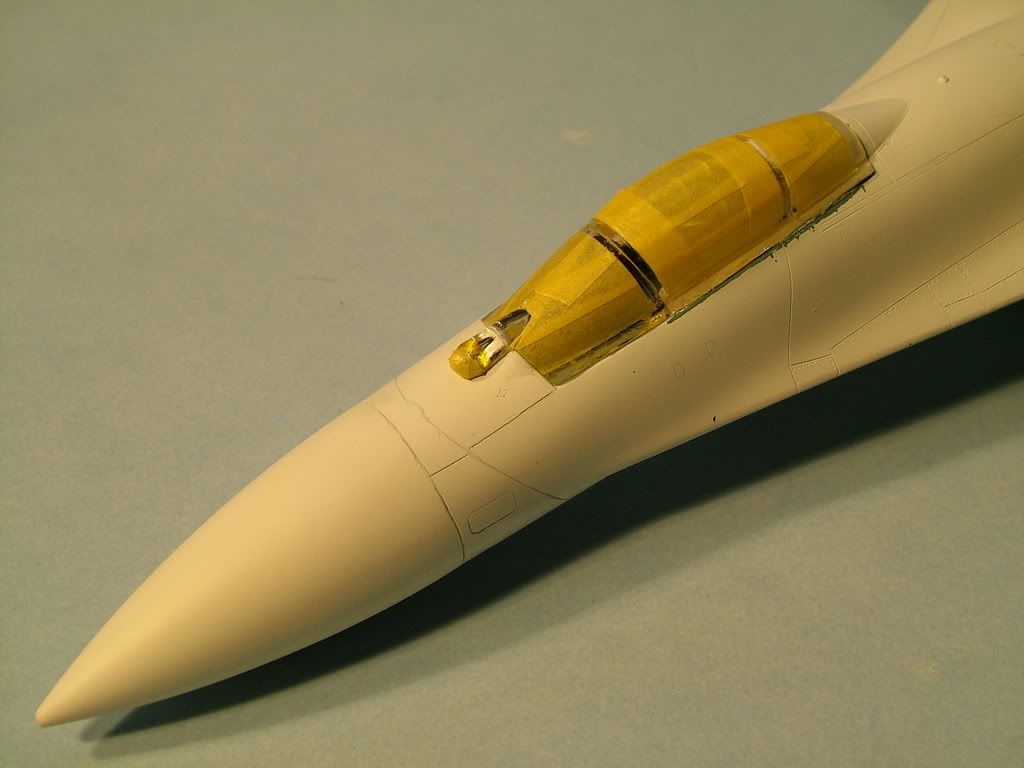
Vertical Tails and the Stabilizer bottom fins are now glued on: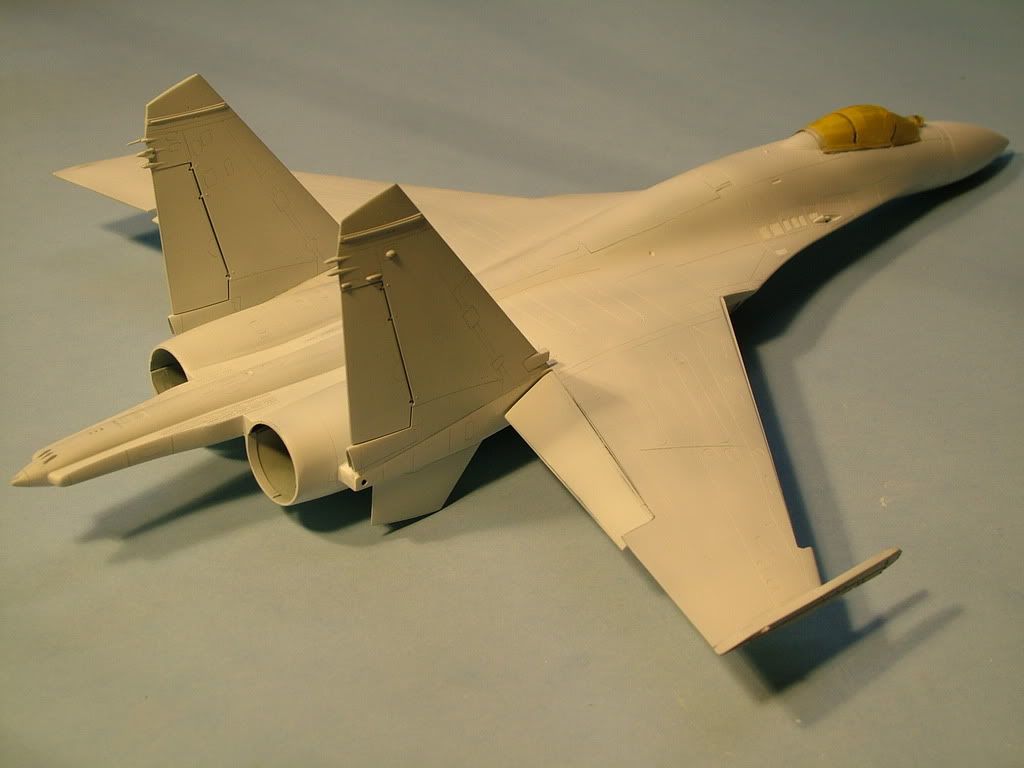
The wheel wells where painted with the lightened Grey: 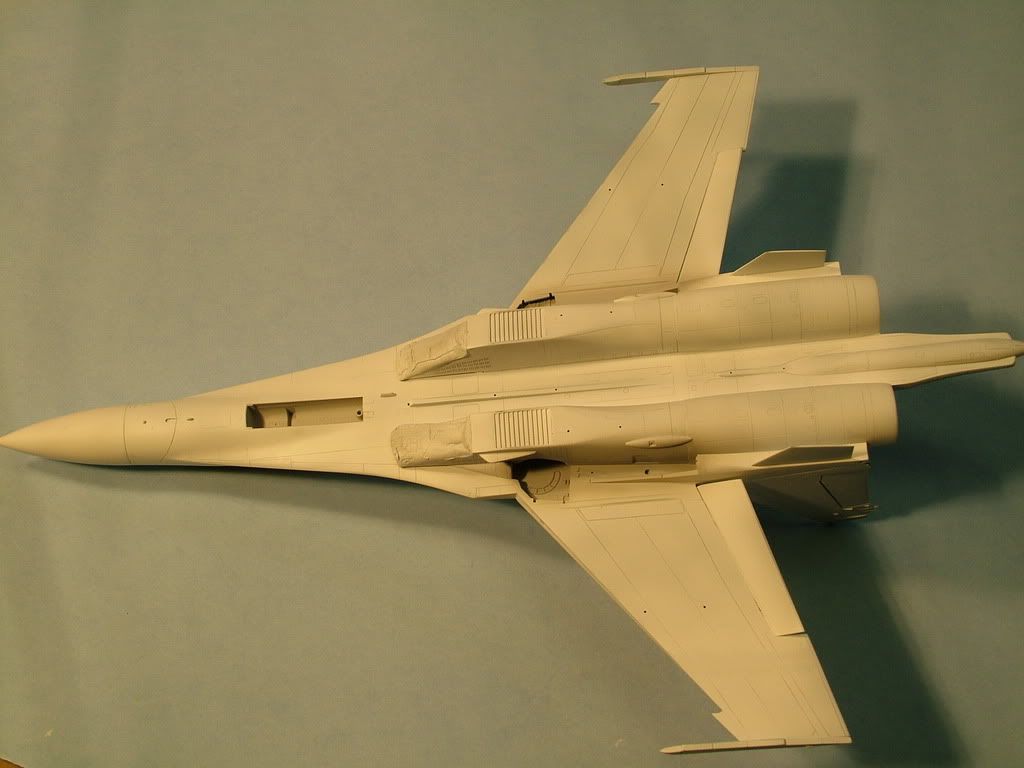
Getting the slats to fit correctly:
As there is no positive lock or pin to glue to the very thin front edge, I used a tooth pick to give the whole assembly something to glue onto.
Drilled a hole and then insert the dowel: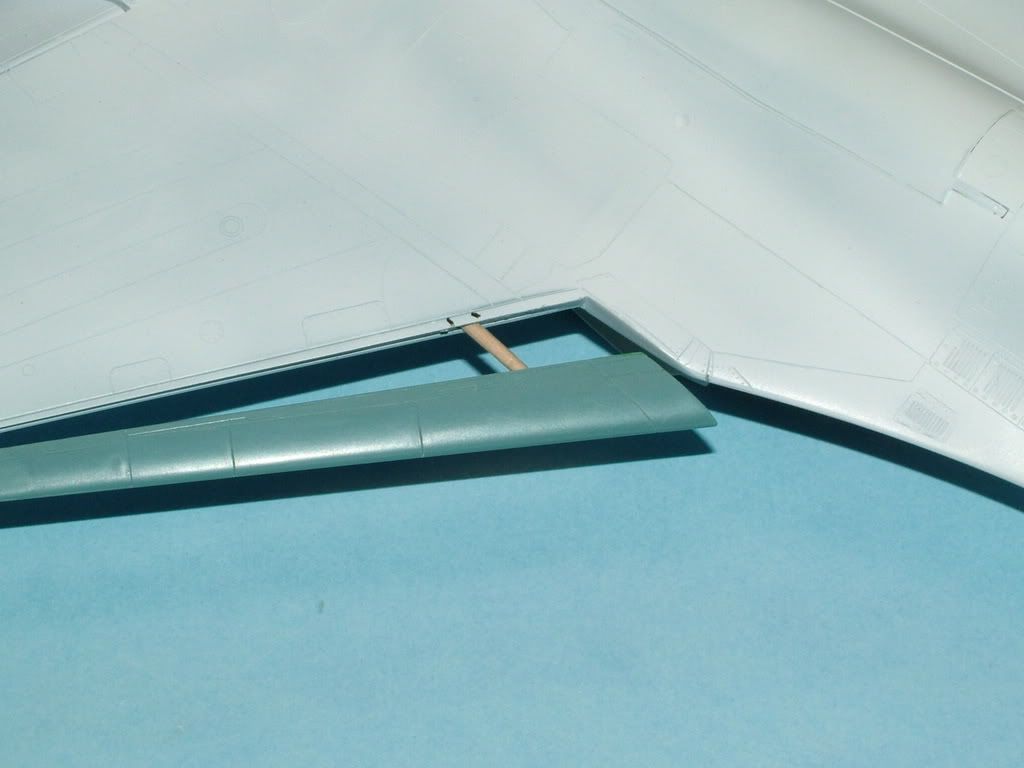
Worked like a charm: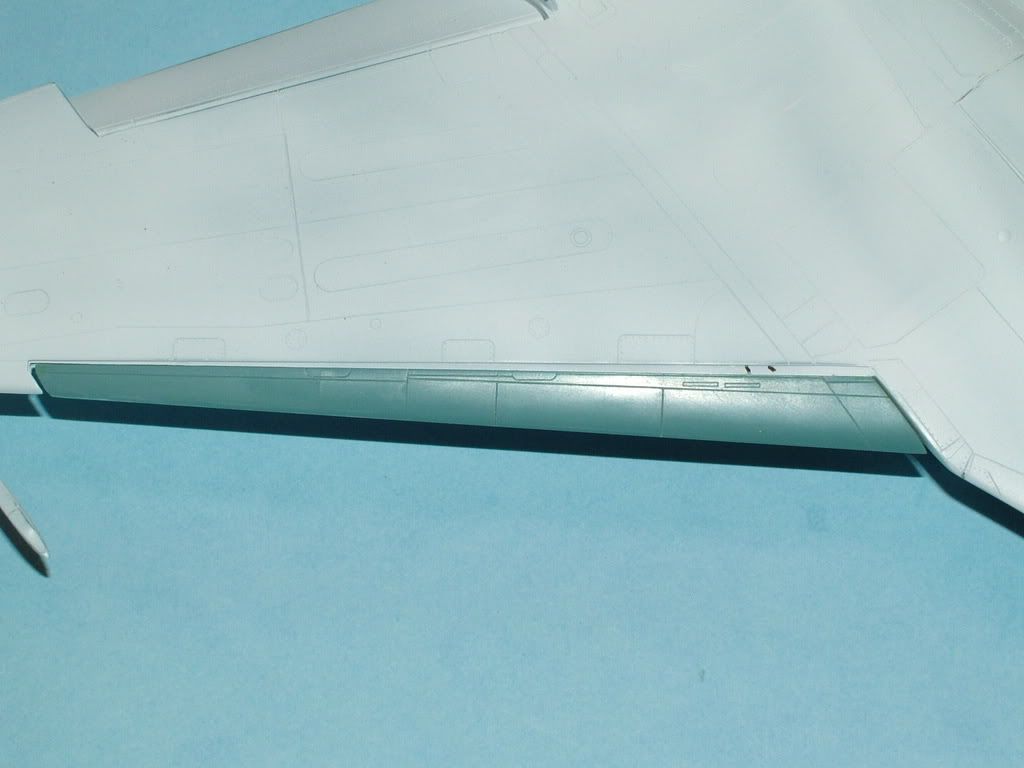
Just a little tape on the far out edges was used to "tighten the fit":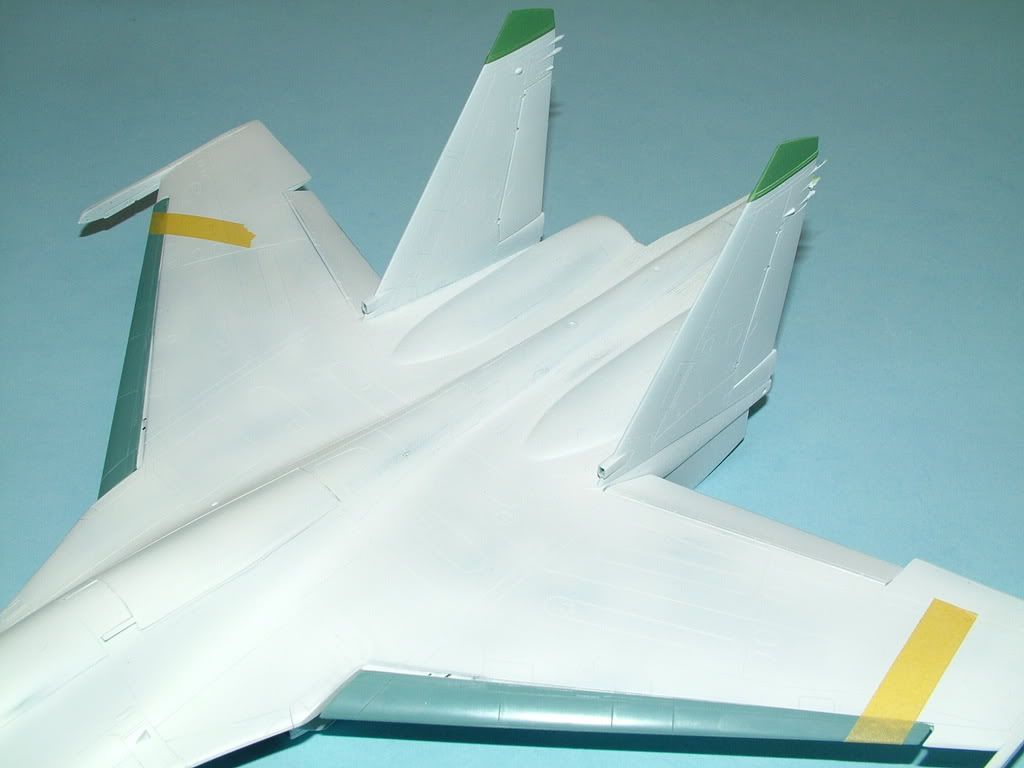
All primered up and checked for panel line scribing:
painted the dialectric panels on the tip of the fin, so I could see how well the "weathered Green" would turn out.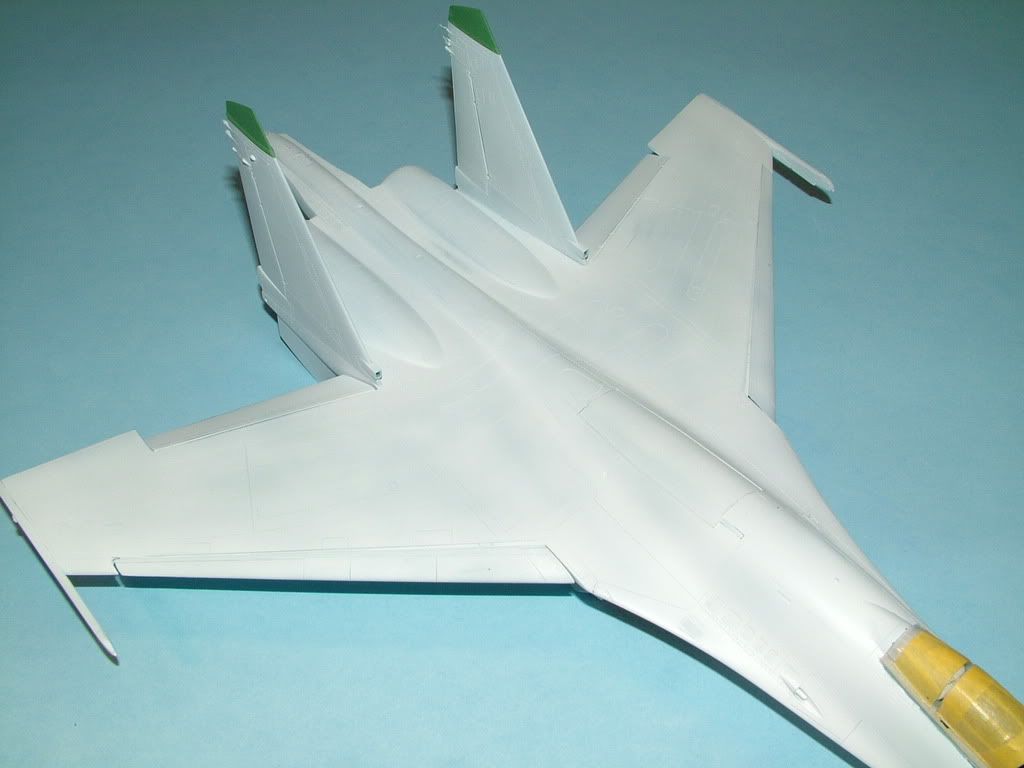
Moved on and painted the "inner frame" color with Tamiya "Light Blue":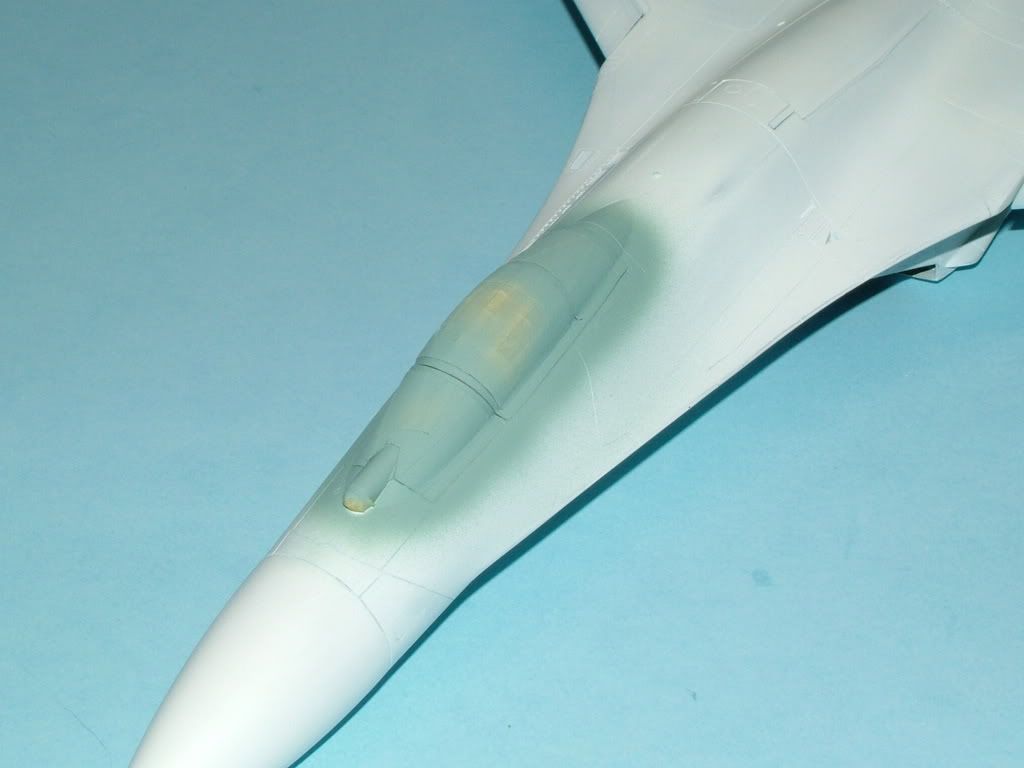
Which unfortunately revealed some not so nice fit as originally thought:
Used some Mr Surfacer 1000 to fill in the gap, placed with a toothpick very carefully to the front edge and the right side "lip" of the cockpit coaming. Need to sand that down tomorrow once thoroughly dried.
As the main assembly is drying various glued parts, and filler areas, moved on to the fiddly parts:
Cleaned up all the ejector racks of flash, locator's pins (not used as I am not planning to load her up). Cleaned the main landing gear of mold lines, glued in the actuators, cleaned up the doors of flash and the ejector pin marks on the inside. Put the wheels together, then airbrushed with "Russian Green". Sanded down the rubber (PVC) tires and got rid of the shine and some of the over stated thread. 
Gear doors painted up Tamiya XF-7 Flat Red: Will shoot a cleargloss in the final stages
Interestingly enough in the picture you can see the ejector marks !
Sanded down the cockpit edge and re-scribed, then re-shot the cockpitBlue then White again as to build up the paint carefully.
Pre-shading the panel lines and various "fun panels" Tamiya XF-53 Neutral Grey: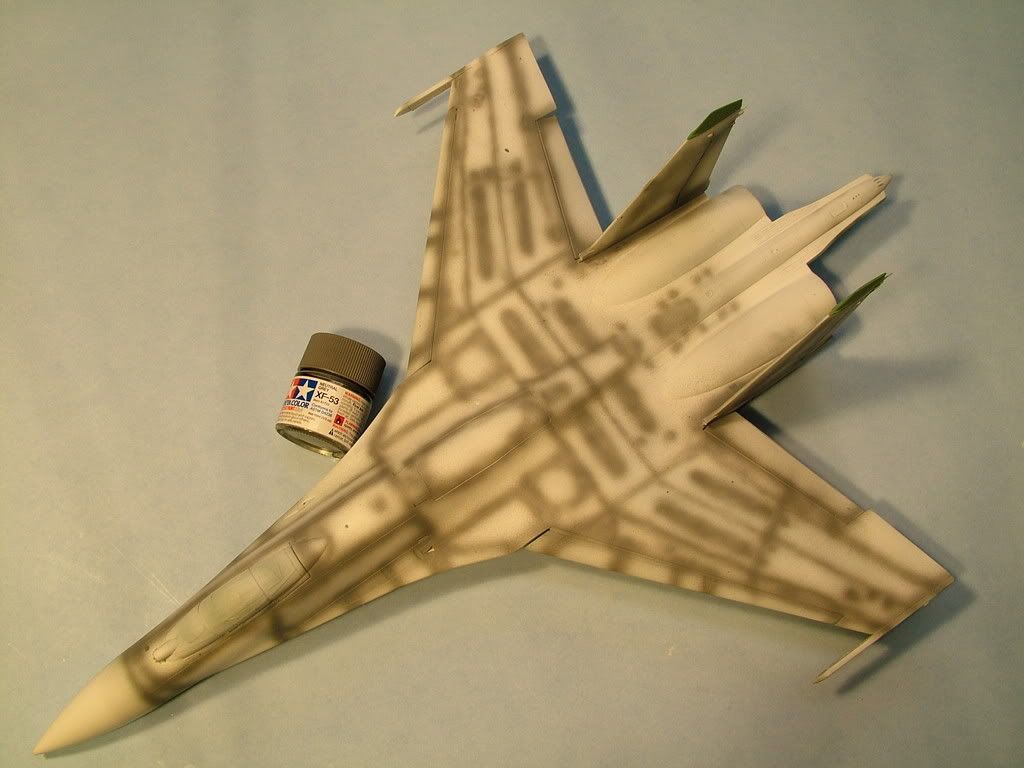
Bottom's Up: 
Masking job.

First layer - Model Master Metalizer - non buff-able Aluminum for a base layer: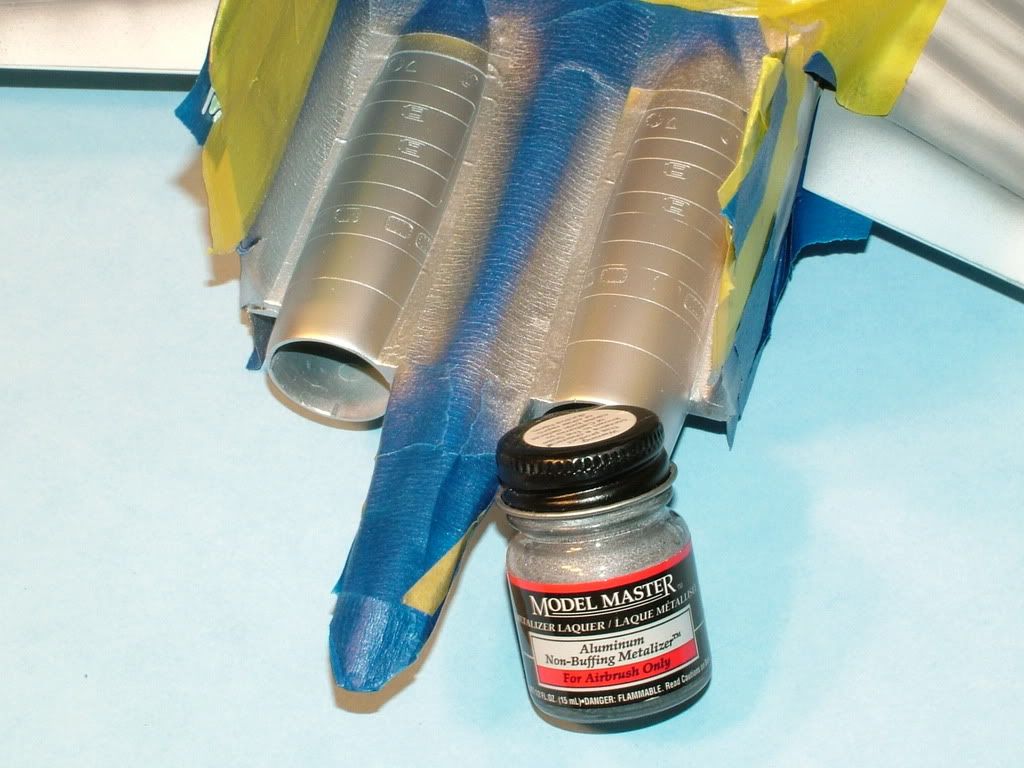

All the small parts finished up. The gear doors were airbrushed with a gloss cote. The gear painted up with a light Grey and then Tamiya Smoke. Finished up the painting of the bang seat. And the ejector racks where painted a Tamiya light Grey.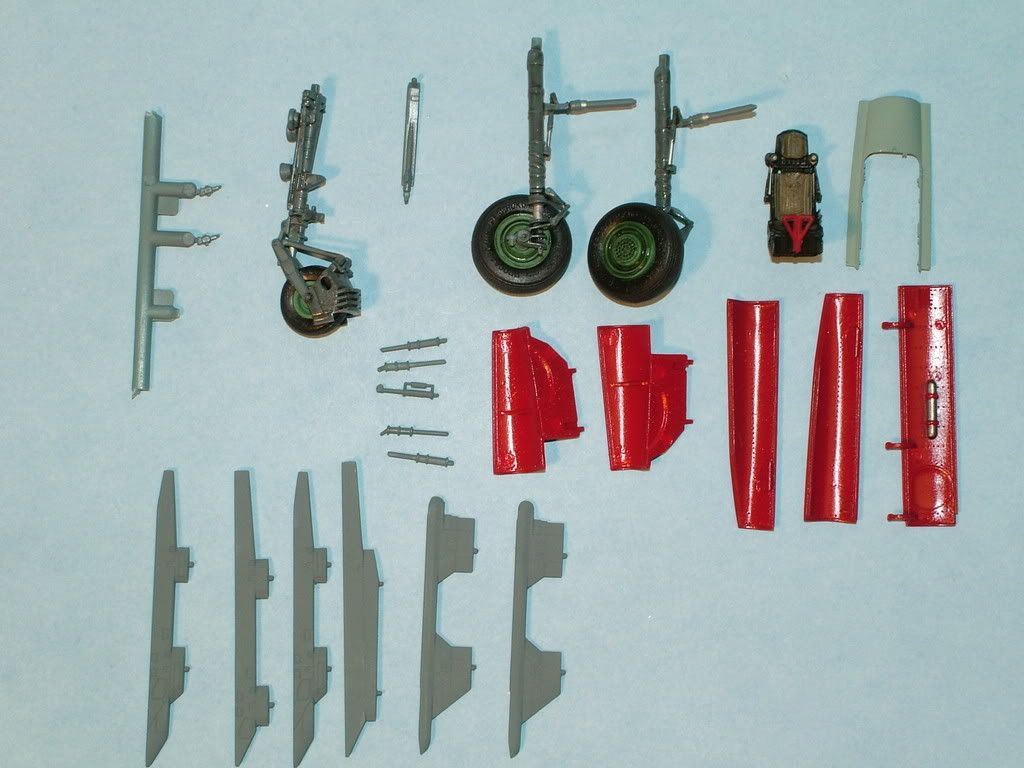
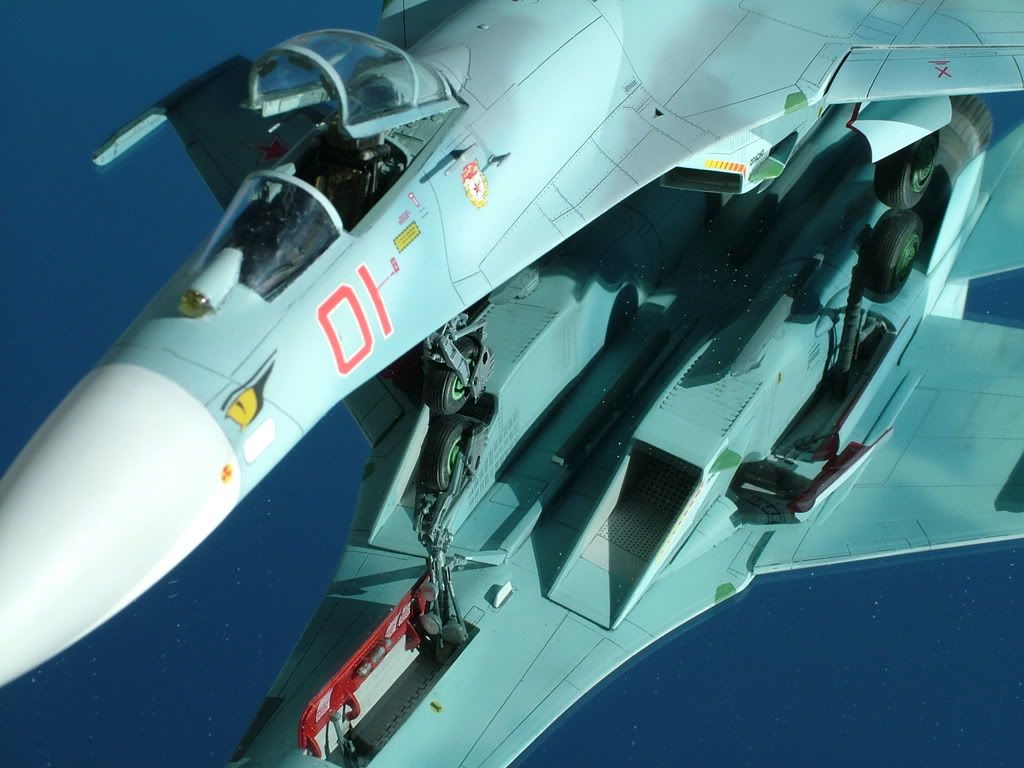
Gear detail picture: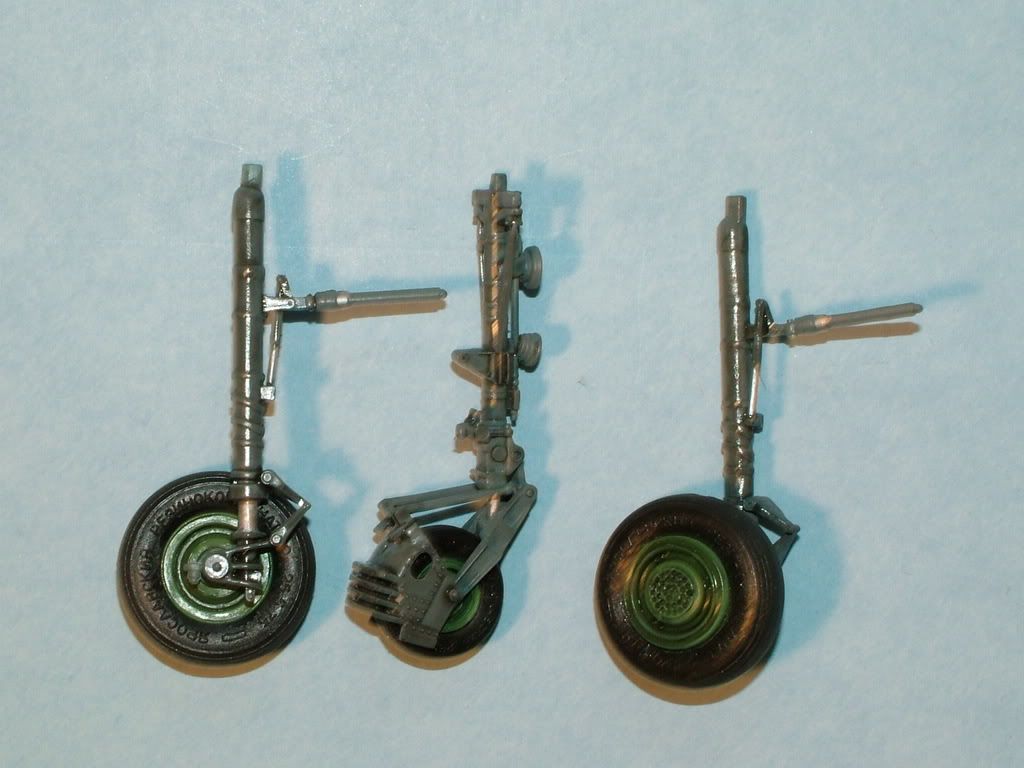
Cleaned up the "tape" and had a good look around at the Metalizer back end: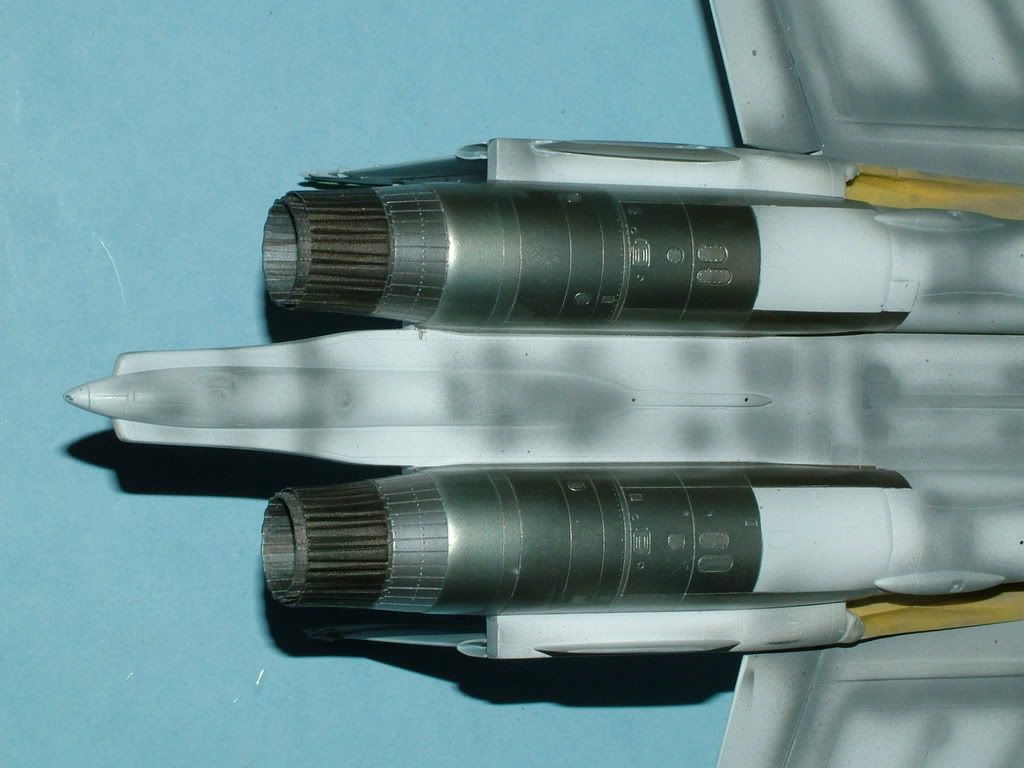
Top:
Time for some more taping off: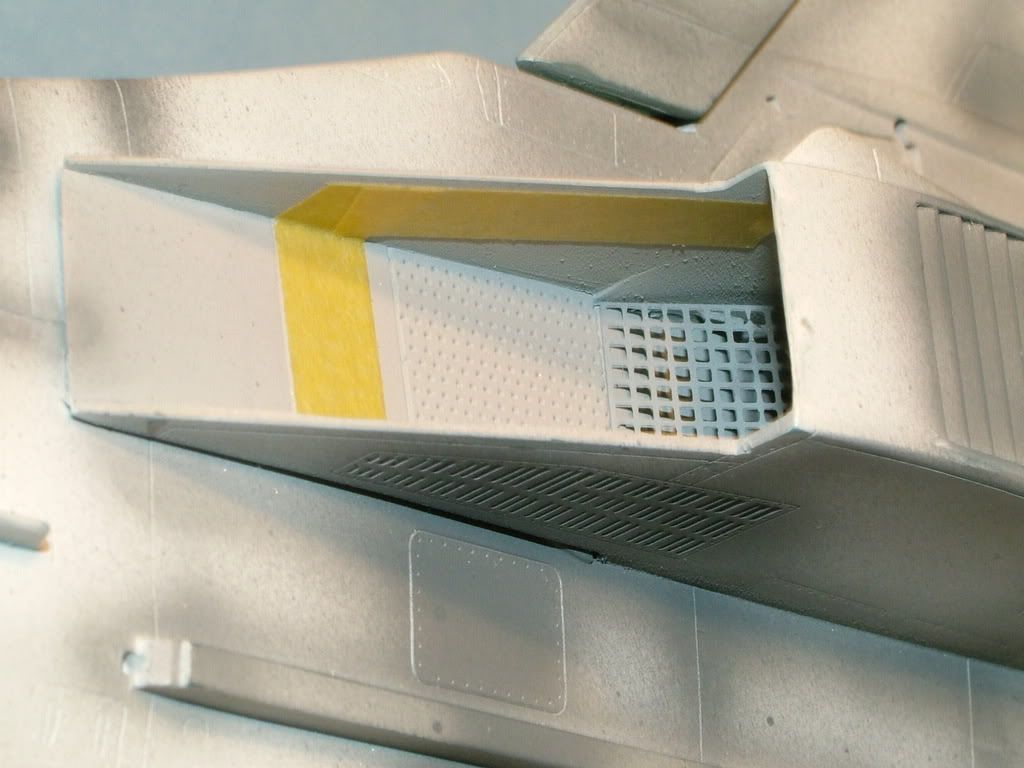
This should do the trick:
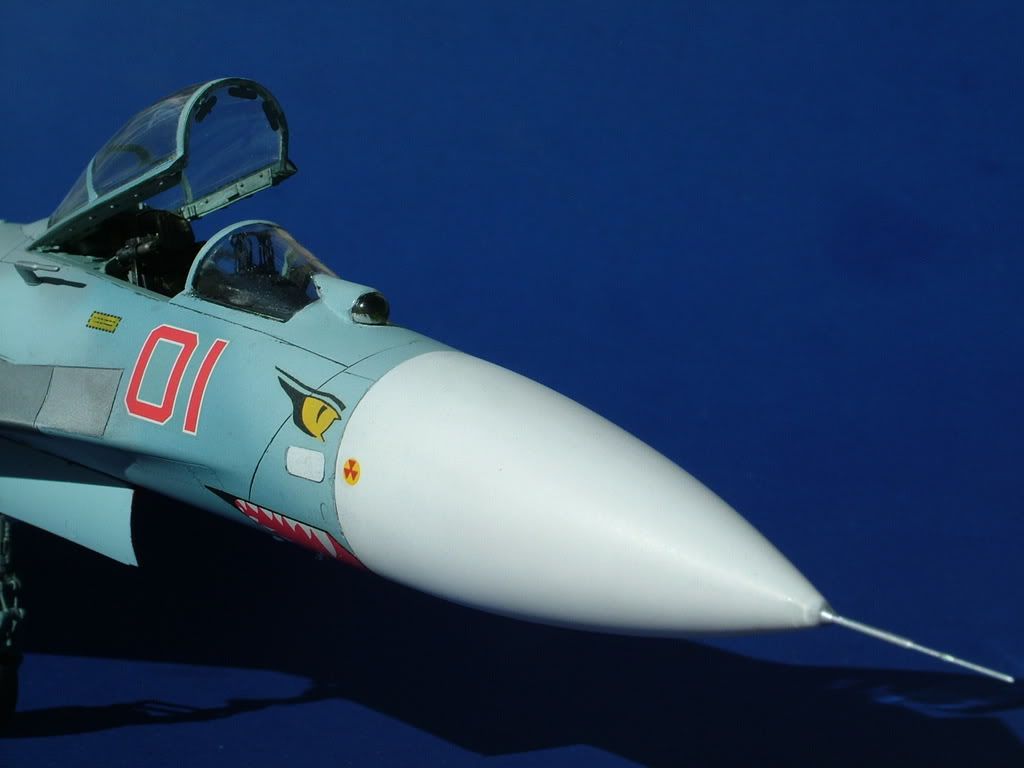
Nose cone final painted with Tamiya Flat White, then a semi-gloss coat to seal her in: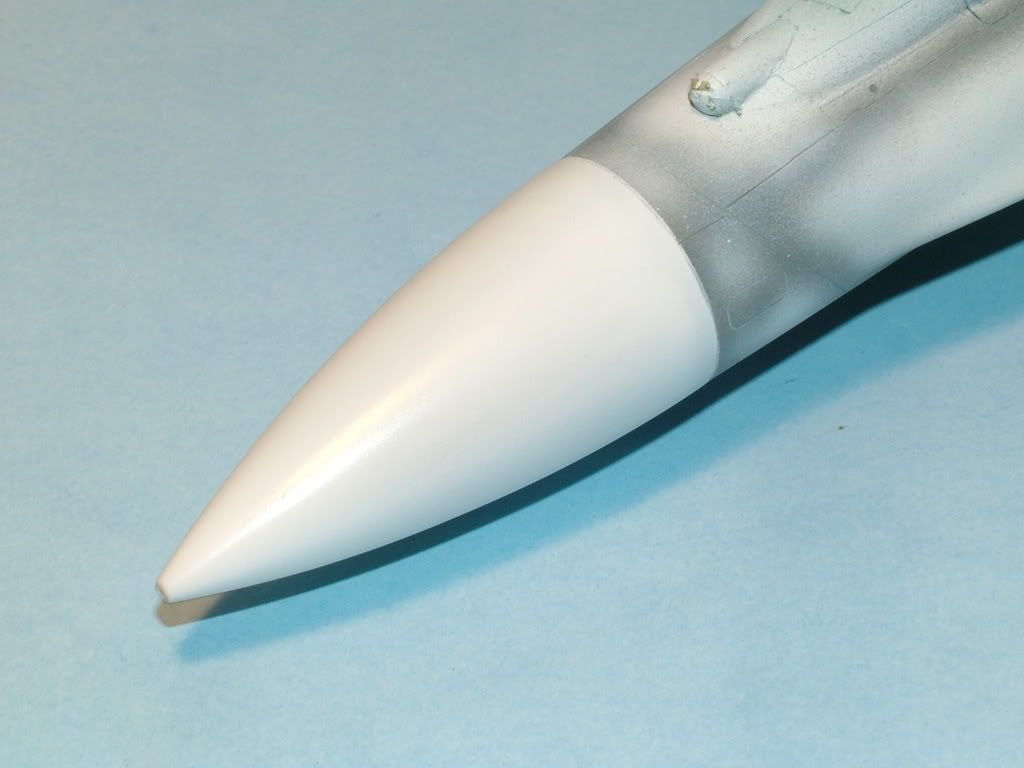

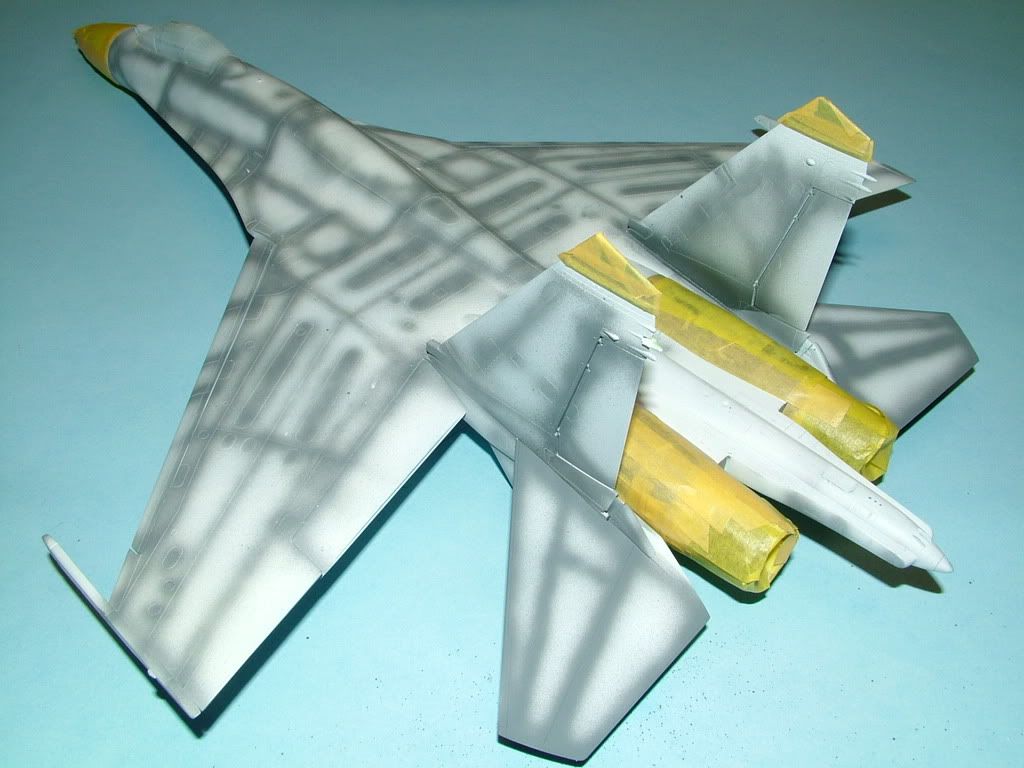
Airbrushed this first coat with approx 8 to 10 PSI max, witha medium head and medium needle (Badger 100 LG Dual Action)
Used approximately a 60% to 40% Thinner to Paint ratio. Just misted it on, let it dry, go over it with air alone, and let it sit for a while before the next layer was placed on.
I am super happy with the results so far and got some very cool shading in the various panels.
Here is my special batch for the "lightest Blue" 70% Russian Top Side Blue with 20% Russian Underside Grey plus 10% Flat White.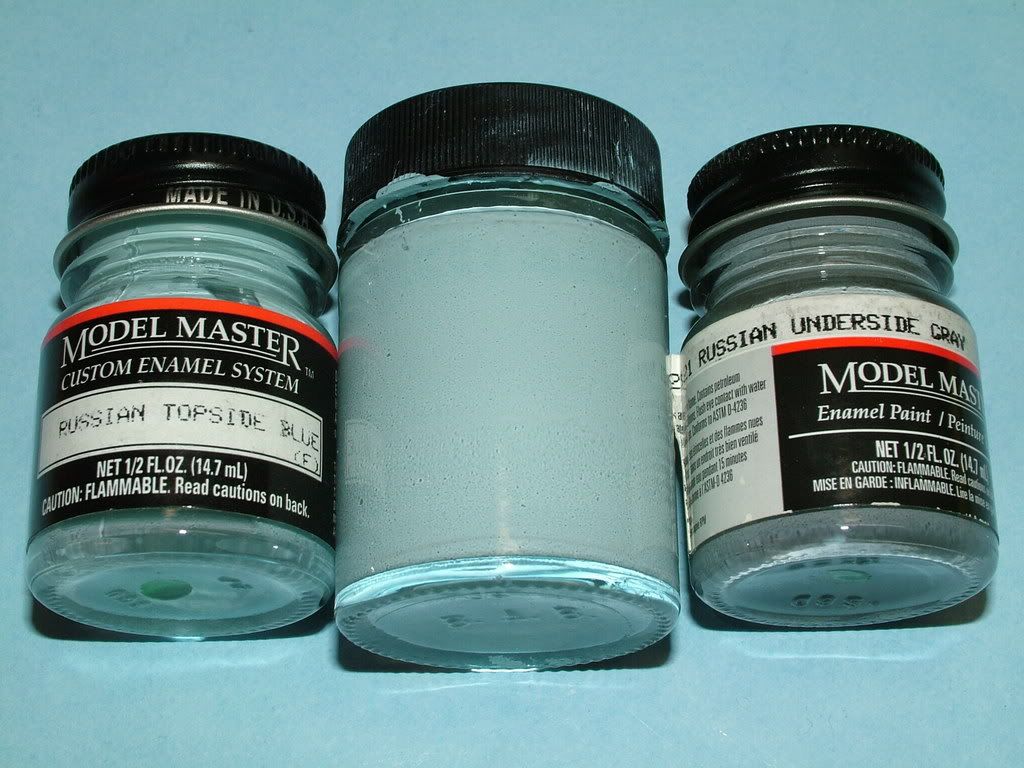
Hope you can make out the subtle panel lighting and shading. 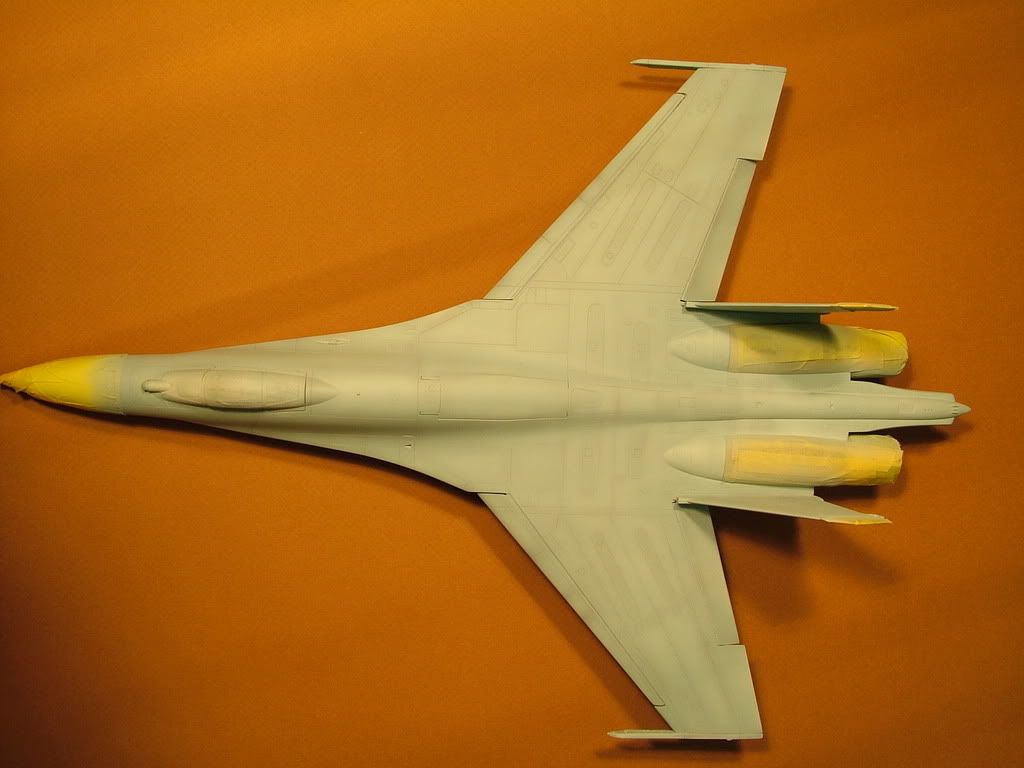
Panel Detail:


Completed the light Blue stage for the elevators and the gear doors, painted up the missile rails with some details: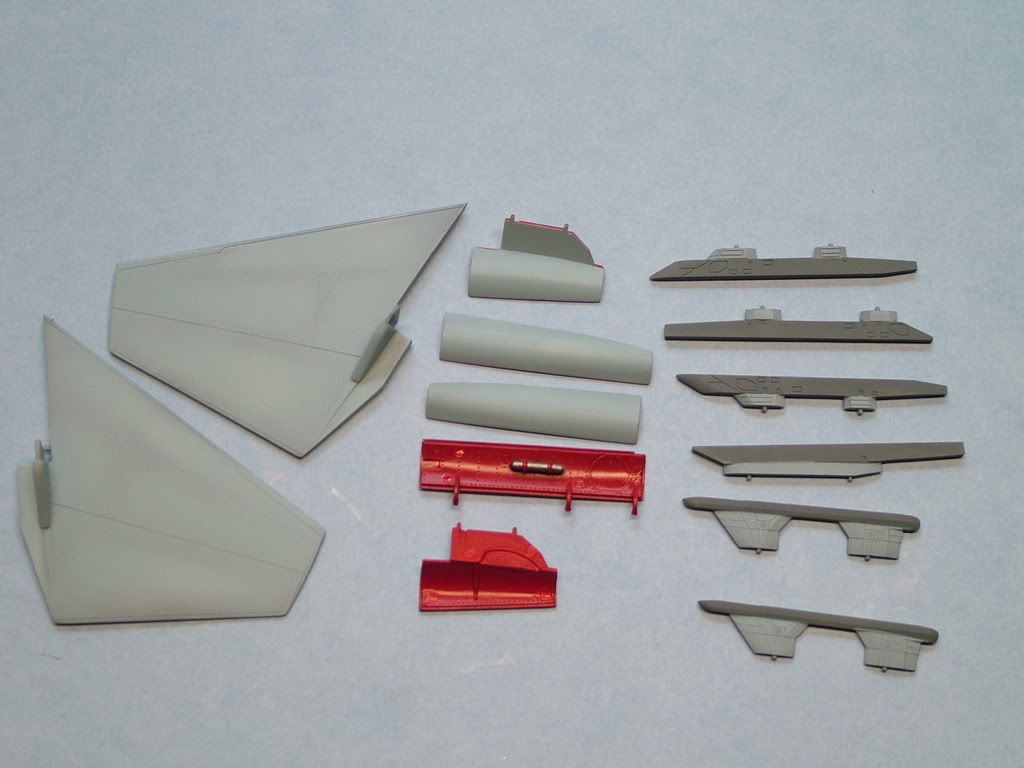
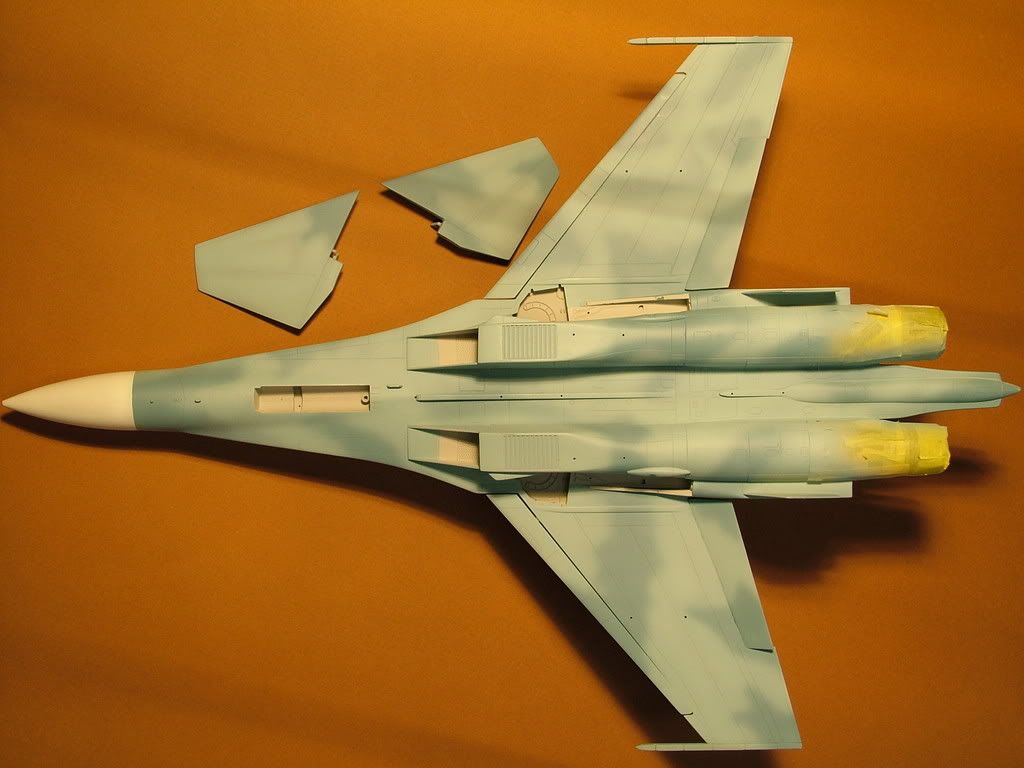
Made another special brew for the darker shade of Blue.
Approximate ratios are 60% Blue/Grey, 5% FS35120 Blue and 35% Flanker Medium Blue:
Quite a bit of trial and error and "fillingback" with some light Blue, to keep it close to what the "official" documentation is showingwhere the various patterns are.
I could have made some patterns with Tamiya tape, but wanted a "soft edge" so ended uptaking some artistic liberty here and there.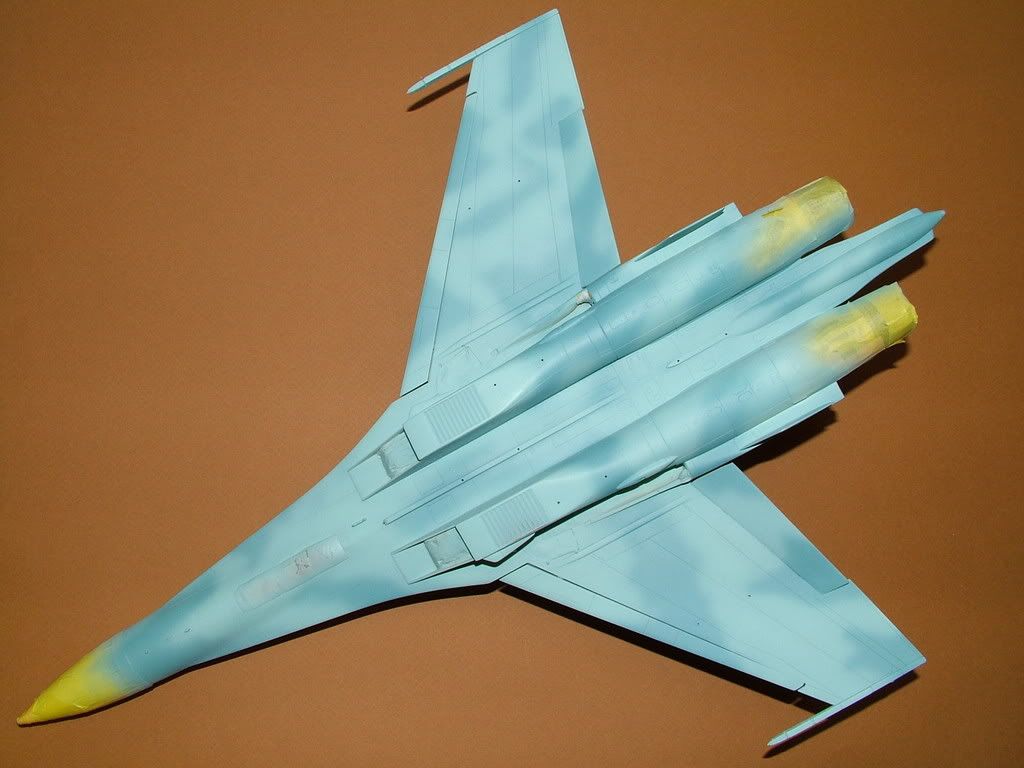
Following pictures includes the Grey ... Top Side...used Medium Gull Grey as the Russian Top Side Grey is much too Dark to my taste.
Some Detail shots:
All the masking was peeled off from the nose cone and the dielectric panels on the fin tips, also plucked out the blue tack out of the engine intakes and the wheel wells and got some great sharp clean lines.
All the dielectric panels where masked off and painted a weathered Green. Also the Chafe Flare area was treated with Model Master Metalizer Buff-able Steel.![]()
The area between the Flaps and Slats were masked off and airbrushed with a very light Grey (similar to the Wheel Well color). The dialectric panel on the Right Fin was masked off and painted up.![]()
Installed the Elevators,
Gun Area detail of the panels, two shades of Model Master Metalizer paint, Buff-able Steel and Anodonic Grey.![]()
Installed all the Missile Ejector rails:![]()
Getting somewhere ![]()
![]()
![]()
The first Model Master Gloss Coat has been sprayed on as well, now the waiting game starts until the weekend and let that harden.
Airbrushed one more thinned with distilled water coat, as to get the --smoothest of smooth-- layer on.
The Begemot decals are always a treat to behold and this sheet is no different. The research effort this Russian Company places into their set is second to none. There are 3 sets of descriptions chock full of info. 
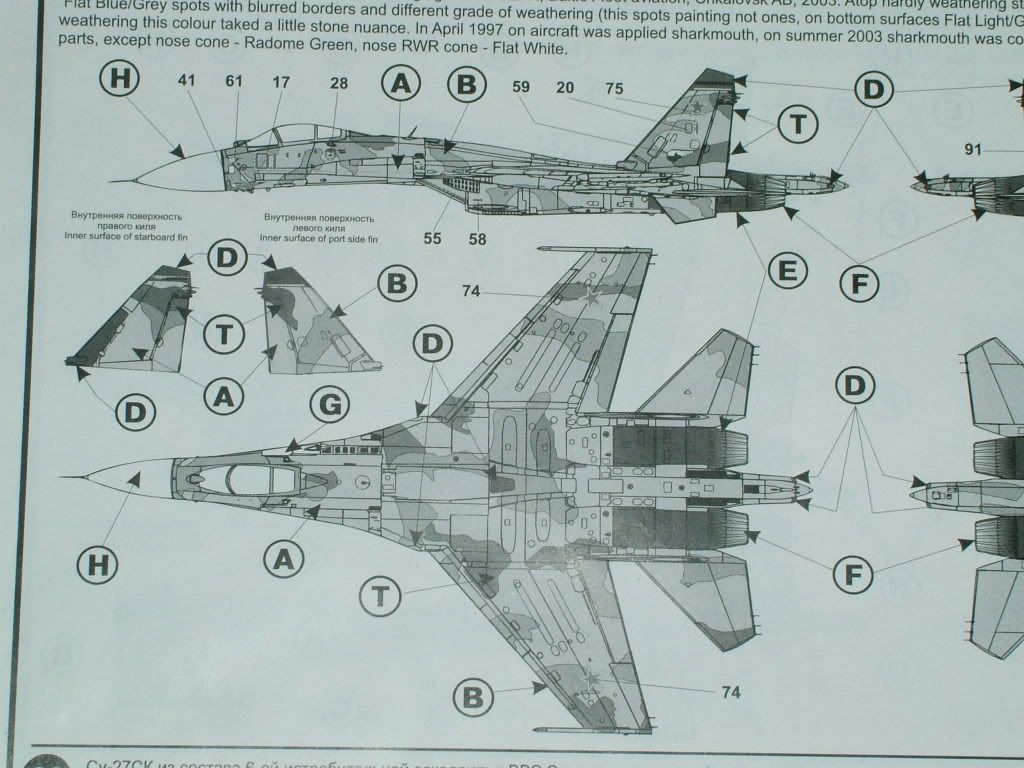
Interestingly enough it appears that this bird also has a camo spotting on the bottom!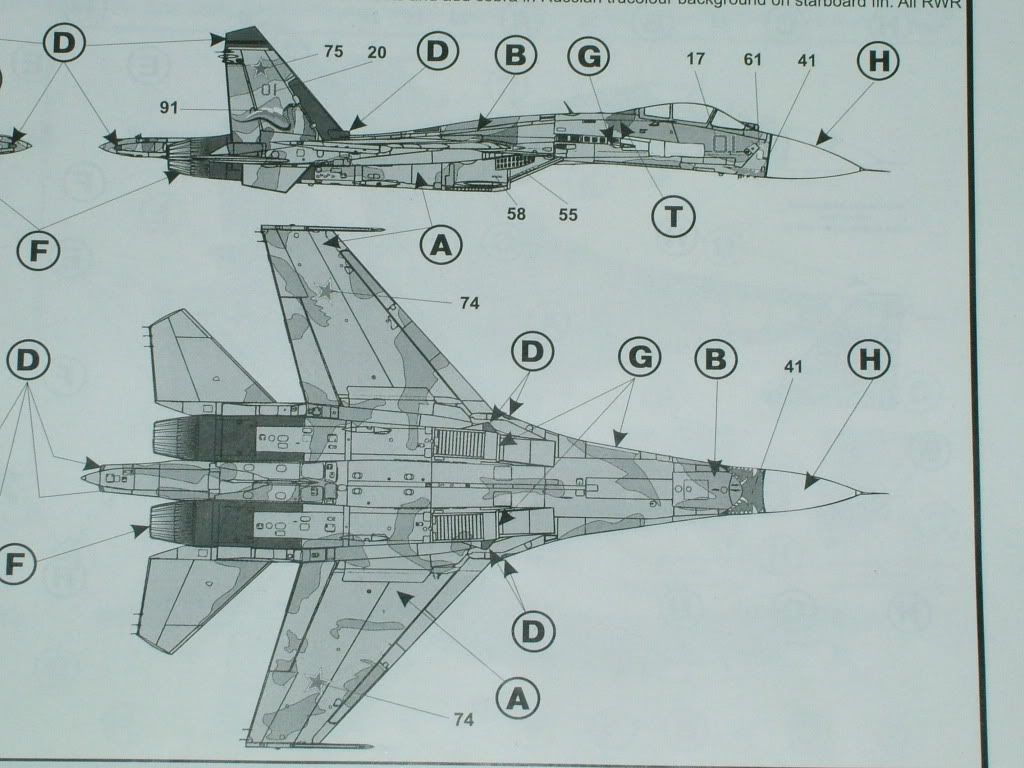
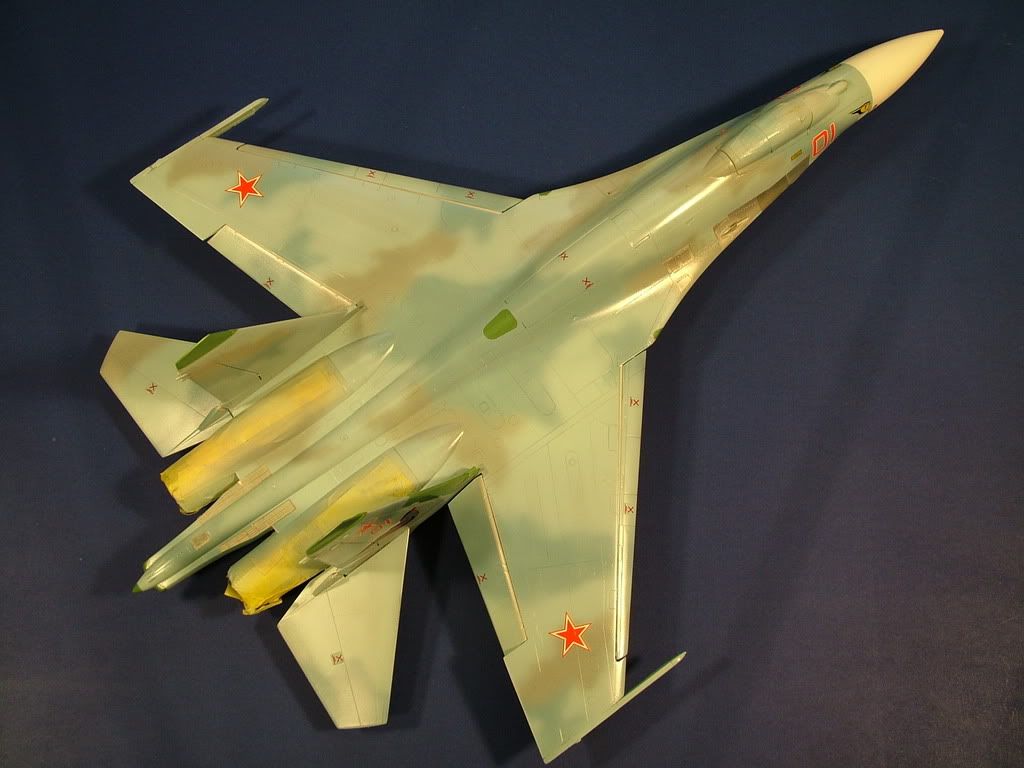
Bottom Over All picture: 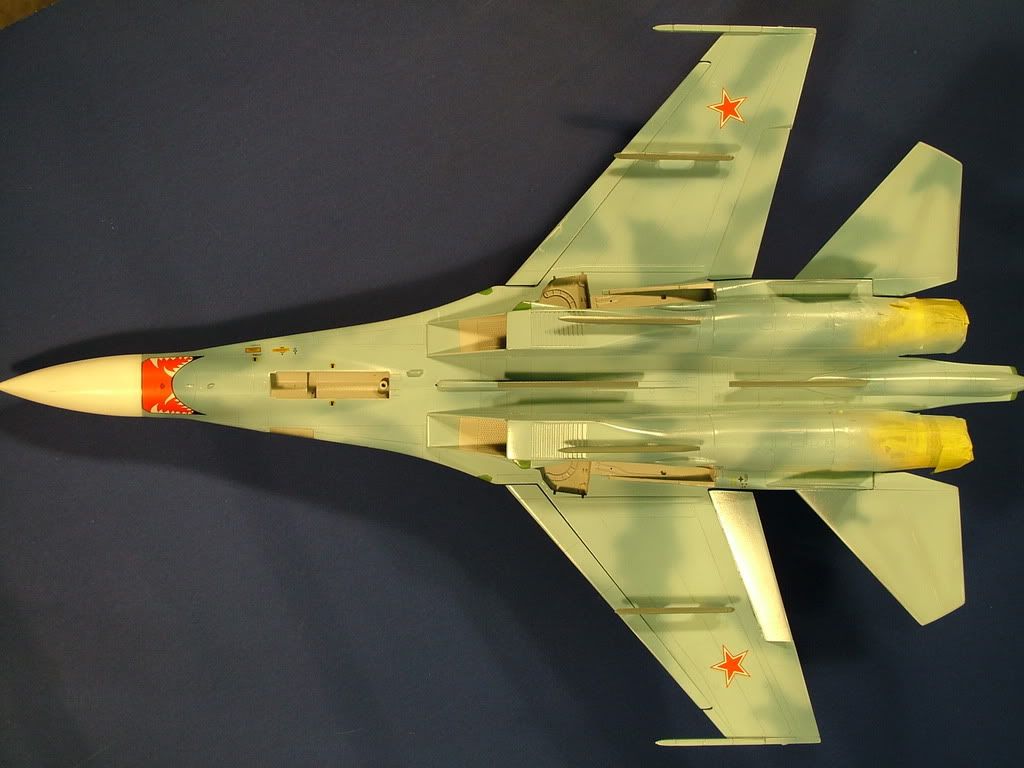
Tail detail depicting the stylized Cobra and Russian Flag:
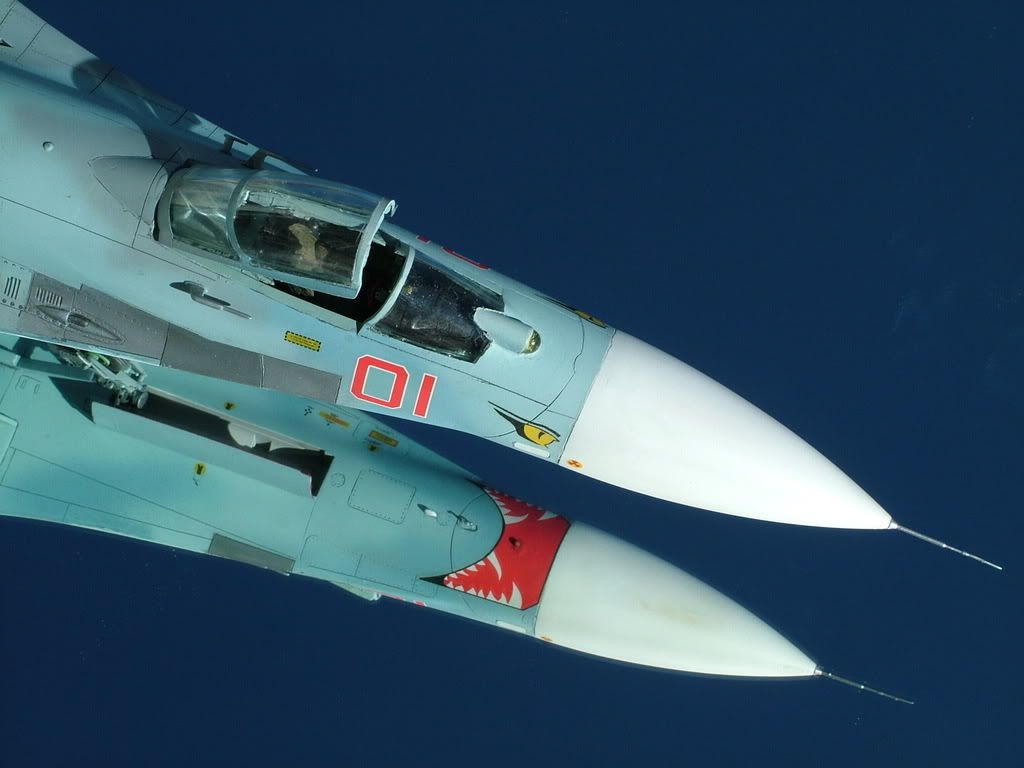
Opposite side tail surface, depicting the bort number "01" and the Sukhoi Archer Logo rising over St. Basils Church in Red Square:
Mr. Snake Face revealed, Guards Unit Badge behind the cockpit: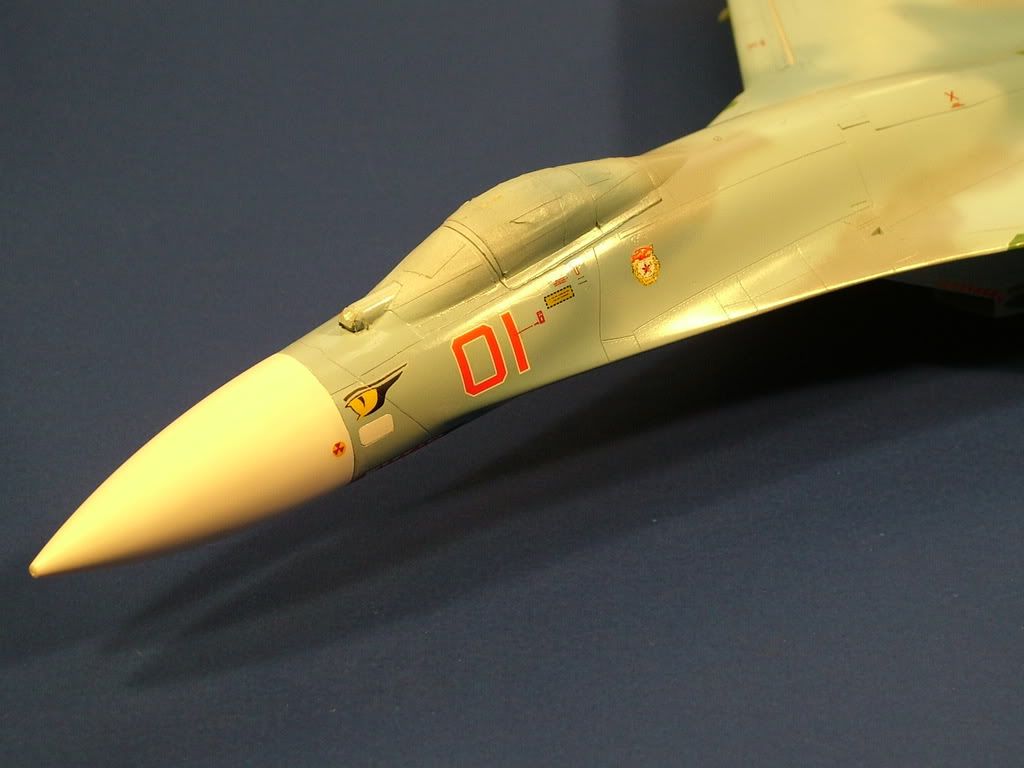
Particularly like the Eyes on this nose art:
Mouth Detail:
The Begomot Decals behaved superbly as always, I didn't use a drop of Microsol, and they settled down super smooth.
Top Shot ---Wash On--- Promodeller Dark Dirt: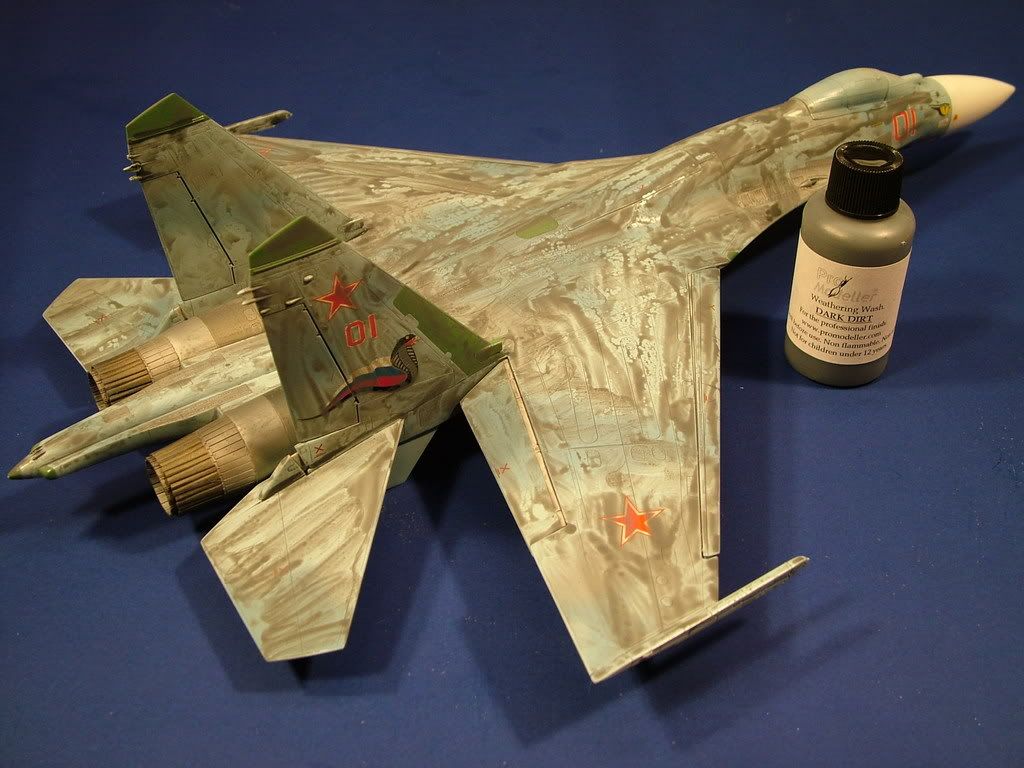
Bottom Shot ---Wash On---- Promodellers Dark Dirt: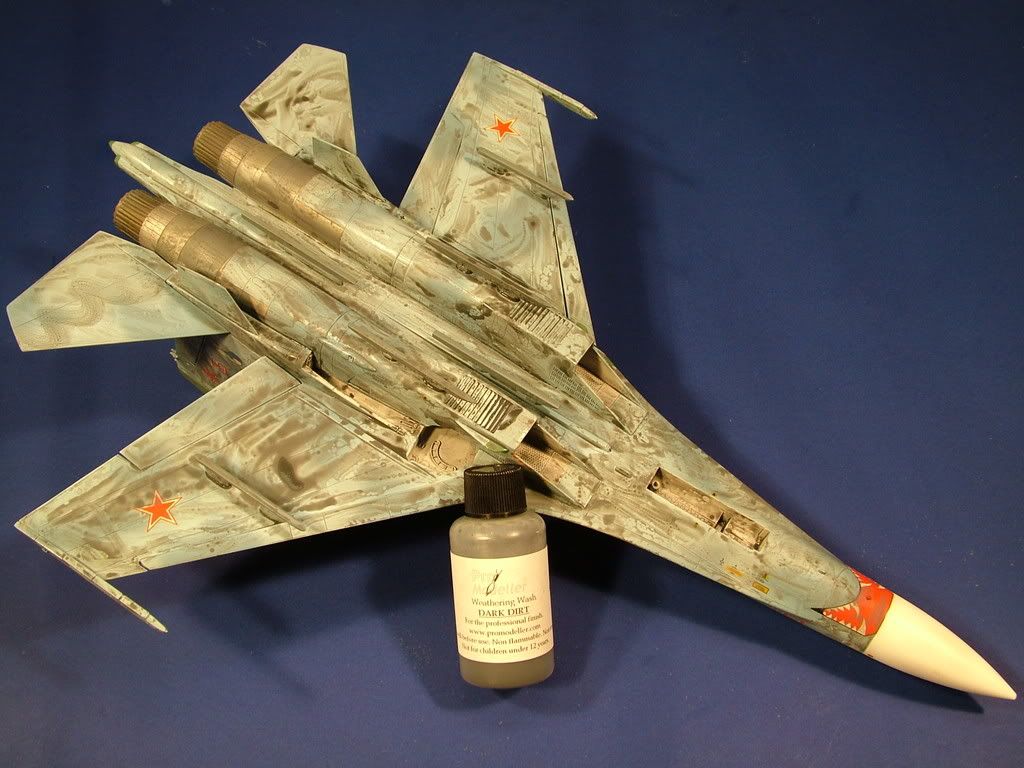
Before the wash detail shot of wing:
Wash Applied to Wing -- Detail shot:
Removing the Wash from Wing --- Detail Shot:
Wash removed from wing Detail shot.... Pleasing results once again in less than 20 mins: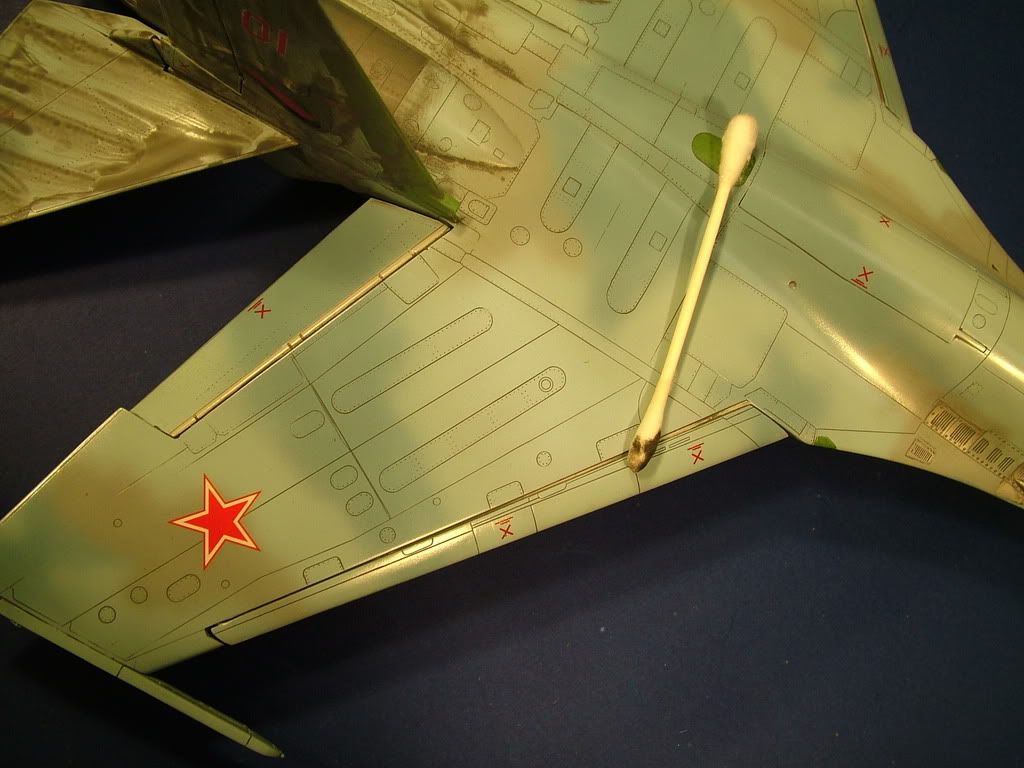
Tail detail shot--before wash is applied: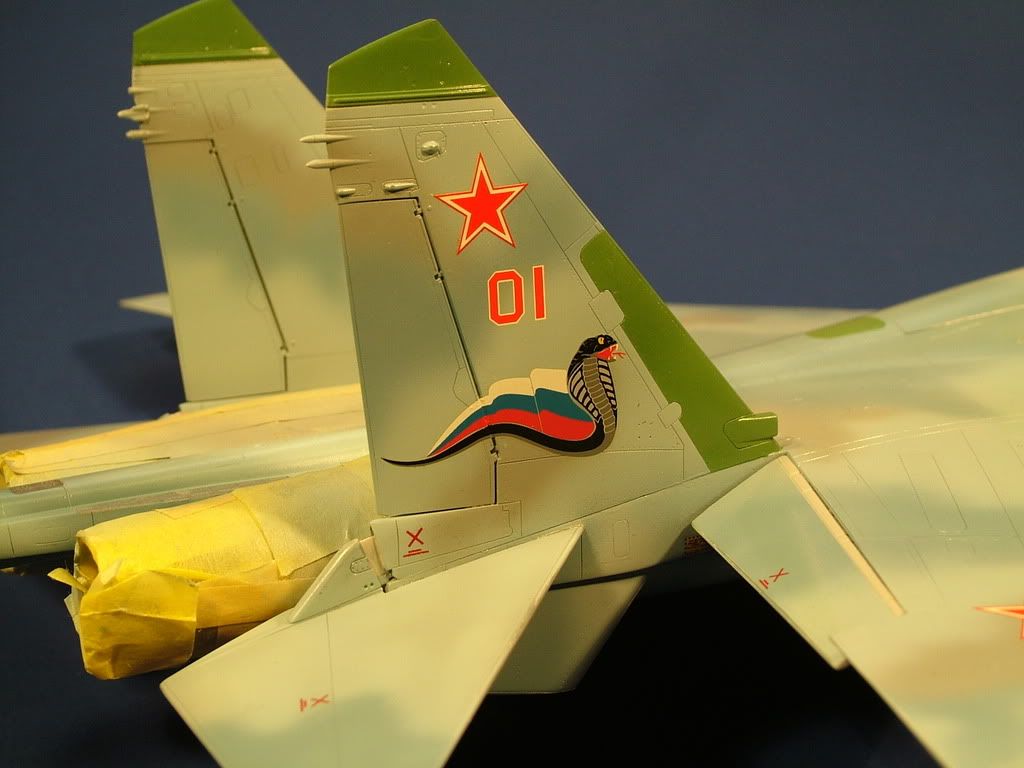
Wash Applied to tail: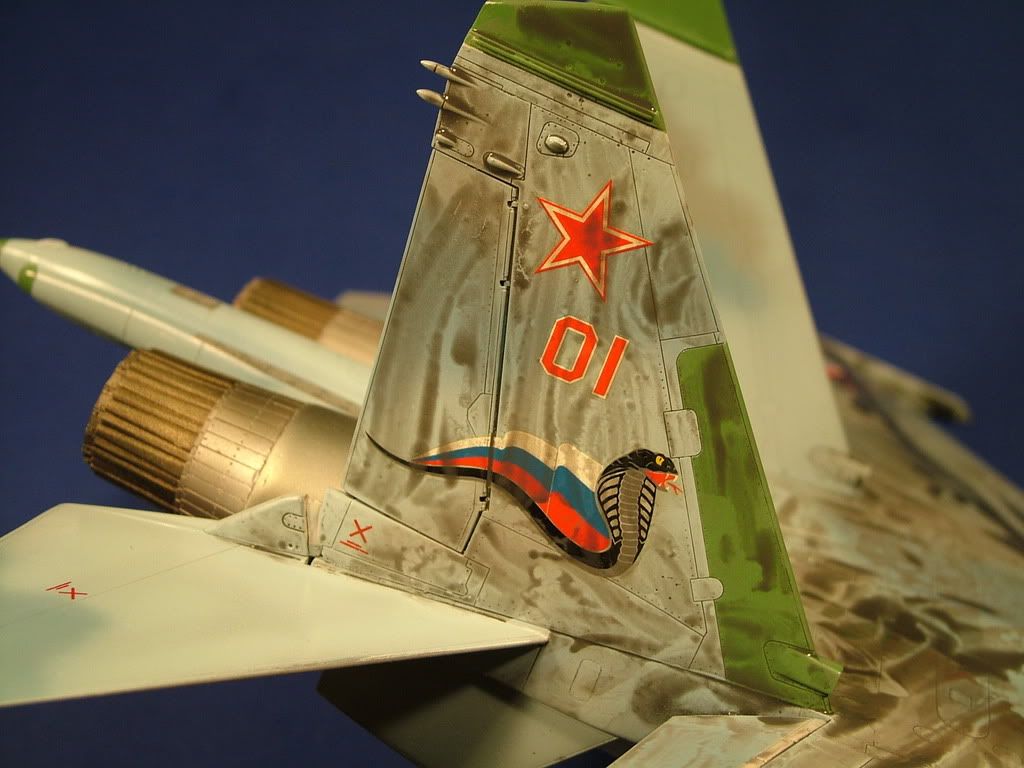
Wash Removed from Tail: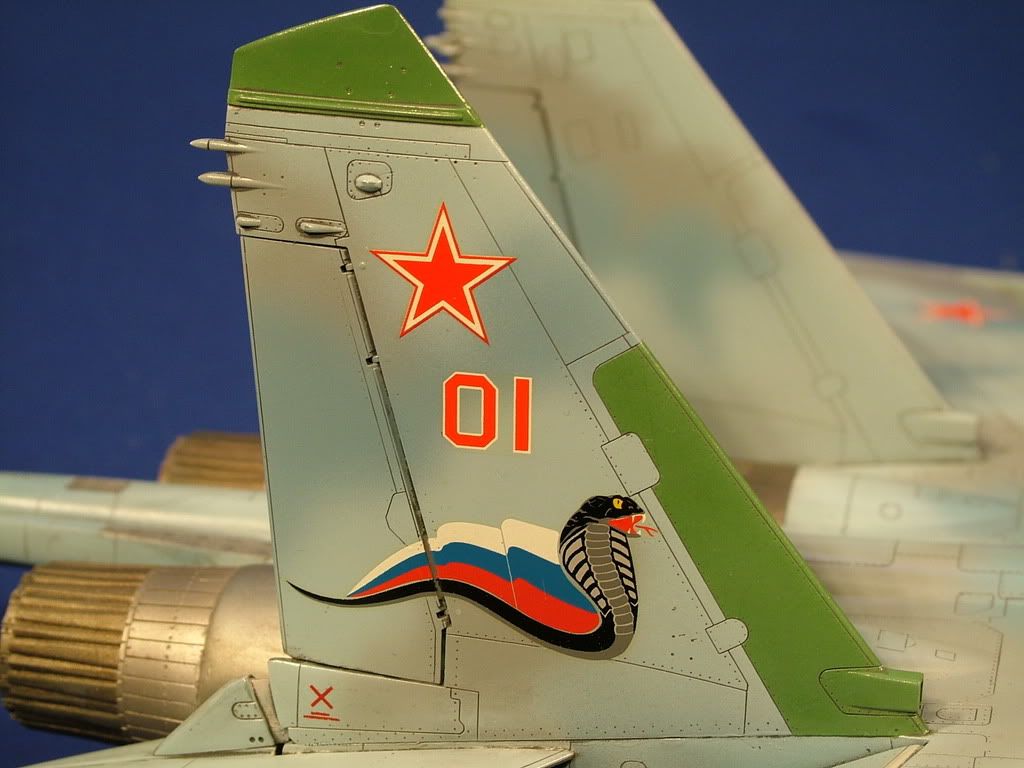
Finished up the wash removal, and checked around and fixed a couple small paint details that I heavy handed and needed touch up.
Overall Testors Flat Coat has been applied, and all the tini tiny parts are ready for assembly and final installation.
Cleaned off the canopy and the track ball on the nose.
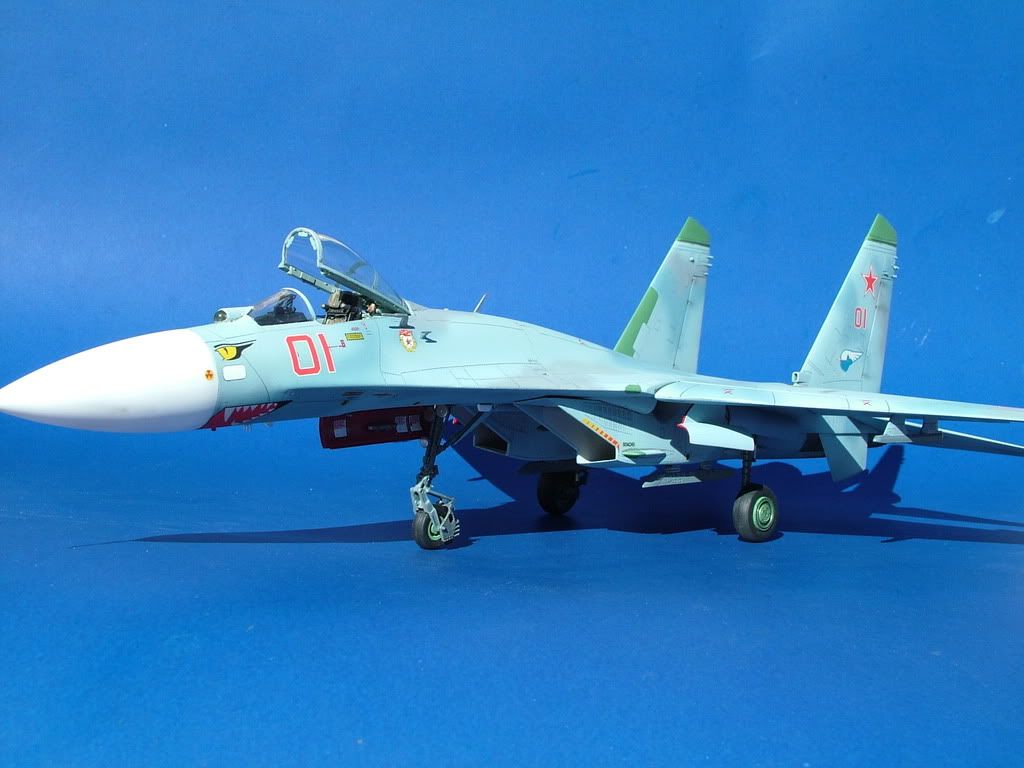
Final Reveal Photos are below: