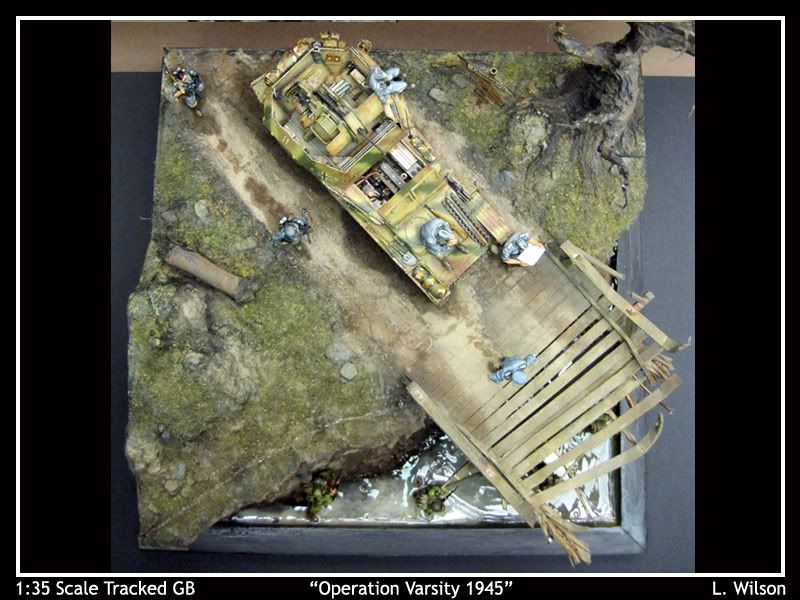
OPERATION VARSITY - 24 March 1945 "The largest single airborne operation in history." Flakpanzer 'Geopard' vs U.S. Airborne
Operation Varsity (24 March 1945) was a joint American–British airborne operation that took place toward the end of World War II. Involving more than 16,000 paratroopers and several thousand aircraft, it was the largest single airborne operation in history to be conducted on a single day and in one location.
The plans called for dropping two airborne divisions by parachute and glider behind German lines near Wesel. Drawn from US XVIII Airborne Corps, they were instructed to capture key territory and to generally disrupt German defenses to aid the advance of Allied ground forces.
The operation was a success, with both divisions capturing Rhine bridges and securing towns that could have been used by Germany to delay the advance of the British ground forces. The two divisions incurred more than 2,000 casualties, but captured about 3,000 German soldiers. The operation was the last large-scale Allied airborne operation of World War II.
The Diorama:
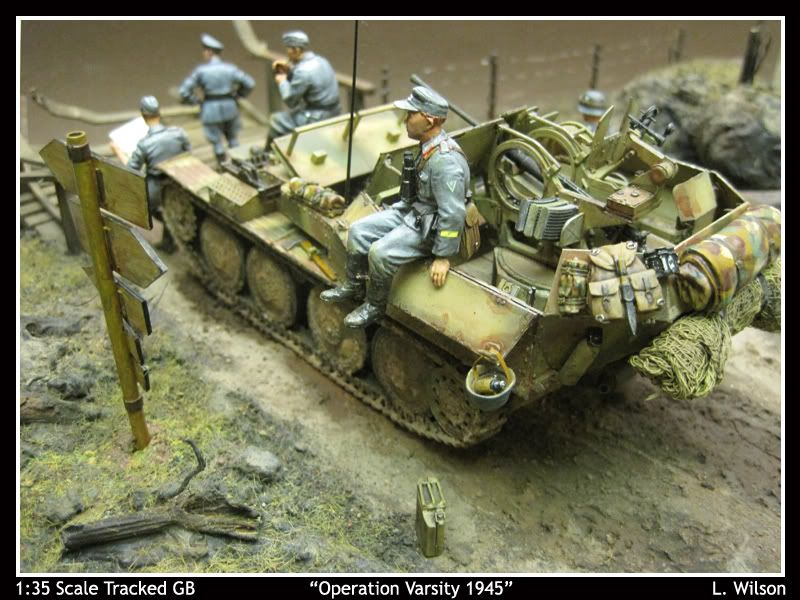
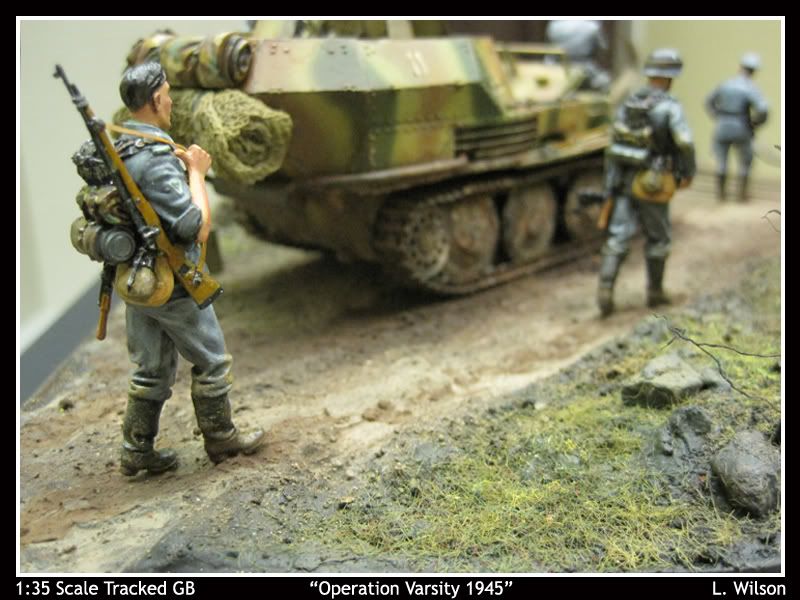
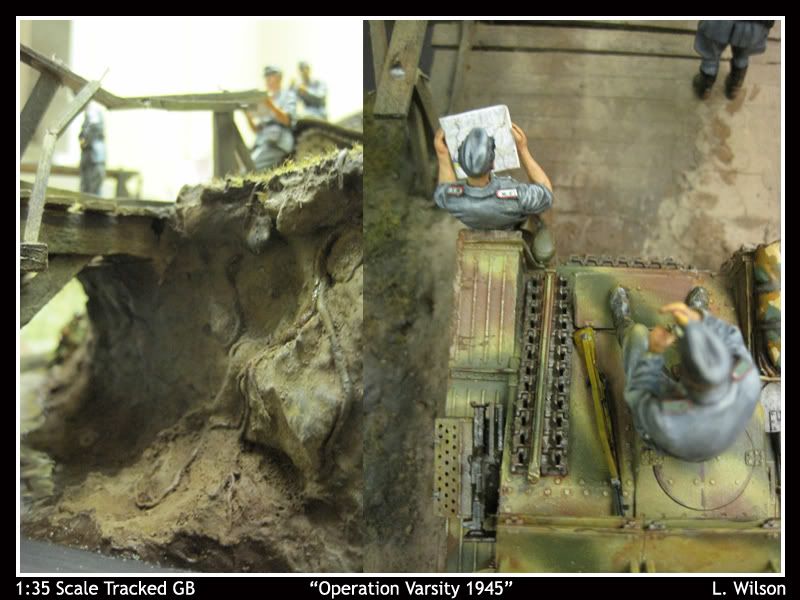
The main focus of the Dio will be the Flakpanzer. There will be supporting German troops and a US Airborne patrol.
The base will be scratch built and will be based around a steep river bank with a partially destroyed wooden bridge. I am planning to model a section of the river itself.
There will be a fair number of figures in the Dio and my main goal for this project is to experiment with and raise the level of my figure Painting.
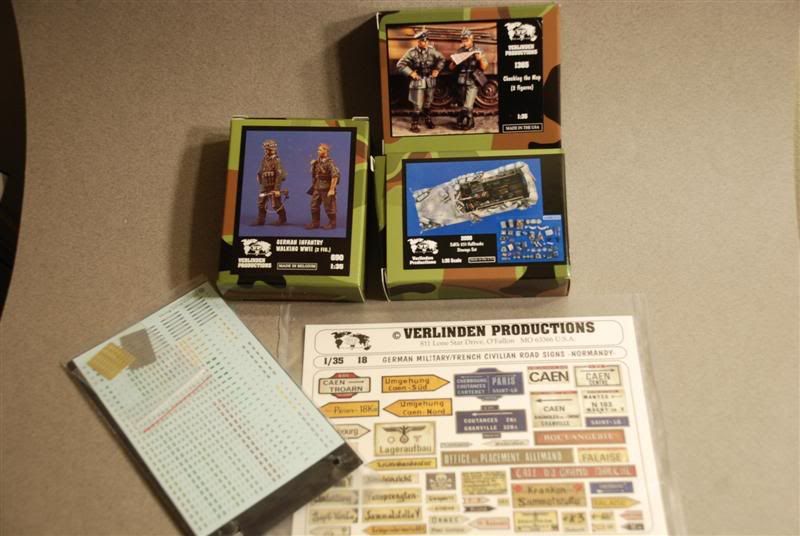
The Kits:
1:35 Flakpaner 38(t) Geopard (Smart Kit) - Dragon
1:35 "German Artillery Crew Riders" - MiniArt
1:35 German Resin Figures -Verlinden
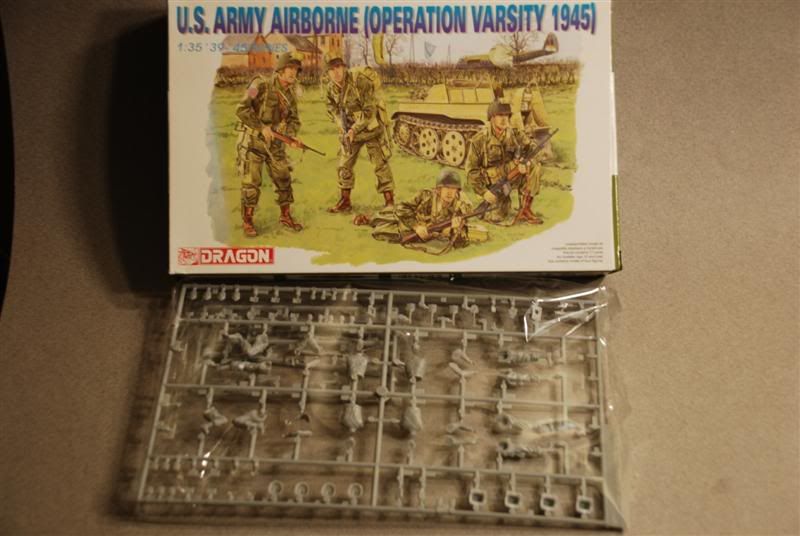
1:35 U.S Airborne (Operation Varsity) Dragon
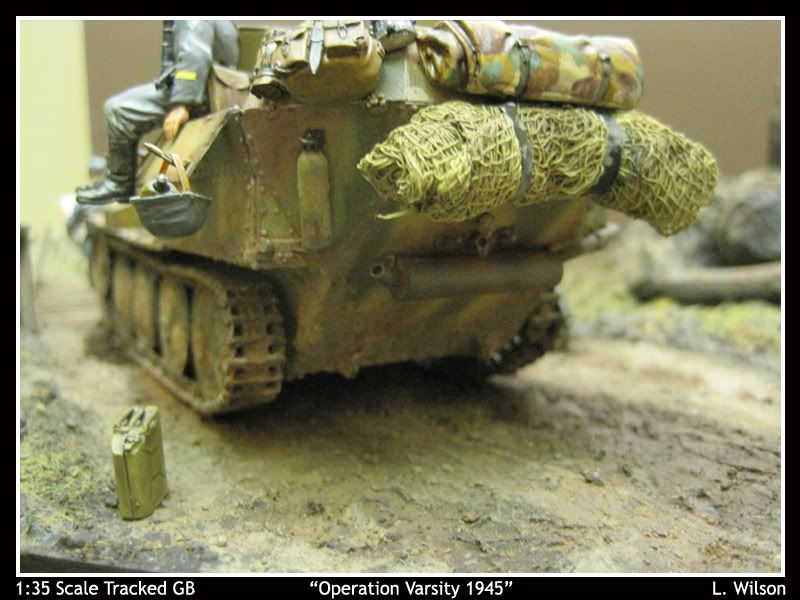
1:35 German Stowage Resin Kit -Verlinden
I will be using various odds & ends from other kits and my Dio materials.
Additional Details of the Flakpanzer kit:
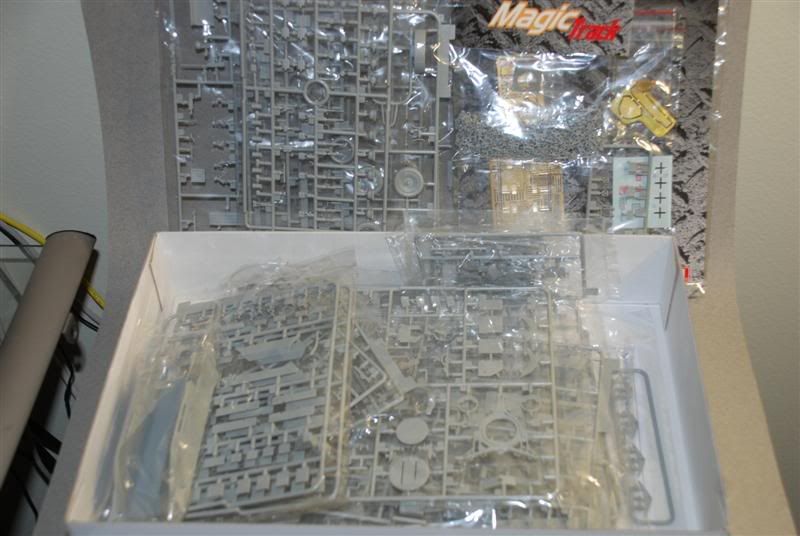
- The kit consists of 744 parts in light grey plastic
- Three frets of etched parts
- A bag of individual track links
Full Review Here: http://www.perthmilitarymodelling.com/reviews/vehicles/dragon/dr6469.html
Pics: 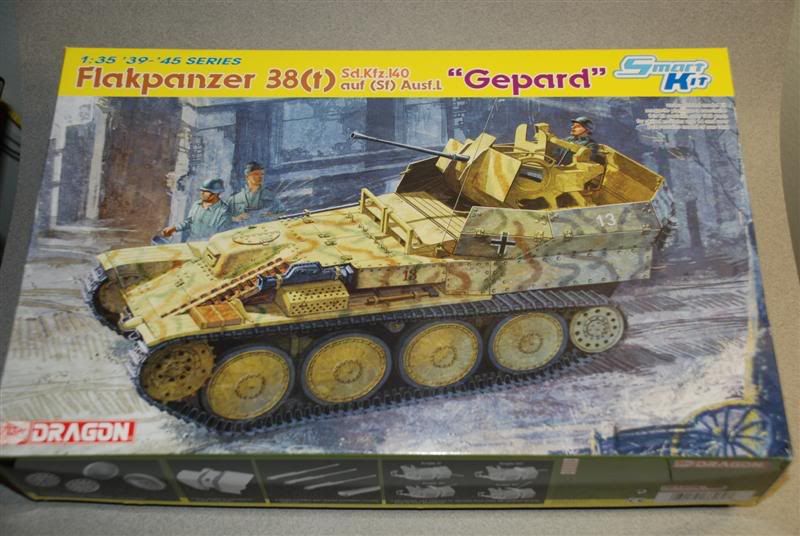
Figures: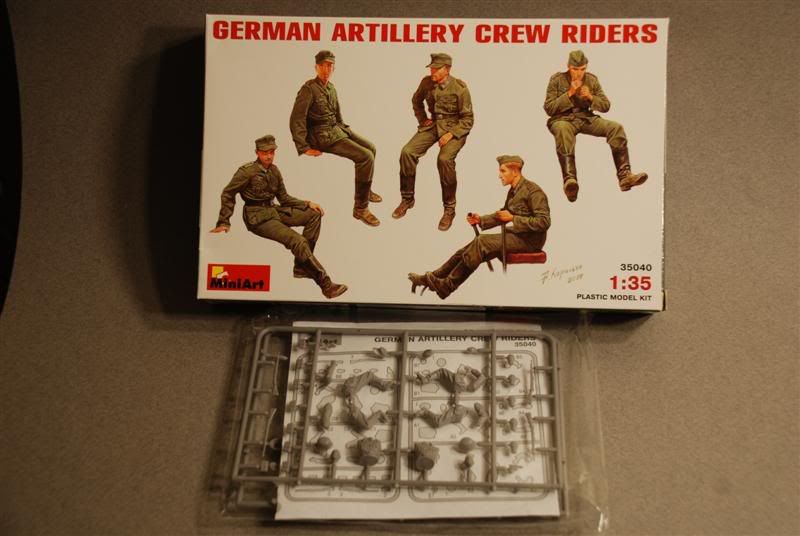
Eager to get started on a fresh dio. This one should not take too long as it will be built from the base up as one project. I have actually had all the pieces ready to go for the past two months but had to finish off some other work before allowing myself to move on 
Headed off to Home-Depot from some materials for the Base on Friday and spent most of Friday evening & Saturday building up the Panzer.
First impressions... What a huge frikken load of plastic for one model!
I don't think I have ever spent as much time just gluing stuff together for any other model. Kit has many sub-assemblies that need to be completed that later join up to form more... Sub-assemblies...
I actually had to CLEAN MY DESK before starting this model...
First up was the main tub and wheels. All very nicely detailed. A rivet counters dream! The instructions were a little iffy and I had to skip some stages to get everything to fit. (this happened a few more times throughout the build...def have to READ the instructions on thin one)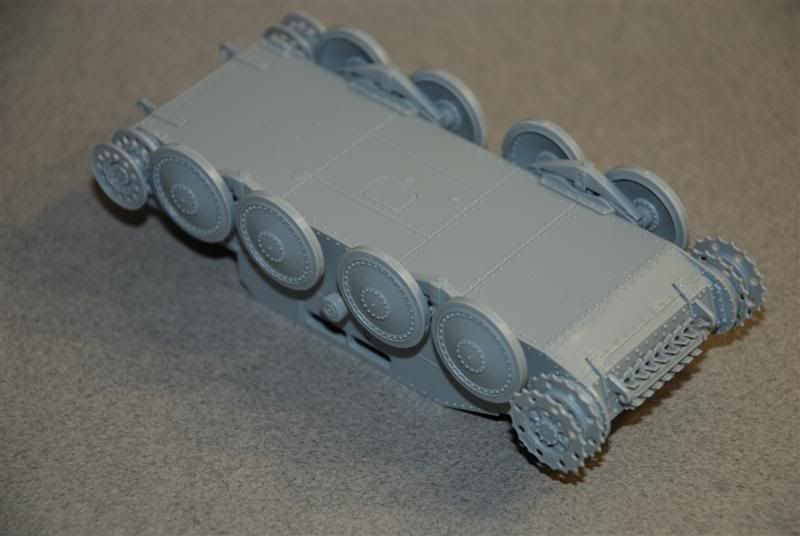
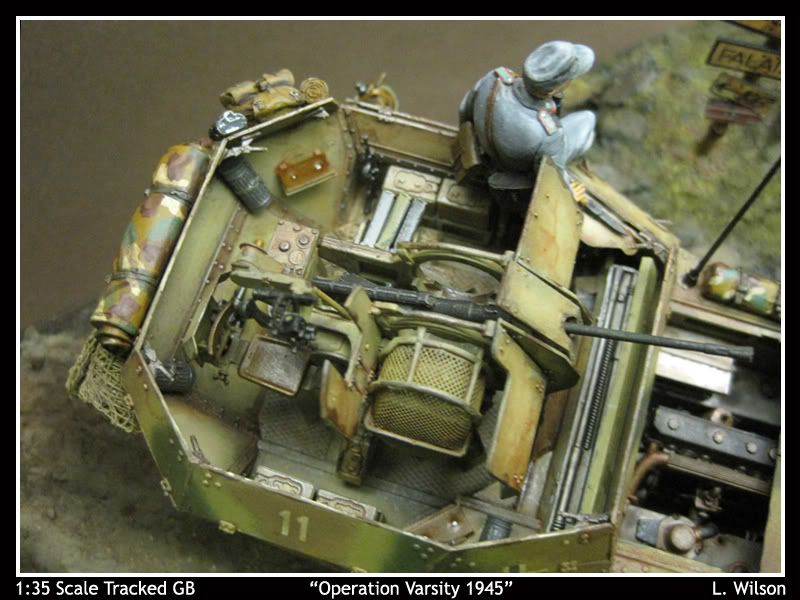
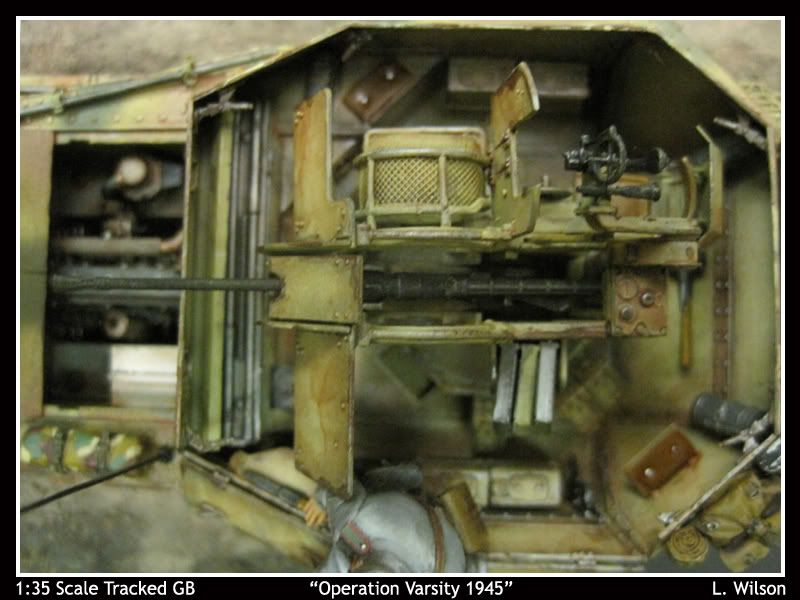
Then I got to work on building up all the interior parts. I am planning on posing the model with as many hatches open as possible. I am going to detail out the interior first and then paint the exterior at a later date, once more of the scene is complete.
The interior is quite well detailed and includes the engine, fuel tanks, radiator, driver controls & transmission. Some PE parts included for the battery.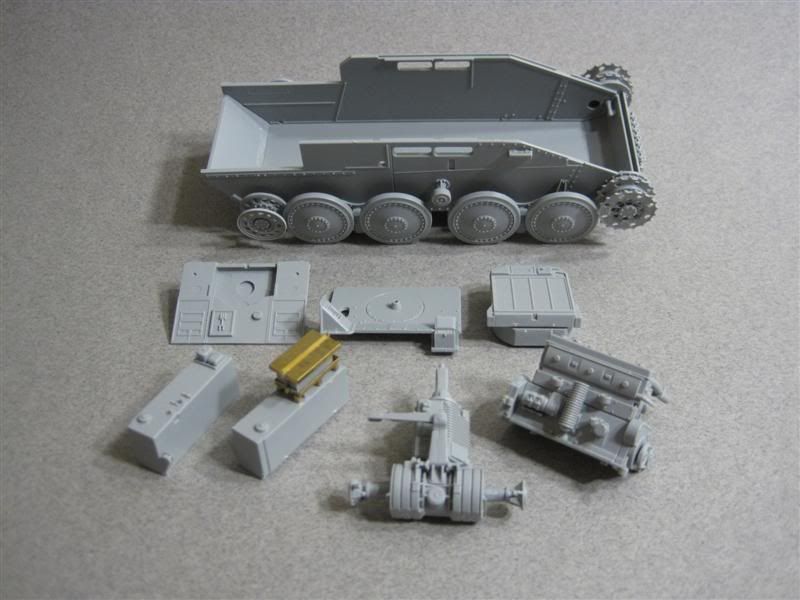
Next up I built up some of the upper surfaces and side walls. Tons of detail here including ammo boxes & PE rails, Radios, Rivets & textured base plates.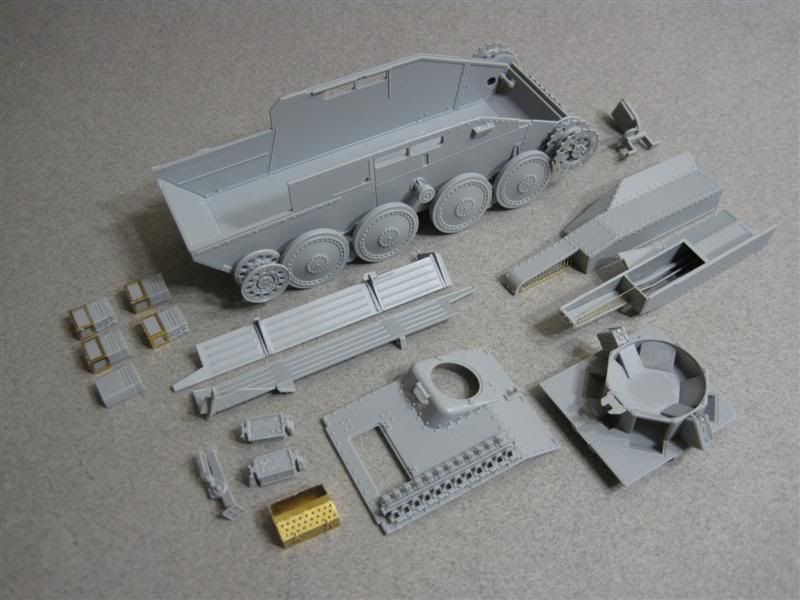
Although this is not a 'super detail' build, I added some wires & surface detail to the engine.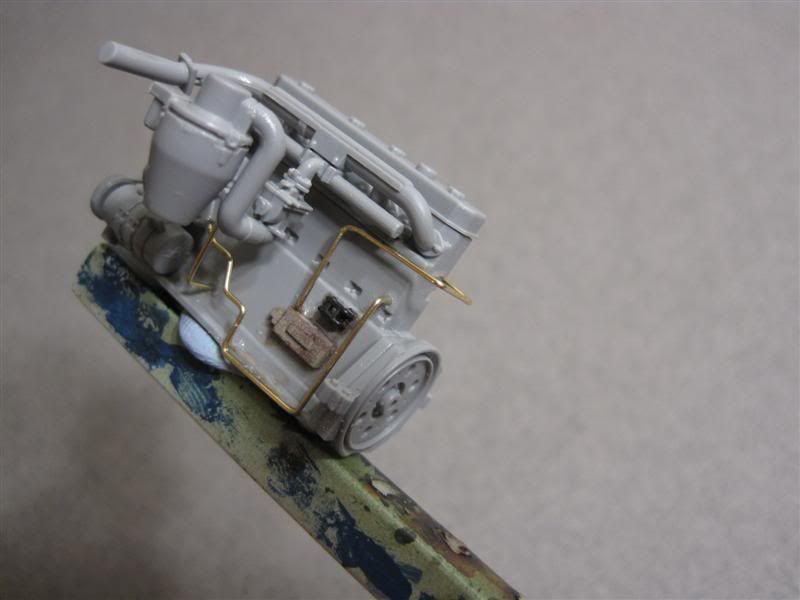
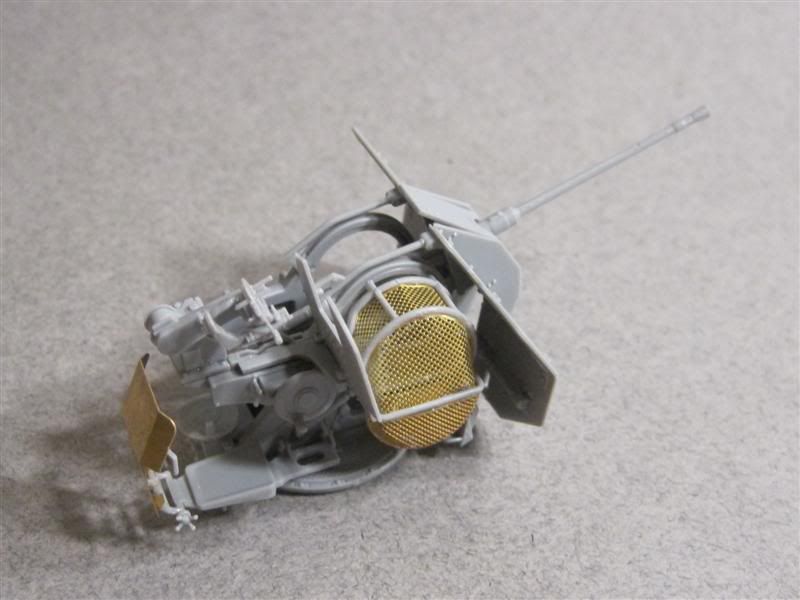
Next up began work on the main gun. This took way longer than expected. The level of detail and construction here is quite impressive. I actually had a fun few hours fitting everything together.
Here are all the sub-assemblies complete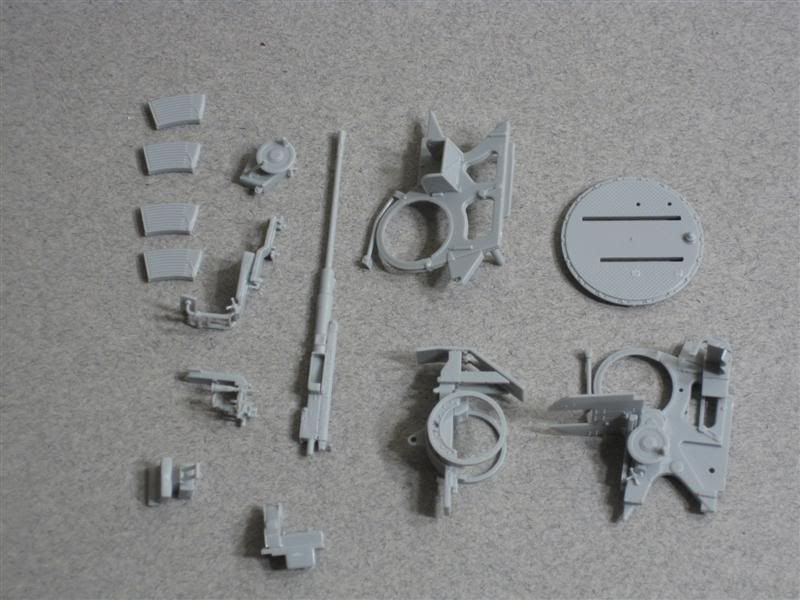
Putting it all together...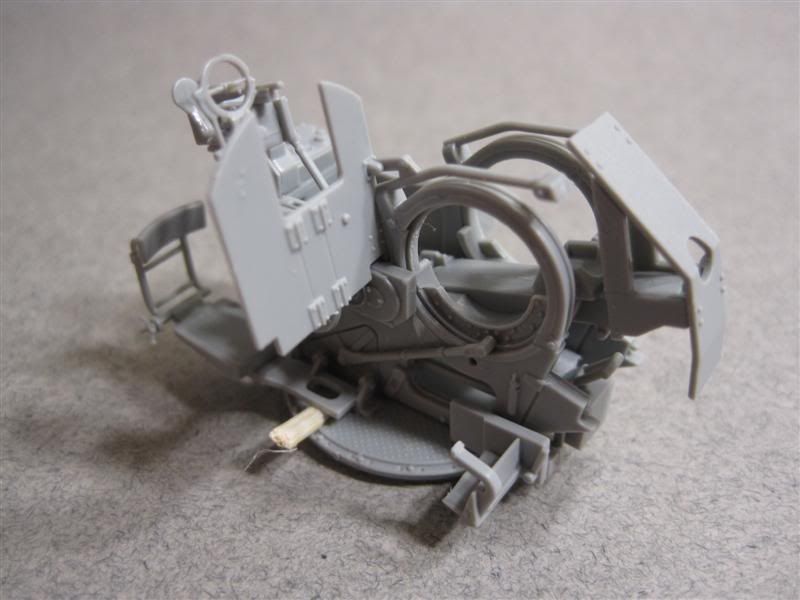
And finally adding the PE armor plate and wire mesh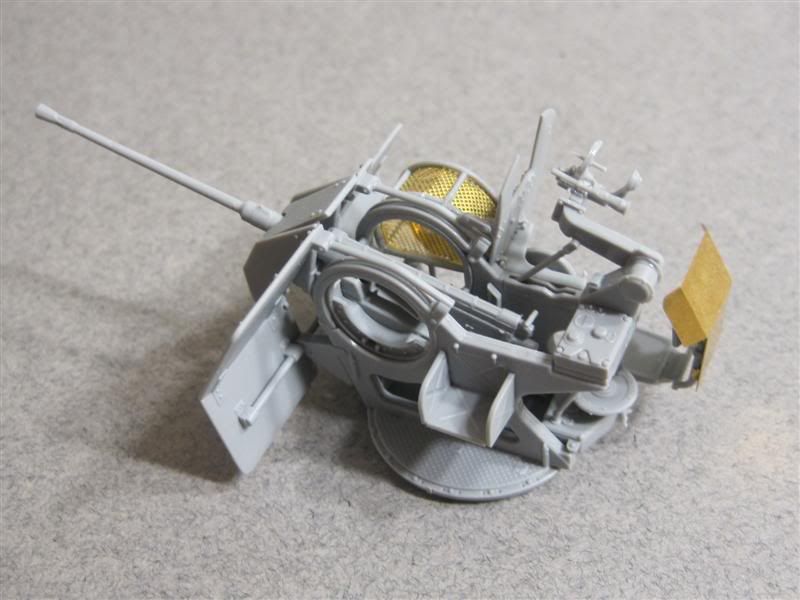
Then started some prelim painting. Gave everything a base coat with Taimya Grey Primer then a coat of Taimya Dark Yellow (XF-60)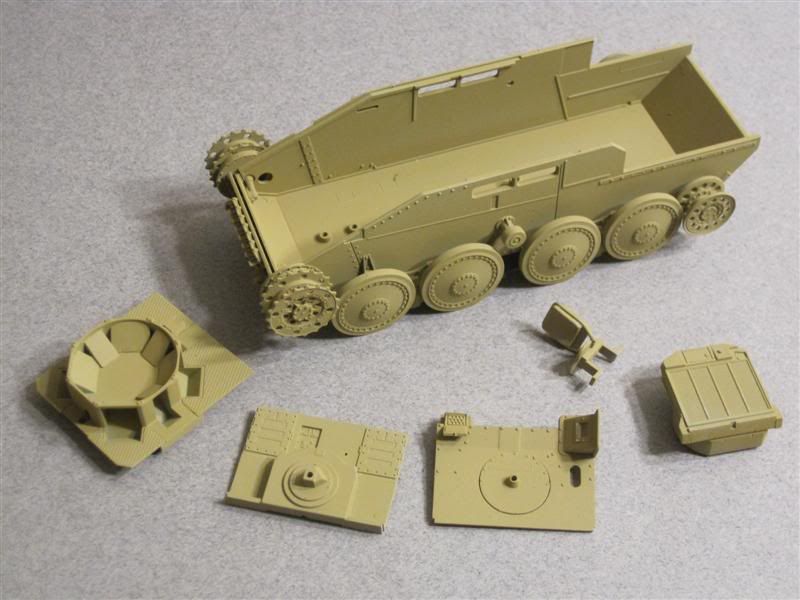
Painted up the engine, transmission & fuel tanks with Alcladd Dark Aluminum, Magnesium & Jet Exhaust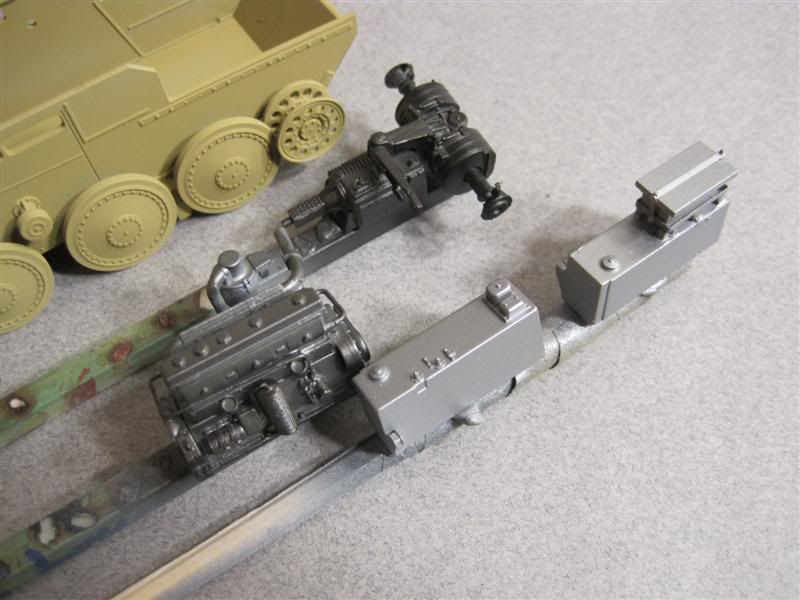
Lastly I began work on the base. I am using a 12x12 inch 6 Ply Board with plain pine for the borders. Tacked & glued it together, Stained and left to dry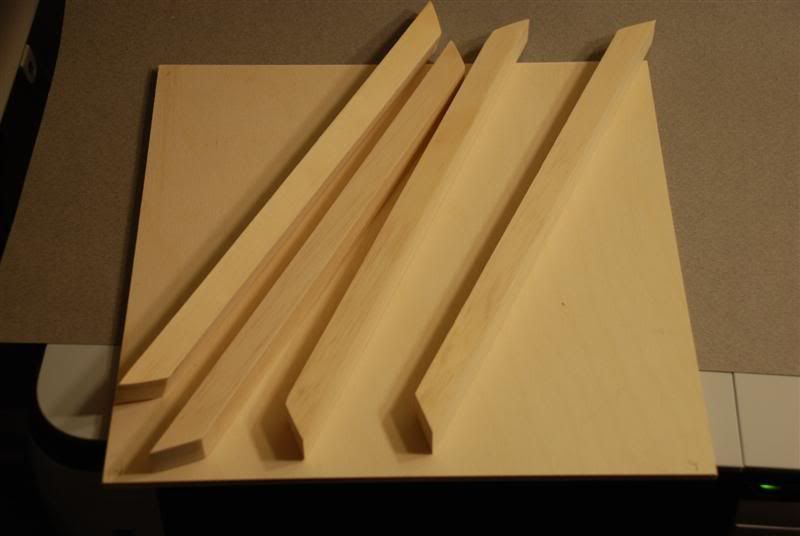
After the base colors were applied for all the interior pieces I finished them off individually by painting up the details and applying various washes including Black & Umber Oil Washes, PM Dark Wash. Added oil drops & stains with Tamiya Smoke. At this time I also painted and weathered the interior walls and floor.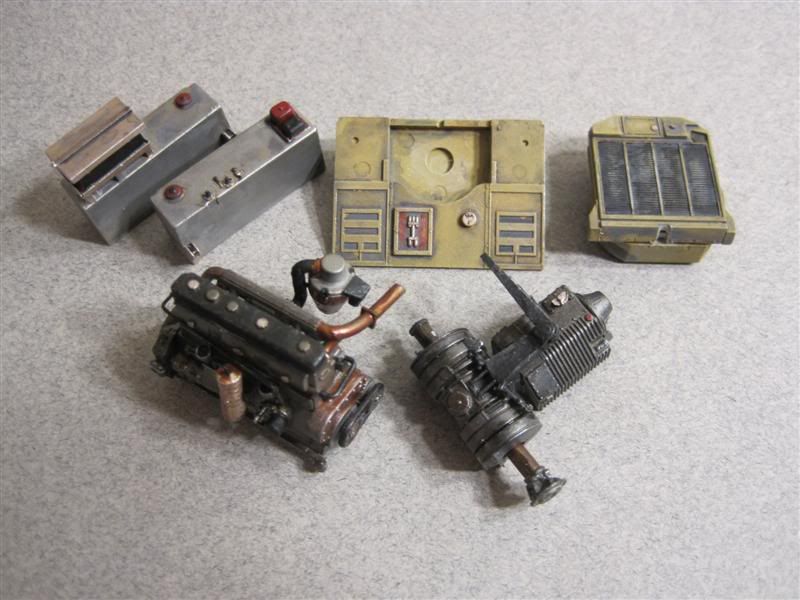
Then once everything was dry the interior assembly was completed. Had to do some trimming and adjusting to some parts. Not a perfect fit, but still decent.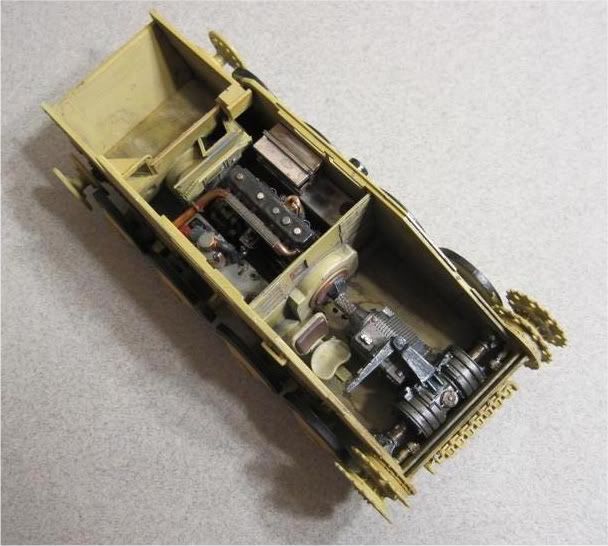
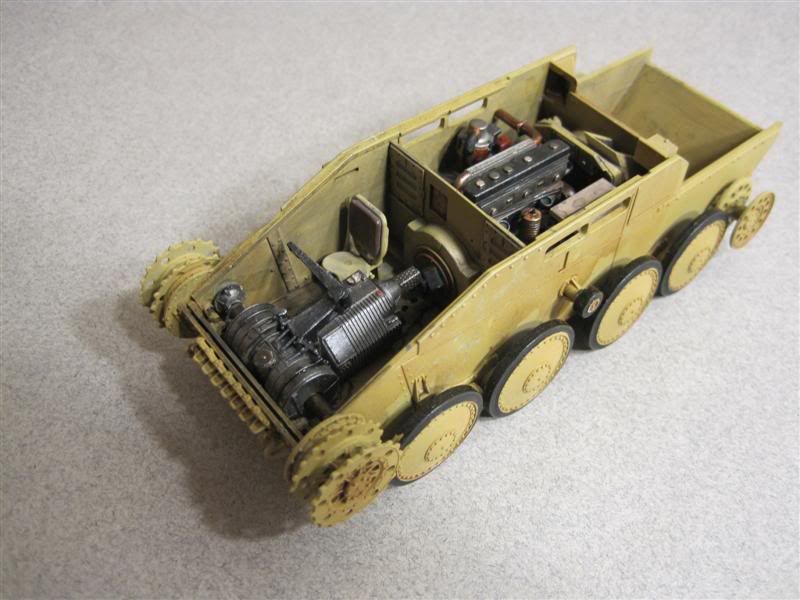
Then started adding the upper surfaces. Again there were some fit issues with some parts having to be glued on in stages. This is only my second Dragon model (the first was my Huey Gunship) and although both have had impressive surface detail both have suffered from some poor fitting parts.
I am figuring this build out as I go, thinking ahead to the painting stage. the combination of open & closed sections with interior detail has given me some headaches as to how I want to paint it up.
I decided to assemble the tracks and glue them in place. These will be hand painted at a later stage.
Not used this type of tracks before but they worked perfectly and I was able to get the required 'sag' without too much hassle.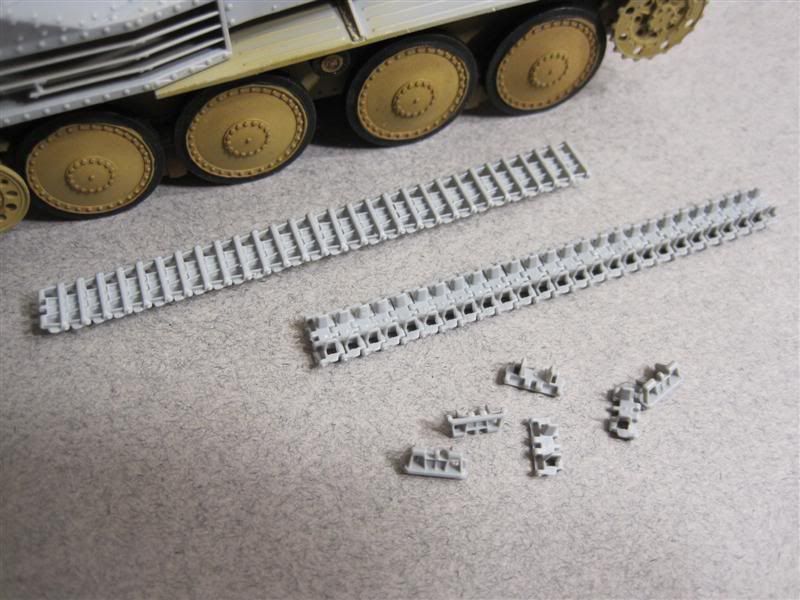
Some great detail on the tracks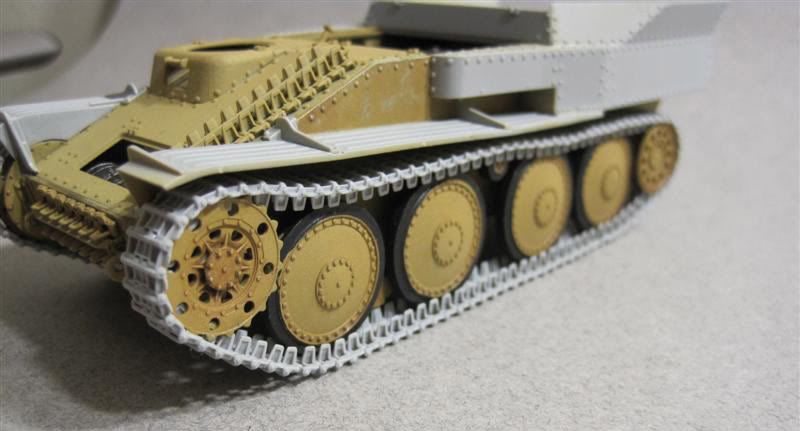
With the main assembly complete I was better able to adjust the layout.
Here the model placed on the upper surface board as I played around with the composition.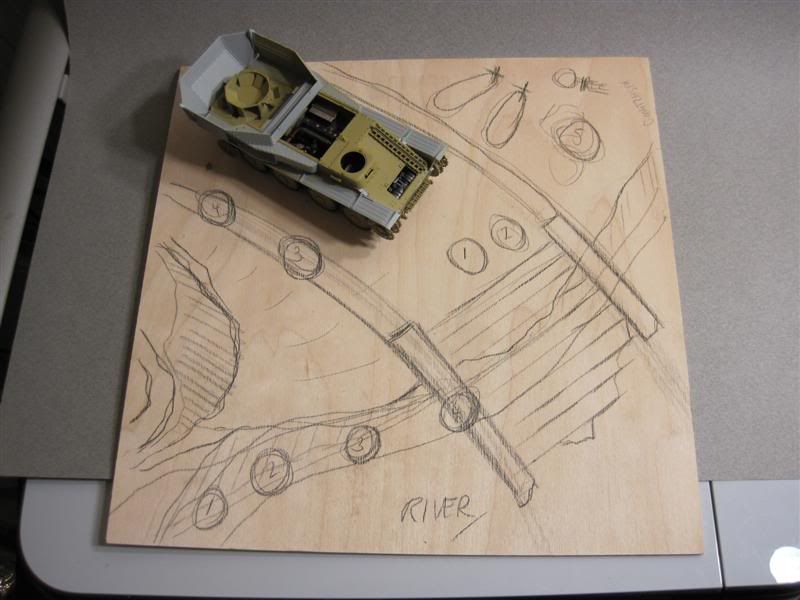
Here I have trimmed off the excess area from the upper surface.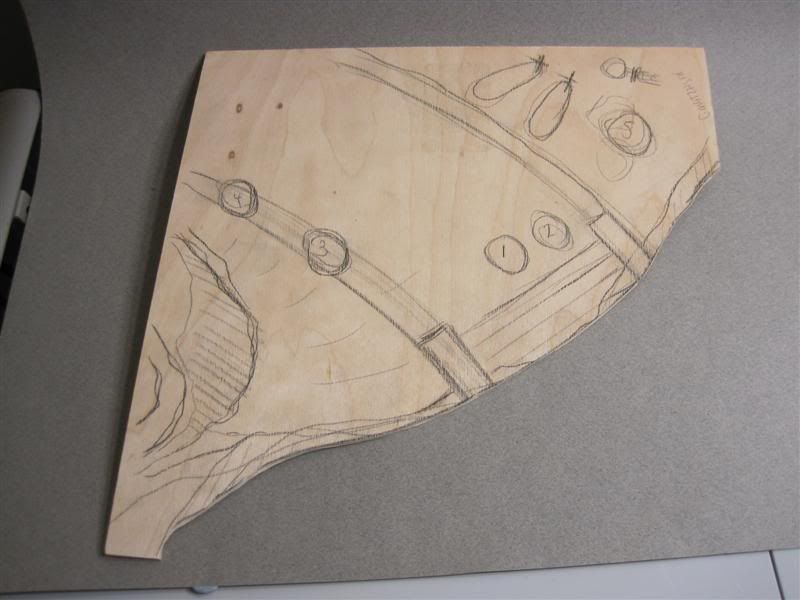
With the base stained & dry I used these Balsa Boards to construct a triangular base for the upper surface. 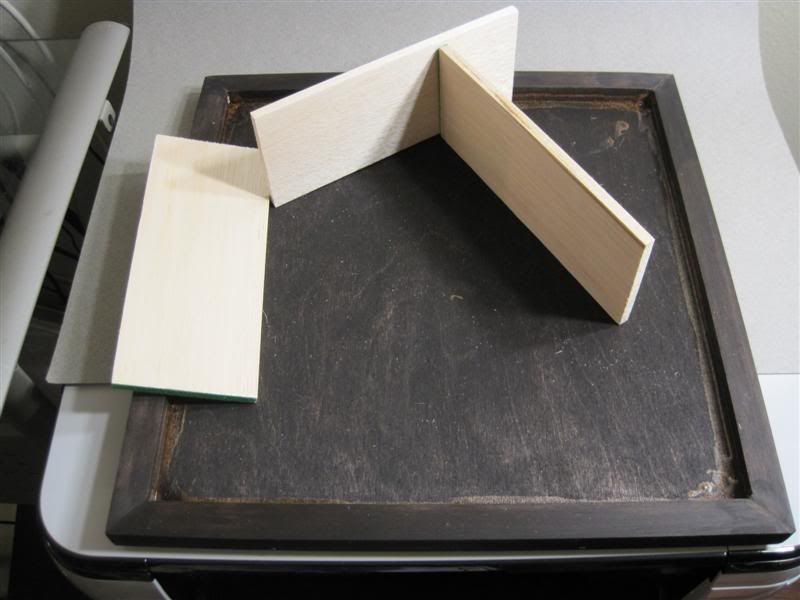
And here is everything assembled and glued in place. The side walls, made from singly ply veneers will be added after the main painting stage.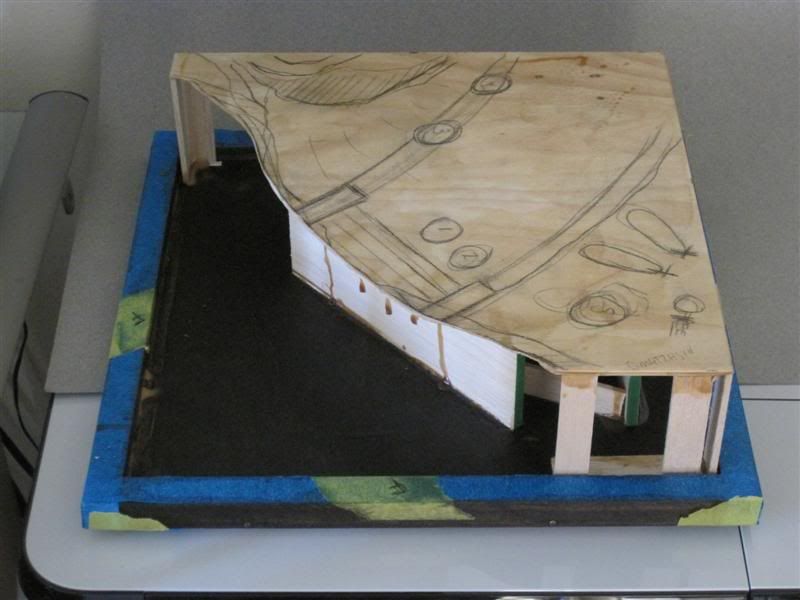
Next up I shaped the upper surface terrain and the cliff faces from polystyrene Foam. I spent some time on carving details into the cliffs which would be accentuated at a later stage.
The idea is to have an 'overhang' which will provide some cover to the men in the stream below.
I gave everything a coat of glue to seal it in and hold all the small details in place.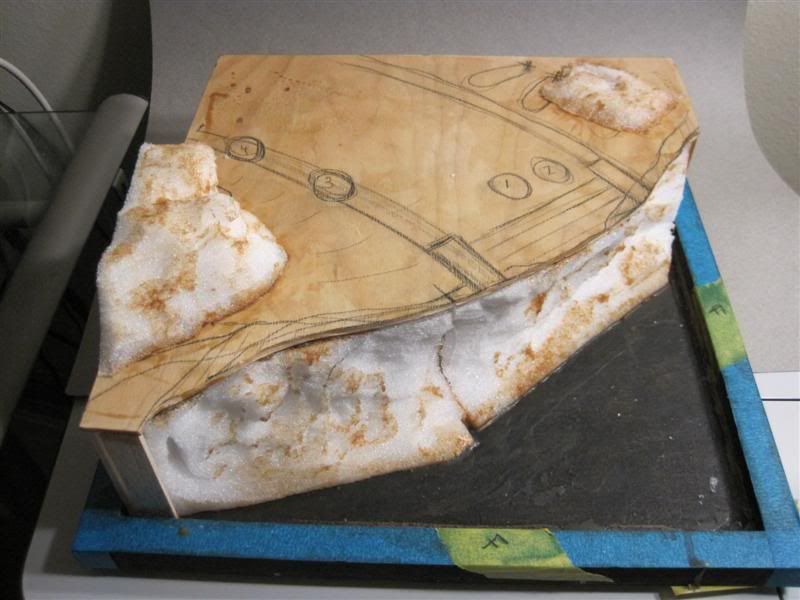
Next I began work on the bridge. At this point I did not want to construct the entire bridge, just the main supports. Details like the hand rails, planking and damage will be added later.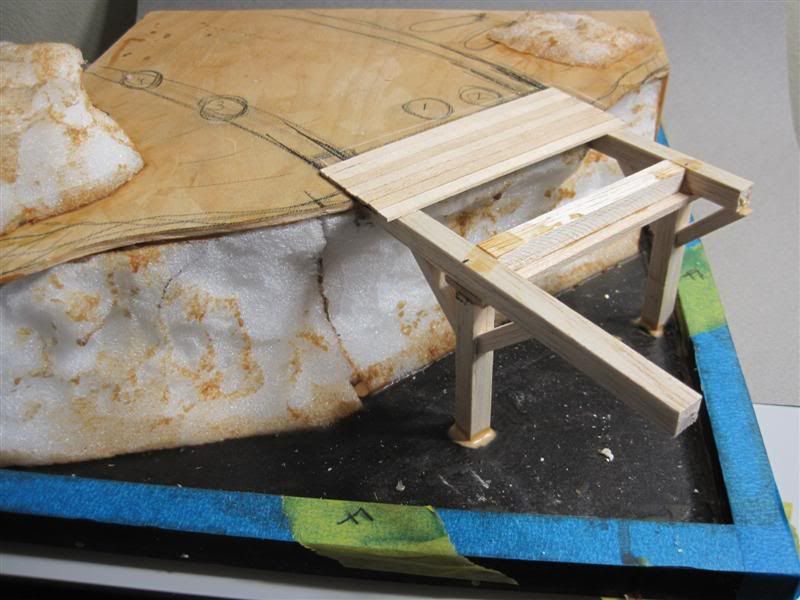
Then lastly I finished off the landscaping by adding the plaster.
For this I used Hydrocal Lite (mixed with double the recommended water)
I use the Hydrocal in various ways, from pouring it on directly to adding dried 'clumps'.
For the cliff faces (and for other more prominent detail) I tore up small section of paper towel, coated it in the Hydrocal Mix and then applied it to the the model.
Allow for 40+ hours before painting!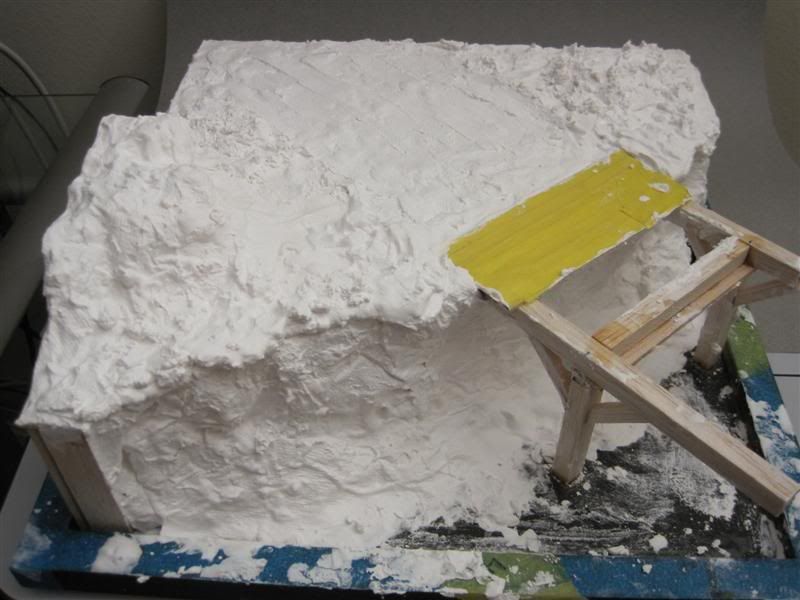
That's it for now. Next major step is to get the base sealed & painted.
then I will be able to pose some of the figures in the lower section.
The German figures for the upper section are mostly Resin Figures from Verlinden and do not require too much posing but I will be adding other details to them.
Once I have the figures assembled I will finish the Panzer construction.
Lastly will be the painting and detailing stage.
I have to admit that I am really enjoying this build and am happy at the rate at which it is coming along. I have a few other projects on the go but have tried to spend a little time each day getting something done on this Dio.
First up just wanted to respond to Fokker. In my next update I will post some pics and add a list of some other products that I use for terrain building.
For now you can visit for some fantastic products and ideas.
Okay so moving along...
The panzer build is finished. I have left the hatches off for now as they will be posed in various 'open' positions.
The only minor issues I had was getting the upper surfaces of the armoured turret to fix perfectly. A little shim addition, some filler and sanding fixed that.
I left two of the left side panels in the "down" position as one of the figures will be placed in that area.
Glueing all done

Some of the interior/exterior details...
The Radios and Ammo boxes
The upper armor panels lowered on the left. The locks are well detailed.
With the construction complete I started to think about the painting & weathering. I was not happy with the smooth 'plastic' look of the panels so I went around and stippled some Mr.Surfacer 500, covering all the exterior surfaces. This was done with a stiff brush and was a very light treatment.
I then used some thinned Squadron Putty and more Mr. Surfacer 500 to build up some Mud & Corrosion effects. This was done on the wheels, the front & side of the fenders and to the rear, near the tracks.

Painting...
Everything was primed with Tamiya Grey Primer (spray can)
Base coat of ModelMaster Dark Yellow.
Some heavy pre-shading with Flat Black. Most of this is going to be lost under the Camo Scheme. 
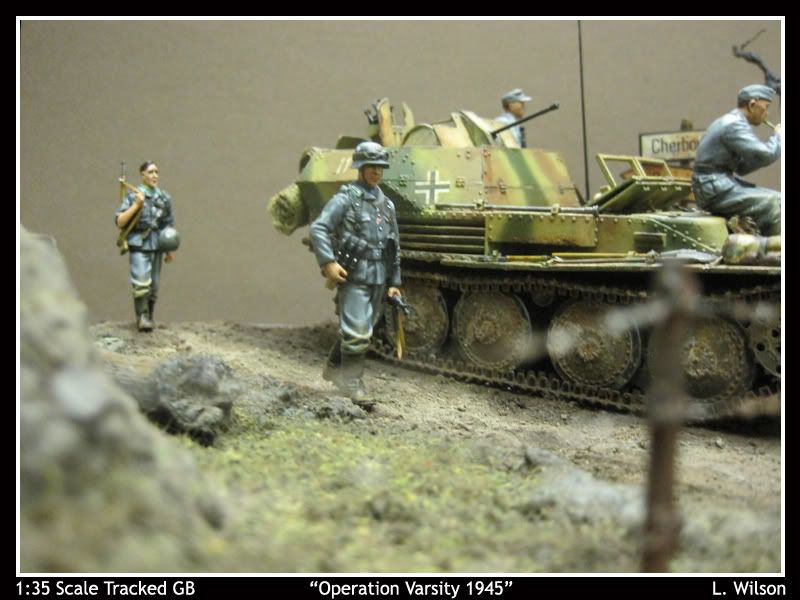
And then I Freehand sprayed the Camo. This version of the Flakpanzer was attached to the H.J Division in France in November 1944.
I started off with a light coat of Tamiya Dark Yellow & 30% White (the MM version looked a little too green). Then added the brown stripes with Tamiya Red Brown. Then the green with Tamiya Olive Green.
Note* Both the Brown & Green were mixed in with about 30% Dark Yellow.
I was very happy with the result and have left the model to dry. I still need to clean up some overspray and then I want to try some post-shading, either with lighter versions of the same colours of with some very thin Tamiya Smoke.
The entire gun section is still seperate from the base but was painted up in the same process at the same time.

Lastly a close up pic of the texturing from the initial Mr.Surfacer application.
The painting is still far from done. I need to finish off the tracks and road wheels and then begin the weathering.
ok... onto the fun part
The Figures
With 10 figures in the dio I was torn as to how much time I was going to spend on them. They presented a number of new challenges for me, mainly the preperation, construction & painting of resin figures.
I started off with the two Resin sets and went to work seperating all the little bits and cleaning them up.
The Verlinden Kits far outshine any of the plastic figures I have seen. The only place where detail was a little lacking was with some of the equipment, like the weapons & gasmask containers.
The other little problem with these kits is that they do not come with any guides for construction or painting.

After asking around and doing some reading I was ready to assemple the four resin figures. I used a small bit to drill holes into all the connecting surfaces of the figures. Then I used sections of thin steel rod to make some pins. These were glued in place with Superglue Gel. 
Finally I had all four figures done. I thenchecked and filled the seams with Mr.Surfacer 500.
Next up... the Plastic Firgures.
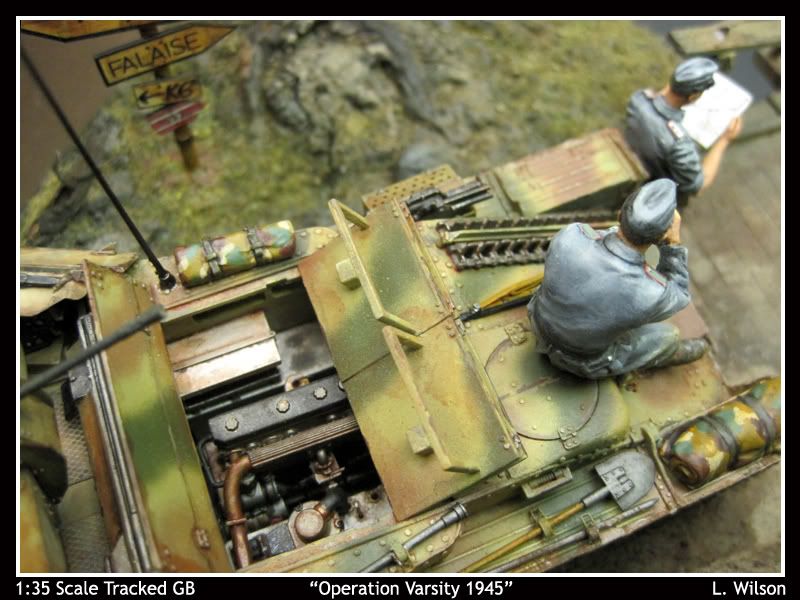
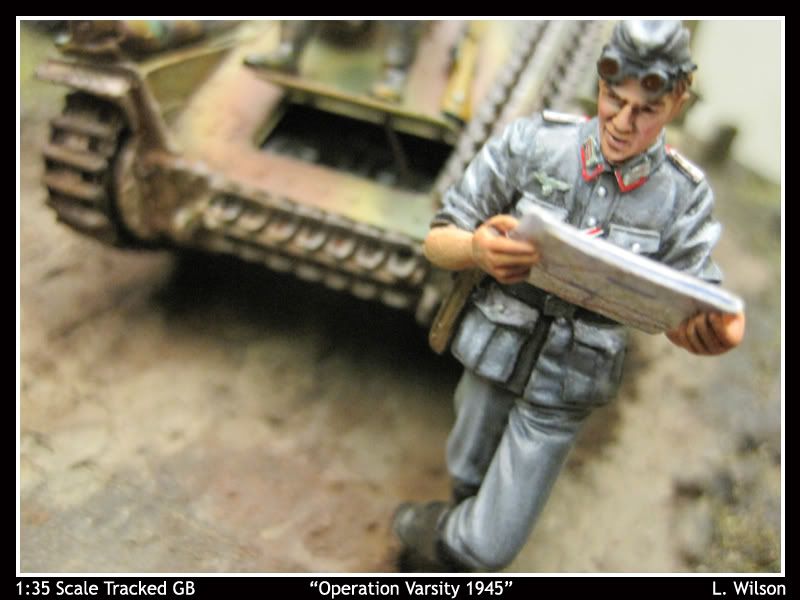
Started off with the Panzer Crew
Great little kit with a number of poses. I was not entirely happy with the kit poses and swopped out a few arms and legs to get what I wanted. this did create a few large gaps though. 
I also fixed up some of the wrist areas. The join of the sleeve protruded out over the hands and needed to be seperated, filed back and hollowed out.
To fix the larger gaps, reset the head angles and scult some additional details I used Mr. Hobby Epoxy Putty. (Milliput is just as good)
Here I have added some hair detail to the two crewmen. I found the Hats did not fit the heads as intended and had the hair helped with that issue.
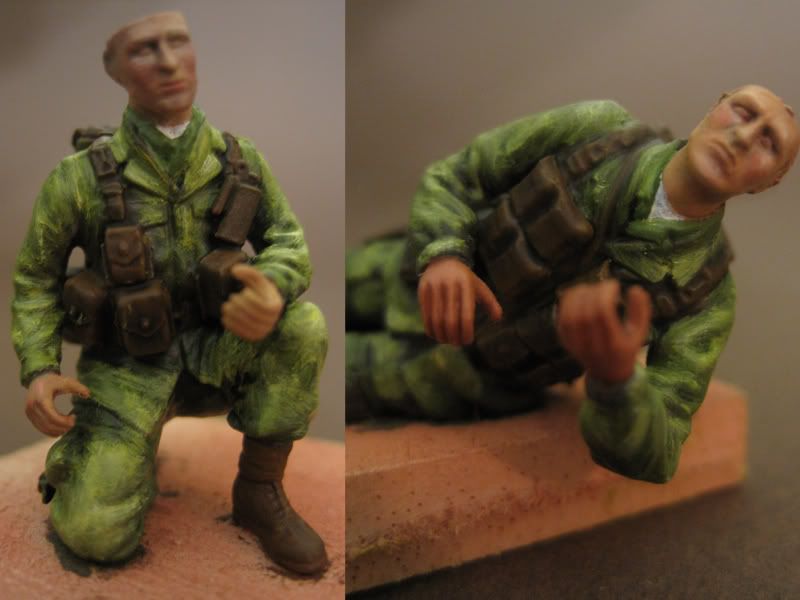
Onto the Yanks...
I was really impressed with this little kit from Dragon. The amount of detail in this plastic kit is fantastic. Almost every piece of gear is molded seperately. the kit also features some unique pieces like the new tooling for the Camo Pants and the Extra Ammo Bags. The only issue I can see so far is that the helmets look a little overscale.
These figues build up without any issues and very minor seam/gaps.
The only things I changed was to reposition thier heads so that they were looking upwards. I aslo swopped out the leader's left hand with was initially holding his weapon. I replaced it with an open plamed hand from a spare kit.
All the figures glued up and ready for the next stage
Next up, adding the small details & equipment.
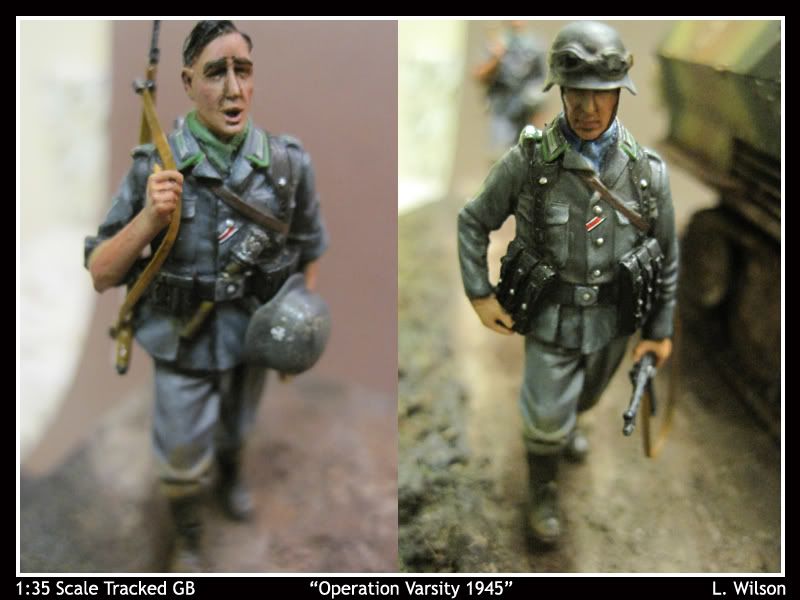
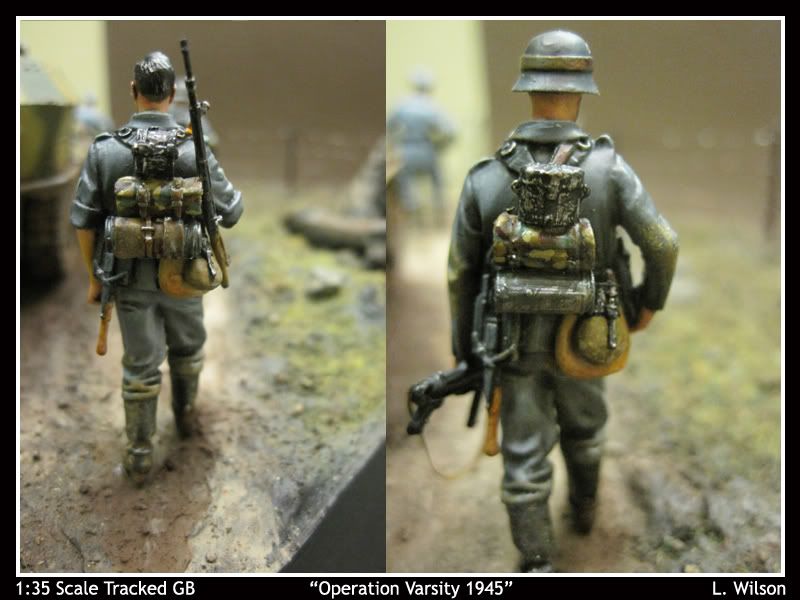
I started off with the two Field Division Troops (Luftwaffe Infantry).
I was not happy with all the resin bits. I used Bread Bags and the Entrencing Tools from a Tamiya Kit. The Gasmask Containers & Mess Kits came from a Dragon Kit. The Bedrolls & Waterbottles came from a Resin Stowage kit.
Everything glued in place with Superglue Gel and smoothed everthing with Mr.Surfacer 1000

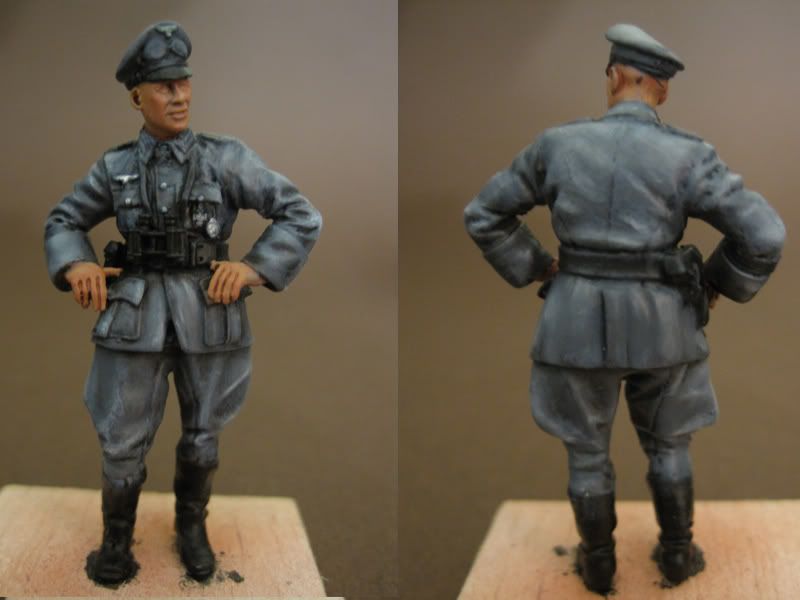
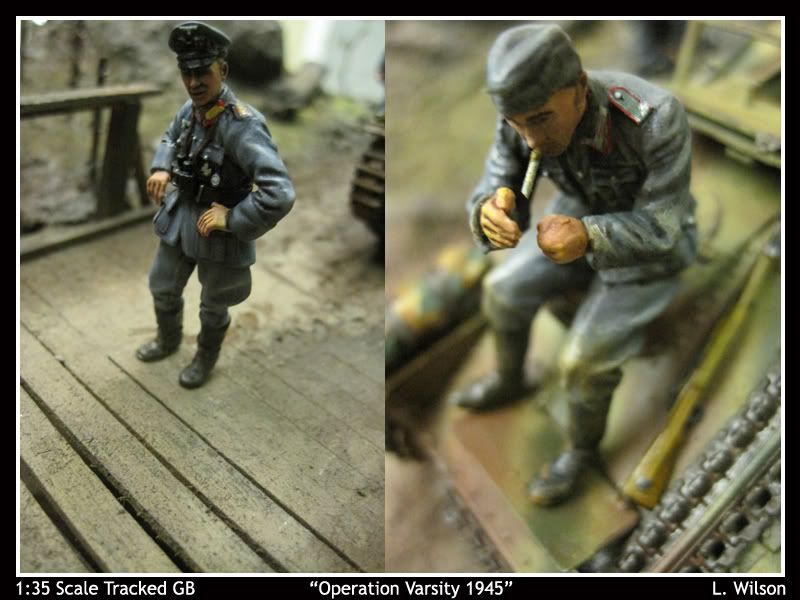
Next I converted one of the Crewmen into an NCO. I removed his shoulder tabs and added a set from the Verlinden Detail Kit - Reviewed here
I added a Binoc, pistol, map & Binoc case from my spares. I then added an Iron Cross at his neck (from the Verlinden Set) and straps to hold the Binocs & the Cases.
The straps were made from paper dipped in Extra Thin Super Glue. Once dry ( a few seconds) they were cut and attached to the figure wil some Gel.
The smoothed everthing with Mr.Surfacer 1000

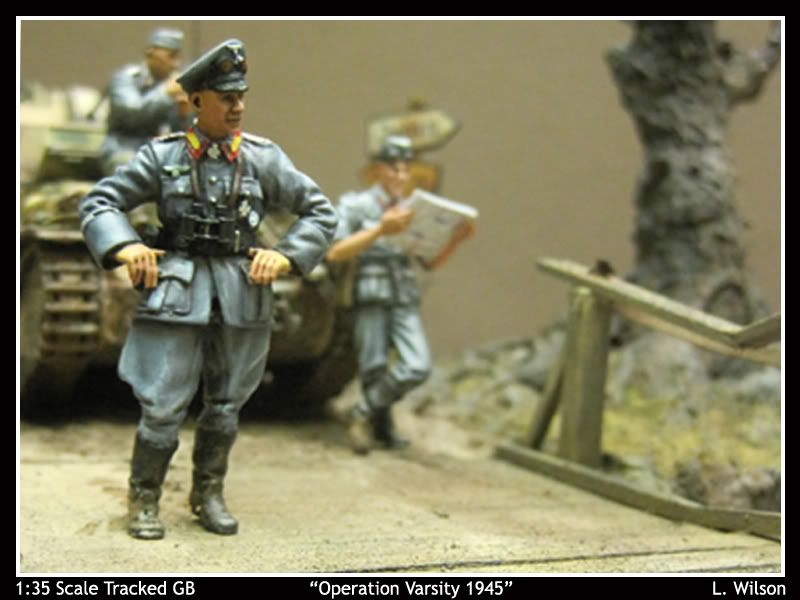
The officer was given new PE shoulder tabs, an Iron Cross, a Knights Cross and a Campaign Medal. The Binocs come from a Tamiya Kit. The resin Holster is a kit part.
The US figures each came with differnt equipment but were all heavily laden for the task ahead. All had large rucksaks, baynets, extra ammou pouches, first aid kits etc etc.
The joins were then filled out and smoothed with Mr. Surfacer 1000

That's it for now the figures are ready from priming and painting.
I have finished the seemebly of all the minor bits & bobs for the tank and will finish painting those up before adding to the Panzer for final weathering.
The base is going to be worked on next and that will be the focus of the next update.
This is going to be a simple update, just to show you where the build is at the moment. If needed I can go into further detail in a following update.
First off, the Tank. I am still wanting to fix up some of the over spray but am waiting for a new nozzle for that. I painted up the tracks with some base metallic shades and repainted the rubber wheels.
Then I went around a dry brushed the model to bring out the raised details.
This will be followed by a few washes at a later stage. Not too much here, still testing the waters as I go
Next the base. I sealed everything in with 3 coats of Polyurethane and left it to dry. Then quickly added some acrylic base colors to cover the white and help with the composition.
Then I glued in the side walls and filled the gaps with wood filler.
Next up is working on the terrain and finishing the bridge.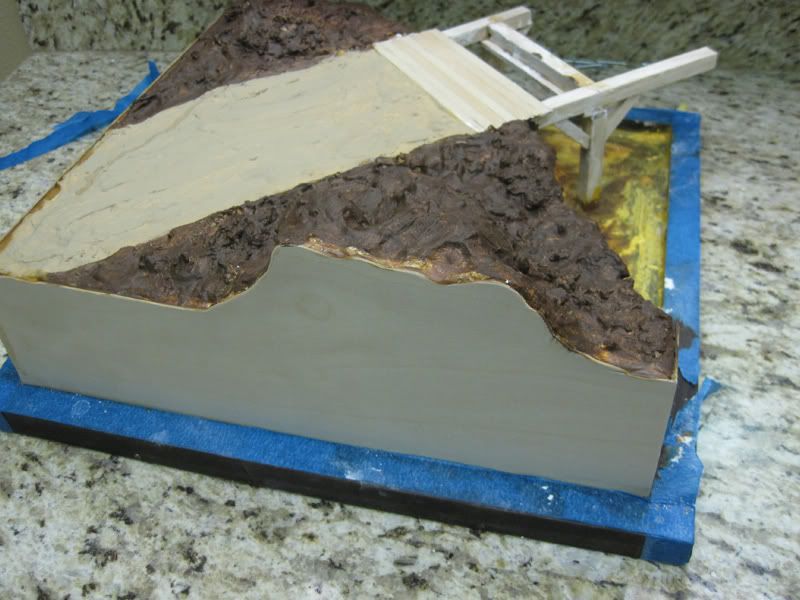
Now onto the figures. - Please excuse the pics they were rushed in poor light!
I went with a new approach for these figures and used oil paints. I have to say that I do far prefer them above any other method I have used before.
For this update I am not going to go into too much detail about the painting.
So far I have just painted the faces - without the eyes, beard growth and deep shadows. I have painted the uniforms and some base tones for the equipment.
I my next update I will use one or two figures and go through the process in a little more detail.
After painting up these figures I can really understand how someone can spend so much time on perfecting just one figure
The entire collection...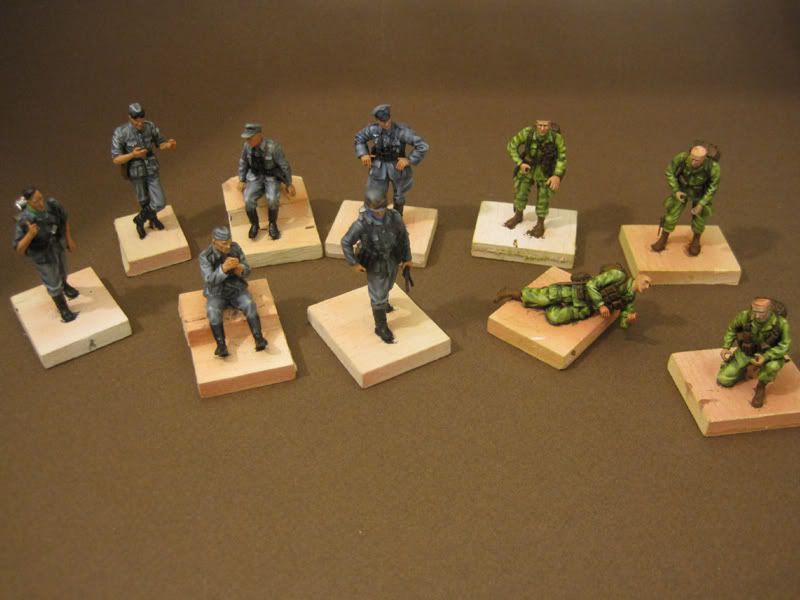
Some front/back detail pics. Note the blending/shading. Much easier to get smoother transitions with the oils. The silver 'metal' parts are base colors to be covered later
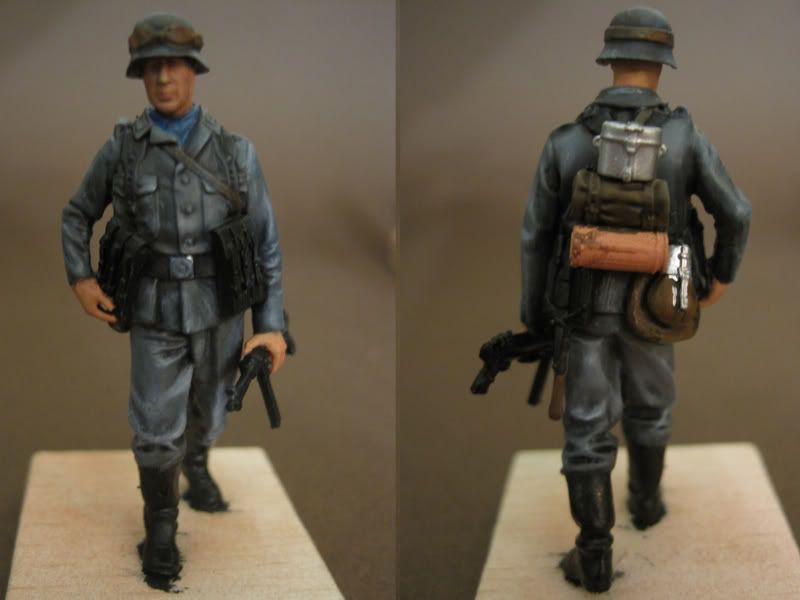
Some facial detail - minus eyes etc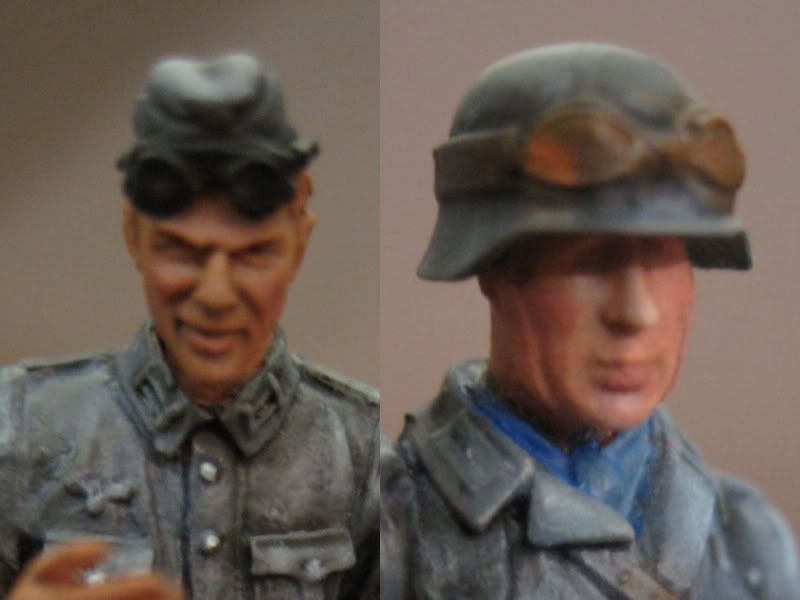
The US guys were a bit of a pain. I made a mistake when laying down the first base color - I did not add white and the color changed to a bright green! This will be fixed with glazes, washes and a flat coat.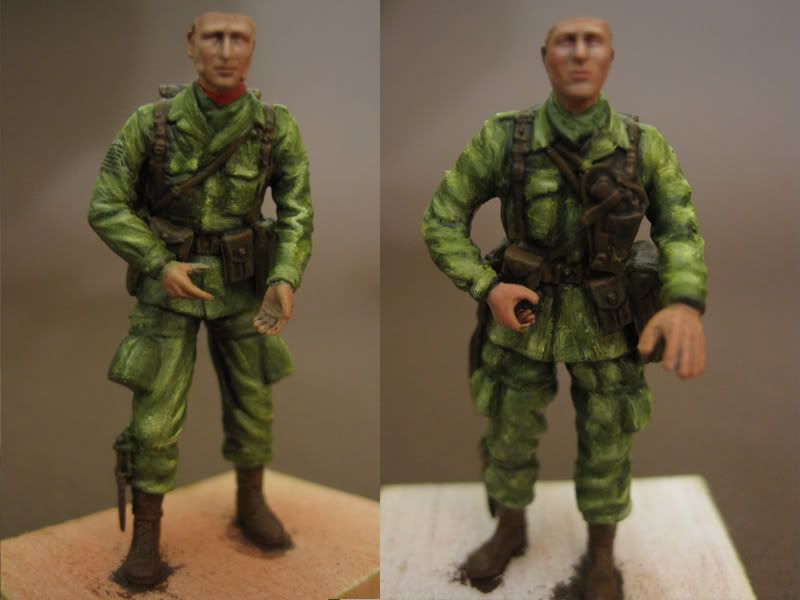
OK so that is it for now. I am going to be working full time on this Dio until it is done and will be adding a little break down of how I painted the figures.
OK so I wanted to quickly go through my process for the figure painting.
There are so many different ways to go about painting figures and the results are all different your best bet is to just keep experimenting until you find something you are happy with.
The following are just some of my opinions based on my experiments. I am in no way an authority on figure or oil painting.
~ I bought a few Hornet heads and tried out some techniques with oils before moving on to paint the full Dio figures. That helped a great deal in saving time and effort. The quality of your finished head will affect the quality of your painting, as it will be easier to establish shadows & features.
~ Technique is even more important than finding the right colors.
- Keep the oils as thin as possible.
- I use one small brush to apply the paint in 'micro dots' and then another to blend in the paint using a
stippling motion with the side of the brush.
- Allow plenty of time between layers for the oil to spread and settle. It is like an 'Auto-Blend'
- I am constantly lifting off paint. Oil spreads like crazy and you really only need minuscule amounts to cover large areas.
- Keep relaxed and only paint when you are in a chill mood. I know it sounds silly but it will really affect your work. Take frequent breaks and if you mess up, leave it until the next day to fix it.
~ Paints & Colors
-I use a variety of oil paints from really expensive whites to cheap no-name colors. Each color seems to have its own 'personality' so you will have to experiment to as you go along. I would suggest buying a set of cheap oils and just messing around for a bit.
-I use tiny amounts of purified(?) Turps for thinners. And I decant the turps into smaller containers for each colors/cleaning etc.
- For Base Opaque Tones like uniforms etc mix in some white. The color may look right on the palette but it will be affected by the layers beneath it.
- Keep the paint as thin as possible and never "paint" only blend and stipple
- I usually mix up a base flesh tone (Yellow Ochre/Burnt Sienna/Titanium White - 2:1:4 Ratio) and then add either White or Raw Umber for the Highlights and Shadows
- For final highlights I just add a speck of pure white and lightly blend it, leaving most of the paint to blend itself.
- Use as much reference as possible - ie the Osprey Books modelling figures.
I am using a method roughly based on M.J Bannermans technique
Some pics to go through the process step by step.
1 - Clean the model of dust/grit/paint etc.
PRIME with 2-3 Light coats of TAMIYA FINE WHITE. (I found that using anything else gives me a rougher finish.)
Once dry, check for fine detail and clean as needed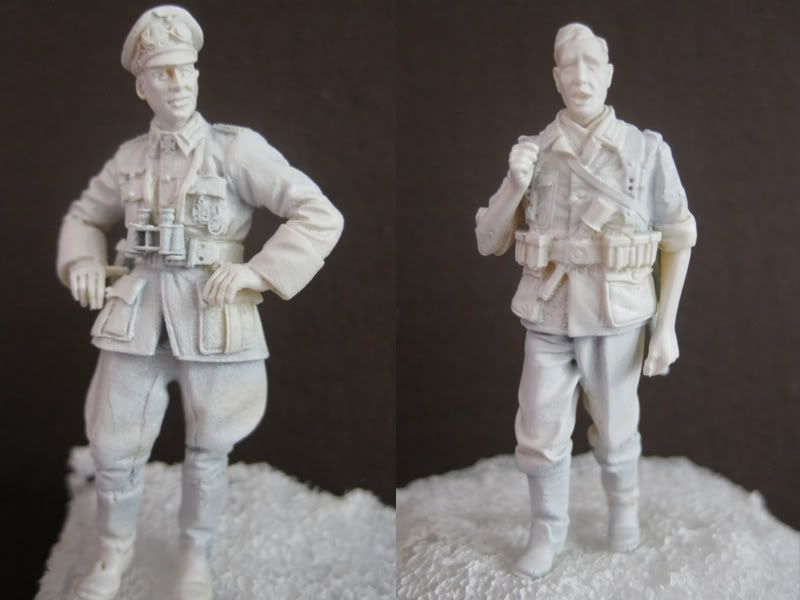
2 - BASE Coat - This will go a long way to affecting your final result.
I use two colors - TAMIYA FLESH & MM WARM FLESH TONE. Apply with Airbrush in light coats. I use this to cover entire model.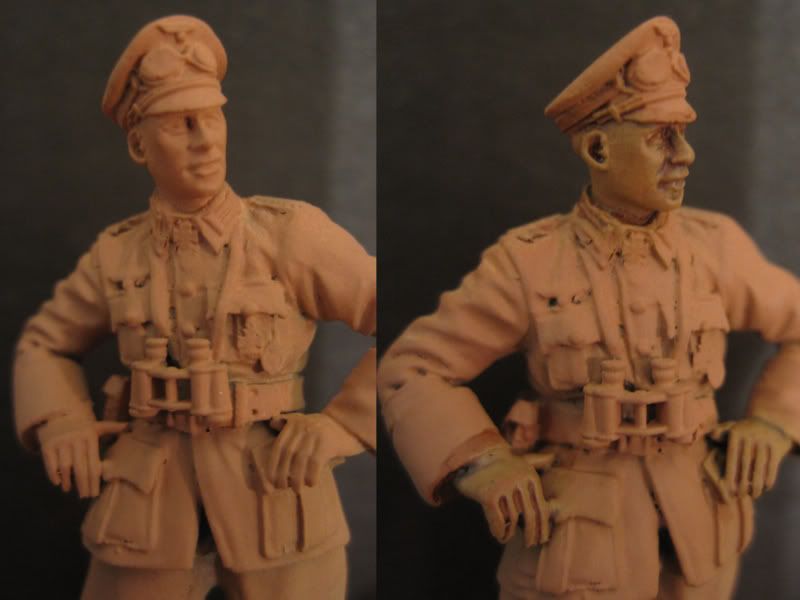
3 - SHADOW WASH - use a thin was of raw umber and turps to apply a very thin wash to the face. leave to dry! Repeat as needed to establish your darkest areas. I have also used the Citadel washes and I think I prefer them. A 50/50 ratio of the Black & Mud applied lightly with a brush. Leave to dry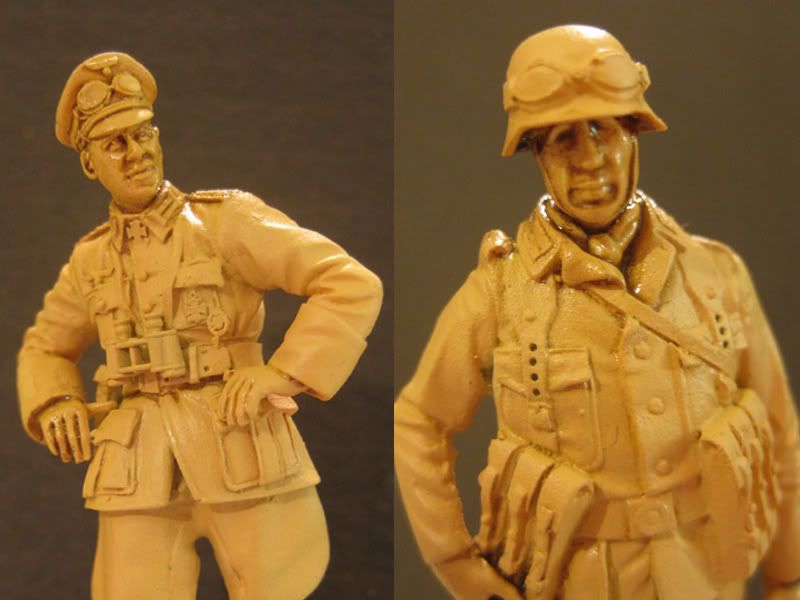
4 - FLESH TONES - The first application of the oil paint. Add on drops of the Base Flesh Color and spread it around the face. Avoid painting over the shadows. Keep the paint thin and transparent! Let it dry for 2-3 hours and then repeat where needed.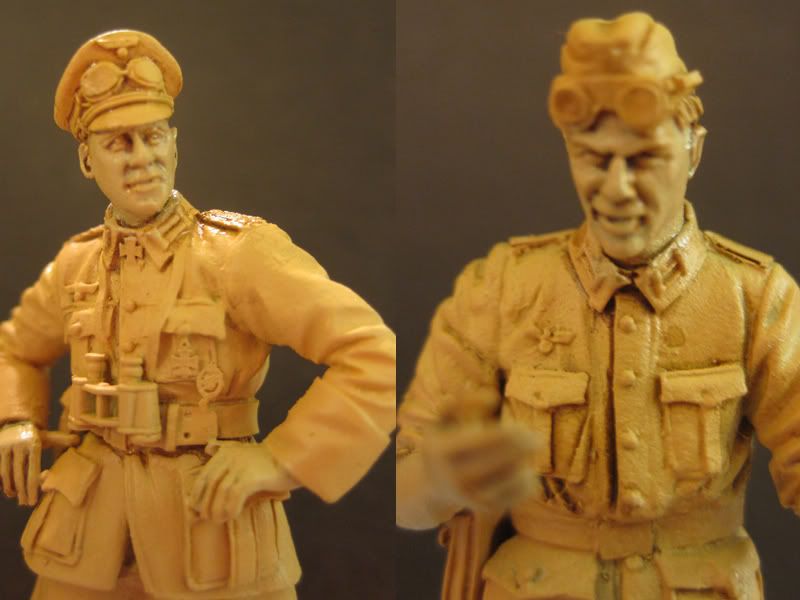
5 - Using Acrylic base colors I paint up the uniforms (do this while the oil dries) This helps to make sense of the facial tones.
- Once the oil has set I add some burnt sienna to the flesh tone and paint in the cheeks.
- I then add a drop of white to the highlight areas and lightly blend. Leave to dry.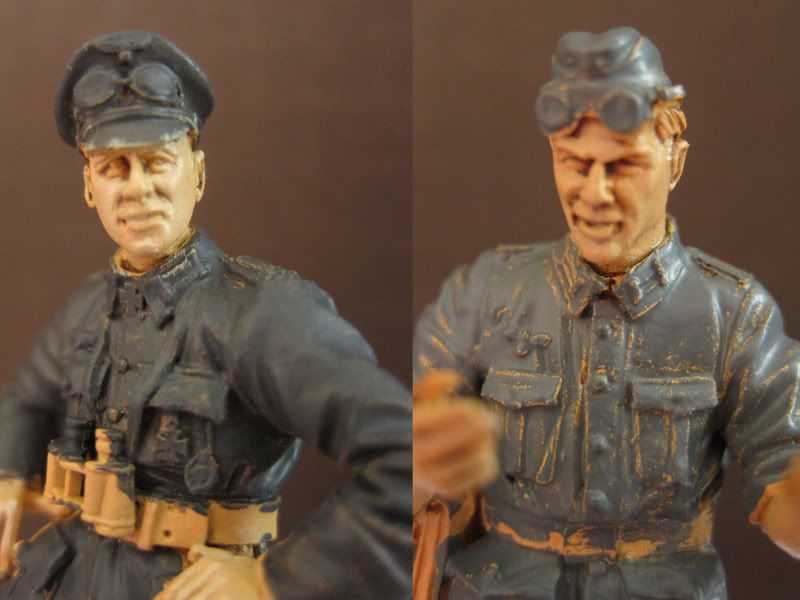
6 - Finish off the uniforms and the various equipment.
- At this stage you can add the beard growth with a thin mix of Grey & Umber. I choose not to do this yet as I found it muddied up the flesh tone a bit. I have waited until the flesh tones were completely dry before adding the bread & eye details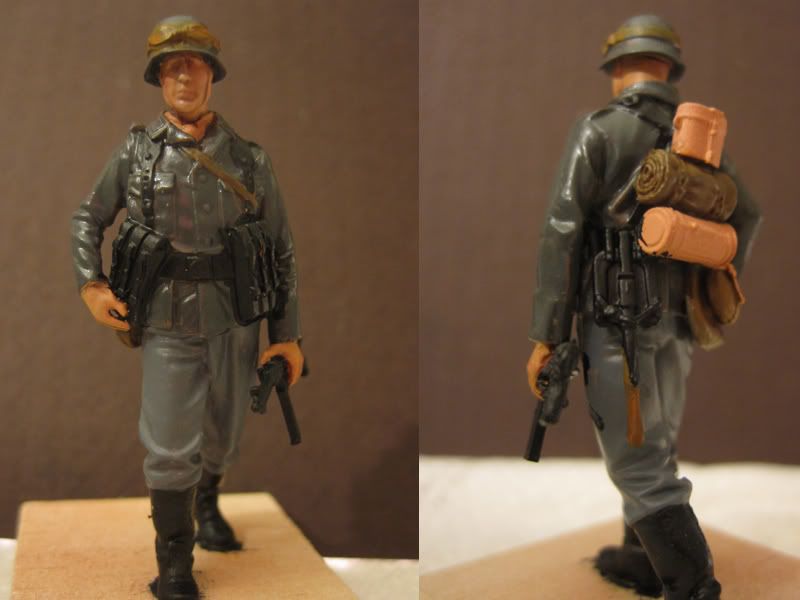
7 -Repeat the process off adding last highlights to the face. You can also add a very little of the cheek color to the lower lip. Blend and leave to dry.
- Use the same process to paint up the Uniforms. You can keep making adjustments by adding and removing paint for the next few days until you are happy with the results.
- I use Silver Enamel for the metal bits and then give them a wash with black/blue and brown. Details will be picked out later with Chrome or Silver.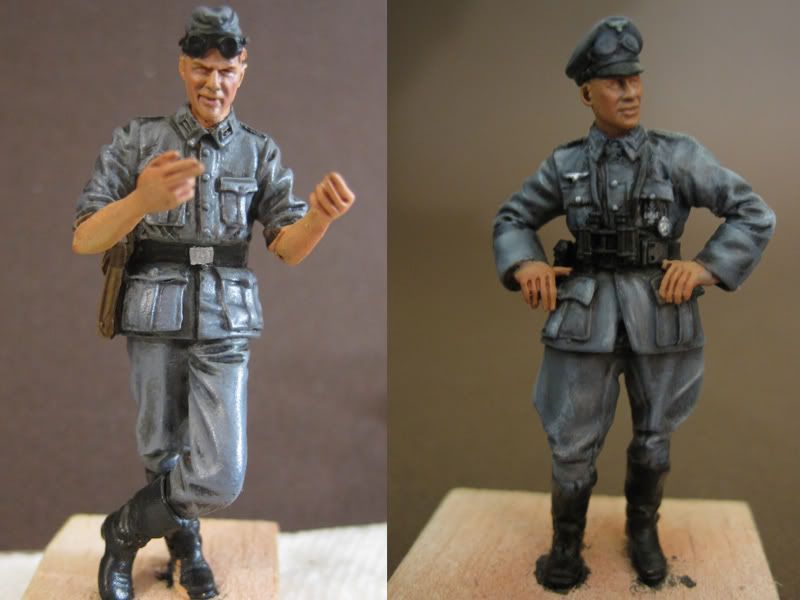
Next up is painting in the eyes, adding some 5o'clock shadow and finished the gear. I will also be fixing up the green of the US soldiers and reworking some of the highlights.
Hope that helps with some of your figures. I have really enjoyed the process of painting these figures and I am keen to try some of the Larger scale products.
Quick update as I finalize the elements before beginning on the ground cover.
First up, I wanted to add something on the left side of the road. I was thinking of an old rusted barrel but ended up scratch building a little Ammo Cart. The idea is to paint it up as a rusted wreck that has been long abandoned, partially hidden in some tall grass. I used some spares, styrene and Balsa. The ammo crate & accessories come from the Academy "German Accessories" kit.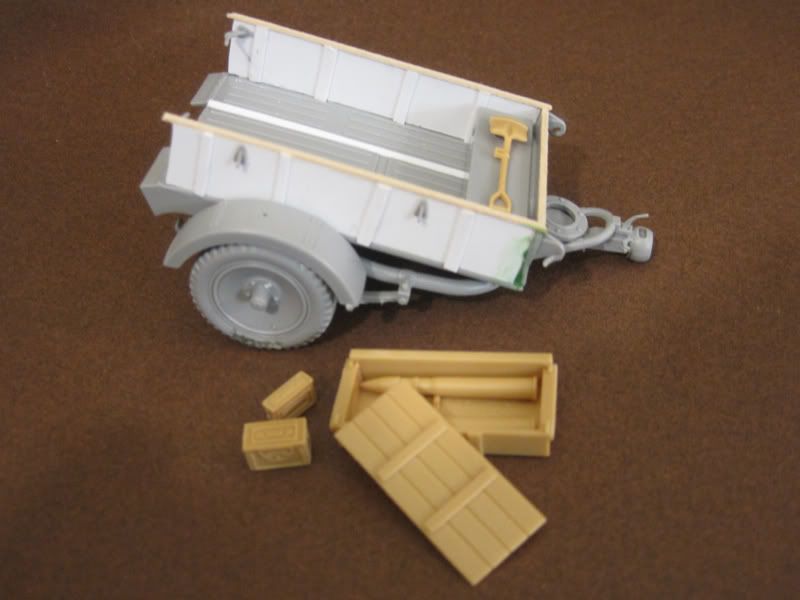
I wanted a tree on the right side of the road and decided to model my own from putty & clay. Started off with a wire armature and then added some quick air drying "Paper Clay". Once this had set I coated everything with some wood glue and left to dry.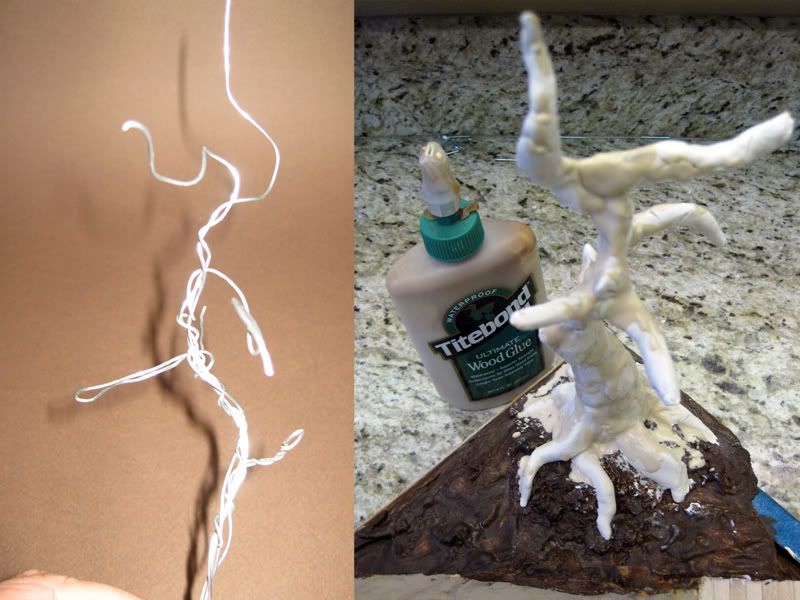
I then used some of the Modeling Paste to set the tree into the landscape and to even out some of the terrain. 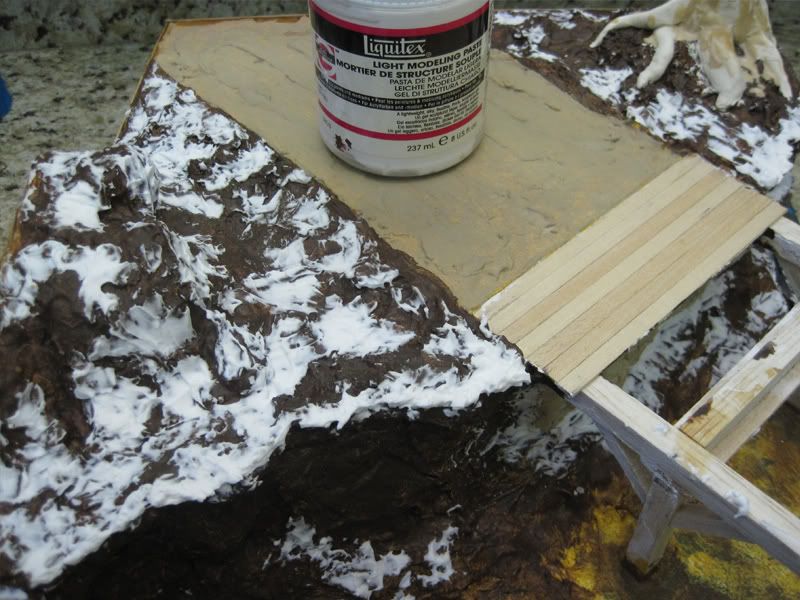
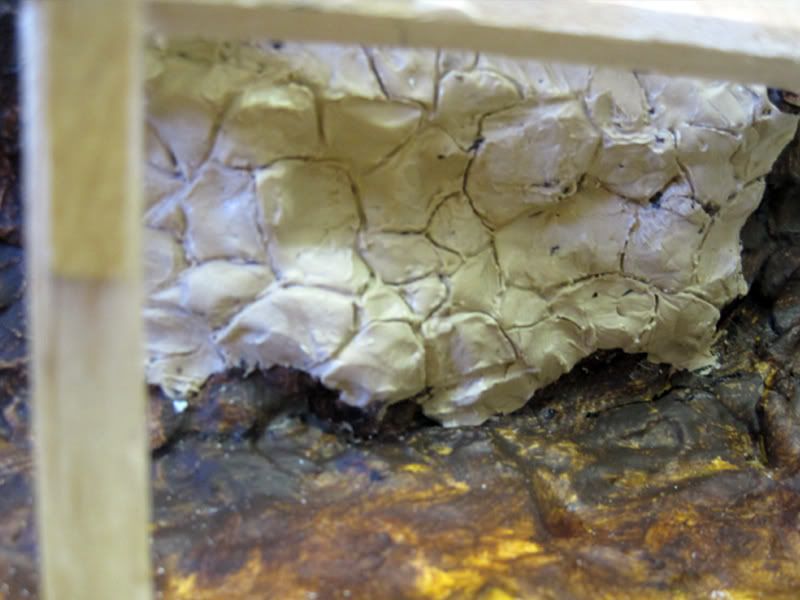
Next up was the area under the bridge. I wanted to add some sort of support for the structure. I mixed up some Epoxy putty and rolled out flat. Then I lay it over the plaster wall and once it had set for a few min, I carved out some crude stone shapes. This will be refined a little later.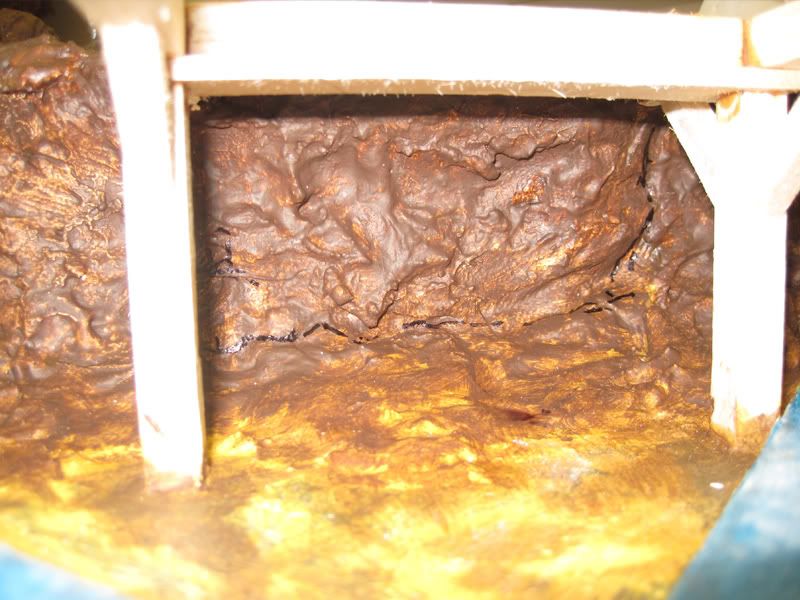
A quick check on the composition. At this stage I think I might leave out the ammo cart.I don't want to Dio to be too busy and I think there is a lot going on in there already. I feel the tree sets the mood for the piece and the figures help tell the story. 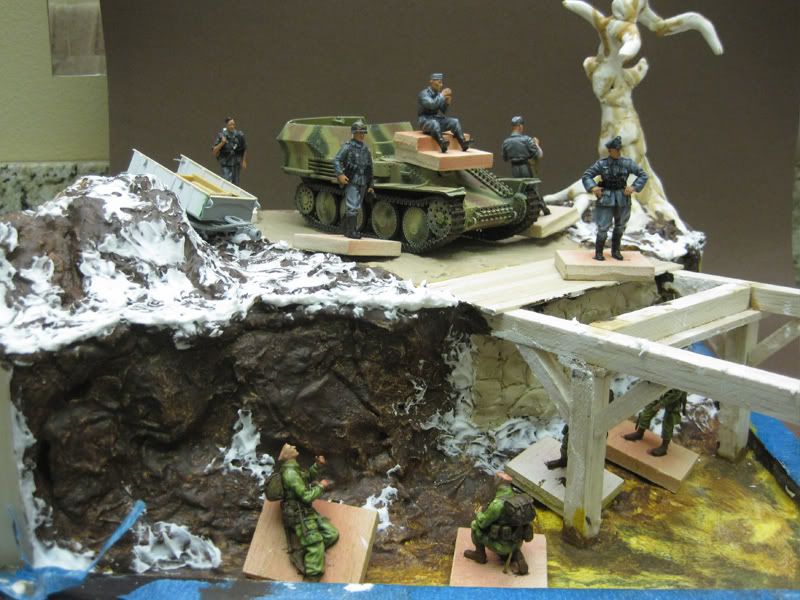
Then I finished up the bridge by adding in copper pipes, hand rails & nails. Still needs a little more work but I am quite happy with the result.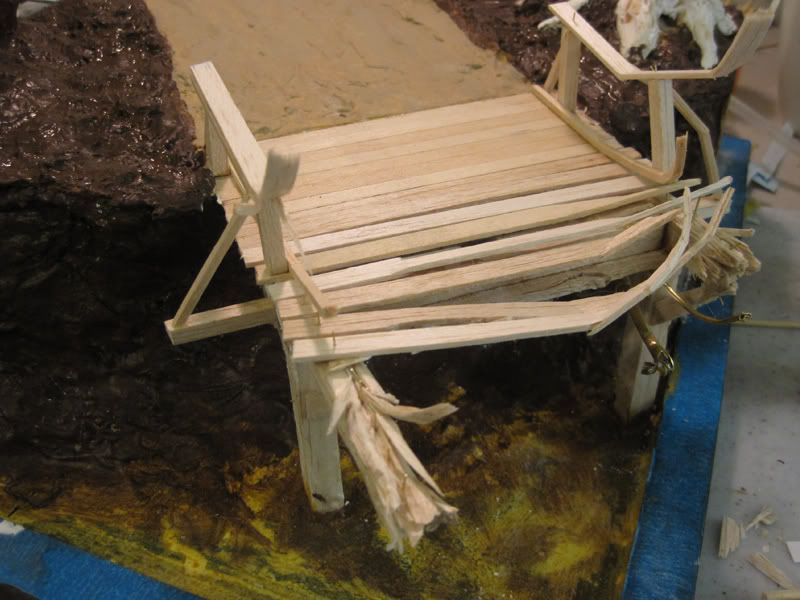
Lastly I added some roots to the embankment with small rolls of Epoxy Putty. I then added a second set of thinner wire armatures to the tree. I coated these with Superglue Gel and then fleshed out the limbs with the Modeling Paste. I will repeat the step one more time with some super fine wire.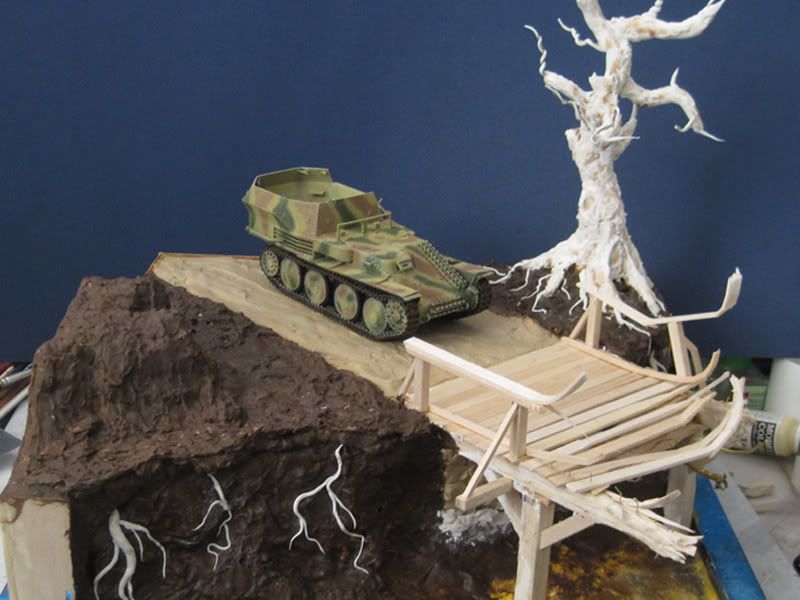
that's all for now... I have to go build the wife some shoe racks... but at least I get to go to Home Depo and pick up the base board for my other dio
Quick update on the base work.
Finished off the the ground detail by adding in some logs, roots and rocks.
Added minimal amount of large talus.
Finished off the surface of the road, adding in wheel ruts, mud deposits and tracks etc.
Then I added some Fine Talus to select areas sealed with Fixative
Installed the poles for the fence.
Gave the entire model a quick coat of Medium Grey.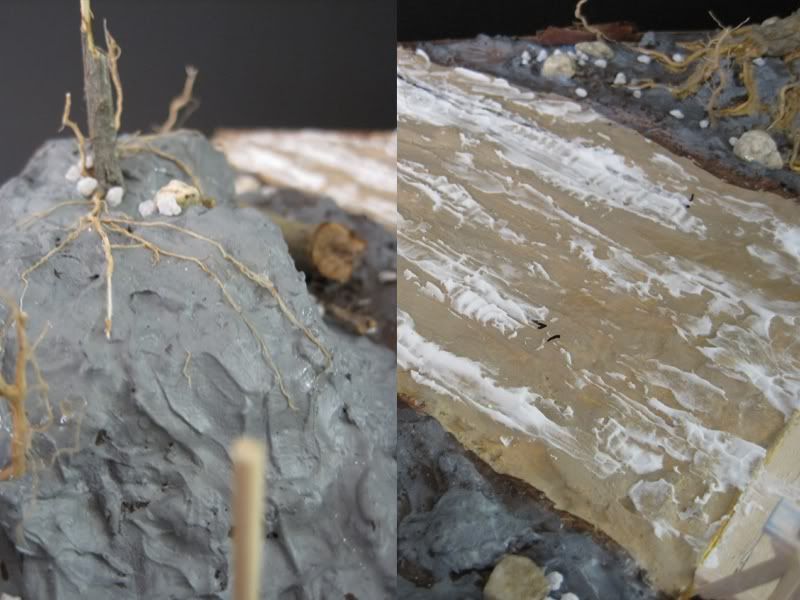
Then went to work on finishing the tree with a last round of wire armatures, filled out with Gator Glue and Mr.Surface 500.
Finished off the Bridge detail by adding metal plates, bolts and straps with Lead Foil.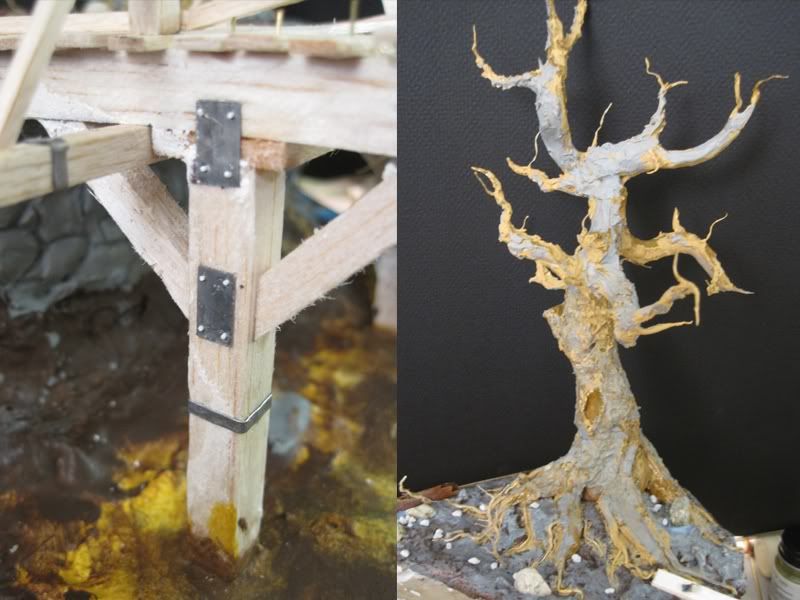
With most of the base detail work finished I moved onto painting.
I started off with giving the entire model a coat of Flat Black.
The side walls were brush painted with Acrylics - Mars Black and Raw Umber 1:1
After the Black I began adding washes of various tones & Textures. I used the PM washes, RUSTALL washes and some Grays I mixed myself.
I used a wet brush to remove some of the wash from different areas.
Once that was dry I sprayed on some Scenic Cement and then added some dirt to the model. (RUSTALL comes with a bottle of fine dirt which works well for this) I covered all the earth surfaces including the wall of the embankment and the river bed.
When that had dried I added another round of washes.
Then I repeated the above process to add some Flocking (Static Grass) to select areas.
While that dried I added the PE Barbed Wire (from Verlinden).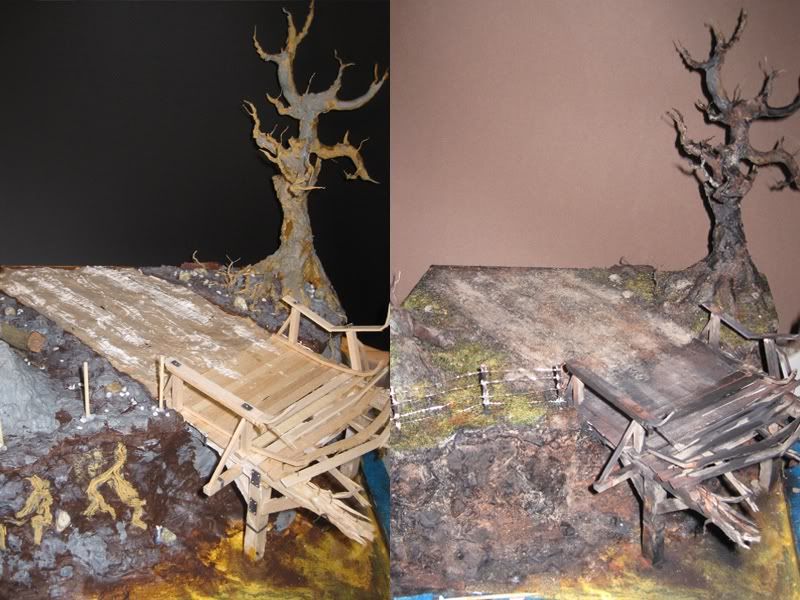
Next up: adding some color with the Airbrush; finishing off the Tree & Bridge;
painting the river bed and highlighting certain details.
Have to note here... after 72 hours of using every method I could think of, my water effects are still not 100% dry!!! I have some cloudy patches which may clear up in the next day or so... but asi am out of time for this GB I am uploading pics of the model as it is now.
I have to say that I am very happy with the way it turned out. I really did learn a lot during the build.
I hope you enjoy looking as much as I did building
Overall Base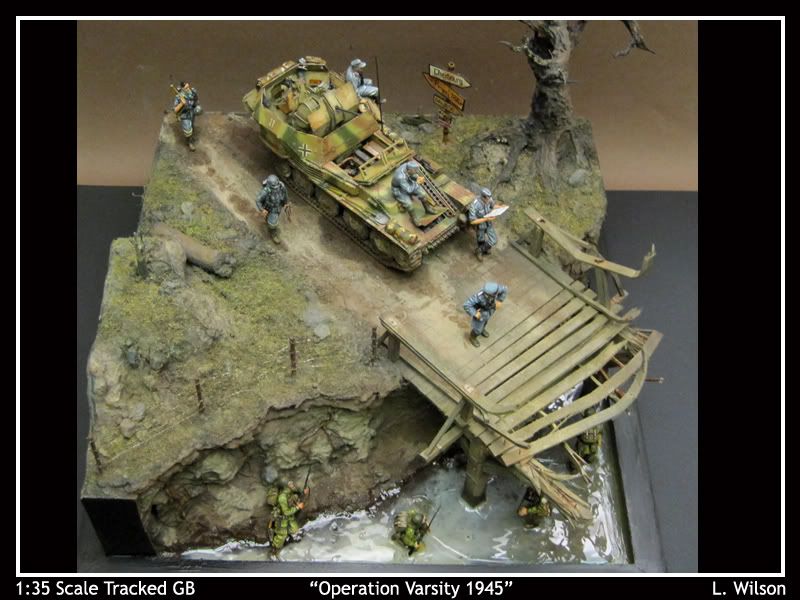
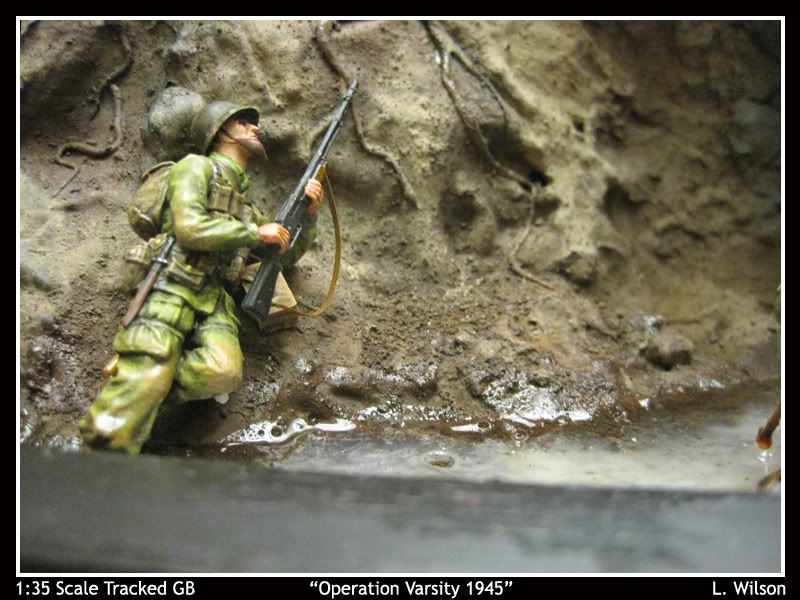
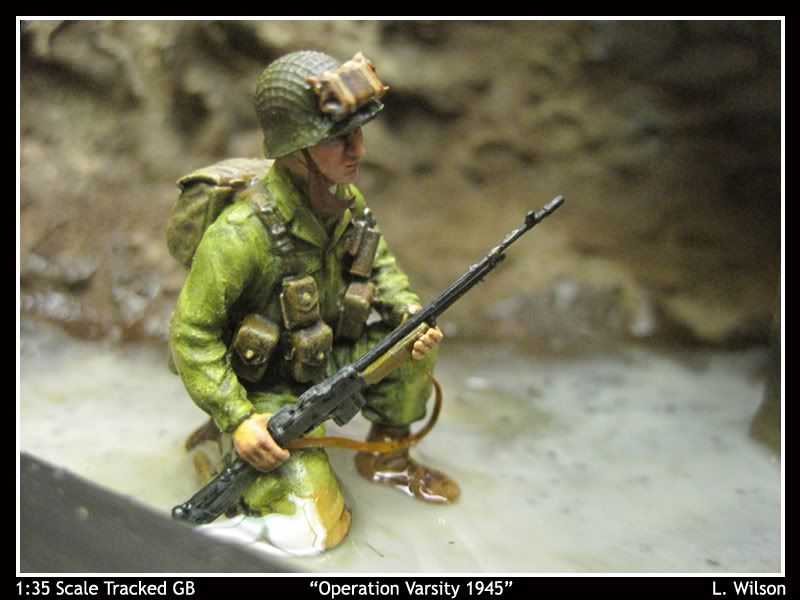
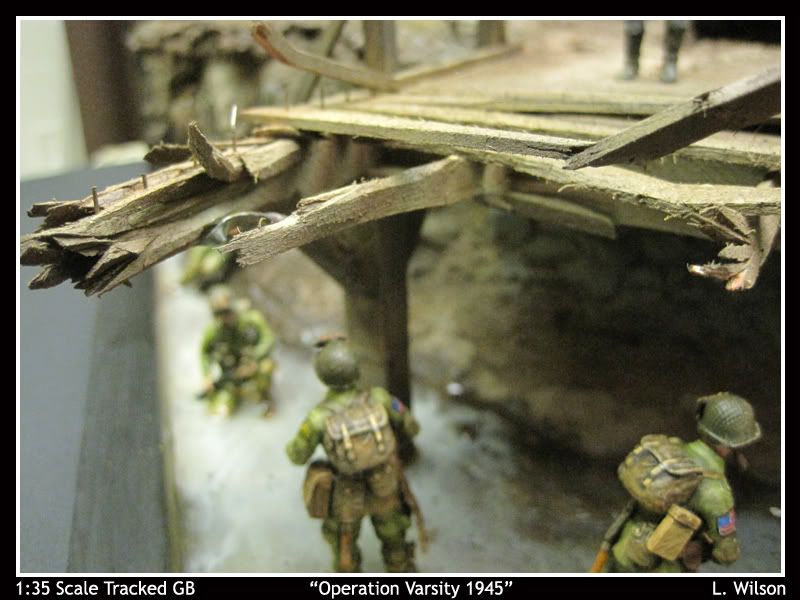
U.S. Troops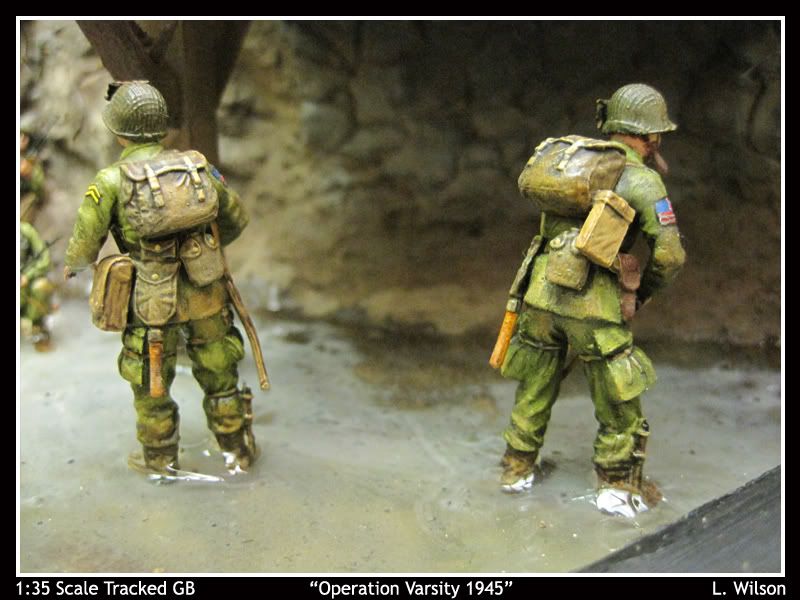

German Troops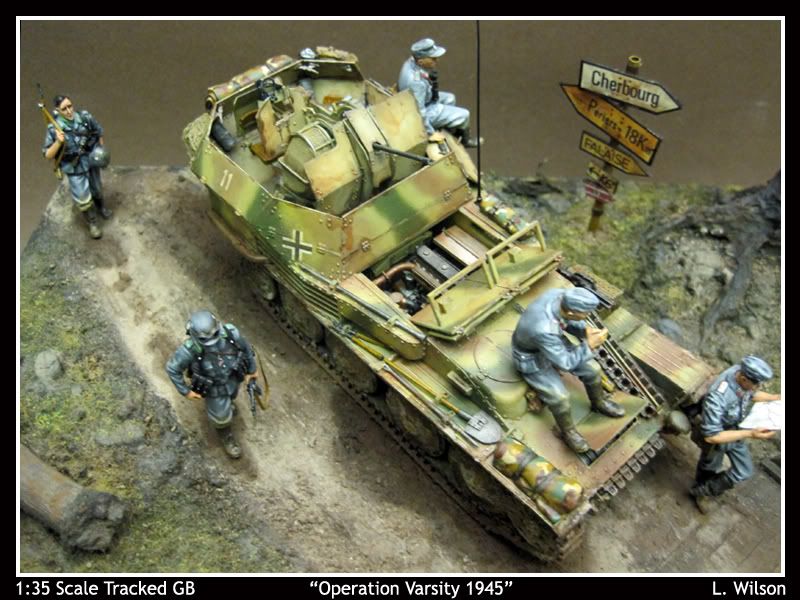
Many thanks for all the support & kind words during the build!.


Store


Kit Reviews

Video Builds


P&M Models