


I picked this kit up at Telford last year from a £5 bin just in front of Phil's stall in fact I almost gave him the fiver! Some guy on e-Bayer has been asking £77 Buy It Now for the past 6 months, he's had no takers yet, I wonder why?
I am planning to do it OOB but the decals are looking very dodgy so may have to revert to cobbling some stars and bars from the spares box. If I have to do that then I go for the two tone blue and white scheme.
The nightmare is going to be masking all that cockpit glazing with Tamiya tape. Well here goes.....
As part of my current penchant for all things old fashioned (especially Monogram, see the shed wall shot, most of those boxes have kits inside) in my modeling endeavors and the fact that US Navy aircraft of the 1941-45 Pacific Theater are really my bag, I,m going to do the OS2U-3 Kingfisher first. 
The battered box, but all the bits were there.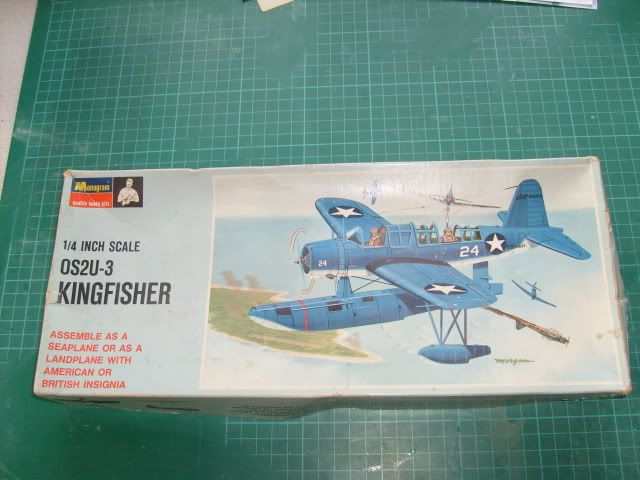
The sprue shot, some bits had come loose over the years, to be expected I suppose and the previous owner had stuck the struts into the wing floats and then given up.
A very simple kit with loads ( for the time ) of interior detail but as far as today goes a bit minimalist. The seat belts are molded into the seats and painted up.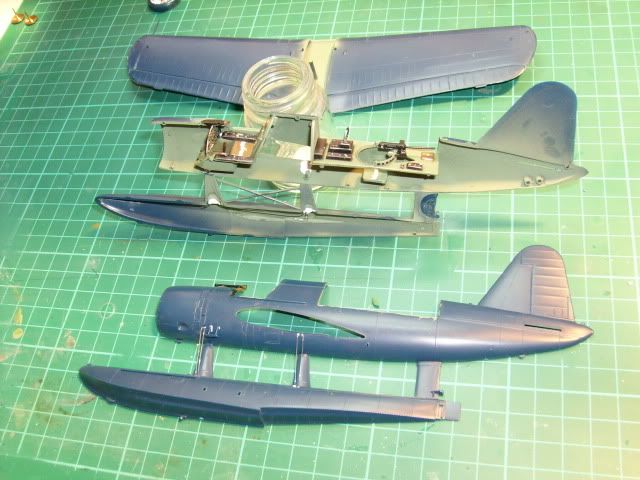
The main float is molded as part of the fuselage.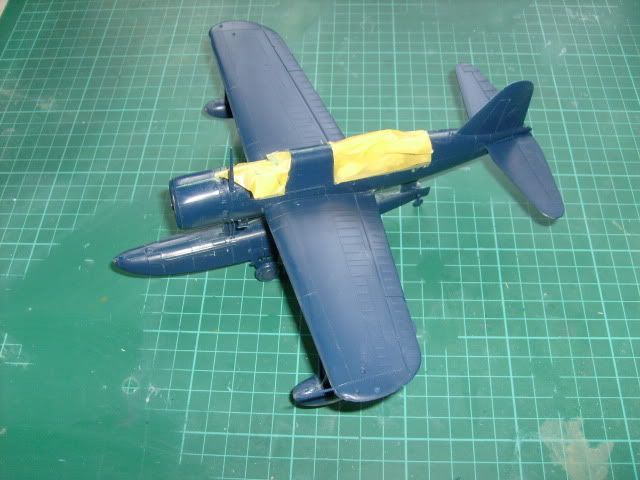
Got to this stage surprisingly quickly for me.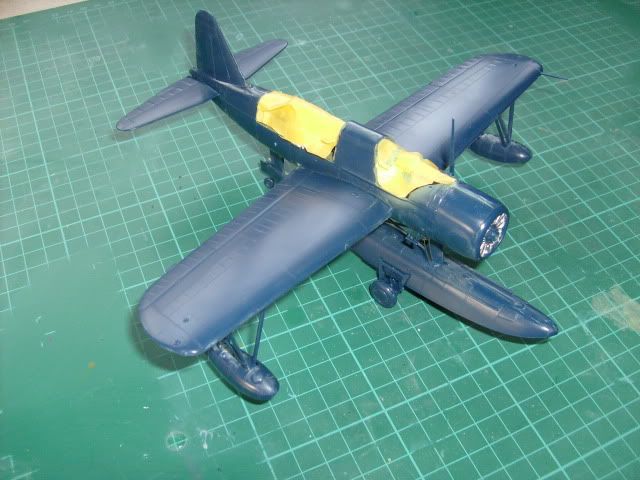
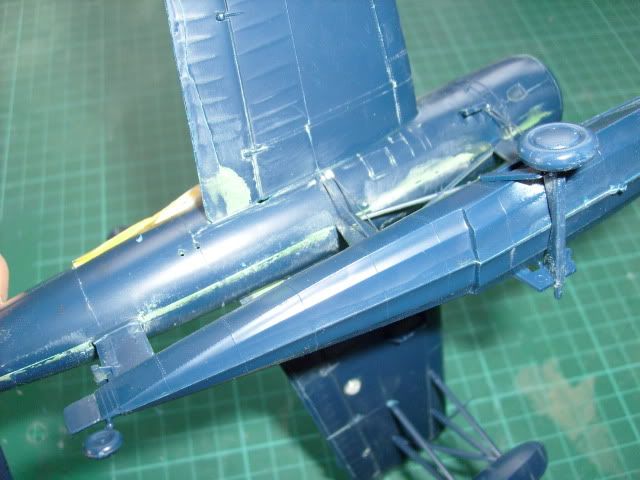
This shot shows the flying wires that the modeler has to thread in through drilled holes.
A bit of final rubbing down to do and then the dreaded masking of the glazing prior to painting.
Firstly it was time to give the airframe a priming coat of Halfords white primer.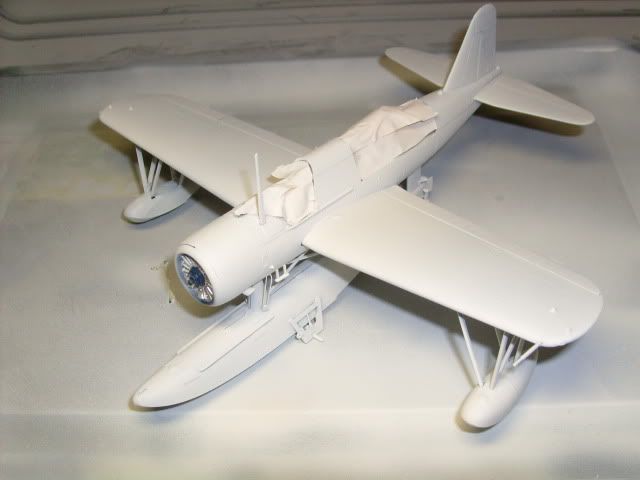

Then the bit I had been most dreading the masking of the canopy. There is very little available for this kit, after market wise, especially no canopy masks ! So it was out with the Tamiya Tape and a very sharp scalpel.

I cut very thin strips of tape and positioned then close up to the framing marked on the canopy, it is very fiddly and took all evening to do. Then I used Maskol to paint in the rectangles made by the tape. This time I've painted Maskol on the inside too, to stop any over spray contaminating the inside of the canopies. They will be White tacked in place for the spraying process.
Next came a bit of preshading and walkway spraying, with the fabulous Valejho Air Matt Black.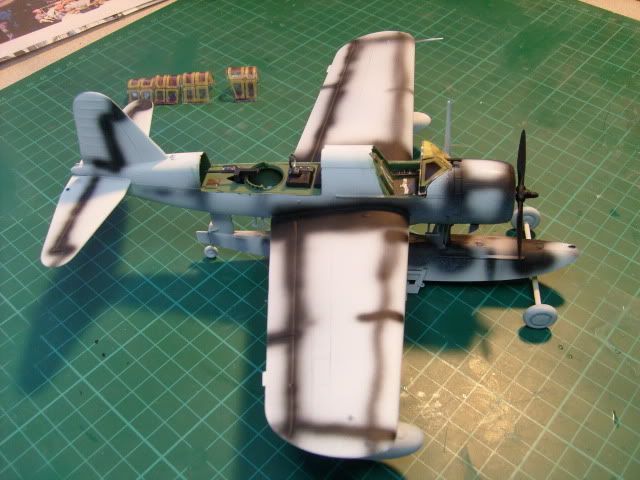
It was at this stage that I cut out one of the British decals from the very old decal sheet, as I put the roundel into water it started to crack up. I tried again with another one and the same thing happened. There are no wartime markings decal sheets available for the Kingfisher so a re-appraisal was required. I'm afraid that I am going to have to deviate away from the OOB theme and cobble together some markings from the limited 1/48 spares box.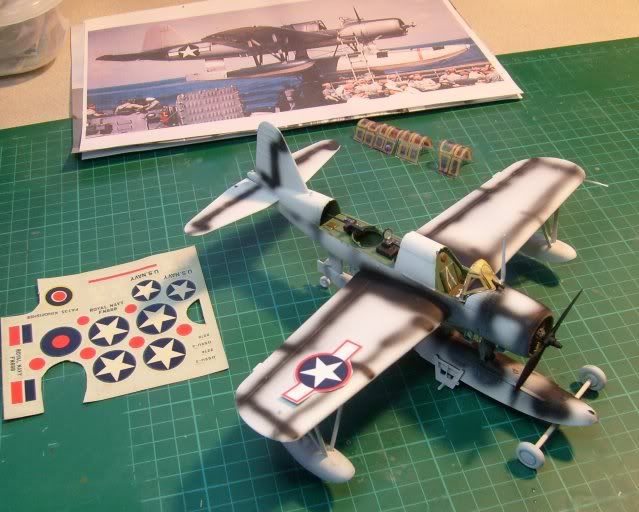
Although I had wanted to go for the early war neutral grey scheme I'm going to have to go for the two tone blue and white scheme. This one looks okay, I like the red surrounds on the stars and bars.
Time to mask off the walkways now and get the red stripes on the float.
First I sprayed the underneath with Gunze Sangyo White which dried a lovely gloss. Realised that I should have left the wing floats off until after painting. The cockpit framing was painted interior green so the framing shows through the correct colour from the inside. Tacked the cockpit glasing on using little worms of White Tac to stop over spray seeping into the cockpit.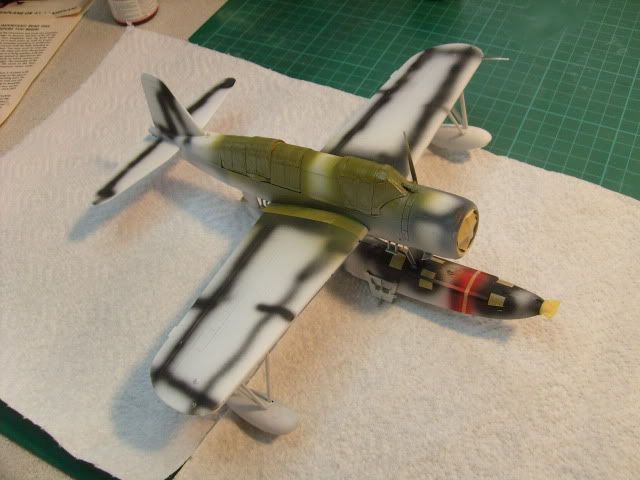
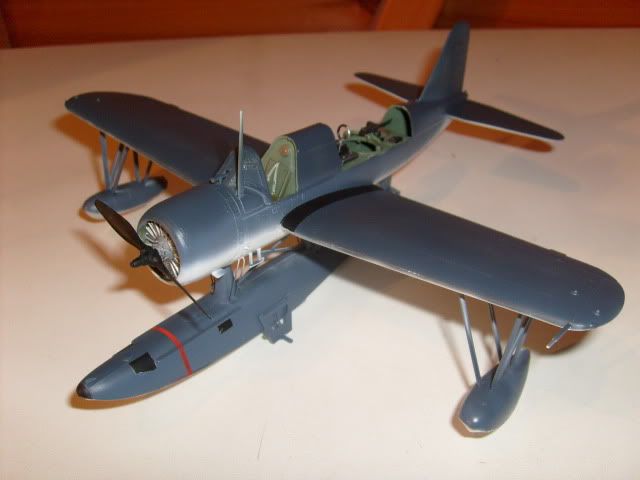
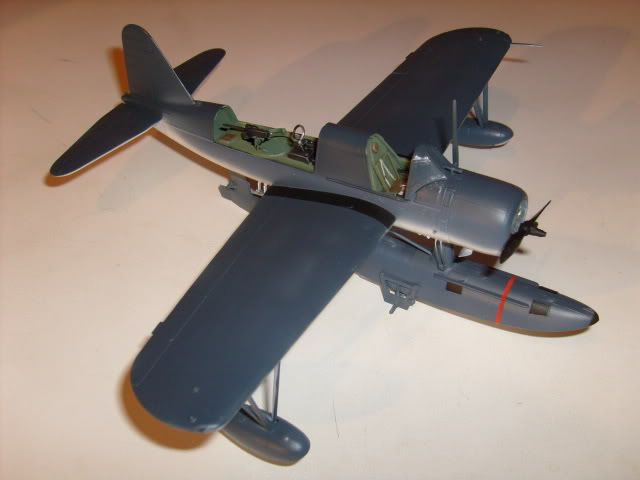
Next I sprayed the Sea Blue again using GS paint.
I then masked most of the white areas and put the GS Intermediate Blue on.
I took the glazing off to check for over spray, the WhiteTac worms had worked.
I'm pleased with the results so far, this is my favorite part of modelling when the fruits of one's labours start to become apparent.
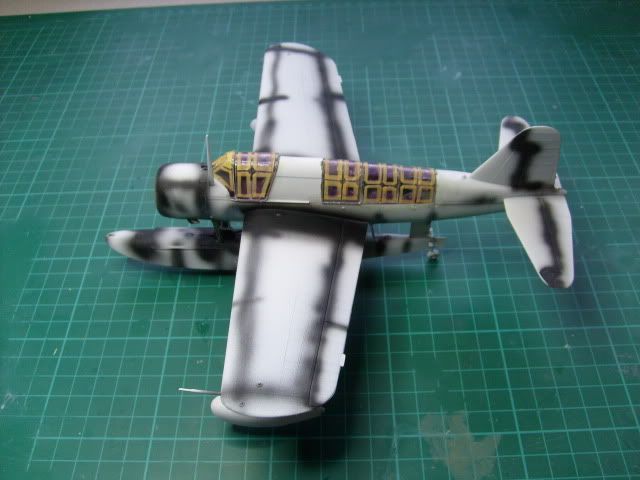
Well after studying all the "sources" I wasn't happy with the GS Intermediate Blue, it just wasn't light enough. So I experimented a bit with some enamels and ended up trying Humbrol Intermediate Blue H144 and Xtracolour X308 Korean Blue mixed around 5:1 to get a better looking colour.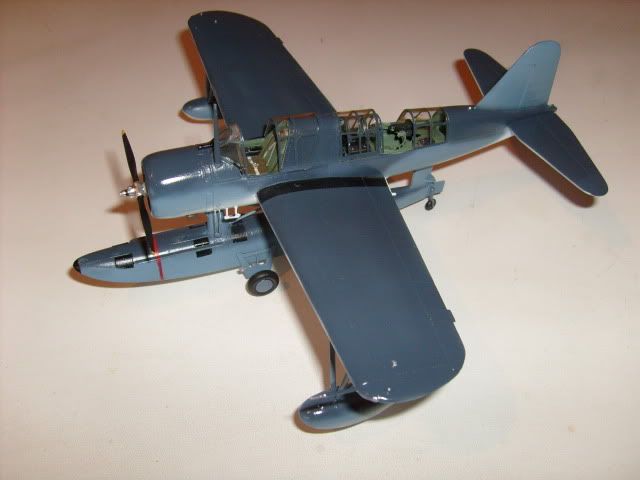
The painting is turning out to be a bit of a nightmare as the float gets in the way and is very difficult to get at, especially under the belly of the fuselage.
Once the main colours were on the prop and other details such as exhausts were painted.
The cockpit glazing was also given another coat of Klear and Gator Glued in place.
Almost time for the decals to go on.
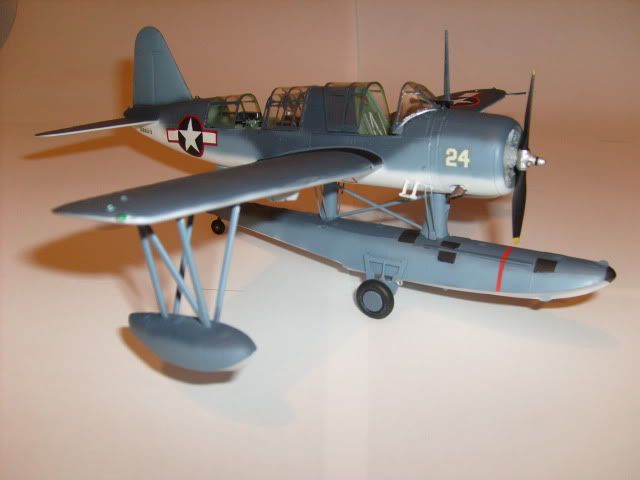
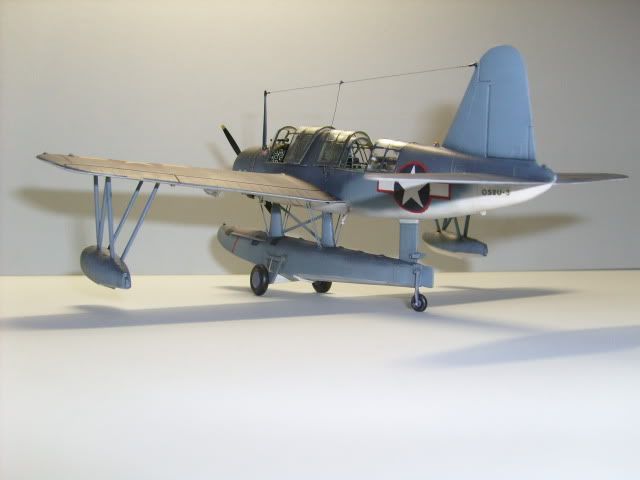
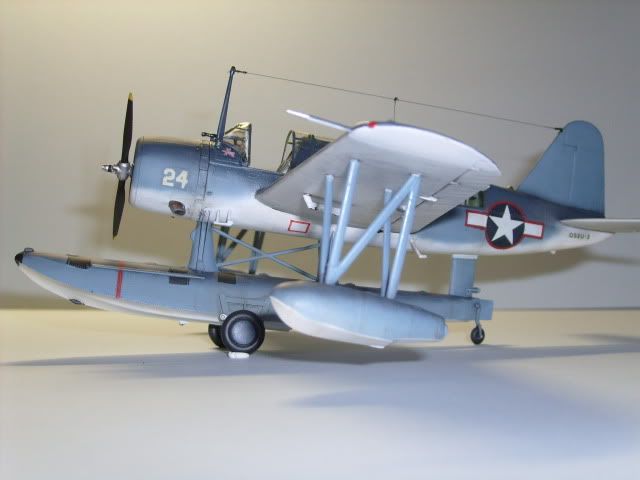
Well after another 3 hours in the shed more progress has been made. It seems it's 2 steps forward and one step back with this model. After another coat of Klear and removing the starboard wing float assembly, it was time to put on the cobbled together decals. I have decided to build it as "White 24" shown in the B/W Photo below. I believe that it is from Battleship Observation Squadron 2 (VO-2) operating off the USS Pennsylvania.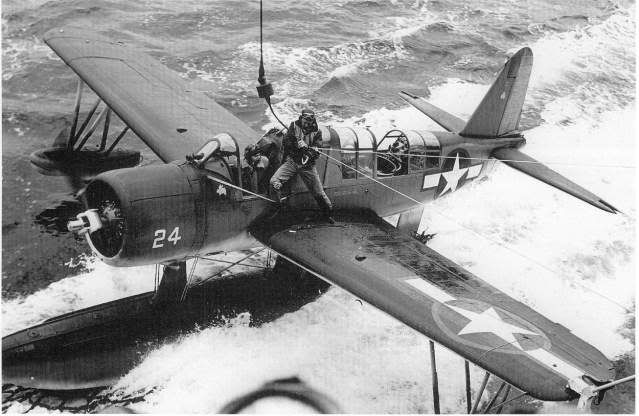
Things to note here I can see a very small flying pig logo just in front of the windshield and possibly on the vertical fin, I'm assuming that it will be pink and black and it will have to be hand painted onto clear decal I think. Notice how clean the aircraft looks. On nearly all the photos I've seen of US Kingfishers from the period they look amazingly clean with very little weathering. They suffered really badly from saltwater corrosion so were washed after virtually every sortie, hence the lack of dirt, grime and weathering. I have even seen a picture of one taxiing through a water jet spray system mounted into the concrete on a land base.
So the upshot is apart from some control surface joint emphasis with oils I won't be going OTT with washes etc. Besides I love that clean look on this model.

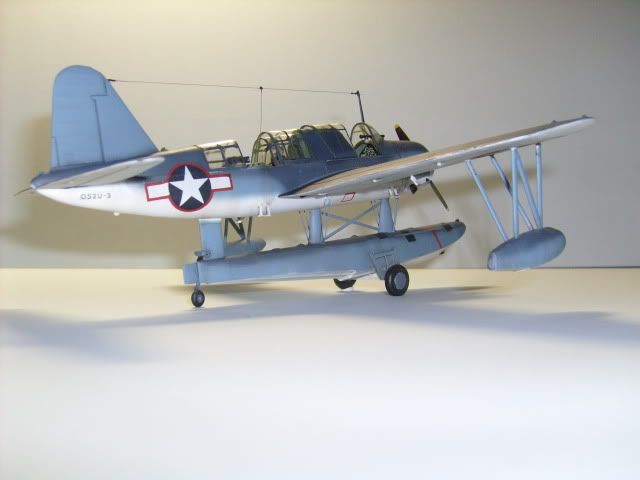
Welcome to the reveal of my OOB (Almost) Monogram OS2U-3 Kingfisher - The kit was released by Monogram in 1967 and was said by Scale Modeler in it's June 67 edition "By any yard stick the Kingfisher is the best plastic aircraft kit produced in this country (USA) and, for that matter, the world". I suppose for it's time it was! It had a detailed cockpit and gunner's station and some fine engraved as well as raised panel lines.
I purchased this kit for £5 from a bargain basket at Scale Model World at Telford in November last year. I have a love of the old Monogram kits and their basic simplicity and innocent gimmickry, but I also remember well as a kid, 45 years ago, not being able to afford to buy them.
I intended to do a straight forward OOB build but was thwarted by the ancient decals that flaked away when immersed in water. So a compromise was made by using the attractive red bordered stars and bars from a Monogram Pro P-38 Lightning kit, sadly these also started to break up when applied.
Tamiya liquid cement and CA were used to stick it together and Squadron Green Puttie was the filler. It has been painted using a combination of Gunze Sangyo, Xtra enamel and Humbrol enamels. A coat of the superb Xtra Acrylic Matt Varnish was used to Matt it down and oil paint washes were used to weather it.
Lessons learned (again) -
1. Don't take the masks off the canopies until all the paint AND varnishes have been applied.
2. Check your references and check them again. The main float on this model is about 15% too short, but then again it is an OOB build!
3. It doesn't have to cost £50 and have a gazillion pieces to make a good looking model and I get a nice fuzzy feeling knowing it only cost me a fiver.
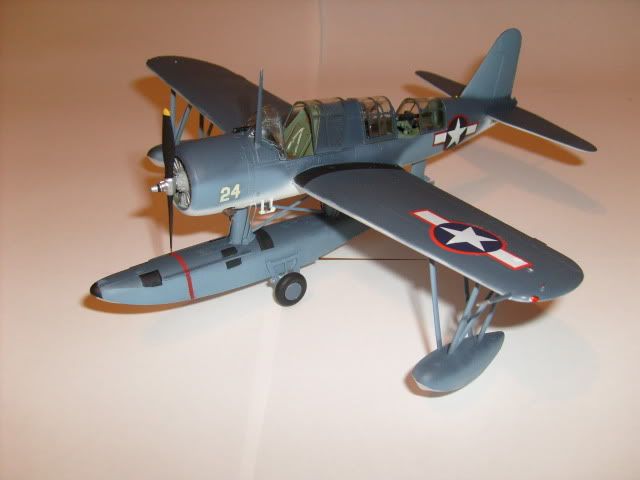
Well without further ado here it is ...ta daaaa.....
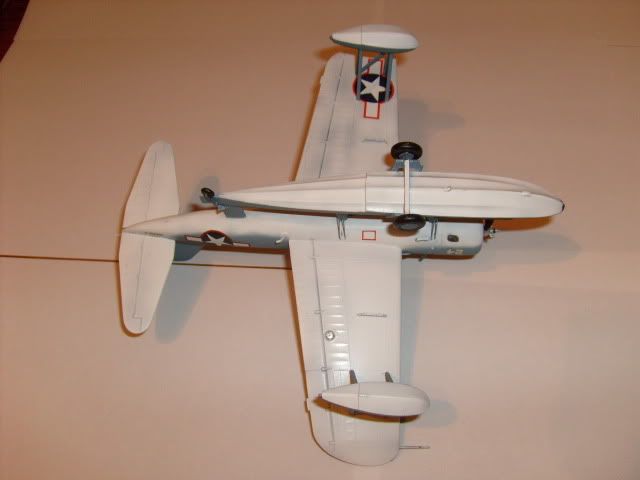
Firstly and underneath shot.
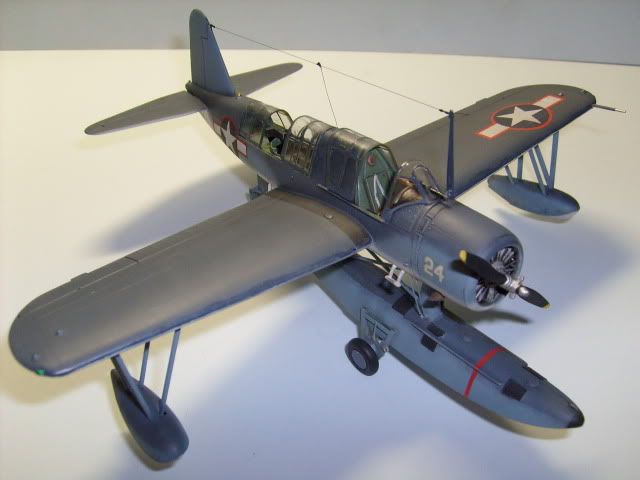
The front cockpit, yes it has a decal for the instrument panel.

Well folks thanks for looking I hope you enjoyed the build as much as I did.
Cheers
Ian S.