1/32 Hobby Boss F-84 G Thunder Jet
Inbox review
With the release of the F-84 E a short while back in 2011, I have been highly anticipating the G version as I wanted to depict an In Dutch Sevice version and go back to my family roots in the Netherlands.
I recieved this kit about a month ago, but due to various life interuptions have not had a chance to formaly write up my thoughts on this kit after I eagerly opened her up for the first time.
The nice thing about the delay was that a few builds have already occured and modelers have posted their observations, I have captured as many of these and sprinkeled them throughout my own In Box google!
Packaging:
-
Were the sprues individually bagged?
-
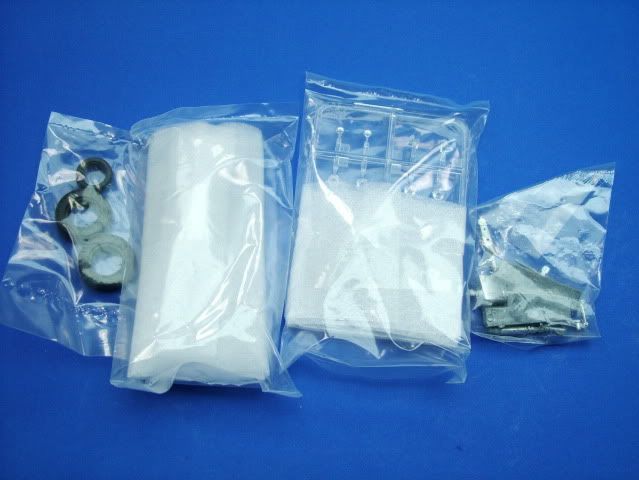
Yes, all main sprues are individually bagged except for the weapons sets, which are doubled up.
-
A very nice touch is the fact that one of the large sprues that have very delicate small parts has an additional layer of thin foam wrapped around it for additional protection.
-
-
Was the clear sprue in a separate bag?
-
Yes, not only are they in seperate bags but also wrapped in thin foam sheets and then seperated in a sturdy boxed-in section at the box end. Doing so completely prevents any scuffing or movement of these delicate parts. A very welcome way to ensure you receive your kit without issues.
-
-
Were there any additional protective measures used which might warrant bonus points?
-
The extra foam wrapping on the delicate main sprue, the additional protection for the Clear sprue and segregated area boxed in at the end are all very well thought out.
-
Seperate plastic bags for the decals, and No Staples to the Wax Sheet is very welcome
-
There is also very little extra room in the box which further assists in preventing the parts from excessive movement during shipping and handeling to your favorite hobby store.
-
The outer box is made of heavy duty cardboard and prevents any type of crushing which you typicaly encounter on Revell badly designed side load boxings or the Airfix flimsy boxing offerings.
-
-
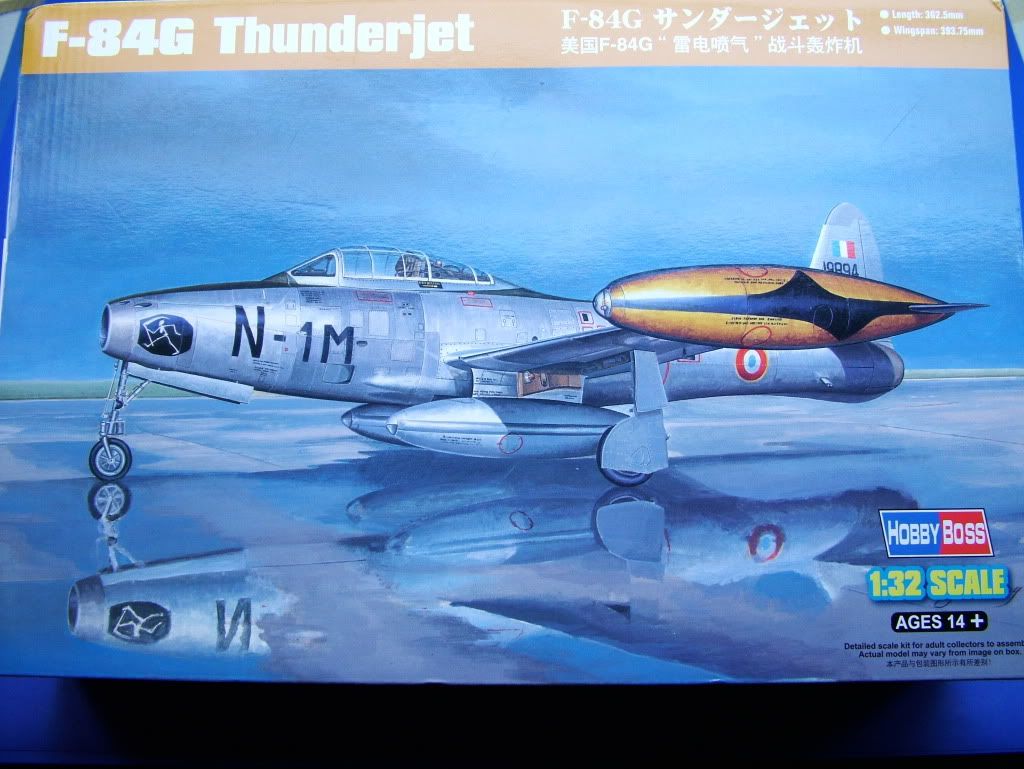
Is the box art worth raving about?
-
Box art from Hobby Boss in my opinion is a hit-and-miss affair, definitly not as good as Tamiya or Hasegawa (although they now seem to take an easier route more and more by doing photographs of the real subject rather than the beautiful artworks of the past)
-
This particular boxing has been done very nicely and captures the beautiful lines of the aircraft parked on a wet concrete area.
-
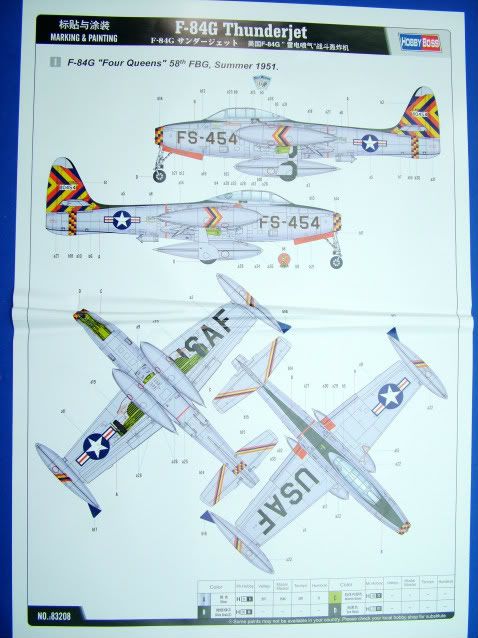
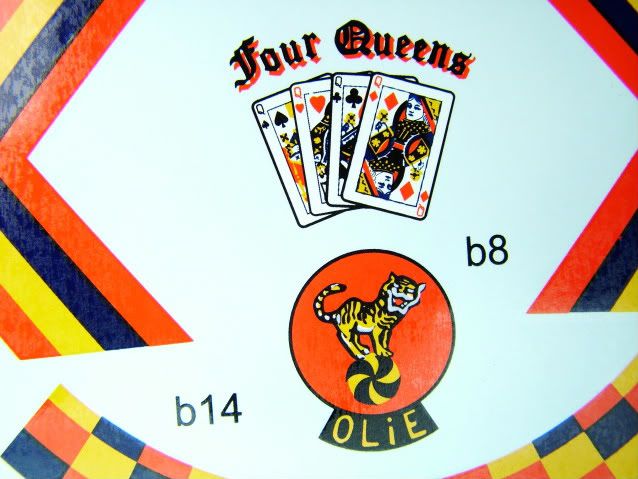
There are only two schemes provided, one of which has been seen on the 1/48 scale versions for the Four Queens and in my opinion was a too safe bet, instead of going with something else.
-
Personally I would have liked to see at least 2 more options in the box as there are so many beautiful choices out there.
-
As we all know ZOTTS, Dutch Decal and other manufacturers are coming to the rescue to satisfy this need, but at an additional cost to the modeler.
-
-
Were any parts damaged?
-
Zero damage was detected and I did look very hard for any scuff marks anywhere or a loose / broken sprue gate(s).
-
Instructions:
-
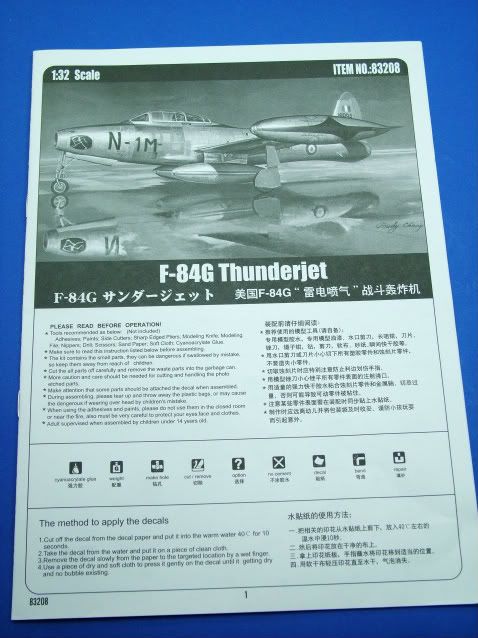
Are they clear and easy to follow?
-
Instructions come in the form of a Black an White booklet, which appears to have a well thought out build sequence.
-
Interestingly as big as the subject is and for the scale the breakdown is fairly simplistic and allows for rapid build up and success.
-
-
Do they include multiple languages?
-
English and Chineese, there is not a whole lot of text to worry about and the translators have done a much better job to get the English text at least in the neighborhood, we all know how badly worded the early releases were. So I am very happy to see Hobby Boss working very hard to listen to the reviews and comments that are being posted and they appear to take them seriously to work towards better and better products.
-
I do not think the instructions are even close to quality found on Eduard's latest releases, but then again I think Eduard has set an industry standard and hope that we see all manufacturers go to the glossy color style booklets.
-
-
Are they accurate?
-
Building sequence and instructions are good and easy to folow, nothing noted to get overly excited about.
-
-
Do you agree with the build sequence?
-
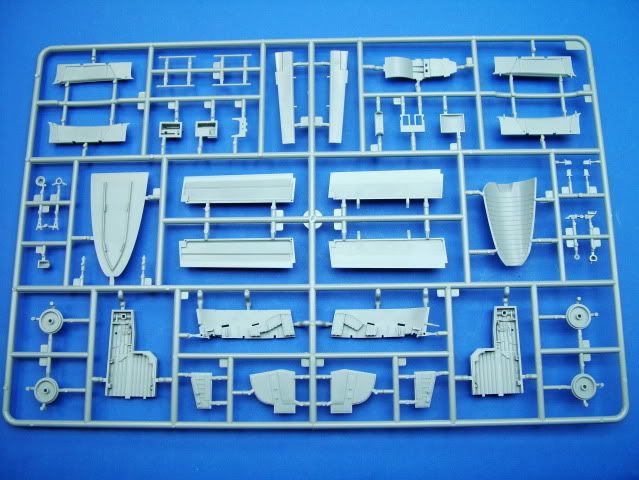
As already mentioned it is surprising to see how easily the breakdown of the build is and should cause no major issues and traditionaly starts with the building of the cockpit , then moves on to getting the gun bay completed
-
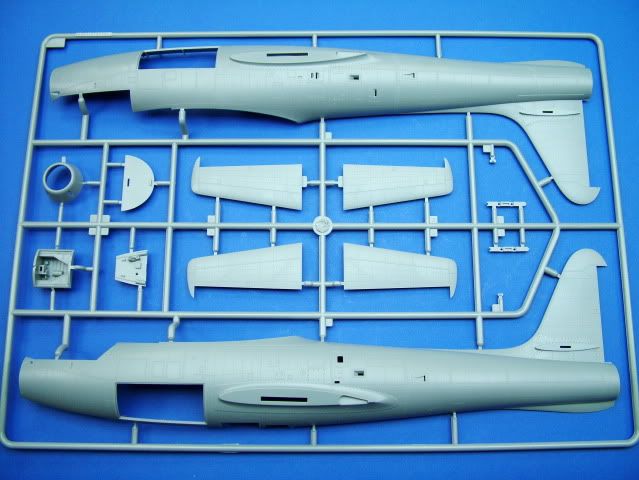
Then the exhaust tube which in my opinion is a bit simplistic with a fan detail at the end, but doubt that anyone would truly be able to behold any extra detail there unless you shine a pen light up the rear !
-
Which is a good thing as there are some serious ejector marks here that will prove to be difficult if not impossible to get rid off
-
There is a splitter insert for the nose intake and I will be interested to see how well this works.
-
Looking at the inner sides of the fuselage there is basically a blank wall and at the top there are the gun through's. I suspect that you will be able to see some of the low level (or non existent) detail here. Plus the lip on the nose part might bring some additional issue to blend in the transition in the interior nicely.
-
Some builders have already pointed out that the intake interior is a bit too long by 1/16 of an inch and you will need to carfully sand back until you get a better fit with the intake lip.
-
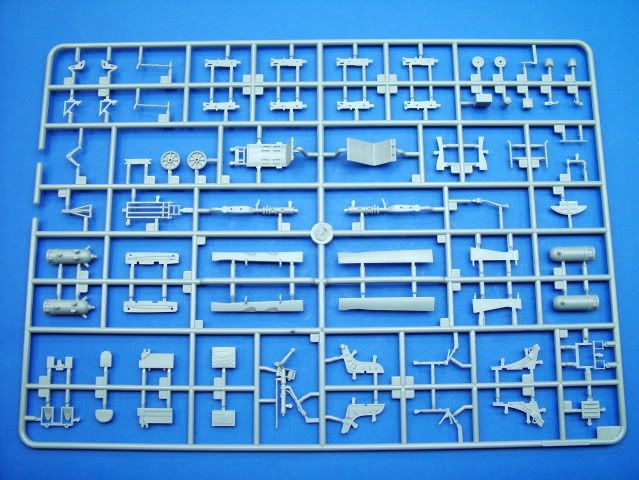
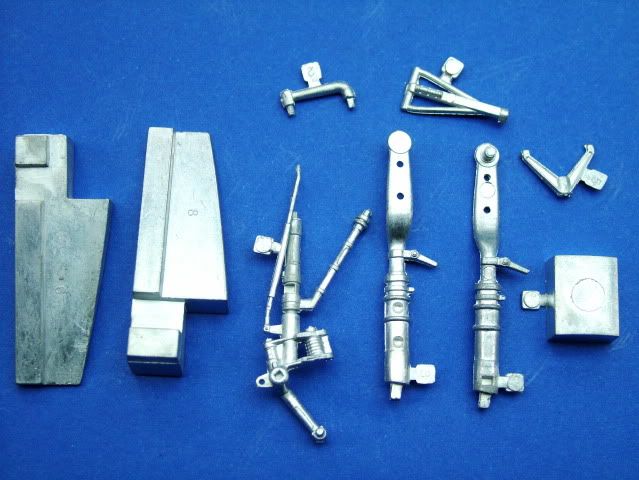
The sequence goes on with the building of the landing gear and you have a choice of a metal or plastic gear leg.
-
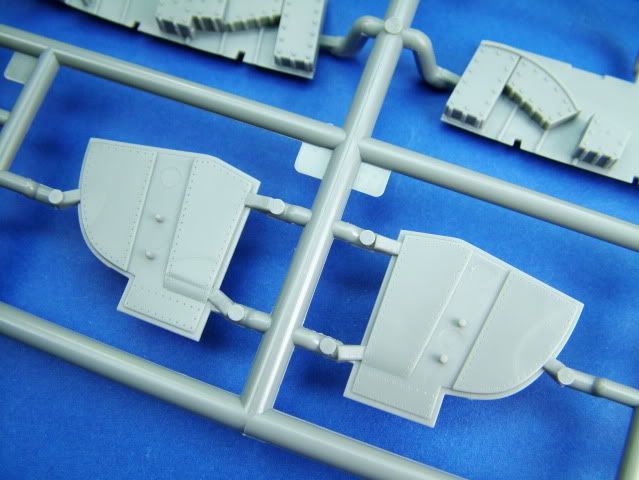
The gear doors are fairly simplistic and had hoped for a bit better representation on these. Some pin marks are present but thankfully not too deep and might be hidden somewhat by the gear legs due to where they are positioned.
-
The complex Nose Leg is actualy nicely renditioned.
-
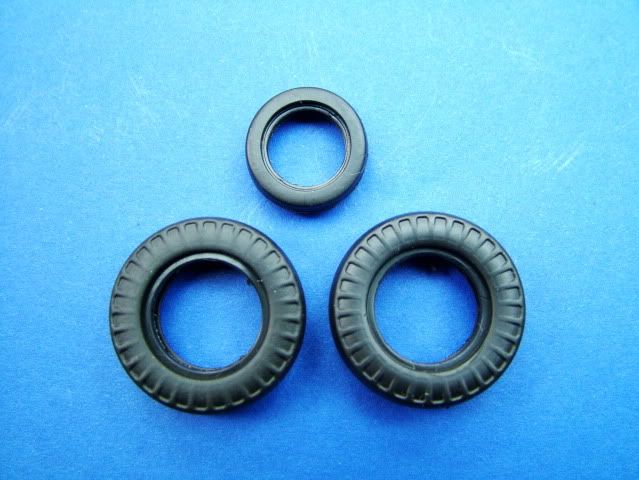
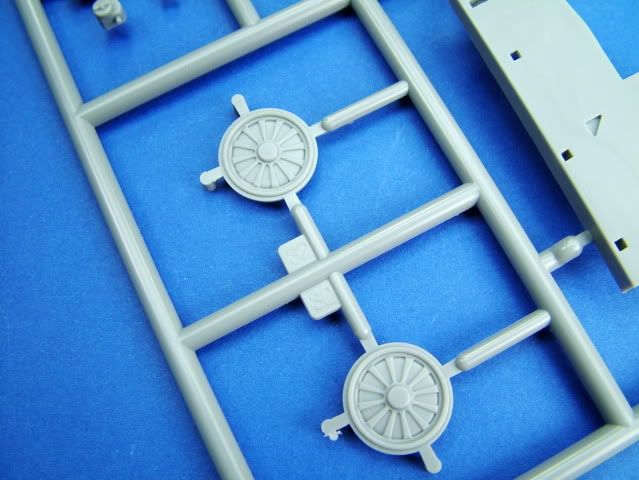
As tradition continues with Hobby Boss/Trumpeter, we again find the vynil tire syndrome, I personaly do not care for these and continue to hope that if they want to have these in the kit to also provide the plastic variety.
-
What I do like is the fact that the hubs are press fit style which makes them easy to paint up.
-
Let's keep our fingers crossed for either Aires, Quickboost or Eduard to come to the rescue and give us some nice resin replacement ones.
-
The most surprising thing with the vynil tires is that they have some very rough texture shown which makes them look like they come from a AFV or a truck, they are completely wrong and not sure what Hobby Boss was thinking here or what would have been used as a reference material. You wll need to sand these down and remove at minimum the outer profile.
-
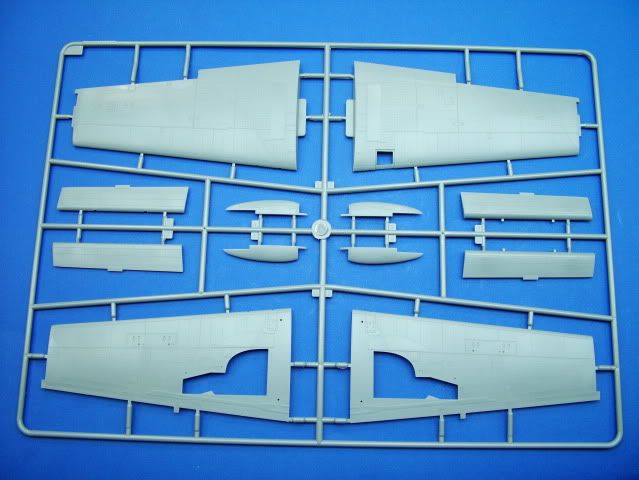
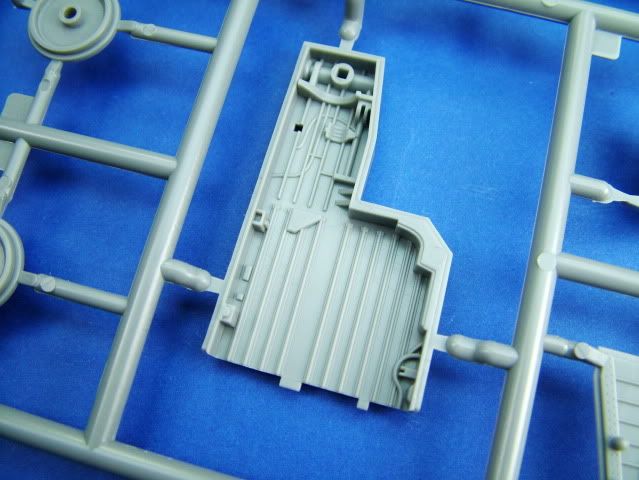
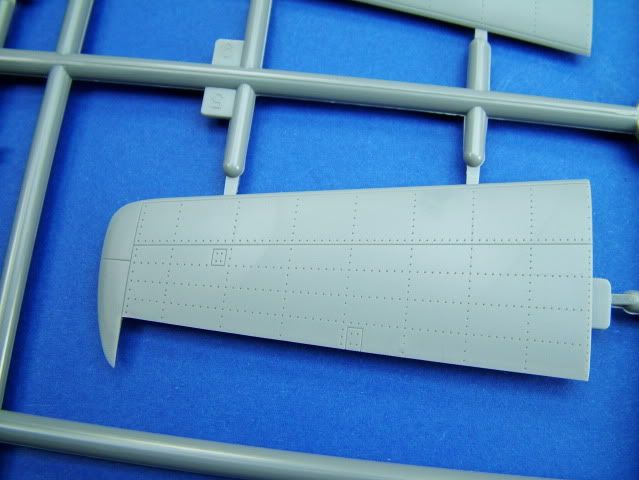
The wing building sequence is a rather simple affair and the inserts for the wheel wells are a simple drop in style fit.
-
I would suspect Aires will quickly take a look at these inserts as they can benefit from some additonal piping and wiring, but the kit ribbing detail accurately captures the real thing here. A landing light is located on the inner doors and a seperate part.
-
Next is to install the wing tip tanks or the wing tip inserts, then onto the flaps.
-
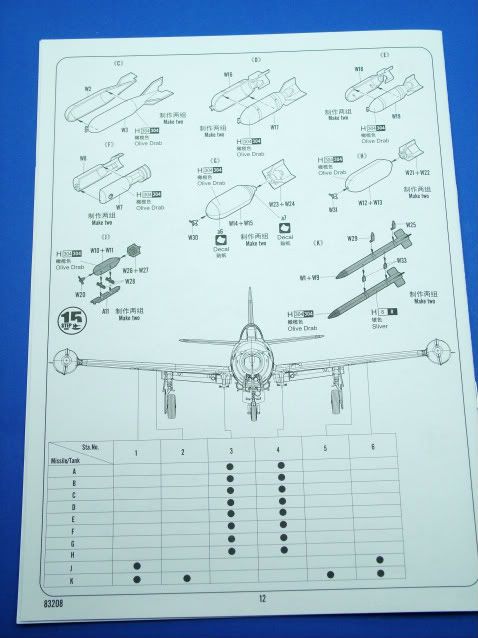
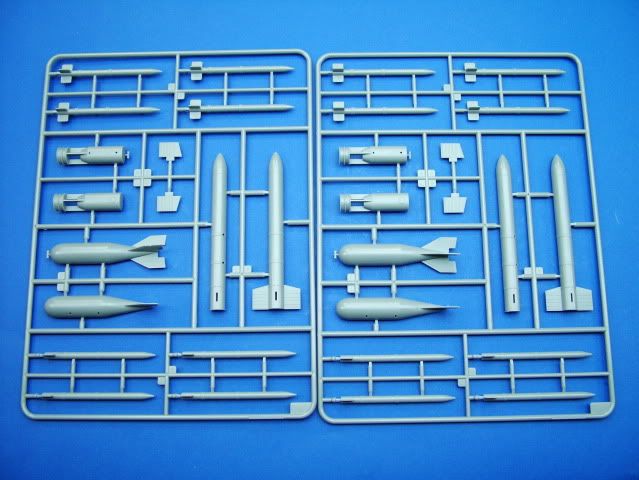
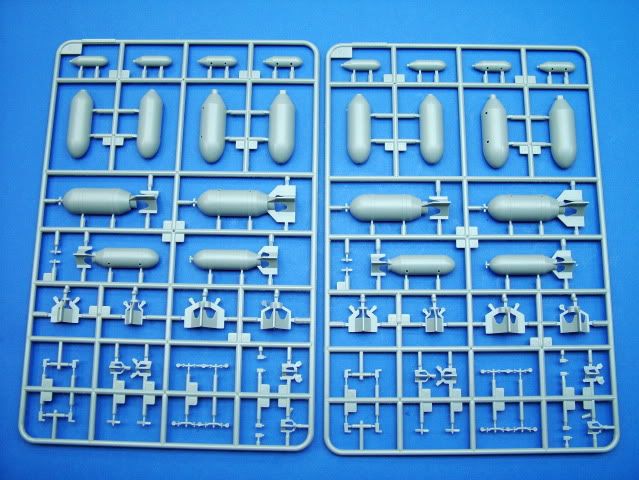
Next is for you to figure out how to load out your F-84G and there is a ton of weaponry to choose from.
-
-
Do they include colour call outs?
-
Color Call Outs are provided but it will be best to check against your references, already discovered are the colors for the gear bay, doors and cockpit walls which show a "Field Green" should in fact be Zinc Chromate.
-
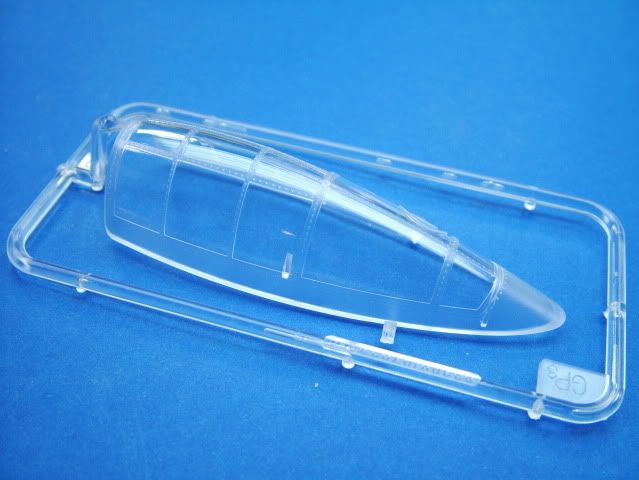
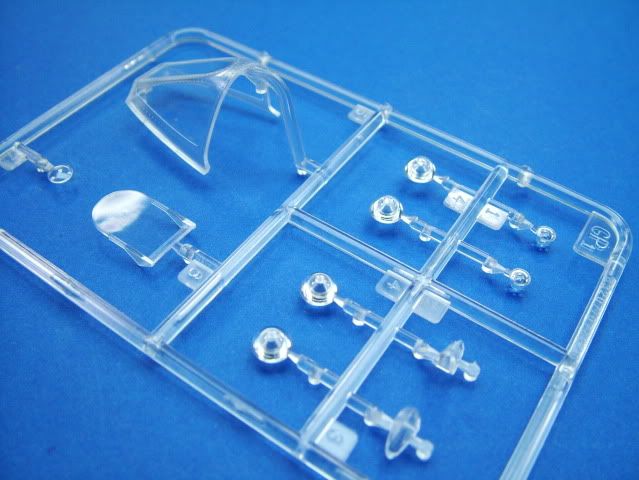
The Cockpit glass re-inforcements were shown to be painted Silver in the "E" release but now correctly show the bottom frame to be silver and the rest to be a flat White which is correct, so some corrections are being caught by Hobby Boss and corrected on their next releases.
-
The negative side of the cockpit glass is that the re-enforcement framing should not be on the outside of the glass as depicted in the kit canopy.
-
-
For multiple paint types?
-
Yes, Mr Hobby Color, Vallejo, Model Master, Tamiya, Humbrol is shown and a "general" like: Flat Black
-
-
Painting profiles?
-
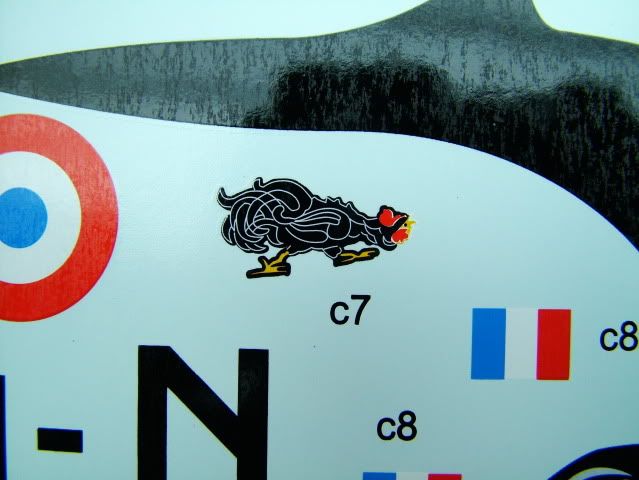
Two color plates are provided seperately from the instruction boolet for the exterior and asist with the decal placement.
-
-
In colour?
-
Yes
-
Decals:
-
Are they accurate?
-
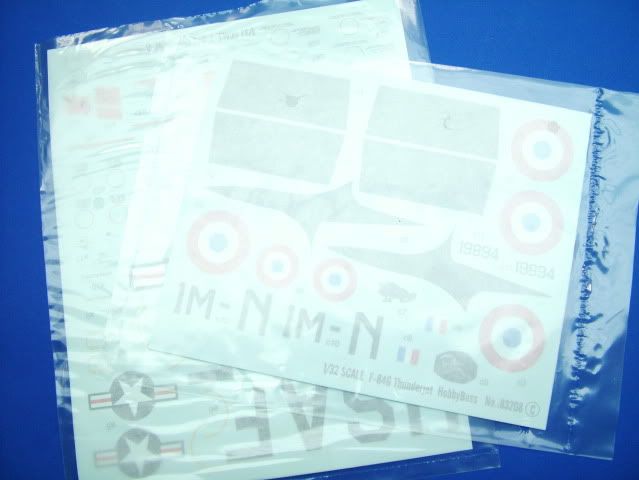
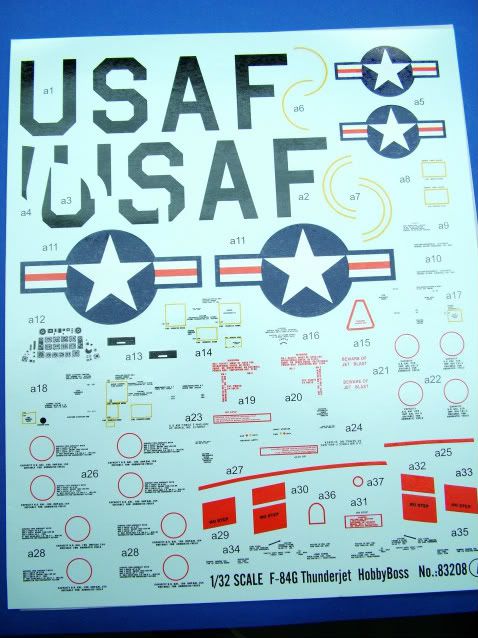
The decals provided are nicely renditioned, the text legible and spelled correctly.
-
Both profiles of the decals are seperately packed in plastic bags and have a taped (much better than a scratchy staple) wax sheet to further protect.
-
The Stars and Bars appear a bit oversized as well as the USAF on the wing, although I have not had a chance to make a comparison to my references and scale them to confirm what I see by the naked eye.
-
The color of the Blue and the Red are spot on.
-
-
Are they in register?
-
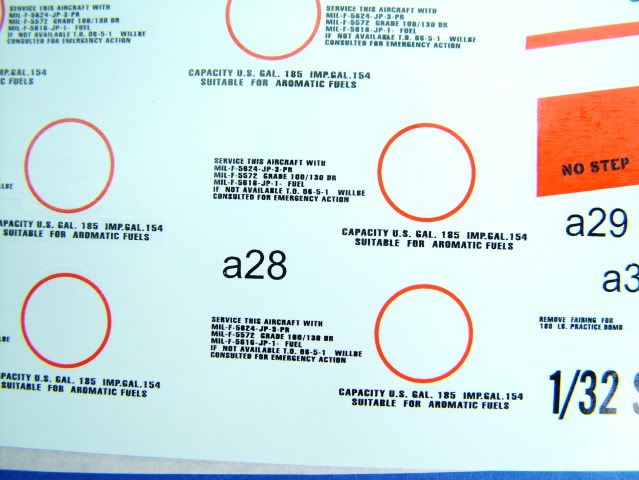
No regrister issues can be detected, even under very high magnification, Color saturation and depth appear to be excelent and very little clear carrier film can be seen.
-
As a side note the large USAF markings can benefit from the modeler to cut out the clear carrier flm inside the "A" and in between the "S" "A" and "F" but thenn you will need to carefully align them once placed on the model.
-
These decals appear to be very thin indeed and would caution to use some care when applying the first one.
-
-
Are stencils included?
-
A few stencils are provided and the text is legible and correct spelling under magnification, although there are not a ton of them, I am not sure how prolific they would have been on the real subject. I am sure some of the minor ones are missing.
-
-
Are there many schemes catered for?
-
As prior mentioned only 2 schemes are provided and am a bit disapointed (or perhaps spoiled by the many markings offered via Eduard). A noce option would hae been to add a camouflaged variety of one of the Latin Countries for folks that are initimidated by the NMF complexity.
-
I am in hopes Hobby Boss will at minimum work towards 4 schemes per boxing, but fully understand that production/research costs can be high for these types of offerings, and they depend on aftermarket companies to fill that need.
-
-
Are seat belts or instrument decals included?
-
No seat belts are included and it would have been a nice touch to start providing a small PE fret, there is a love / hate relationship with modelrers on these so I understand that Hobby Boss is stil sitting on the fence and not adding these to the boxings.
-
No molded in seatbelts either on the seat, which is very nice as they are usualy not nicely rendered anyways. Two seat versions "Early and New Style", and look a bit simplistic but would do fine for an OOB build.
-
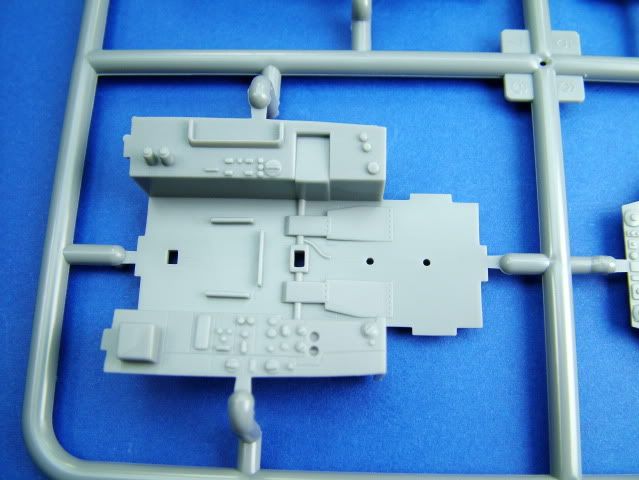
There is a decal provided for the instrument panel or you can opt to use a panel that can be painted up and has some nice relief that will shown up beautifully with a bit of dry brushing.
-
Accuracy:
-
How does the kit compare with the real thing?
-
From first looks the outline appears to capture the real subject nicely.
-
I have not heard too many rumblings on the net regarding any major flaws. Looking at some internet references and a quick browse through in my library she looks indeed nicely captured and within acceptable scales.
-
I did not perform any extensive measurments and scale drawing comparisons.
-
-
Are there any glaring errors?
-
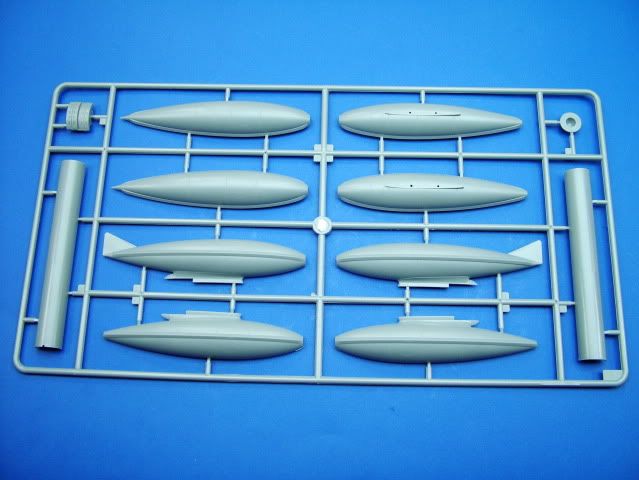
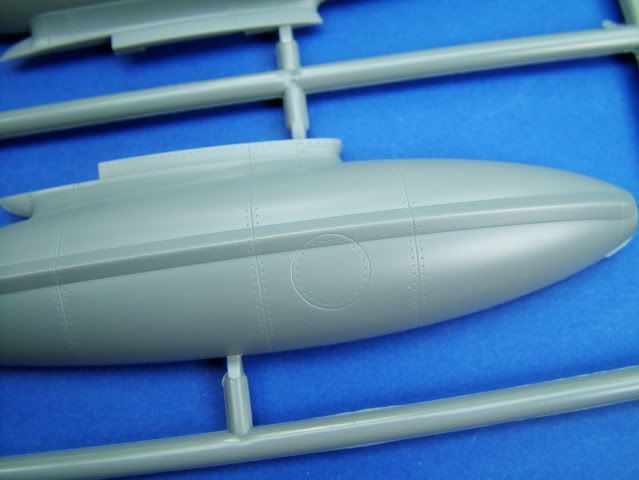
From a quick look the ejector racks for the main fuse tanks look a bit too long (by perhaps as much as 2 to 3 mm).
-
Looking at a few builds these do push down the belly tanks to were they almost scrape the ground. I would venture to guess that these are indeed too long or the tank circumference dimensions are potentially off. A quick fix would be to opt for a weapon load out instead of going with the tanks.
-
Hobby Boss have thankfully not drilled out all wing locating holes except for the main center ones. I personally would like to see all manufaftueres go to a system that just shows a marker hole on the inside and allow the modeler to choose which ones to open up (if at all) and avoid filling issues or be forced to use a simplistic ejector rack.
-
As prior mentioned the re-inforcement of the cockpit glass is an issue and should not be exposed on the outside.
-
The cockpit interior is fairly simplistic and some of the dials are in the wrong spots on the main panel.
-
The gun sight in comparison is very nicely done.
-
The side panels are again fairly simplistic and could benefit from some scratch building of throttle levers etc.
-
The bottom airbrake is incorrect for the G version. I am sure Quickboost will come to market rather quickly with the perforated version as a drop fit.
-
- Are there any after market sets available which are worth considering?
- AMS has a resin seat and a cockpit released. I have yet to see these close up and in the flesh but could potentialy bring additional detail to life in and around the sparse kit cockpit.
- Given the fact that Aires has brought out a ton of aftermarket resin fun for prior 1/48 Hobby Boss releases for the Demon, I am in high hopes we will see a cockpit, wheel bay, an airbrake, a more detailed gun bay and potentialy a more accurate nose intake insert.
- Of note regarding the gun bay - although you can pose it in the open position there is no strut part provided to prop open the nose door panel. Perhaps Quickboost might bring out a nose panel with additional interior detail and strut / hinge mechanism soon, at minimum you can build the strut out of brass tubing.
- Another mention has been made that the tail exaust pipe is a tad short (0.5 inch) and could benefit from an extension, I have yet to build this kit so I can not confirm/deny this observation. If need be you could sratch build a FOD cover.
- There are two large side panels that need to be inserted on the fuse however no interior detail is in the kit parts provided.
- I have no idea why Hobby Boss choose to make these as seperate parts except for increasing the ovel box parts count. I am in high hopes that there will be no fit issues here due to the high visible area.
- I would venture to guess that again our aftermarket folks will come up with some very nice extra detail inserts in this area.
Detail:
-
What is the detail level like?
-
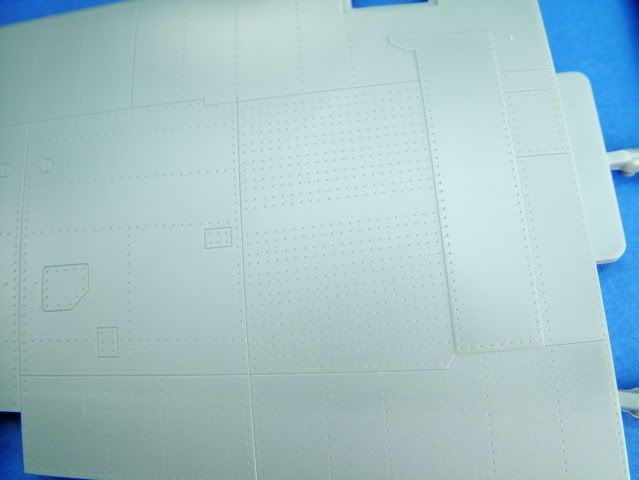
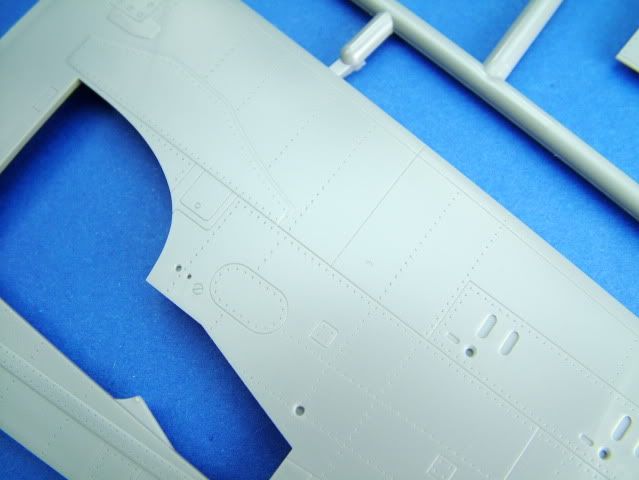
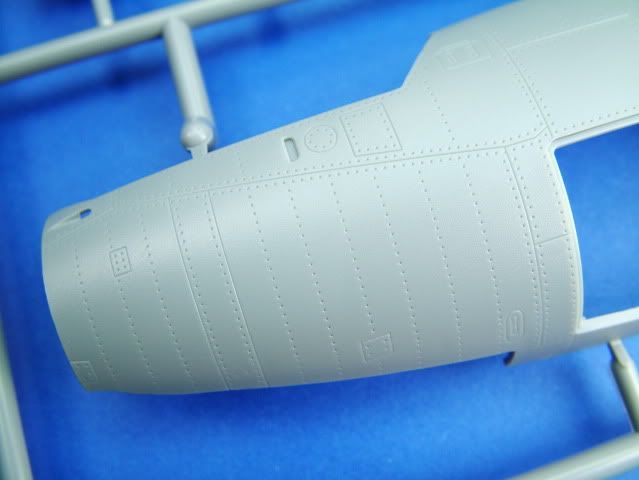
Overall detail is nice and crisp, the panel lines are of consistent depth and sharp from nose to rear and consistent from fuse to wings.
-
-
Does the kit have lots of raised or engraved surface detail?
-
Engraved detail is the best yet seen via Hobby Boss, the riveting is subdued and not overdone.
-
-
Especially in areas people frequently focus (e.g. on aircraft this would be the cockpit, wheel wells and engines)?
-
Exhaust pipe is bare minimum effort but difficult to spot without the asisstance of a pen light.
-
More detail in the cockpit would have been nice for this scale, some inaccuracy of dial placement
-
Lack of seatbelts, throttle levers
-
A minor issue that the cockpit glass can not be displayed in the open position but easily remedied by removing the pegs.
-
- Was there lots of flash?
- There was no flash detected on even the smallest parts.
- Are the clear parts thin or thick, or deformed?
- Clear parts are very translucent and quite thin, no distortion can be seen and no deformations detected anywere.
Fit:
- If the kit has been built, how well did it go together?
- I have yet to build this kit but am anticipating a very nice and easy build, so far the other builds I have witnessed no major issues have been mentioned, except for the nose ring to splitter being too long.
- The only filler being mentioned is around the wing tip tanks to the wing tip mating area and appears to be minor.
- One builder mentioned the fit being so good that the fuse and wing roots were build painted seperately and the join does indeed look beautful there.
- This is quite a bit of relief as the NMF finish will be a challenge to apply if there were major gap/fit issues. I will be doing a full in depth build and post findings in the next few months.
Extras:
- Did the kit include any photo-etch or resin parts?
- No photo etch or resin
- A nice addition was the stock nose weights and removes the need to guess the weight and were to place them.
- A canopy or marking masks?
- No Canopy Masks ala Eduard or Great Walls, I am in hopes that Hobby Boss will start to incorporate this trend as well and in future boxings with complex canopy frames has these added.
- Plastic and metal landing gear is provided as options.
- Quite a bit of weapons load out is provided which is a welcome touch. Weapons stations are called out although no naming conventions are used for the weapons, the Tiny Tim rockets in my eye are a bit simplistic and will benefit from a bit of scratch building extra details.
- You can either build a plank style wing (no wing tip tanks) or with wing tip tanks.
- Flaps can only be build OOB in the down position but a bit of cutting off the tabs can easily be installed in the up position as well.
- The elevators and Rudder are seperate parts and could easily be modified to be in a more dynamic pose and deflect should the desire be to do so.
- Rato Packs - are an optional install
Value for Money:
- How does the cost of the kit compare with its contemporaries?
- In my opinion the price point of this kit is right on for the detail level you get and within their competitors range.
Packaging 9.5/10
Instructions 7.0/10
Decals 8.0/10
Accuracy 8.5/10
Detail 7.5/10
Fit Untested
Extras 7.5/10 - mainly the load out options are a nice touch