


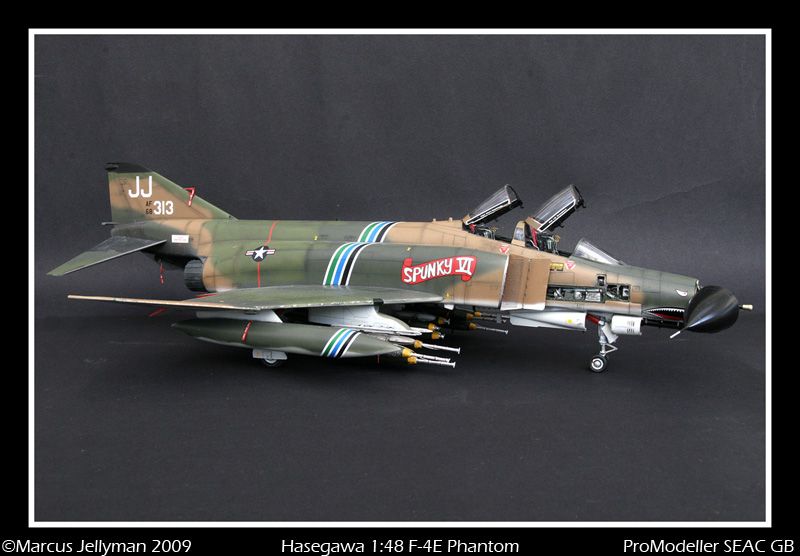
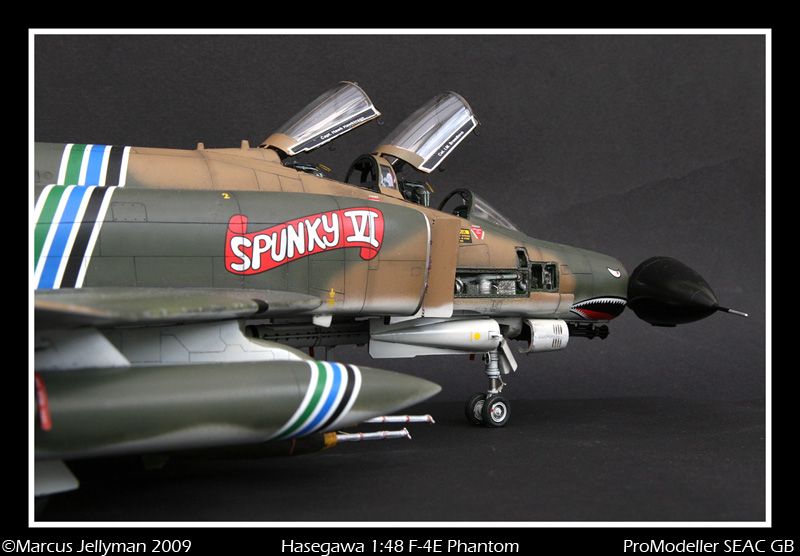
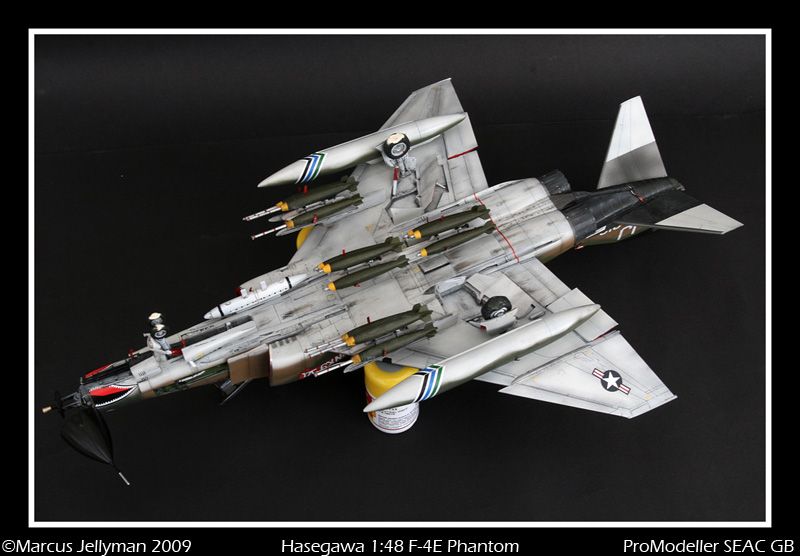
Marcus Jellyman's F-4E Phantom II
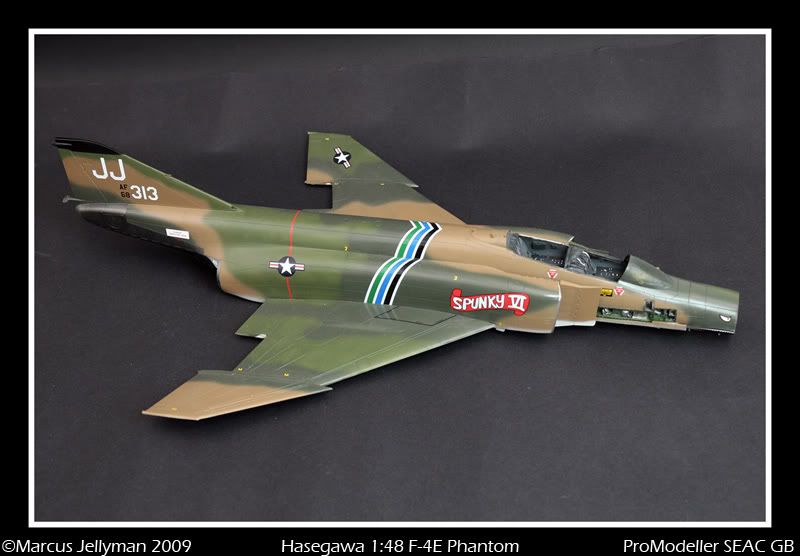
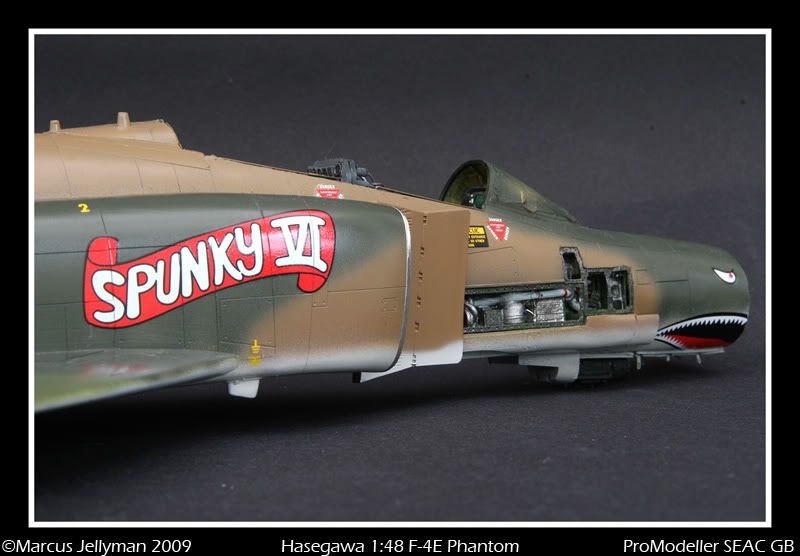
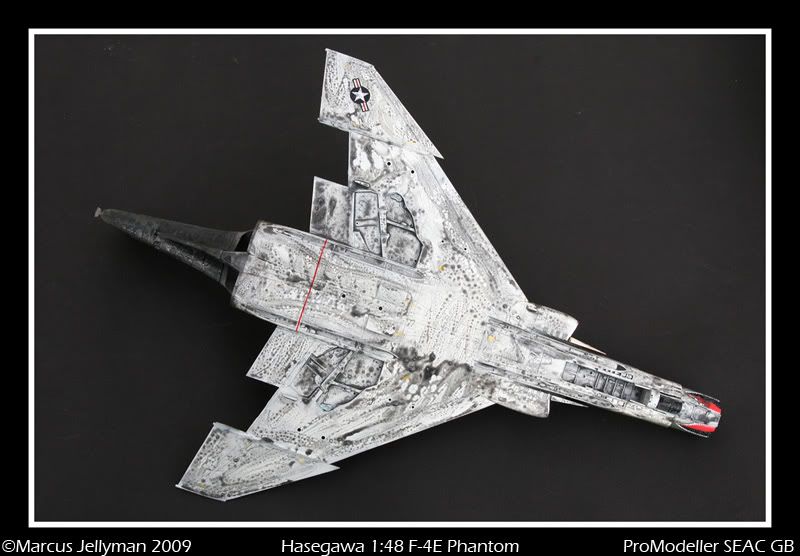
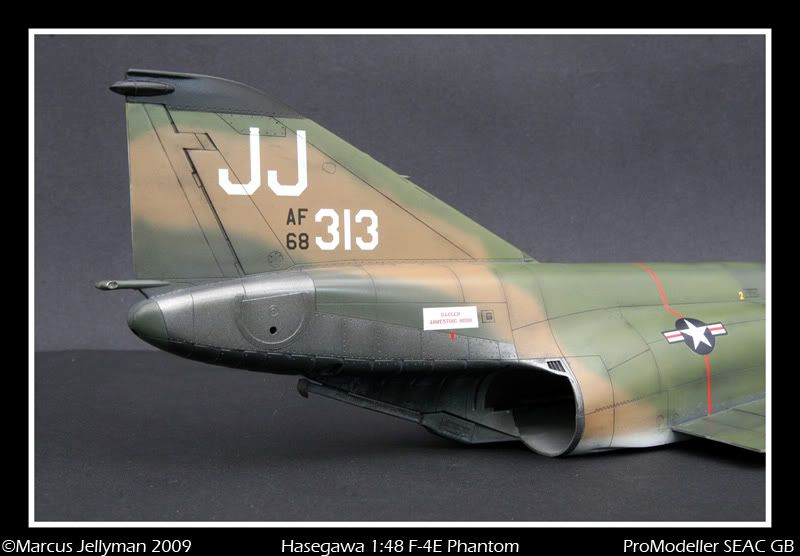
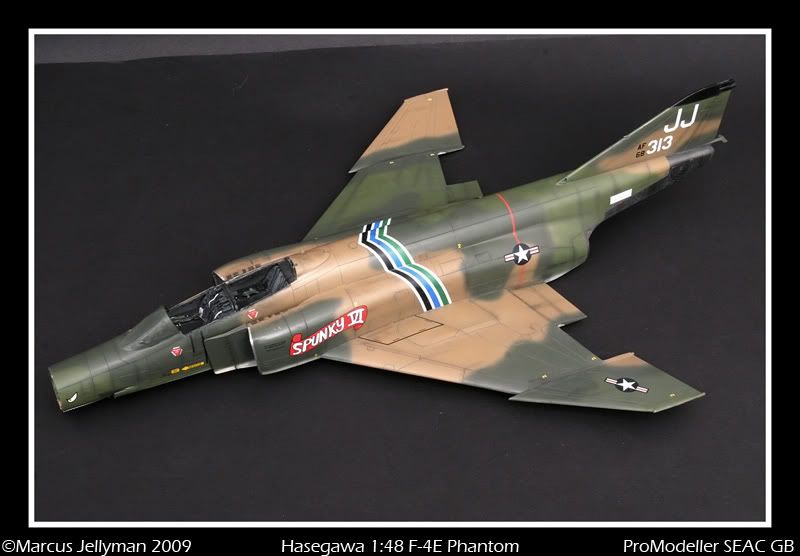
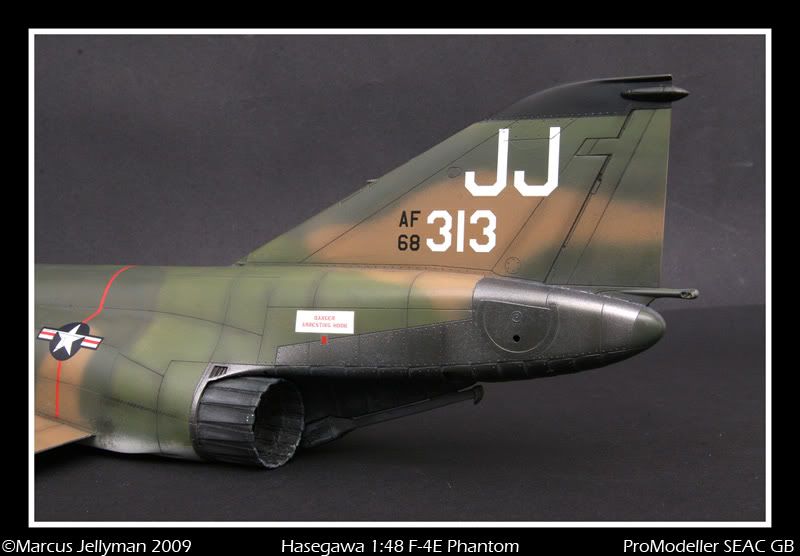
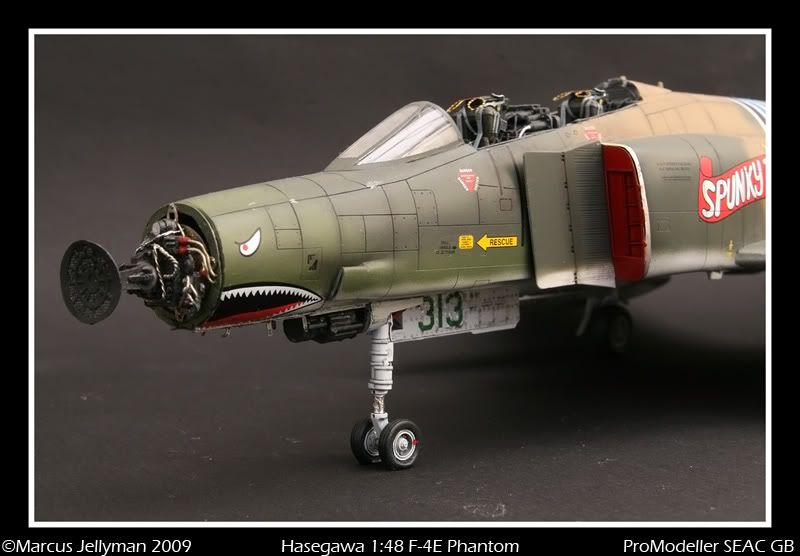
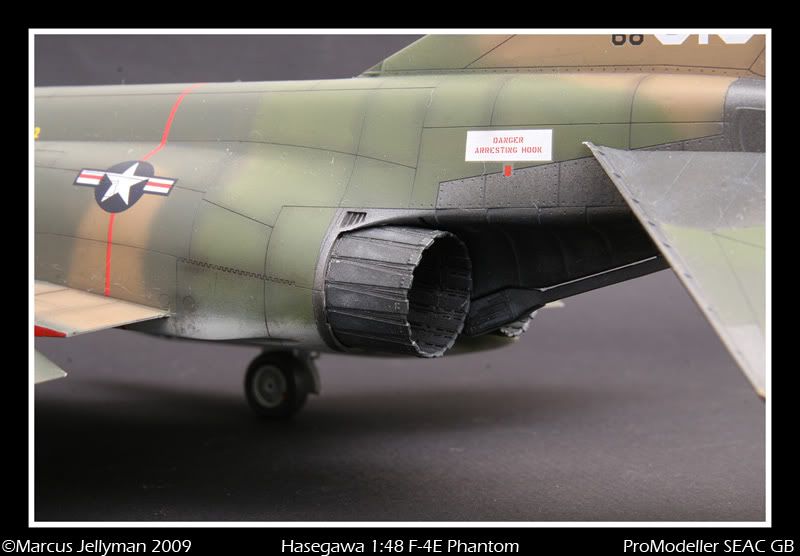
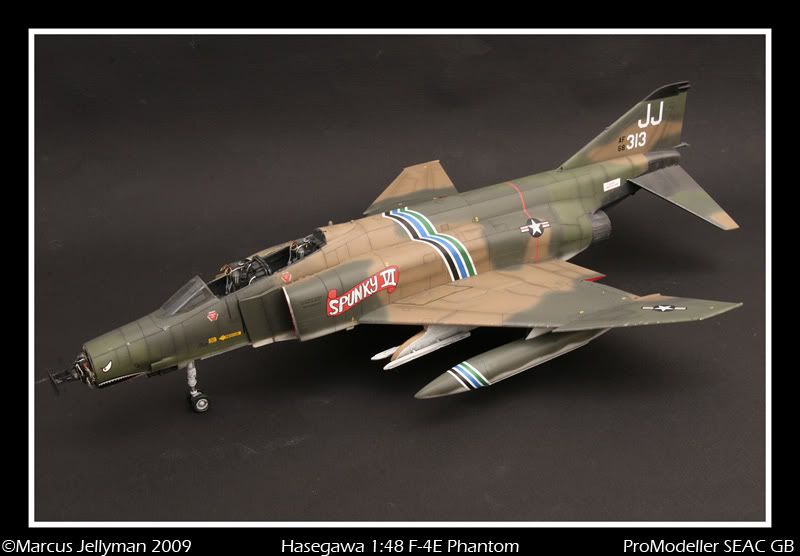
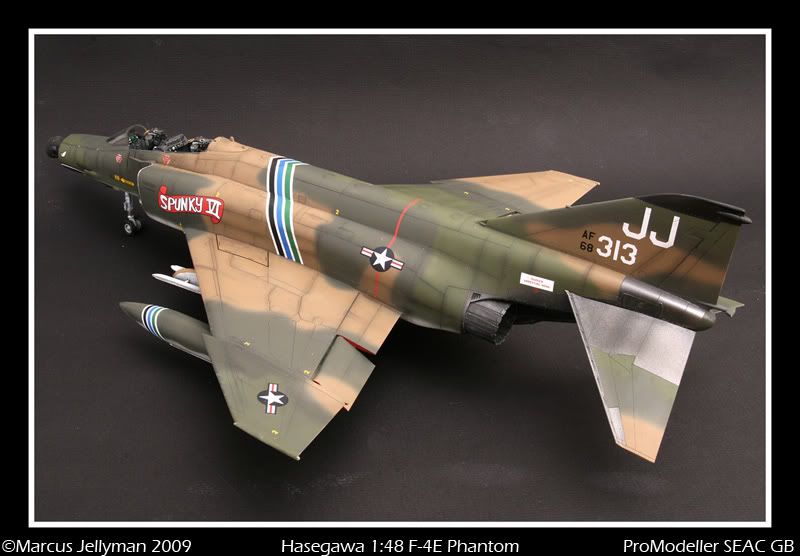
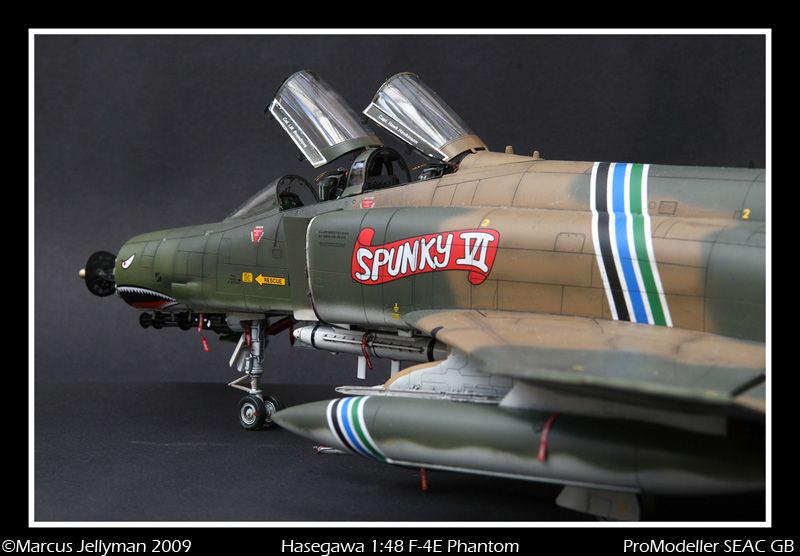
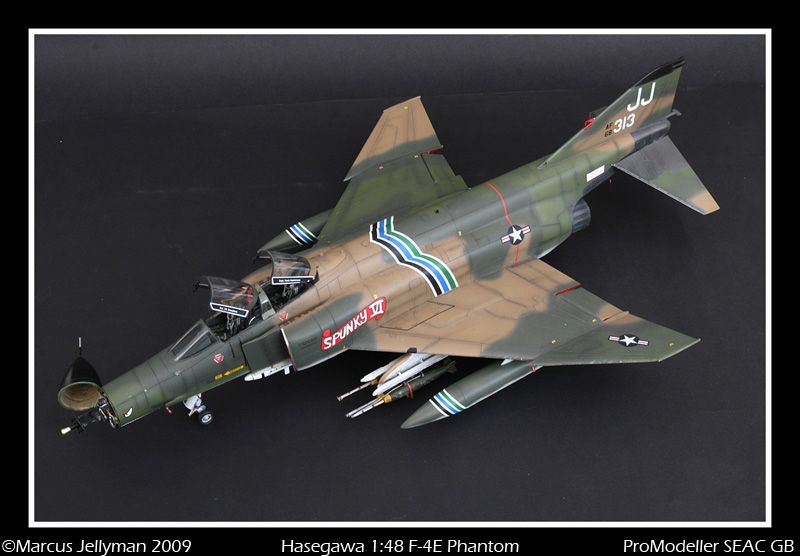
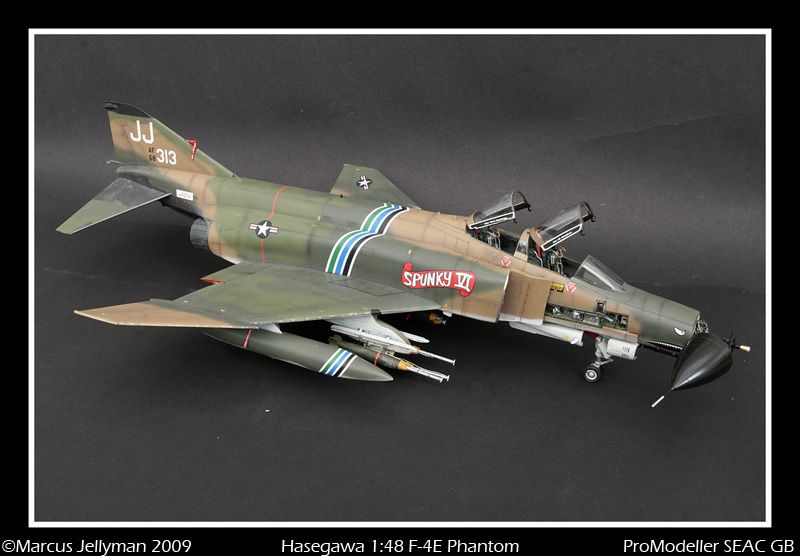
68-0313/JJ "Spunky VI" F-4E Phantom II - 34th TFS / 388th TFW Korat RTAFB Thailand.
388th Tactical Fighter Wing - A Brief History
The F-105 equipped 388th TFW was assigned to Korat RTAFB from McConnell AFB, Kansas, On 8 April 1966 with the 35TH TFS, 44th TFS and 469th TFS. The first F-4 assignment to the wing was the 35th TFS, which attached from the 3rd TFW flying 'UP'-Tailcoded F-4Ds between 12 June and 10 October 1972. In addition to the F-105 Thundercheif , the wing operated A-7D Corsairs, EB-66 Destroyers and AC-130 Hercules Gunships. 'JJ' Tailcoded (Black) F-4Es arrived with a deployment of the 4oth TFS in May 1969, with assests assigned immediately to the 34th TFS, known as the 'Rams'. This process was repeated in december 1969 with th 469th TFS bringing 'JV' tailcoded F-4Es. The F-105 remained only in the Wild Weasel role.
The wing was heavily involved throughout the Southeast Asian conflict, with most missions flown "Up North" and over Laos. As the US commitment drew to a close, the number of assigned units were reduced. The 469th TFS inactivated at the end of October 1972 and the 34th TFS downgraded to the F-4D in October 1974. In 1975, the wing was involved in the rescue attempts of the SS Mayaguez. The 34th TFS and the 388th TFW were reassigned in title to Hill AFB, Utah on 23 December 1975 to operate 'HL' tailcoded F-4Ds. The 388th TFWs three new squadrons, 4th TFS (yellow), 34th TFS (red), and 421st TFS (blue) continued to use the 'HL' tailcode. The wing converted to the F-16A/B Falcon starting on 6 January 1979 as the first operational wing to do so, with the last F-4D leaving before the end of 1979.
McDonnell Douglas F-4E Phantom II
On June 30 1967, the first F-4E flew, it was another step up from the prototype aircraft. Problems with the initial gun installation and ammunition feed system borrowed from an F-105 required a complete re-design to correct. The re-designed ammunition drum and feed installation also brought with it an unexpected bonus with an increase in ammunition supply to 640 rounds. The flat side of the RF-4 forward fuselage, with its oval-shaped radome, were replaced with an almost circular fuselage design. A M61A1 gun was installed in a long, slender fairing under the fuselage. A short gun gas diffuser covered the gun muzzles to help break the expended gas before it entered the intakes, which could cause a compressor stall.
The APQ-30 radar and F-100 gun sight installation were replaced by the Westinghouse soild-state APQ-120 radar, that was specifically designed for the F-4E gun-nosed Phantom. The APQ-120 had special insulation and dampers to reduce damage caused by the vibration from the gun. The APQ-120 was intergrated with a new Heads Up Display or HUD, which projected tactical information, i.e speed, altitude, range to target etc., onto the gun sight glass. Thus the pilot did not need to take his eyes off the gun sight reticle to check any other instruments. It was a major breakthrough in combat effectiveness.
Other changes included installation of the production J79-GE-17 engines offering 17,900lbs of thrust, a seventh fuel cell in the aft fuselage behind the cockpit , removal of the powered wing fold mechanism (the wing tips still fold however), slotted stabilators for greater low speed control, and longer afterburner exhausts due to the "turkey feathers" variable exhaust nozzles. Although the APR-25/26 and APS-107 Radar Homing And Warning equipment (RHAW) had already been installed in other fighters operating in the hostile environment over North Vietman, initail F-4Es were delivered without any RHAW equipment.
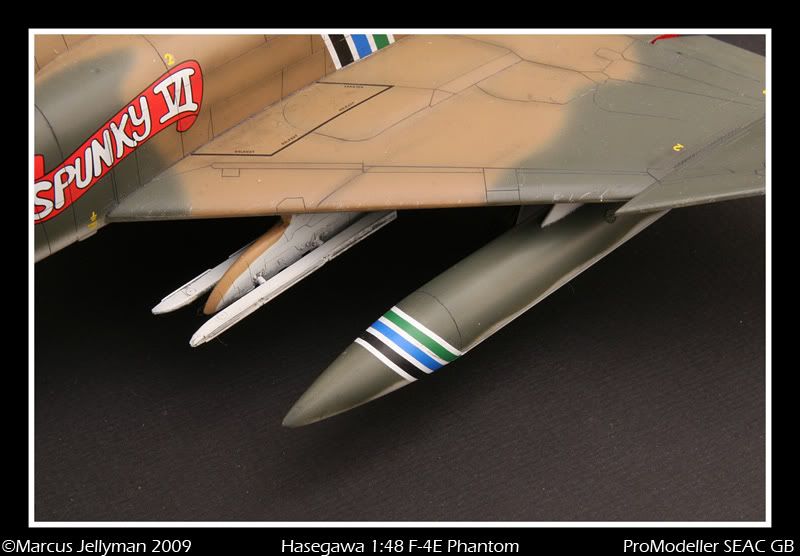
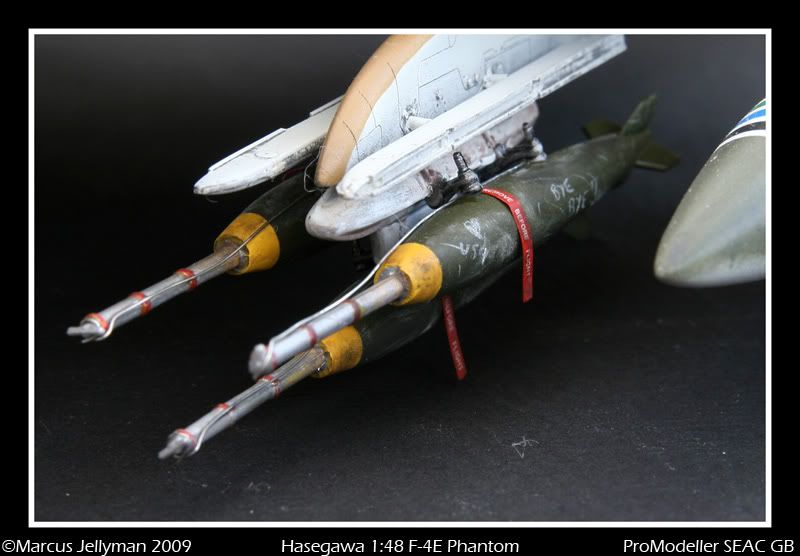
The F-4E was able to carry almost every available type of ordnance in the Air Force inventory, from standard gravity or dumb bombs, to sophisticated air-to-air missiles, to nuclear weapons. The F-4E had five hard points for ordnance carriage; two under each wing and one on the centreline of the fuselage. Air-to-air missiles, beyond the standard load of four Sparrows in the fuselage cavities. included AIM-9 Sidewinder heat seaking missiles carried on Aero 3B launch rails on each side of the inboard weapons pylons. AIM-4D Falcon air-to-air missiles could also be carried on the inboard weapons pylons.
Conventional ordnance could be carried on ejector rack adaptors , holding either three or six weapons each. The inboard pylons could only carry the triple ejector rack or TER; while the centreline and outer wing hard points could handle the multiple ejector racks, or MER. Each adaptor rack could easily hold its maximum number of weapons, although many times combat aircraft carried a lessor number due to size limitations. The ejector racks were capable of carrying conventional weapons weighing from 250 lbs up to 1,000 lbs on each lug or mount, with conventional contact or extended fusing, standard free-fall or retarded high drag or low drag bombs, including napalm, cluster bombs, fuel-air explosives and mines. Pods of rockets were also carried on the ejector racks. And the F-4E was even capable, and often did , of carrying the 20mm Gatling gun pod, as seen on earlier F-4Cs and Ds.
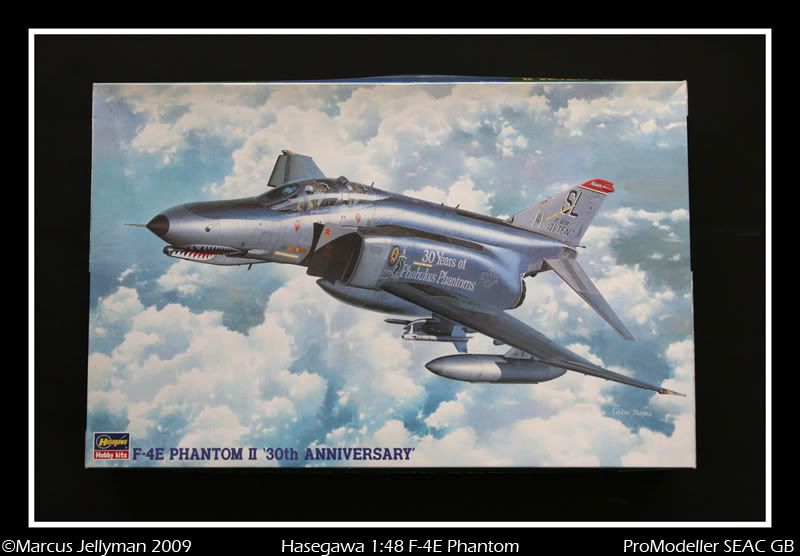
The Kit Box Art
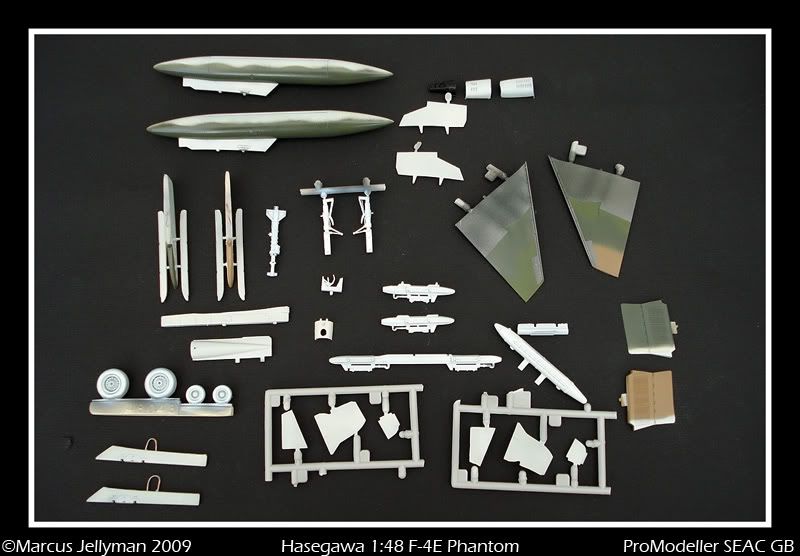
Extra's for this build will include, the Verlinden update set for the F-4E, AIRES resin seats and exhausts, True Details wheels and USAF pylons, and decals from Eagle Strike.

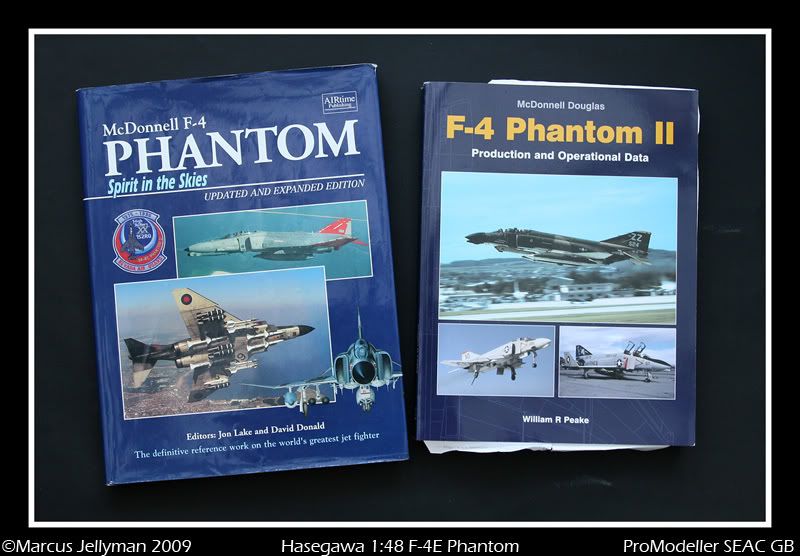
Plenty of reference books, my favourite part of a new build.

The Verlinden update set, Aires Exhausts, Eduard Phantom set and Remove Before Flight Tags.
The Verlinden Resin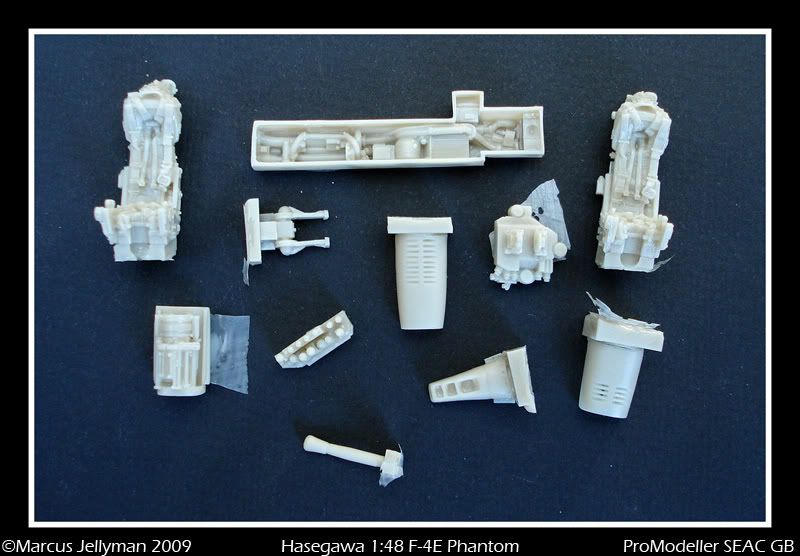

I made a mistake from the start by wrongly measuring the resin insert to gauge what plastic needed cutting out, trouble is the resin is a lot larger that the PE that sits on top of it!! One fuselage half in the bin!! TIP - use the PE for your measurements!!
The pic below show the resin glued in place inside the fuse, trouble is the plastic is very thick which would mean the panels that have been removed would have been about 6inch thick!! To combat this i added small strips of styrene to sit the PE on and bring it out slightly.
With the PE and air diffuser added it brings the whole thing together, just needs a lick of paint. 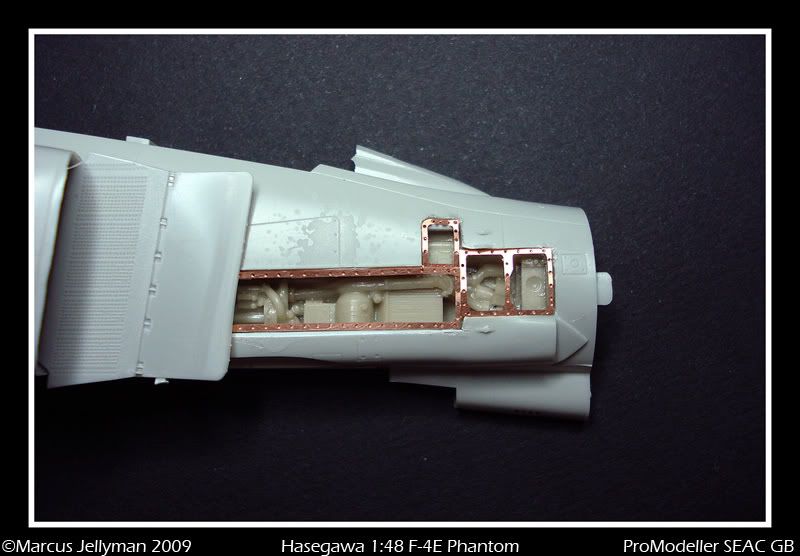
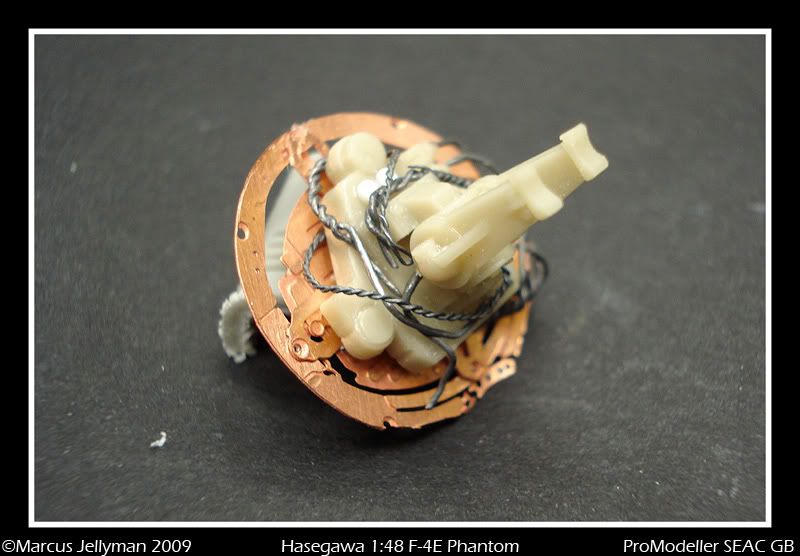
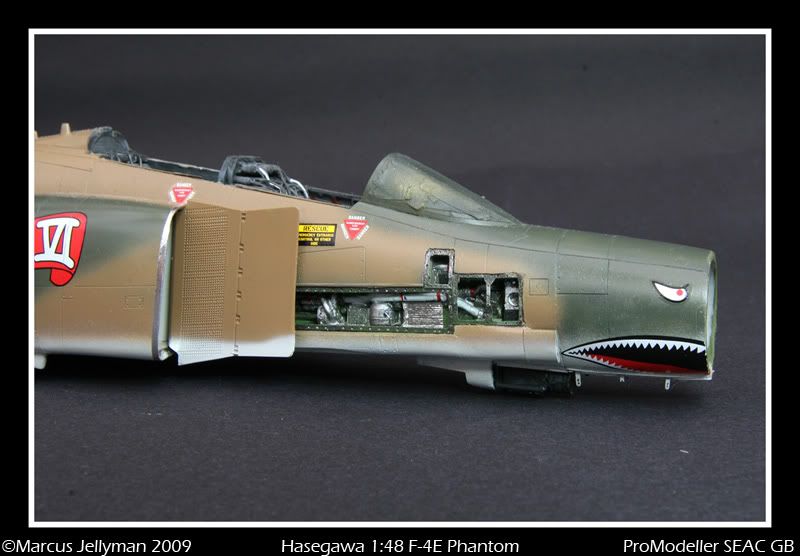
The nose section was cut in two ready for the radar PE to be installed, the housing for the gun was also cut away, resin replacements are included in the Verlinden set.
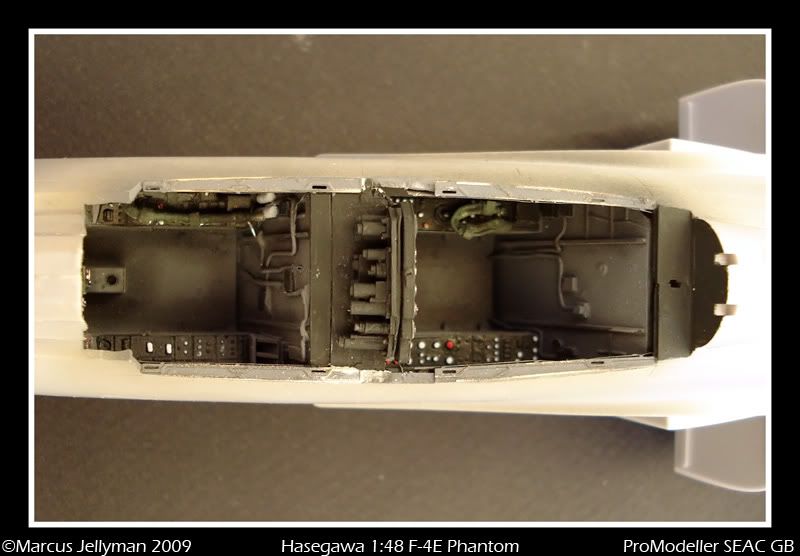
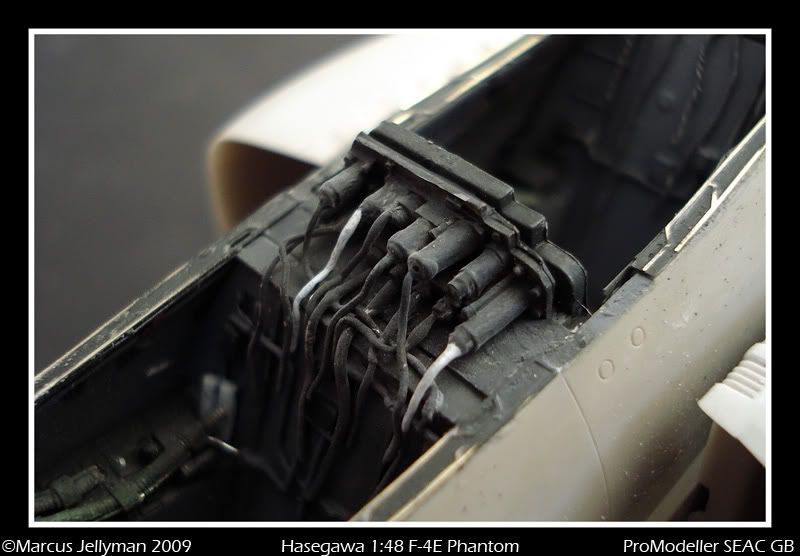
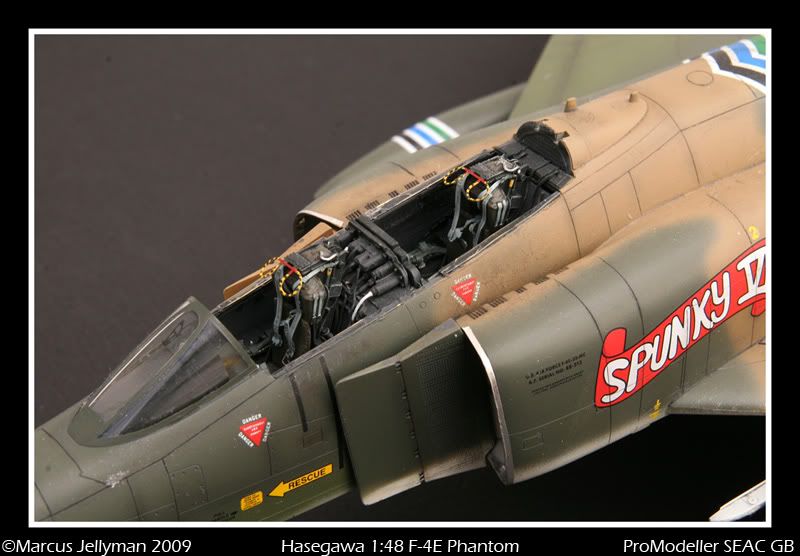
I have also added some detalling in the cockpit area with styrene, lead and fuse wire. Wiring and plumbing, including oxygen hoses was built up and a map/paperwork holder added from sheet styrene.
The cockpit panels are from Eduard and are the pre-painted ones, i said to myself i would never use these as it takes away fun of painting dials etc, but for this one i will give them a go.


Eduards pre-painted instrument panels were not too nice so went in the spares box, in the end i used the kit panels.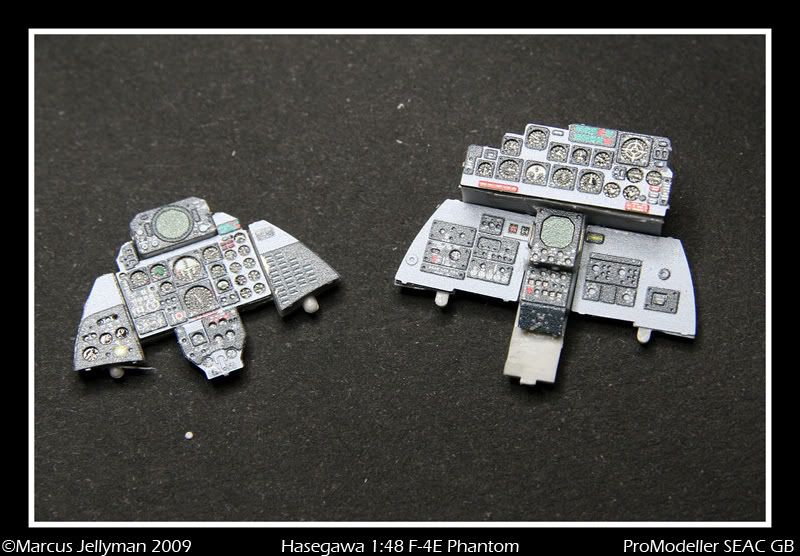


A few of us have been chatting about the different wings on F-4E's throughout their careers and found that mine had the 'Hard' wing without the slats. The kit i started out with has these so would have been wrong, fortunately i found another 'E' in the stash i had forgotten about that came with the 'Hard' wings so panic over. For anyone wanting the Hard wings the sprue letter your after is 'L', it is also in the F-4J boxing and a few others.
So the new box.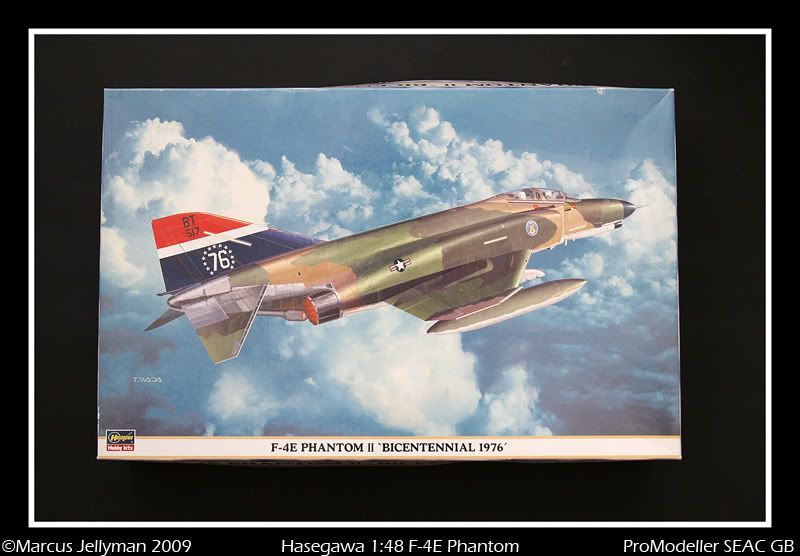
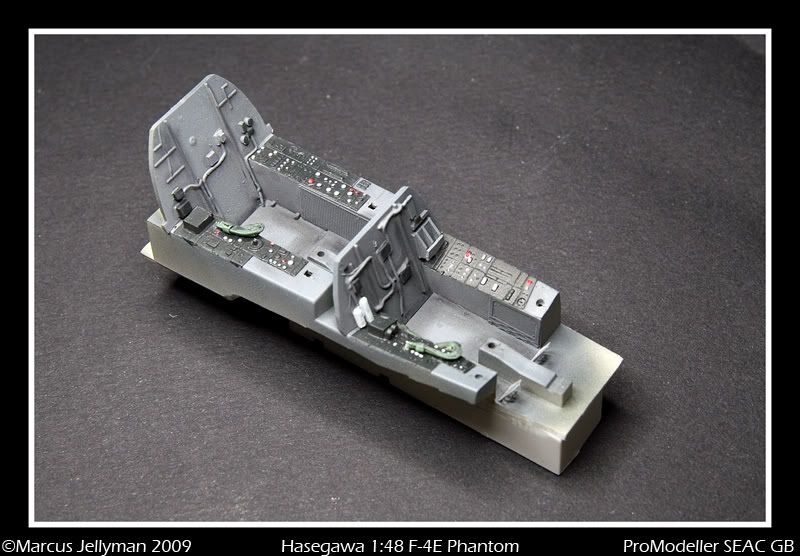
The pit was painted with Tamiya Nato Black before Tamiya XF-54 grey was airbrushed on. The panels were also painted Nato Black and switches were picked out with a tooth pick. The lot was weathered with pastels and given a wash before a flat coat applied.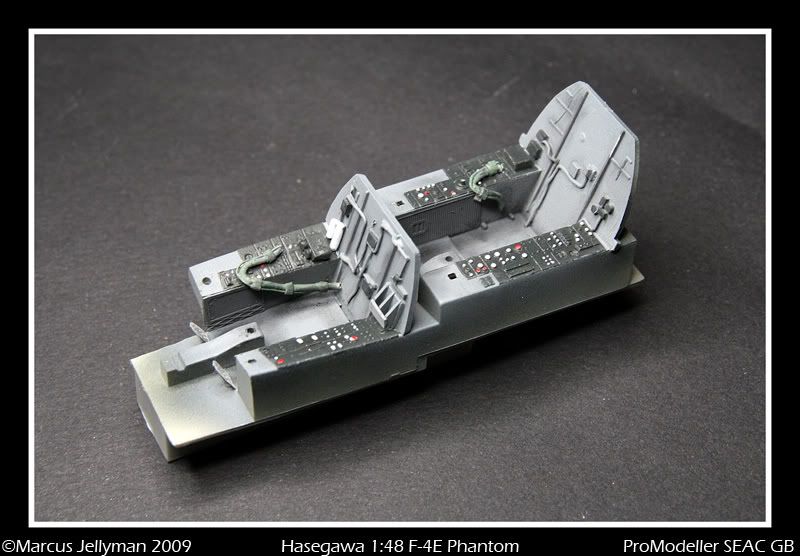
I did intend using the Eduard pre-painted instrument panels but i wasn't happy with them, so they went in the bin and i painted up the kit offerings.
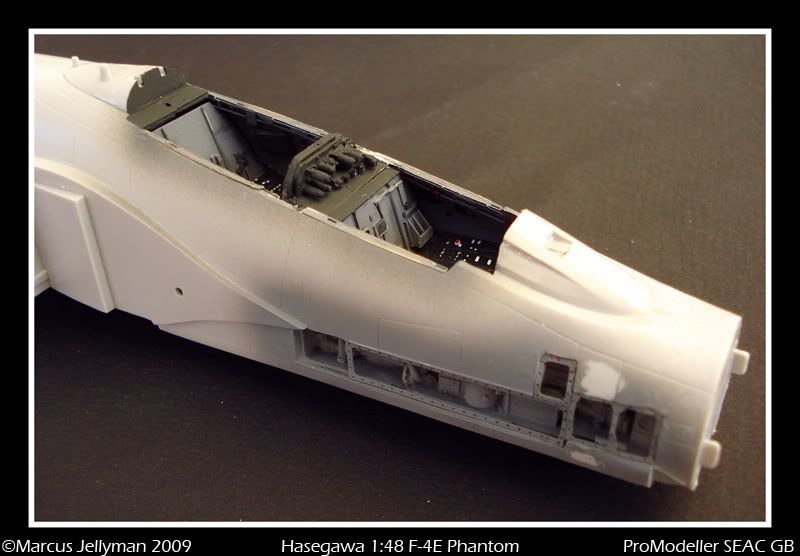
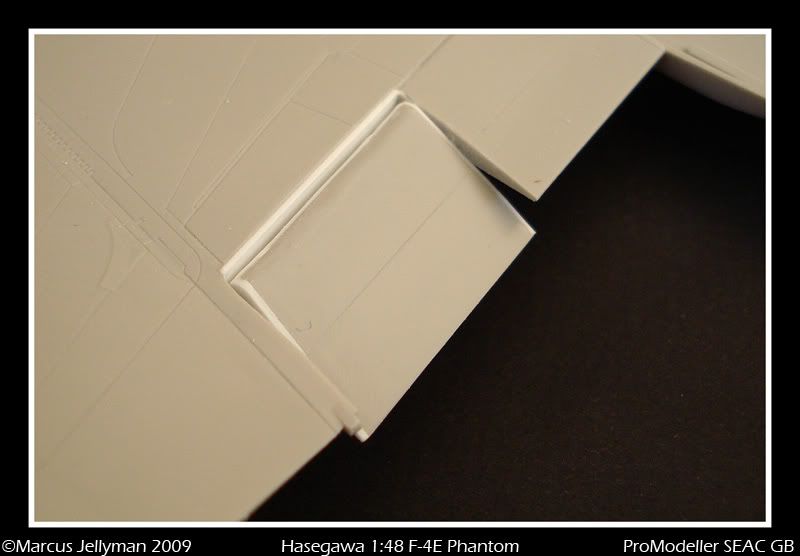
The cockpit is now finished and installed in the fuse and the wings have also been cemented together. I decided to drop the flaps, so using my Olfa-p cutter scribed through the plastic, this was then cleaned up and 15thou plasticard added to cover any holes left showing.
Next up to be added will be plenty of wiring around the cockpit area.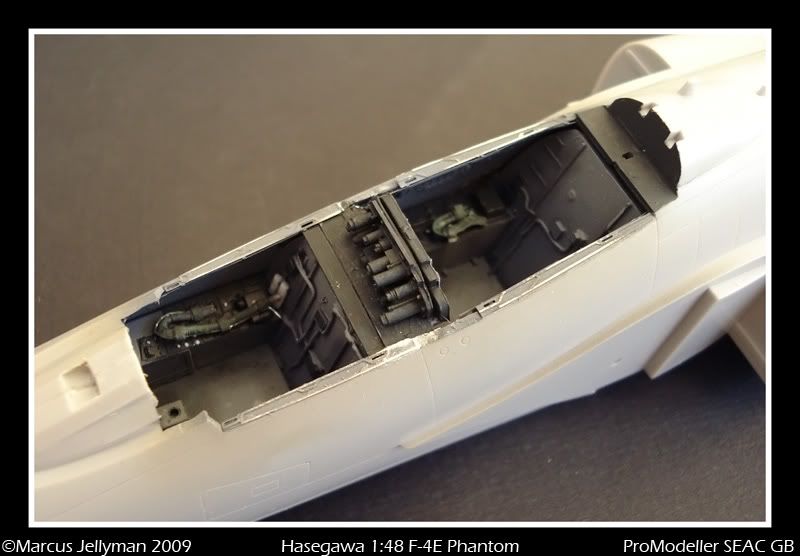


And the gun covers sliced off and the resin gun has been added.
Main jobs today were to add wiring in the cockpit area, get the cut nose on to the fuse and to just tidy up any joints/area's that needed attention.
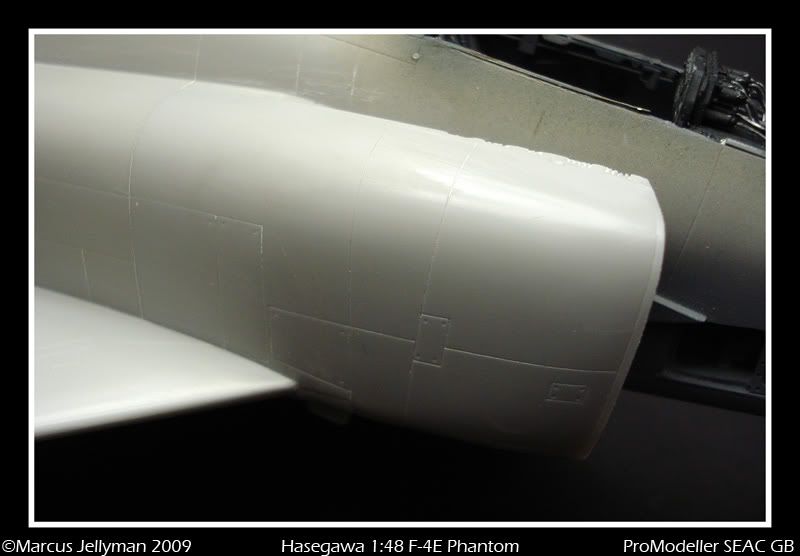
The intakes are now cemented on and have been blended in and re-scribed.
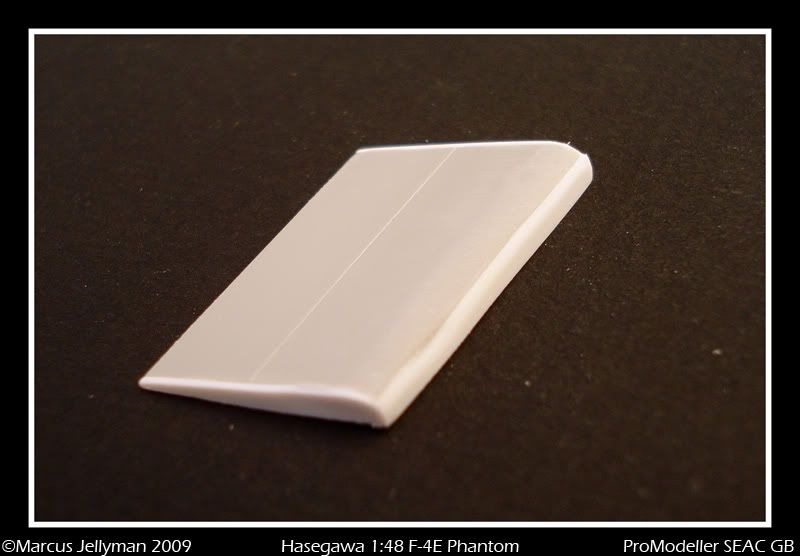
The 'bumps' that come on the Hasegawa wings have been removed and any loss of detail re-scribed.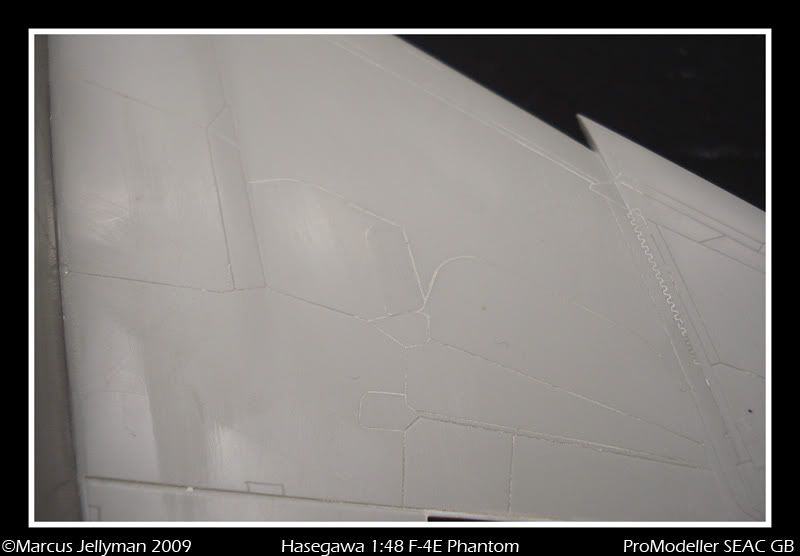
PE added to the wheel wells.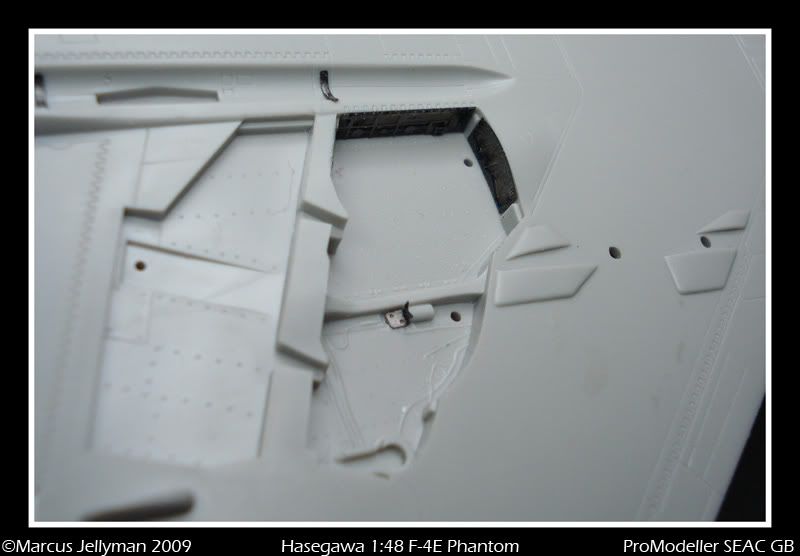
Rear end of the fuse joint filled with Mr Surfacer 1000 then sanded and re-scribed.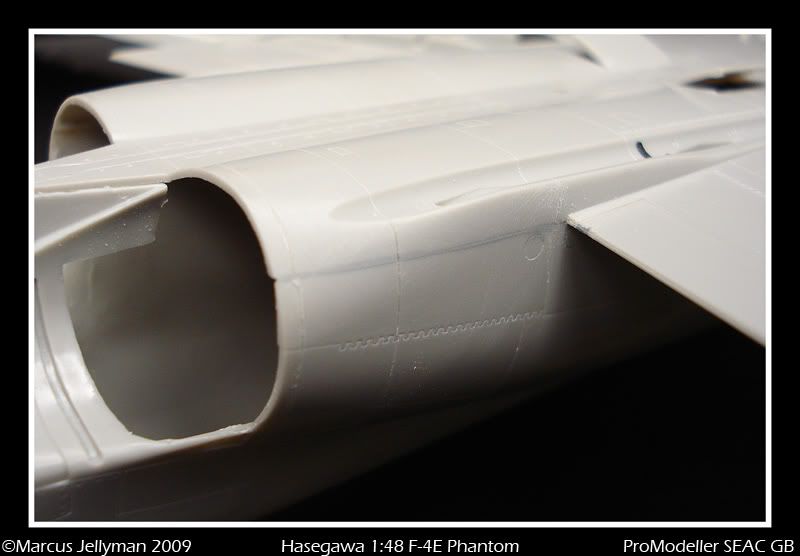
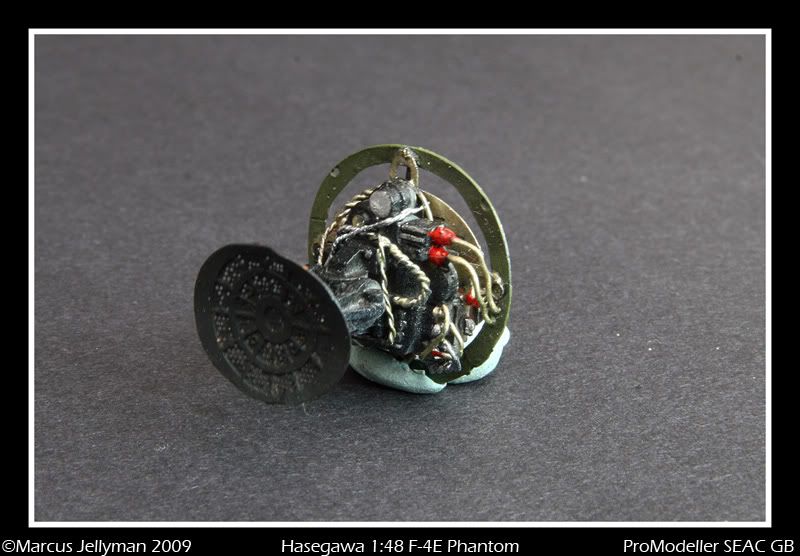
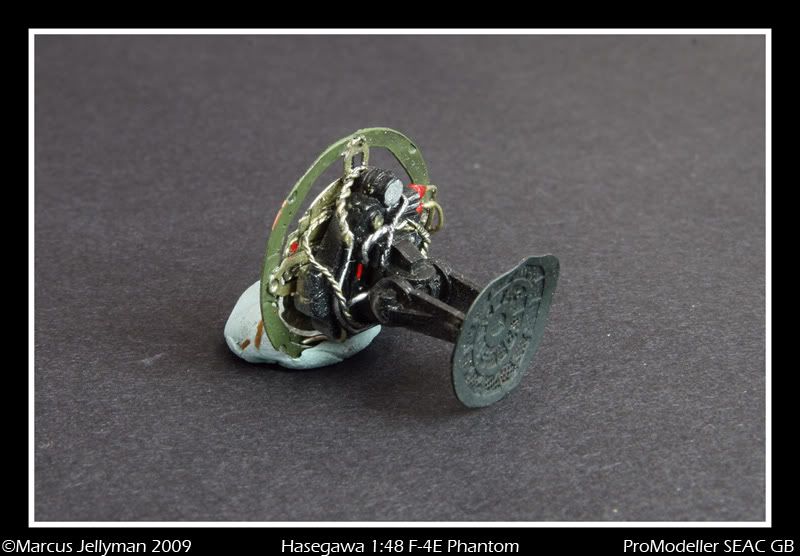
The extensive wiring behind both seats has been replicated with various sizes of lead wire. These will be painted and weathered.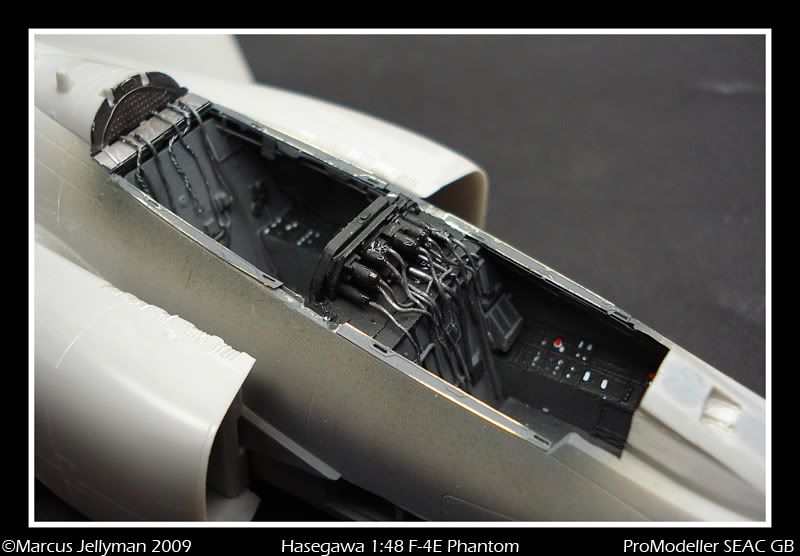
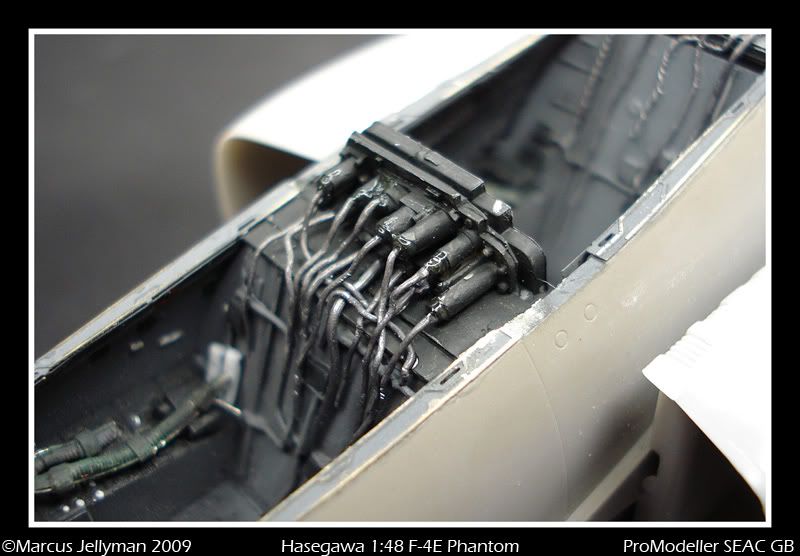
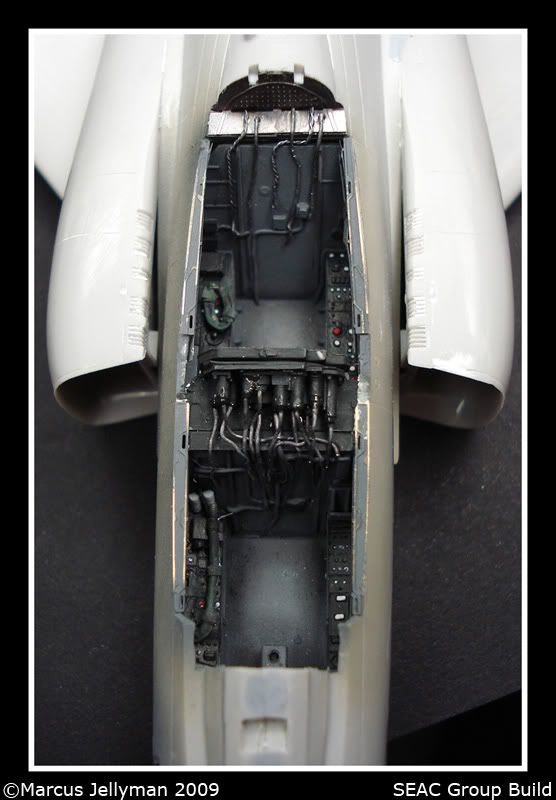
The radar has also received some wiring, again using lead wire.
The cut nose has been attached and blended in, i need to re-scribe this area and cement the radar to the front.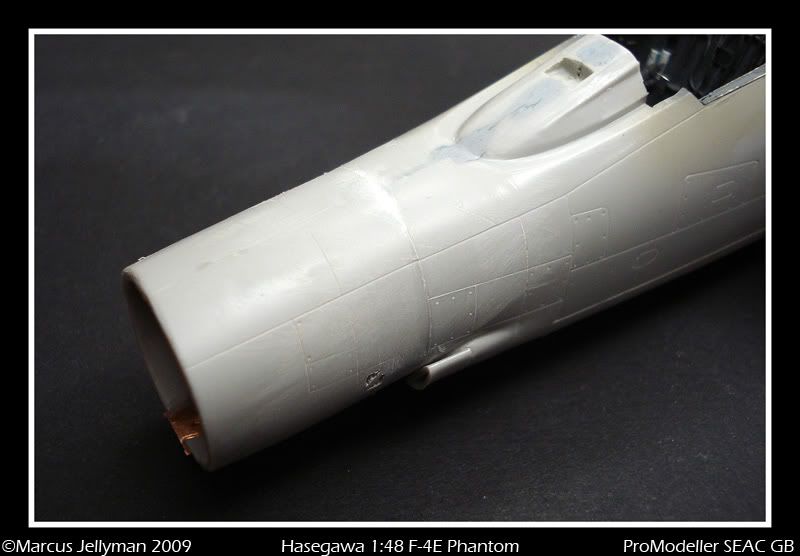
I have finished the detail work in the cockpit, just need to add the flight controls and seats.

As i have the True Details pilon sets, it requires you to remove the molded sway braces as the set includes resin replacements.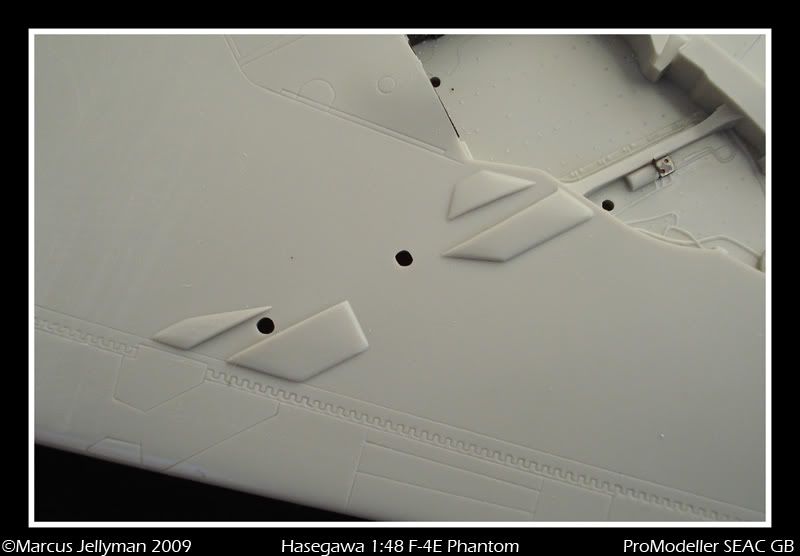
Gone!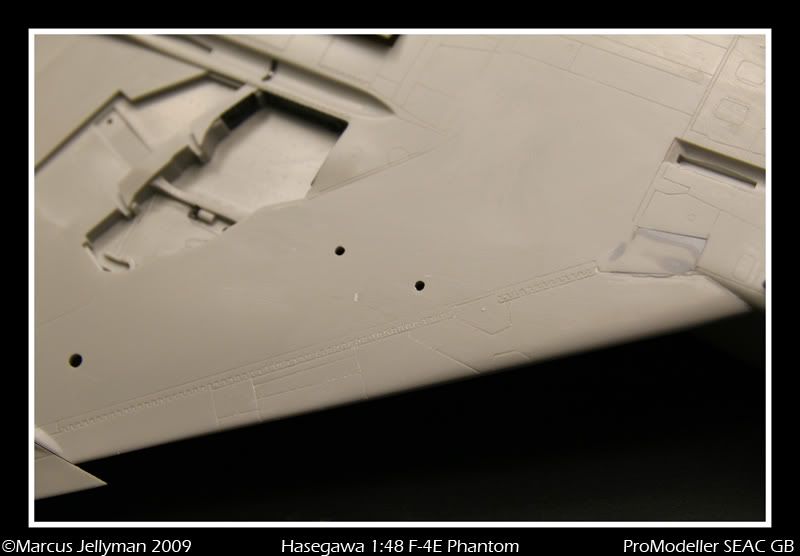
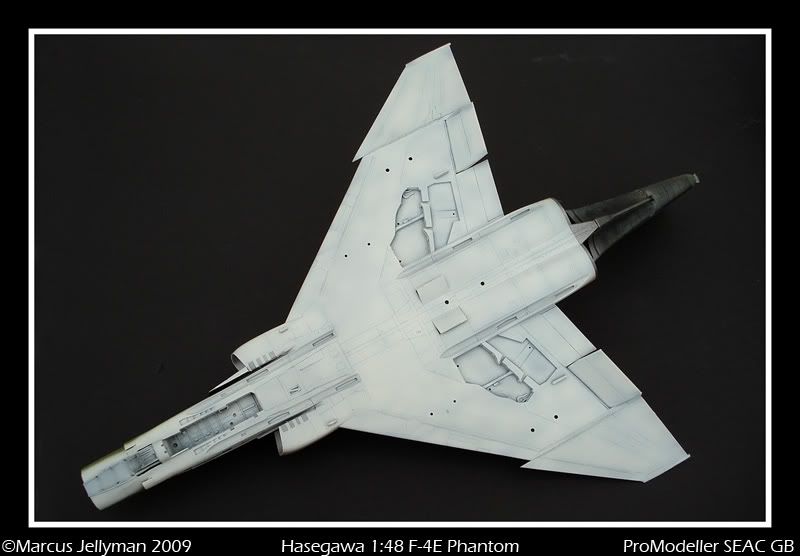
The airframe was then primed with Xtracrylics and any blemishes fixed before pre-shading wth Tamiya Nato Black.
The metalic area at the rear received various shades of Alclad, followed by Tamiya clear blue and matt black. 
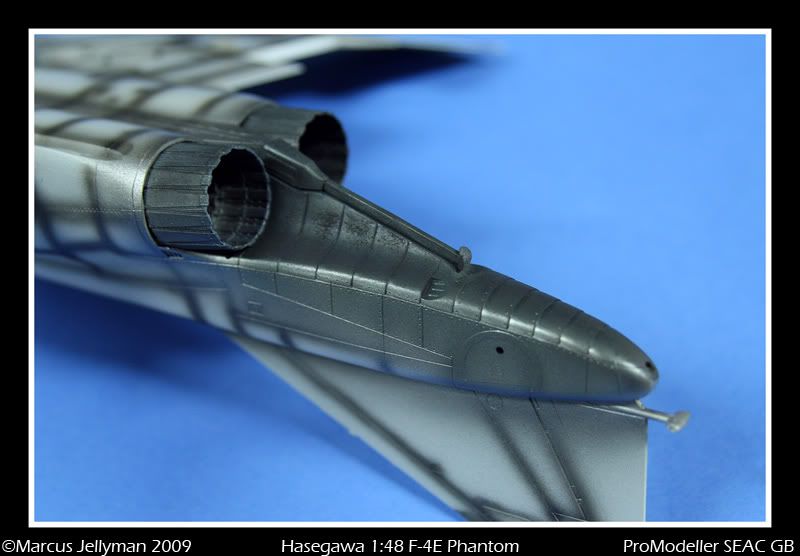
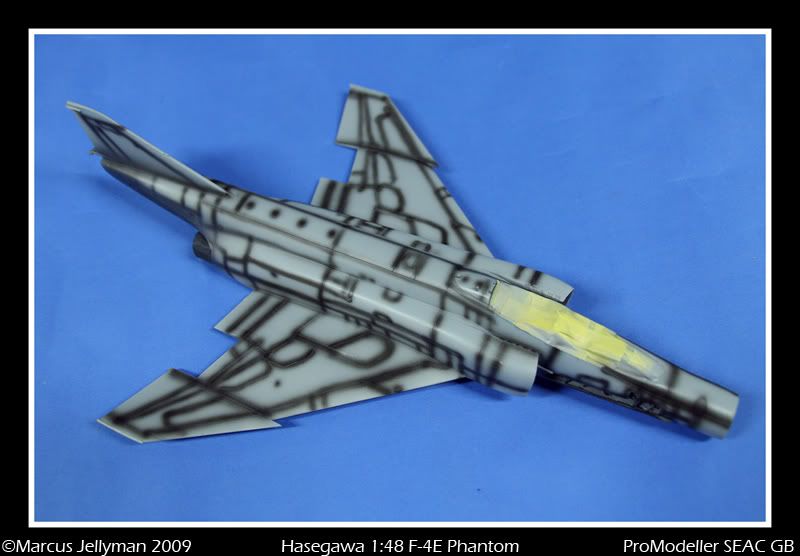
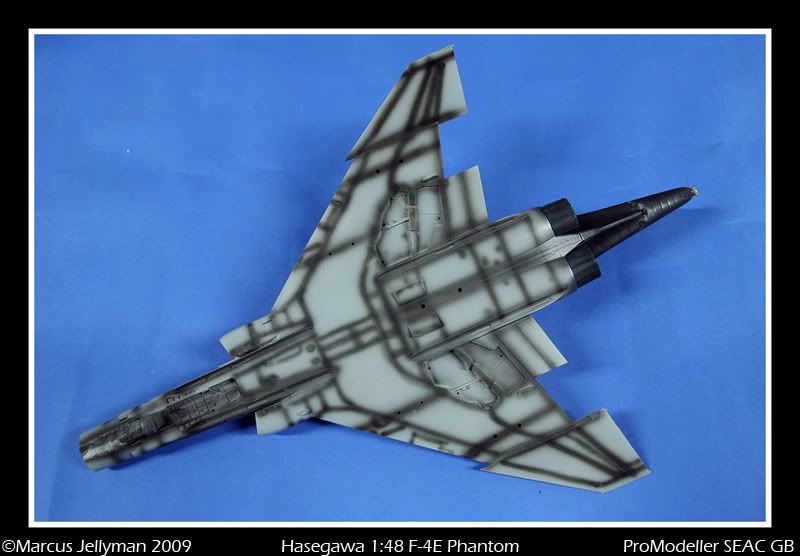
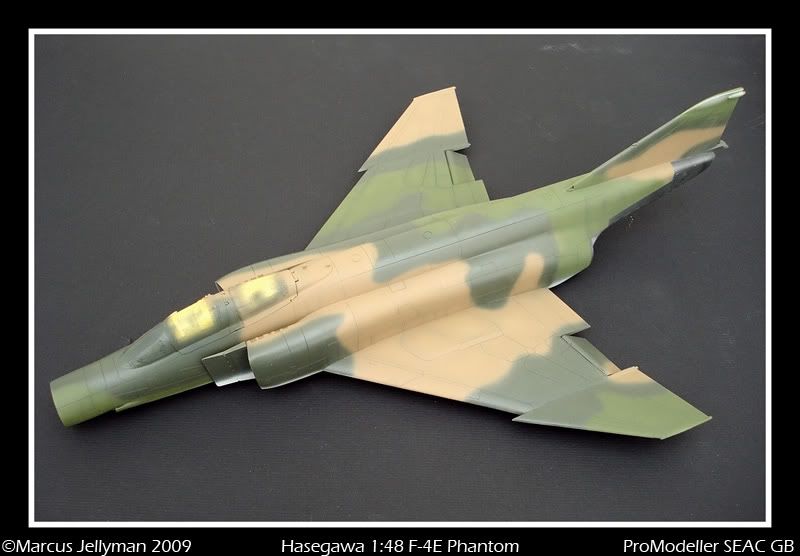
The camo now painted using my Iwata HB-SP with Gunze Acrylics. The entire model was the rub down with Micro-Mesh and then sprayed with Johnsons Klear.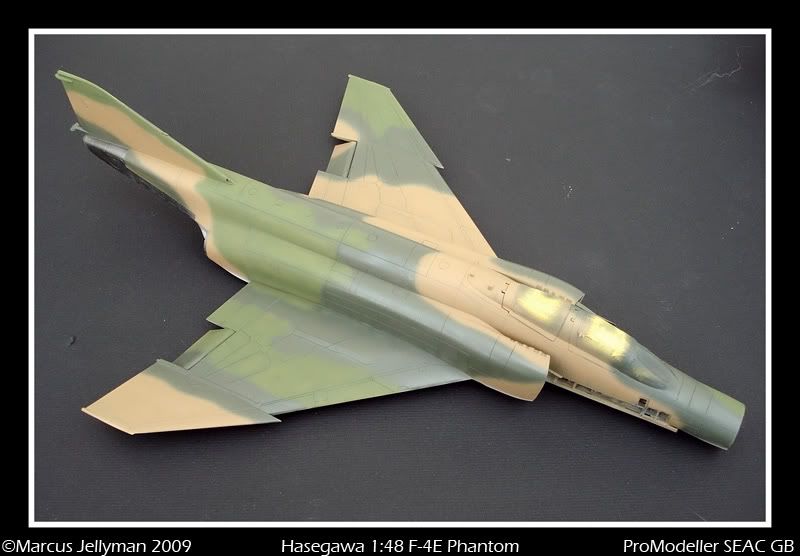


The decals are now in place ready for a quick wash to remove any setting fluid marks. The open panel has also been painted ready for a wash to be added, for the small grill inside i used Bare Metal Foil, i also used this for the landing gear oleo's. The landing gear was first painted gloss black before the white, this gives you some nice deffinition once painted. Fuse wire brake lines were also added.
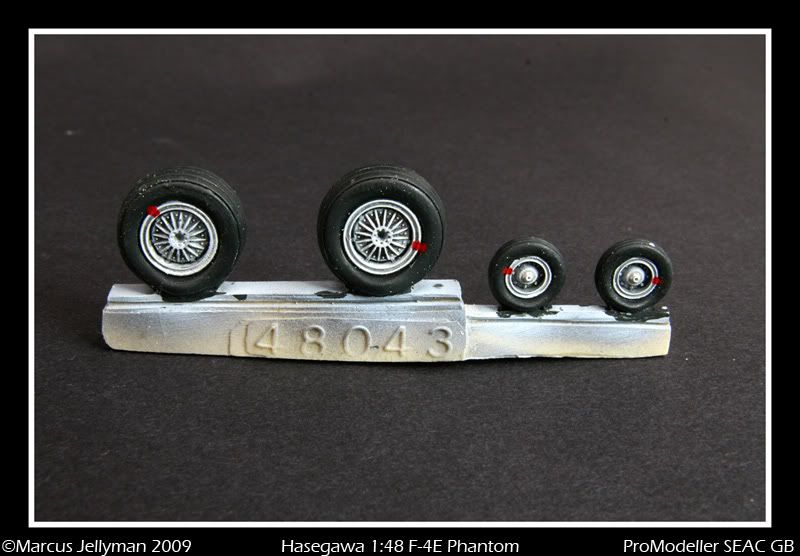
The True details wheels were shot in gloss black before the white, Tamiya Nato Black was used for the tyres and a wash of diluted Tamiya Smoke 'dirted' them up.
All thats left now is to paint the ordnance and put it all together.

Got a Klear coat on to seal the decals in. Spent today weathering the airframe, also got the seats and landing gear almost finished.
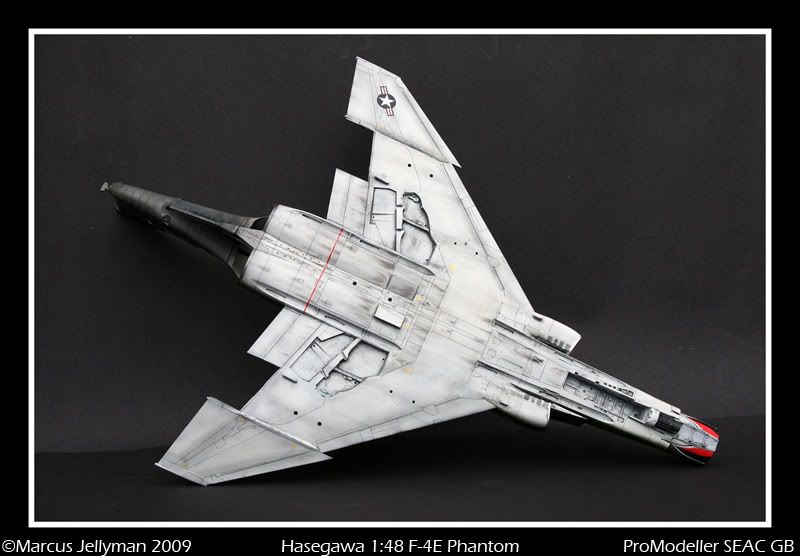
First up the model was given a wash of Promodellers 'Dark Dirt' wash. This was followed by chalk pastels and Tamiya weathering powders.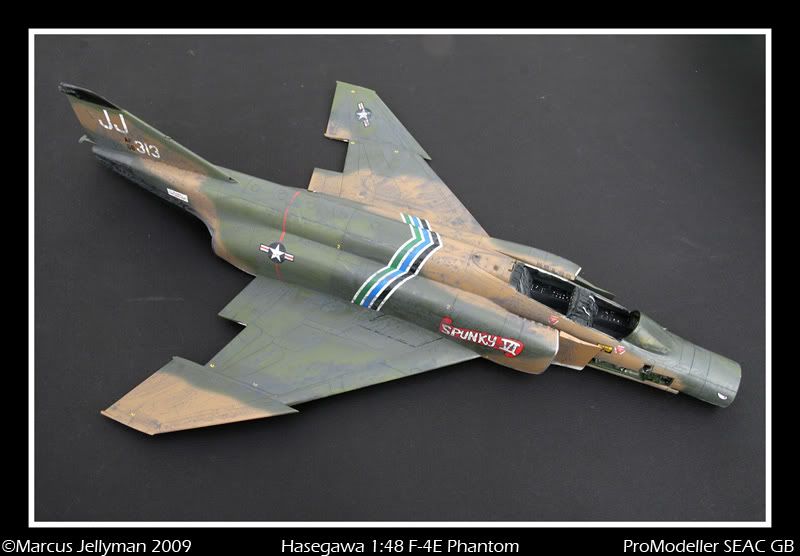

The Aires seats have now been finished and are ready to be installed.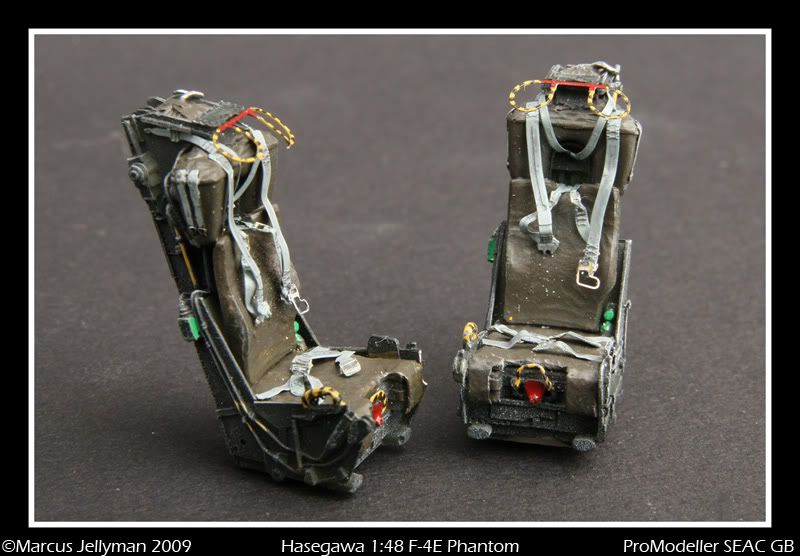
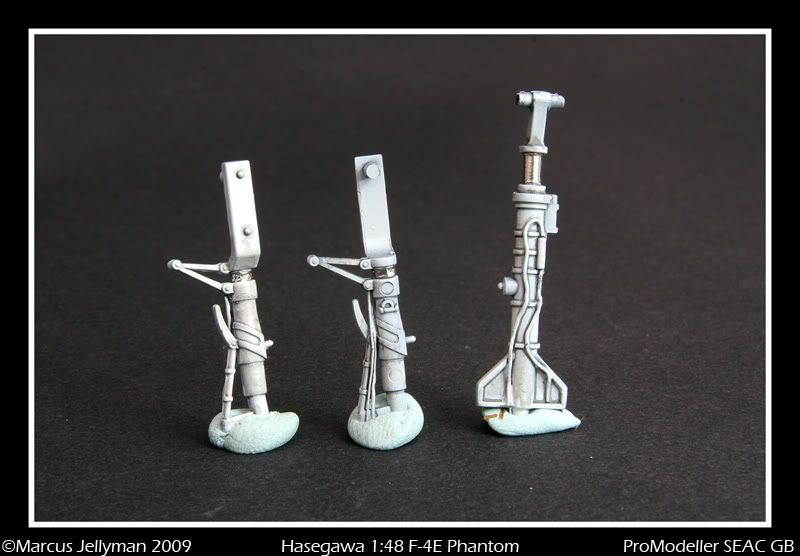
The landing gear almost done.
She's NOW had an Xtracrylic flat coat and had her legs attached. I've also made some progress on the ordnance, these just need some weathering before being attached.


We've finally reach the finish line!!
I must admit this was another really enjoyable build, the Phantoms got to be up there amongst my all time favourite aircraft so really had to have this one on the shelf.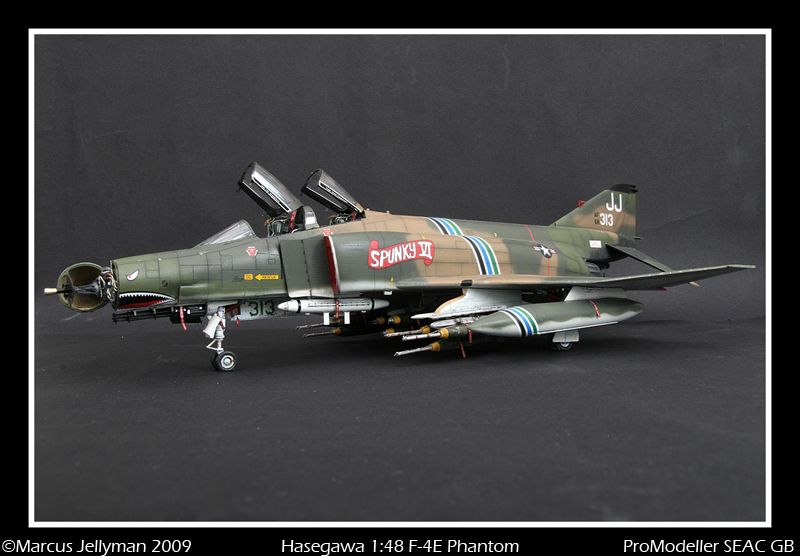


Marcus