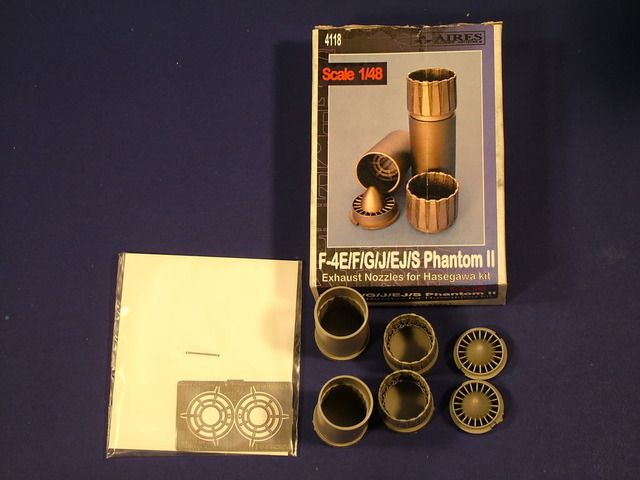
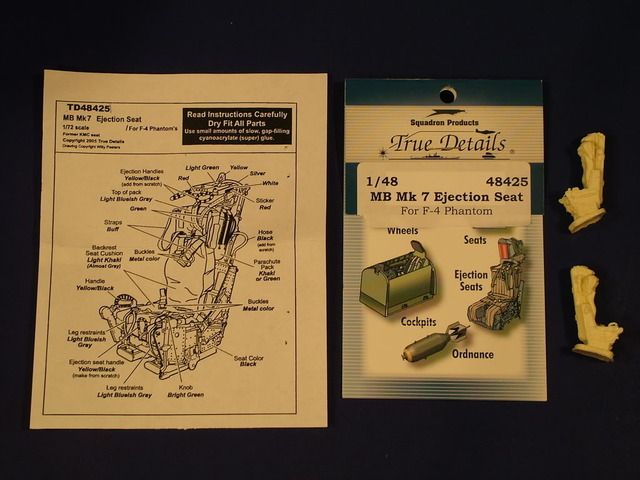
F-4 E Phantom II – Easy Rocking Mama II 34th Fighter Squadron based at Korat AB, Thailand Maj. George Koch Pilot & Lt. Paul Brown as the WSO 1970 1:48 scale release from Hasegawa Kit # 09805 will be utilized. I will be modeling the scheme of an F-4E stationed at Korat AB, Thailand, known as Easy Rocking Mama II. Comments about my build/interpretation: Pre-shading to be performed utilizing Mr GunzeGrey as a primer coat and XF-1 Flat Black for pre-shading. Overall Standard SEAC Camouflage will be build up usingthe following: 308 - FS36375 Grey Semi Gloss - used as a primer Tamiya X2 Gloss Black for the radome and XF-69 NATO Black for the tip. The engine nozzles will be detail painted to simulate heat distortions by using various shades of Testor’s Metalizer and Alclad Clear Blue plus stains of Tamiya Clear Yellow and Red. Bits of worn surfaces to be picked out with a silver artist pencil, some boot scuffs on the port wing and engine tops where maintenance crew wore down the paint, with black artist pastels, fuel stains etc on the wings will be simulated with artists’ pastels of burnt umber. Gun staining performed with various shades of grey and black pastels. Clear coat of Model Mastergloss coatto be applied in preparation for the decals, they will be snuggled down with solve- a-set. Once dried another layer ofModel Master Supper Glossto seal all details and decals in. The next step will be followed with Pro-modeler clay based washes (Dark Dirt, Light Dirt) to accentuate the various panel lines and general weathering of the SEAC camouflage. Finally a Testors acrylic semi-gloss coat will be applied to seal in all details. I will be using the following aftermarket products: Eduard cockpit PE set…………………..#49-231 Aires Exhausts Nozzles………………… #4148 Two Mikes Resin FOD Covers………… #48013 Decal sheet from Eagle Strike………… #EP48267 True Detail MK-7 Resin seats…………. #48425 Hasegawa Weapons Set B & C References used: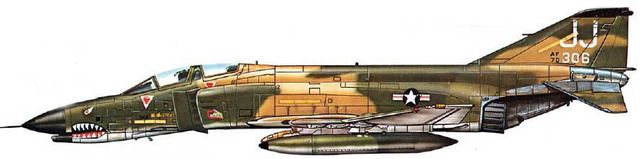
310 - FS30219 Brown Semi Gloss
309 - FS 34079 Green Semi Gloss
303 - FS 34102 Green Semi Gloss
311 - FS 36622 Grey Semi Gloss

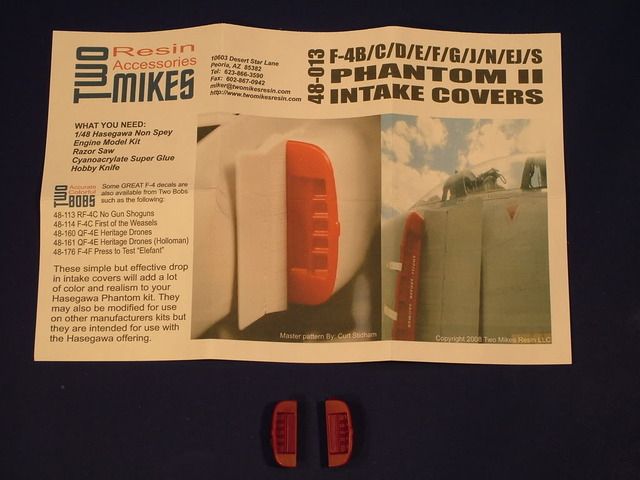
Two Mikes Resin FOD Covers:
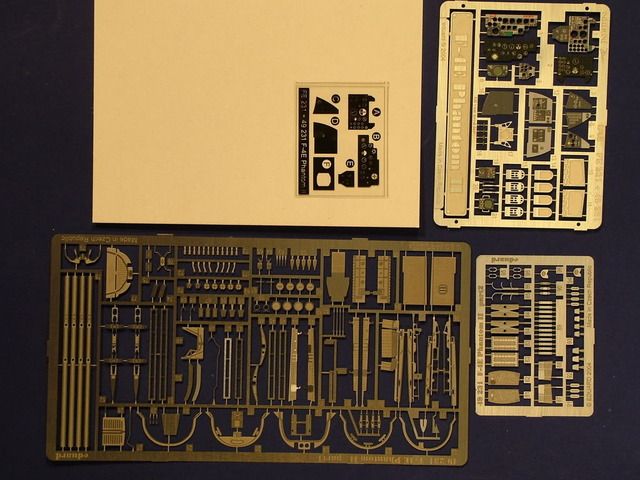
Eduard PE detail set
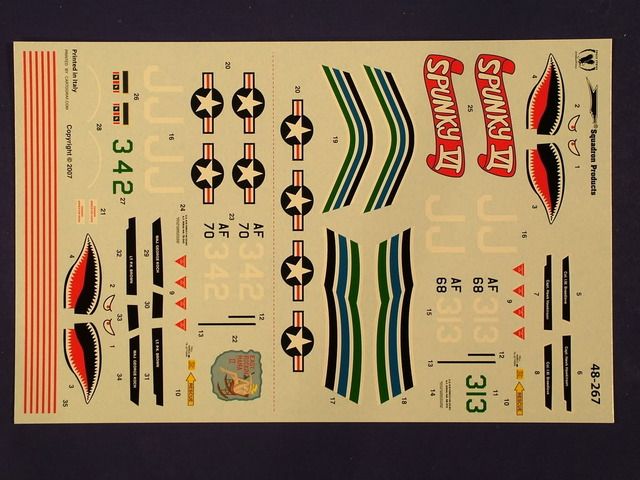
Eagle Strike Decal Set

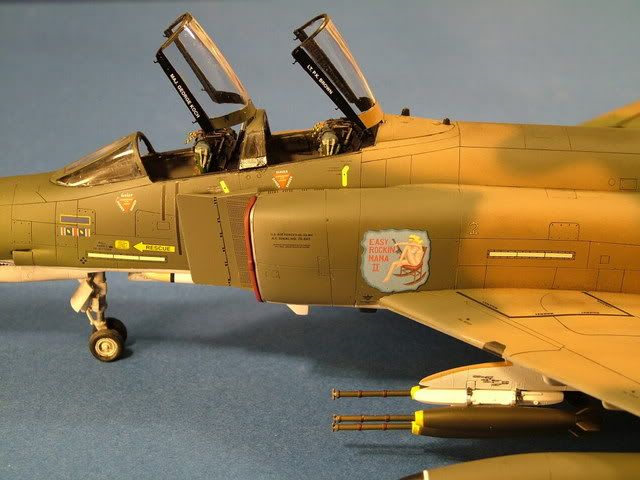
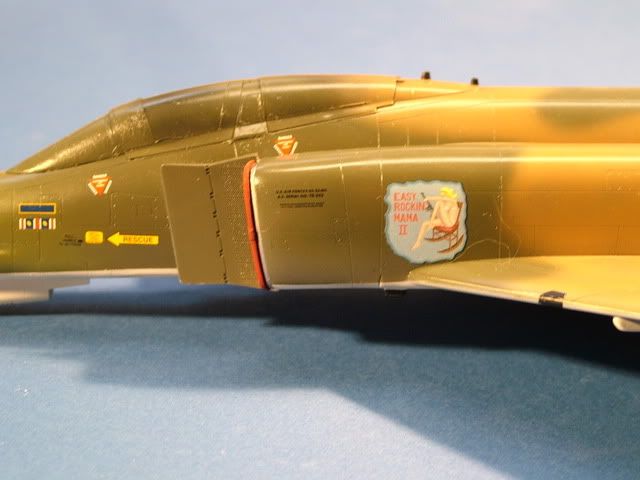
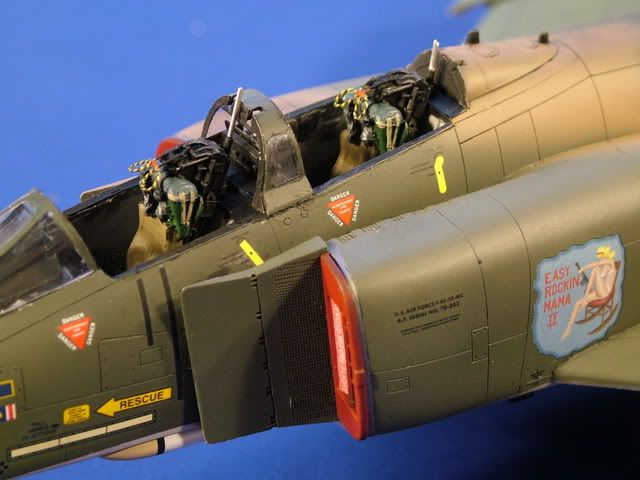
Side Art Detail shot of Easy Rocking Mamma II

Aires Corrected Nozzles
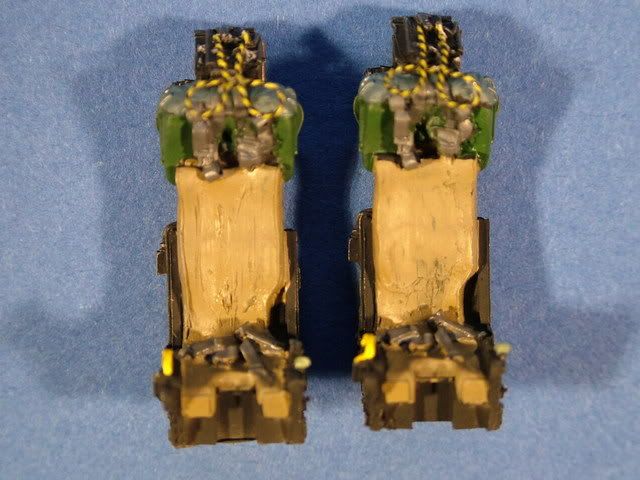
True Details -Martin Baker MK -7 resin EJ seats
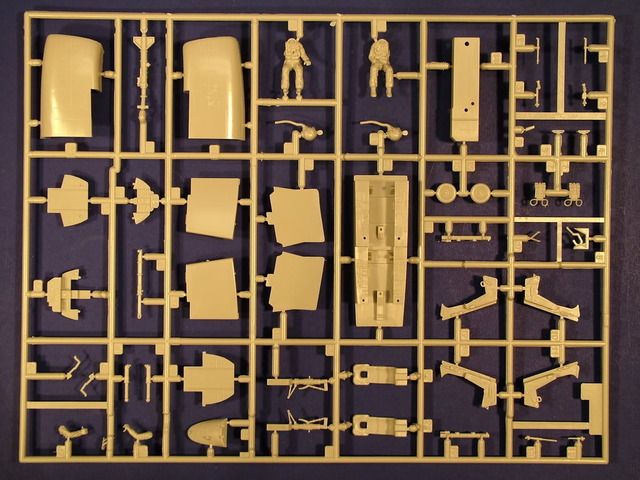
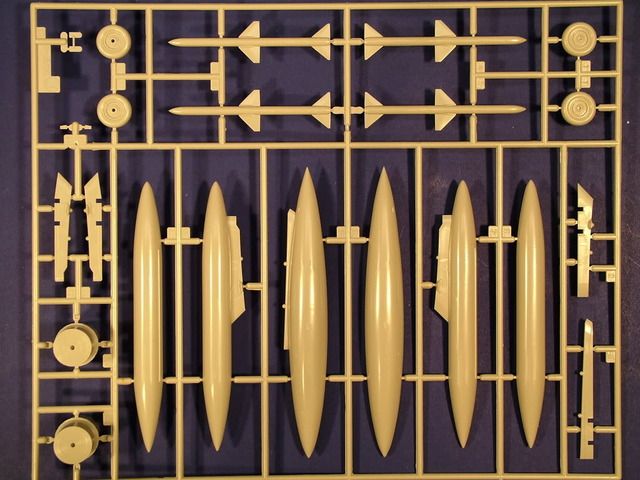
Sprue shots
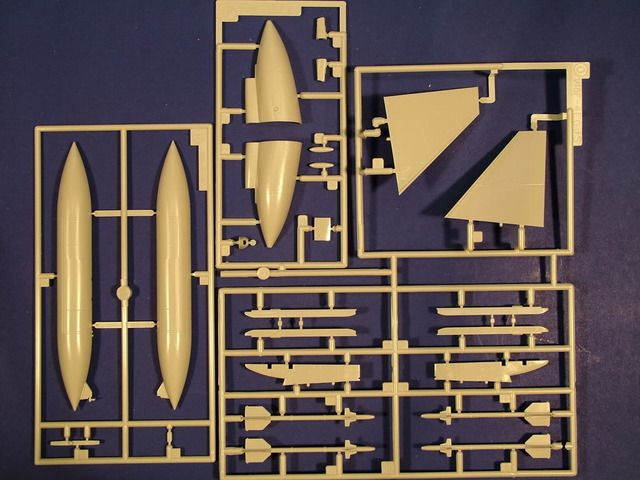
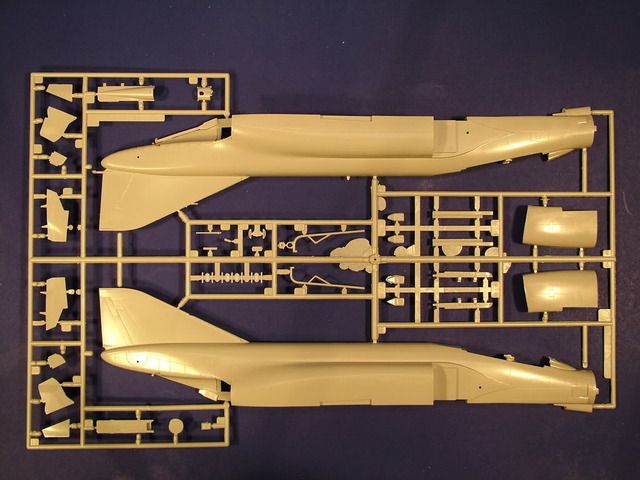
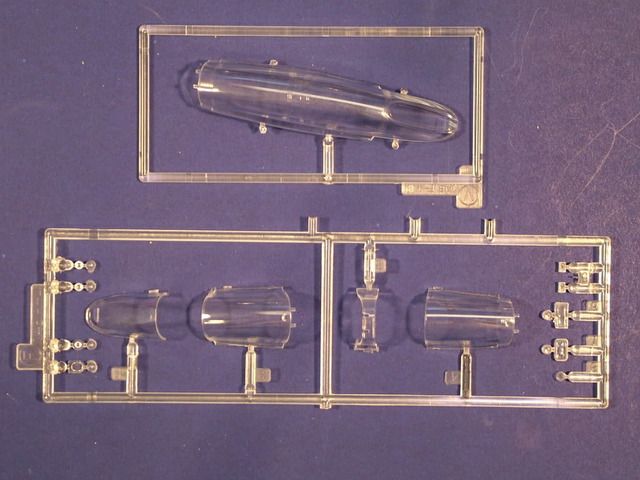
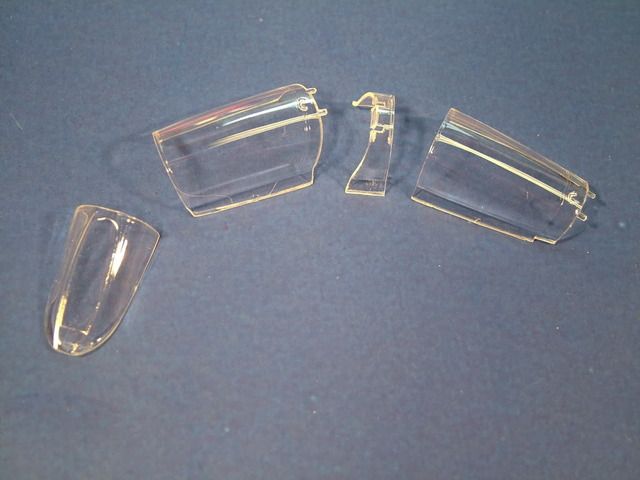
Clear Sprue:
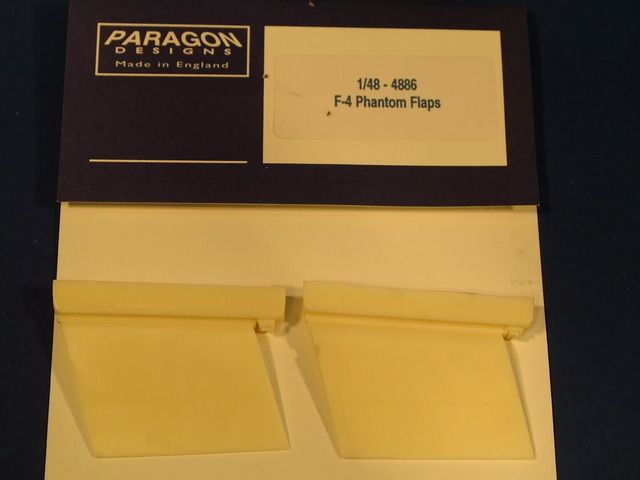
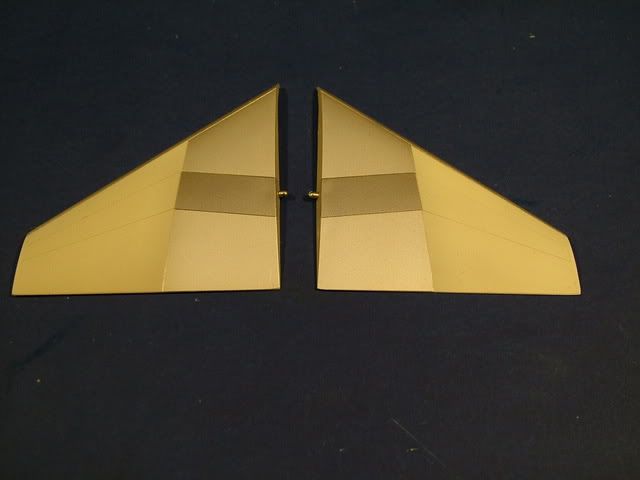
Paragon Resin Flap
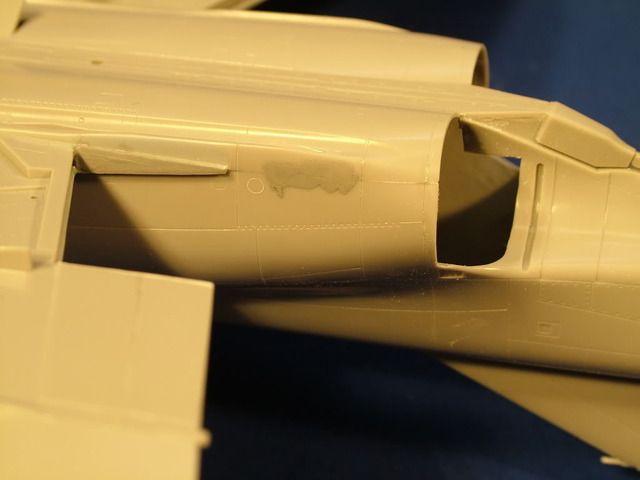
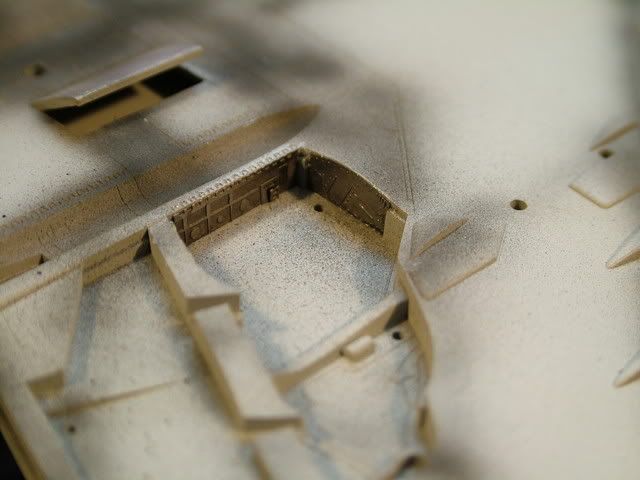
Removing the unwanted "static flap area"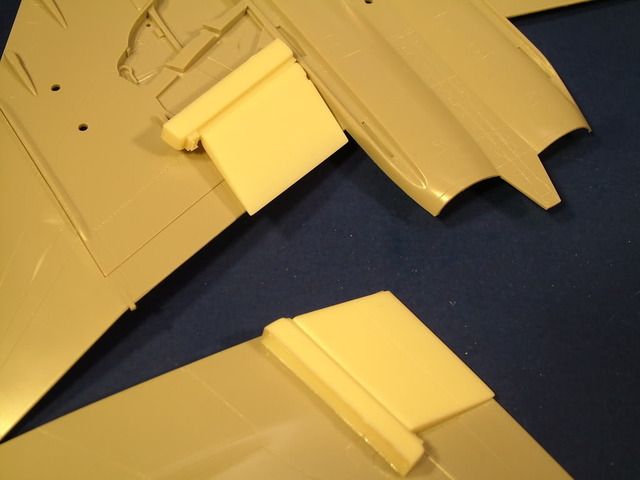
Firstis to get rid of the casting blocks on the resin seats, usinga razor saw makes quick work of this step.
Onto getting the cockpit tub figured out and test fitted with the seats in it and the PE Parts for reference
Glued the nose cone together and the front engine intakes.More work on the resin flaps
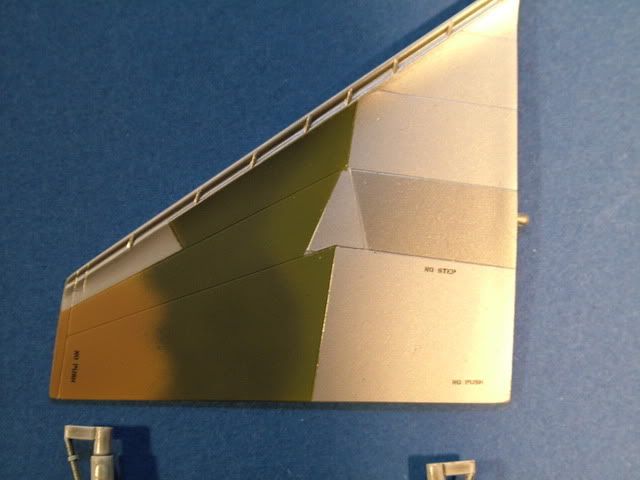
Before committing to any cuts in the plastic, I like to check twice and understand which panel lines I am to follow and cut away which parts.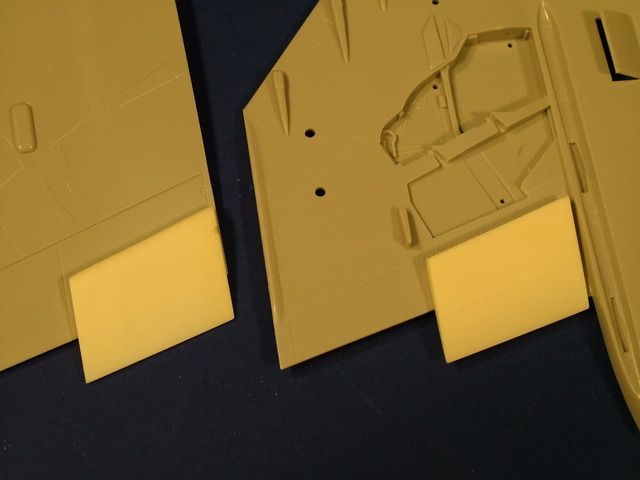
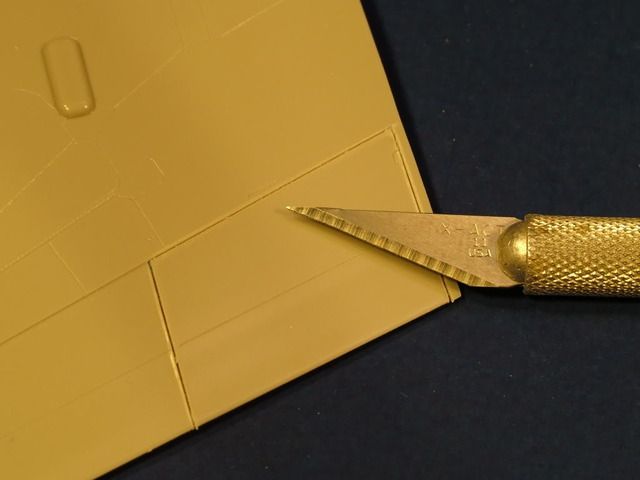
Following the panel lines with a new sharp scalpel blade makes easy work of a task like this. Keep in mind to angle the blade ever so slightly "inward" towards to part that needs to be removed.
After a few passes flip the part over and look for the score line (lighter) plastic. Just follow that line very lightly and within two to three passes with the blade you are through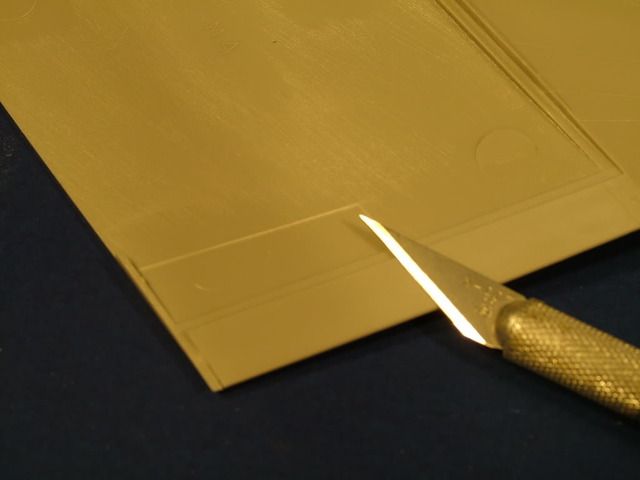
Check for rough fit
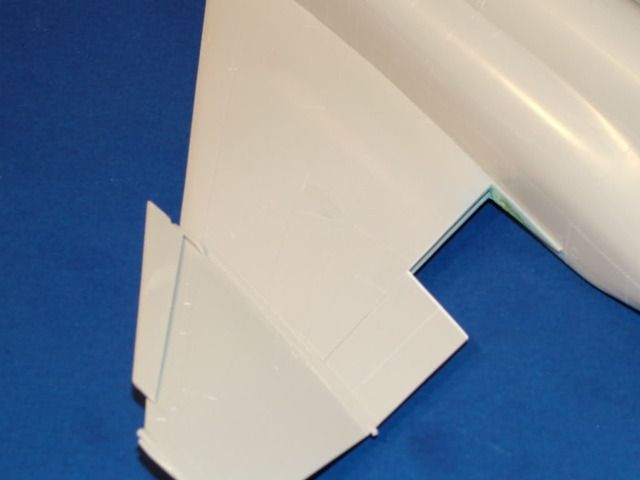
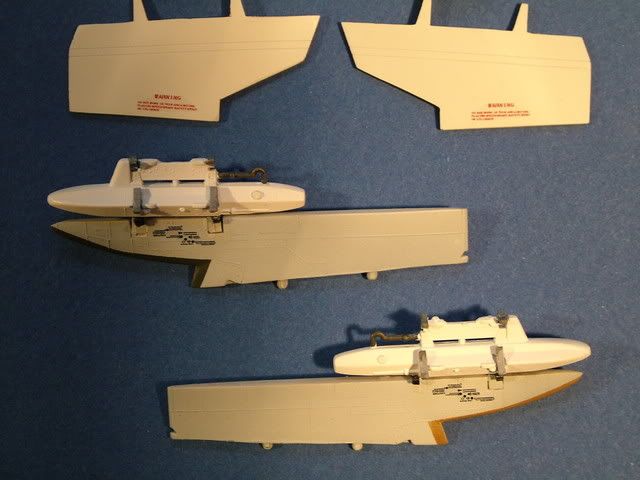
Glue the wings together and fill in the small gap you would see when the flaps are in the lowered position
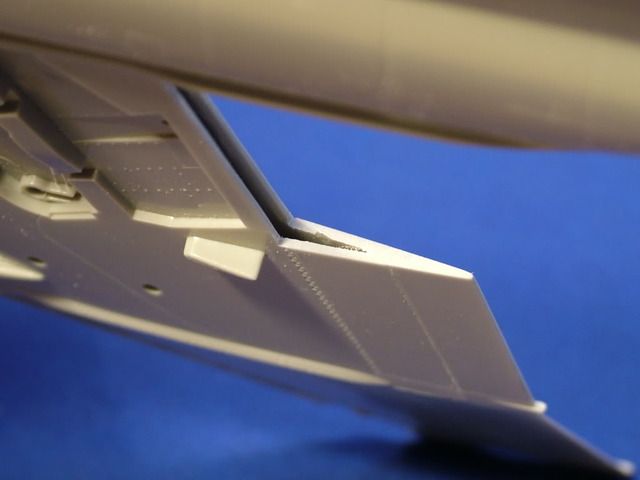
Gap filled in with some very thin plastic card stock and sanded into the correct shape

The opposite side of the flap bay just needed a little green putty
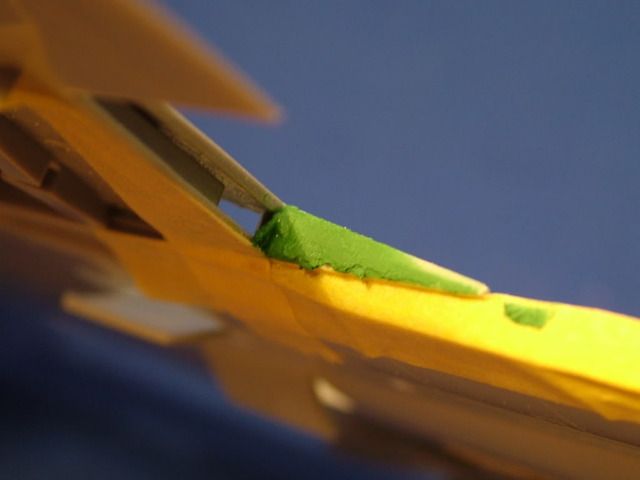
Sanded back to shape
Flaps dry fitted
Overall wing shot. I think it adds a little bit more interest to the whole wing. Flaps were primered with light Grey and the front slats are installed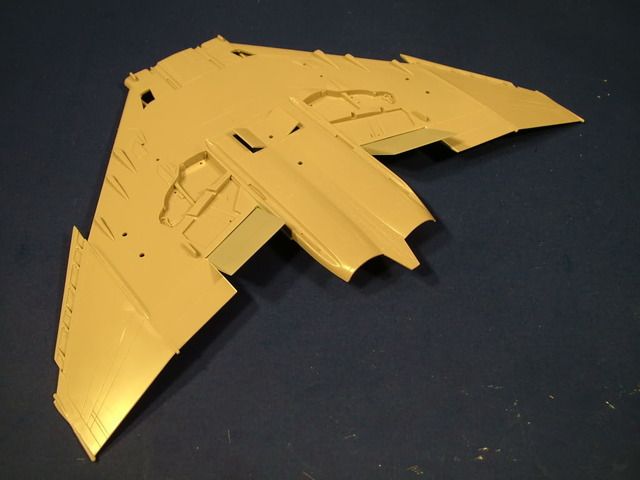
Work commences on the Eduard PE pre-painted cockpit set.Small drops of future simulatethe glass surfaces
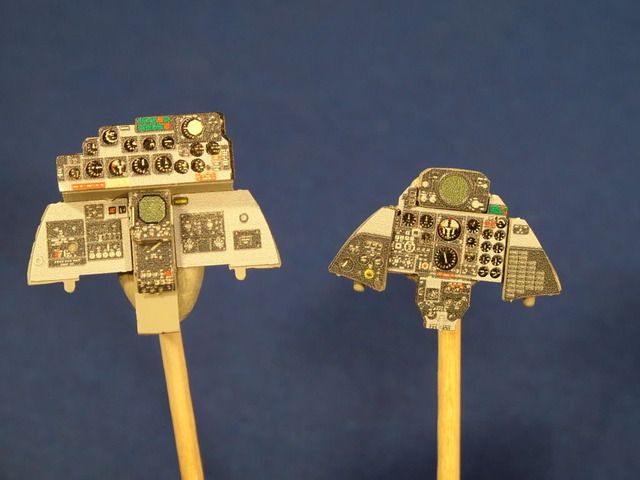
Quick dry fit ... Front 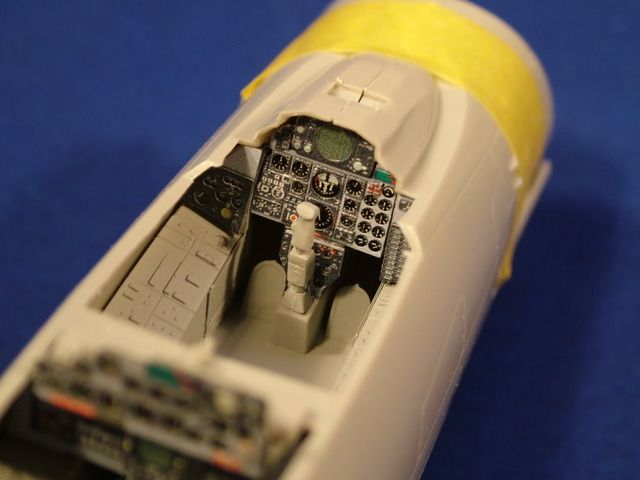
Dry fit rear WSO home base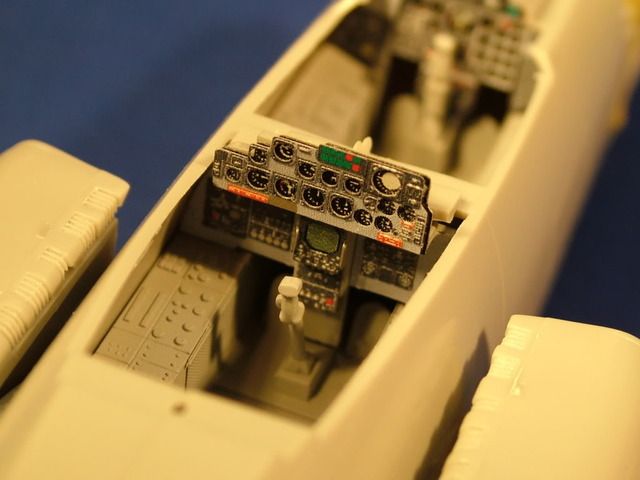
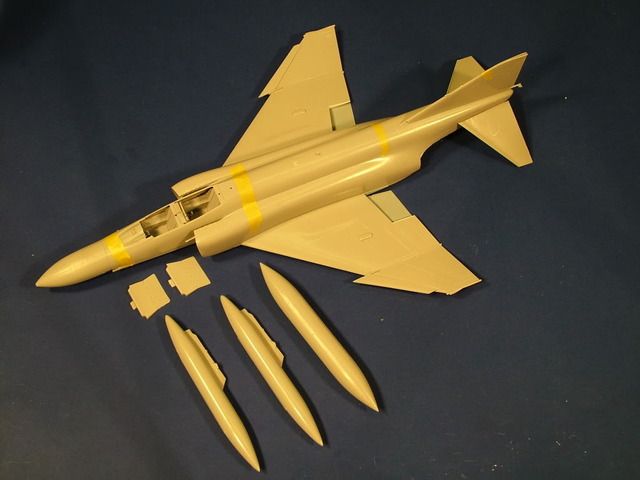
Overall progress pictures, glued up the tanks, an overall dry fit of the fuselage and wing joint. Some minor sanding needed.
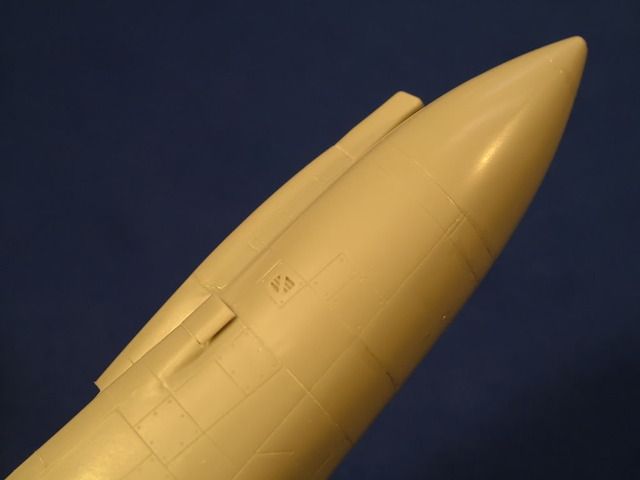
Nose conegrafted on, sanded down the main front fuse area completely flat and removed the locator tab as I had quite a bad dry fit join.Sanded very lightly the nose cone itself by placing it on a piece of sand paper which was placed on a glass tile to ensure I would end up with a super straight alignment.Very little re-scribing to be done or sanding.
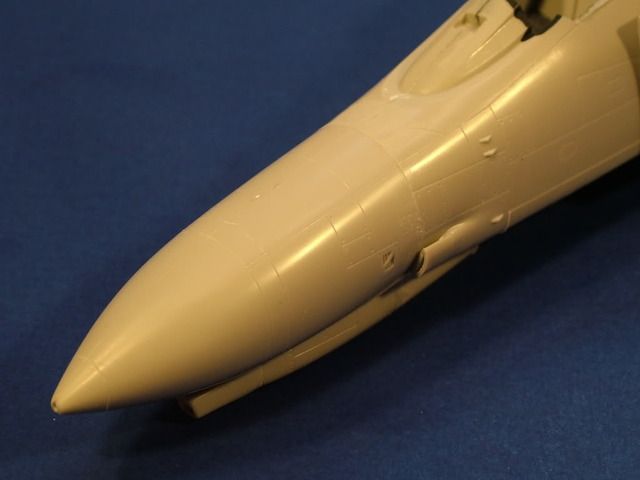
Opposite side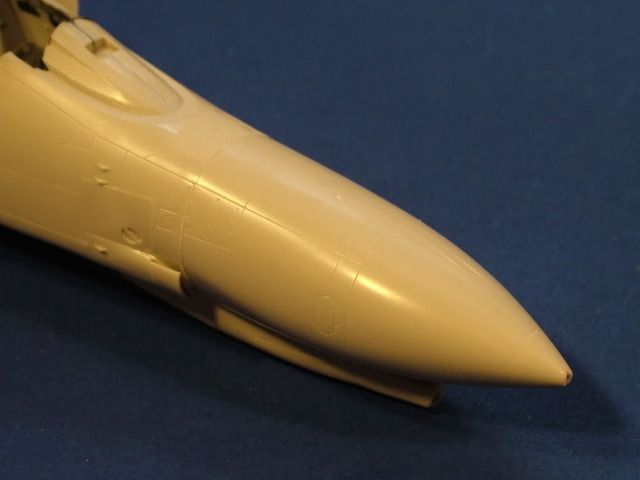
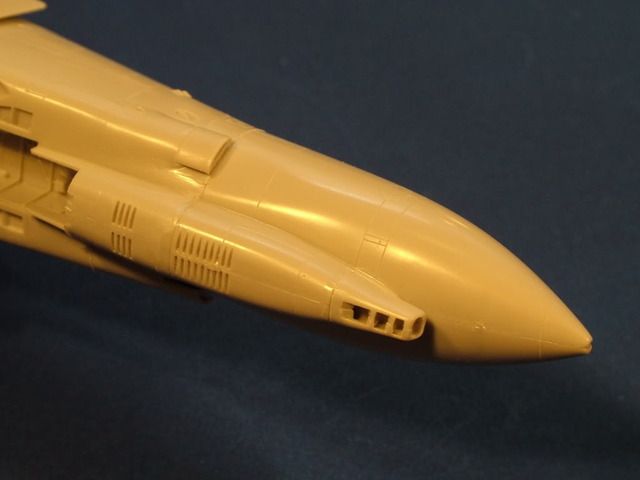
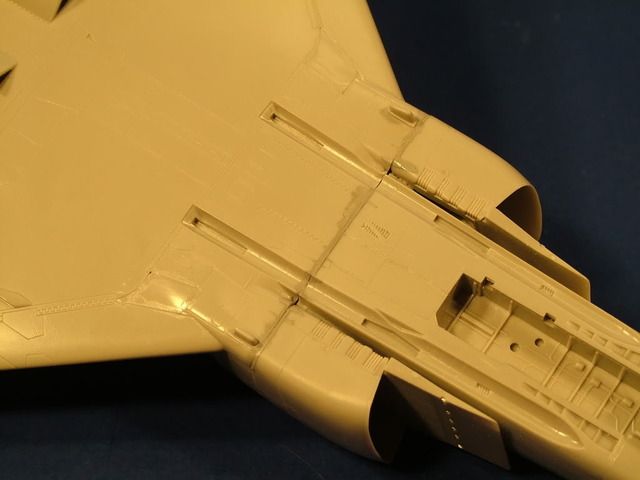
Bottom with the gun ports, zero filler required anywhere all around
Glued on the main wing. Started off aligning it first and did some small sanding to get a better fit on the bottom front join.Tamiya Thick weld on all to be joined surfaces and placed rubber bands just to pull in the wing to the fuse tight.
Then went through the wing to fuse joint one more time and placed Tamiya Thin weld and let the capillary action draw it along the join.
This is left to dry over night. There is no pressure on the dihedral just side pressure to push the wing towards the fuse. Another thing I did is to not glue the false bottom of the fuse and leave it on it's own so as to allow for the fuse to "expand" once I relieve the rubber bands if it is needed.

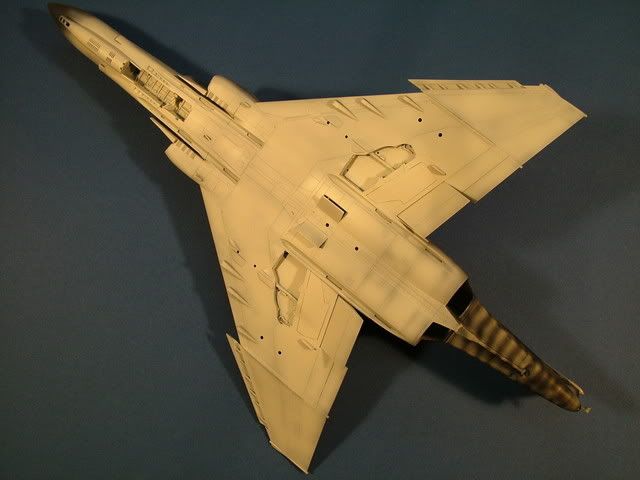
High frequency band antennas removed
Here she looks as smooth as a baby's bottom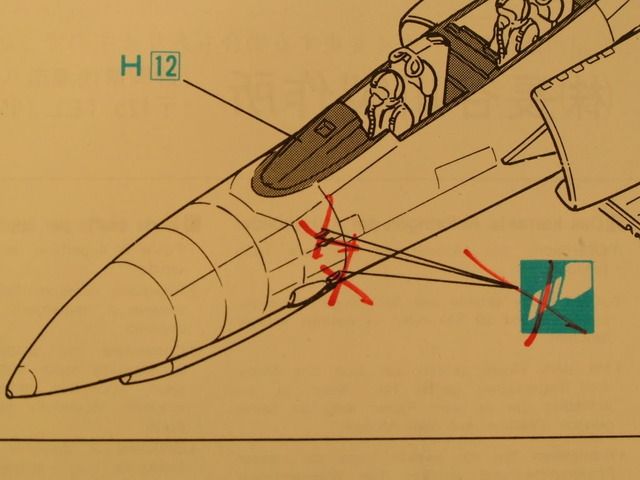
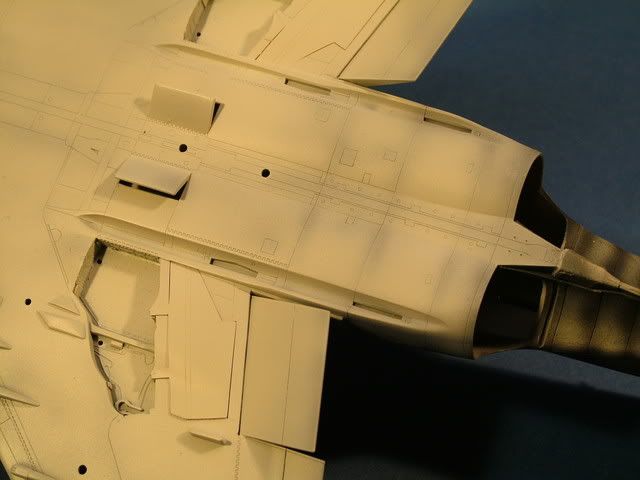
Another removal this time the wing "lumps"
Taped everything off as to protect the surrounding detail. Then used a rough piece of sandpaper glued onto a piece of aluminum (as to keep it as flat as possible and not sand in a dent)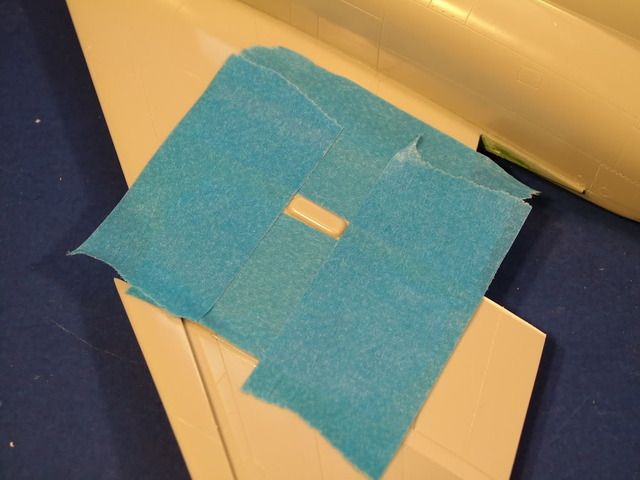
After some minor sanding down through the various grits and a final polish with MDC Master Caster sanding blocks. A small re scribe to correct the panel lines here is the final result.
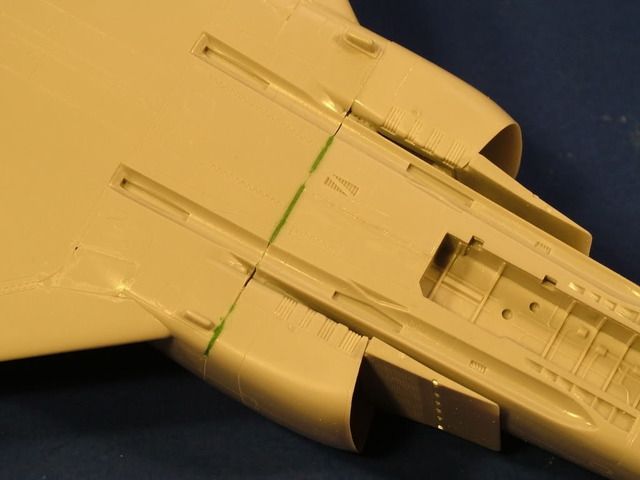
Filling the minor gap between the main fuse and the wing which is notoriously bad on this kit.
On my rendition though with some prior patience and dry-fitting/sanding/fitting the gap was very manageable which can easily be filled in with Squadron Green Putty and a little Tamiya Thin over the top to smooth it out.
The Tamiya Tape protects the surrounding area detail from overspill and perhaps rework on panel lines.

End result
Completed the canopy clear pieces, sanded smooth and polished up with MDC Polishing Blocks. Thena quick dip in Future provided crystal clear glass
Main fuse and wing to do a little re scribing of the top spine and some fine polishing of the remaining seams. A seam spot check was performed utilizing Tamiya Sky Grey paint
Nose area check

Alight layer over the Squadron Green putty to ensure the final paint does finish does not get affected by the porous putty
Aires Resin Exhaust parts. Cut them off the casting blocks, a little minor sanding was all it took to get these super detailed cones ready for paint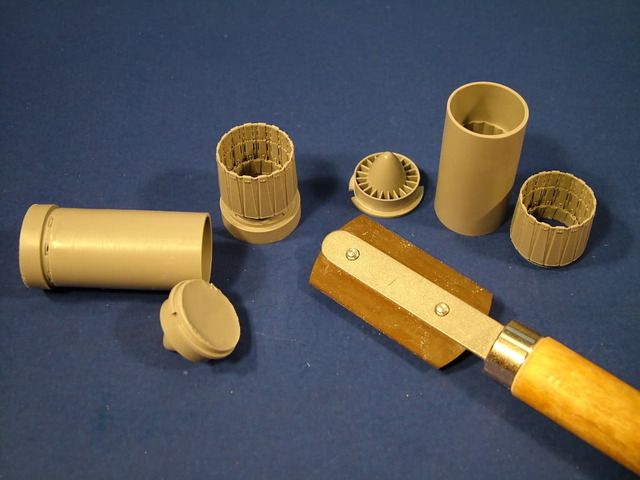
Aires part vs Kit Part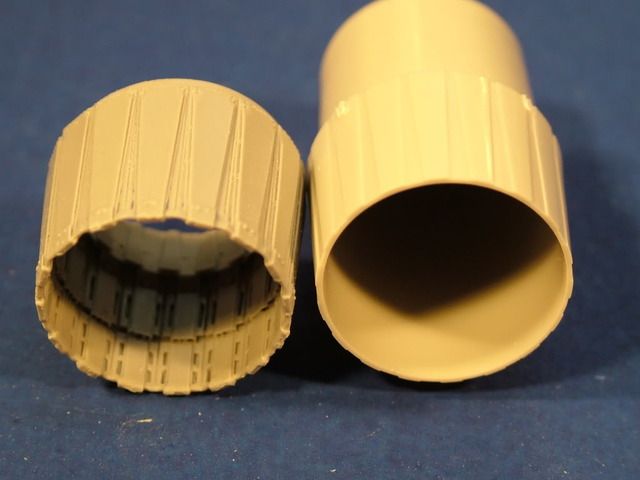
Another Aires vs Kit Part.
Worked the Aires Exhausts with Model Master Metalizer paint
A light over spray of ALCLAD II of Yellow (Pale Burnt Metal) and Blue and finally a light layer of Tamiya Smoke to bring some depth to it
Clean any finger print grease and mold release agent with some Plastic Prep. Using a paper towel slightly damp rub the whole airframe down. Use a small brush and a toothbrush to get into some of the small crevices and ensure no dust is anywhere in the re-scribed panel lines.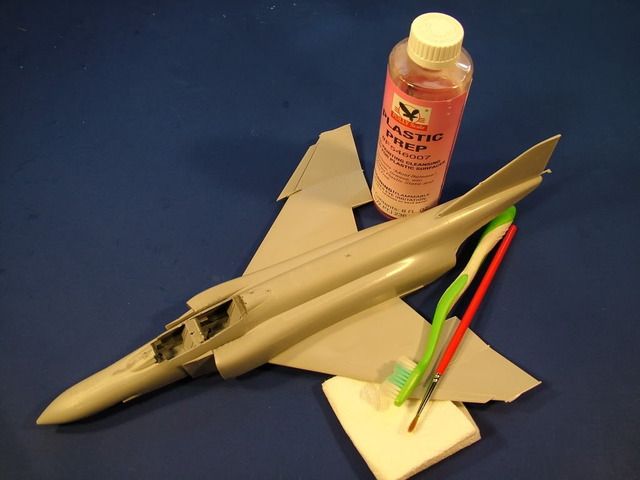
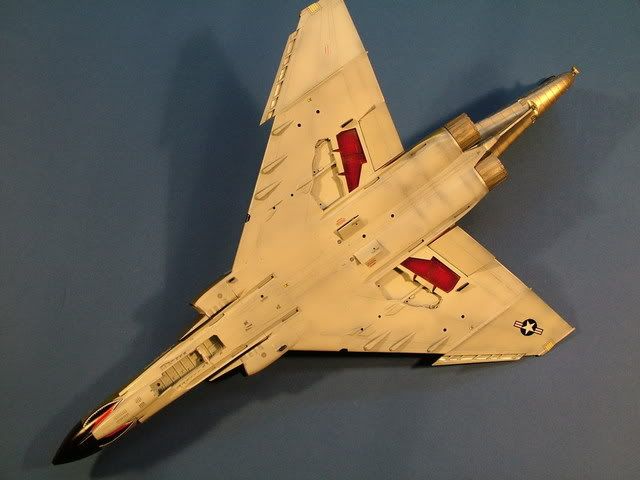
Nextshoot a primer coat and check for any fit issue and missed seams utilizing Mr Hobby (Mr. Color Light Grey)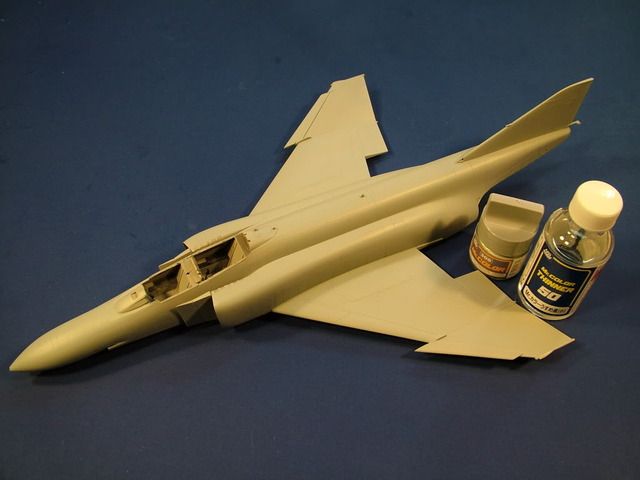
Masking off the canopy was accomplishedwith Parafilm and a small piece of Tamiya tape, front armor glass wind screen and middle section was glued on using Gator Glue. The positional Rear Cockpit and Front Cockpit canopies are held in place with blobs of "white tack"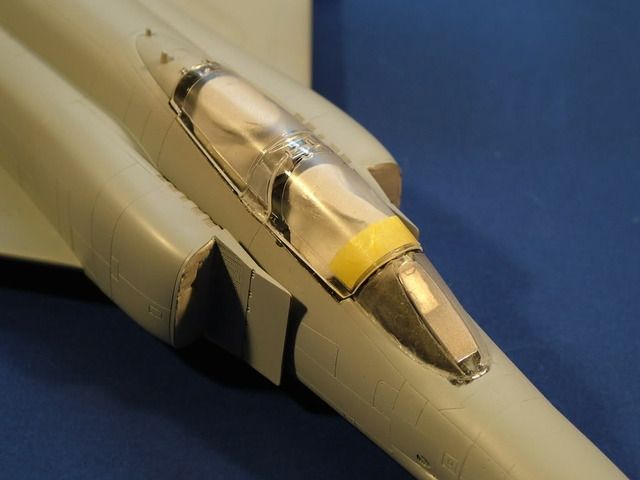
Pre-shading was performed with Tamiya Flat Black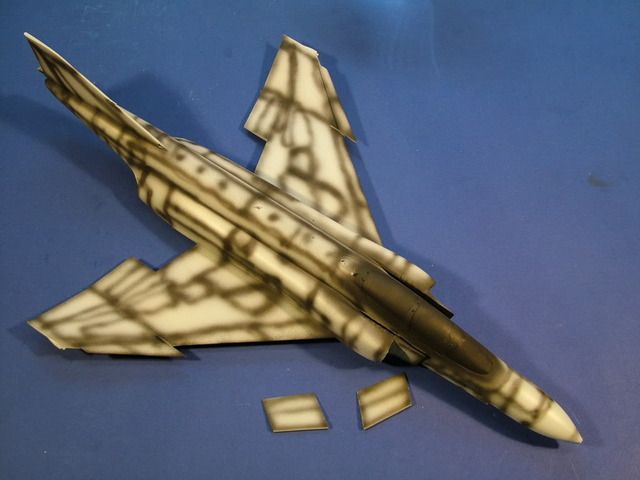
Underside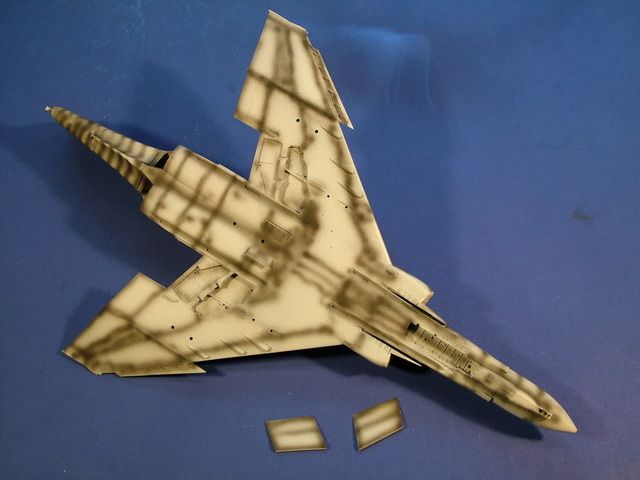
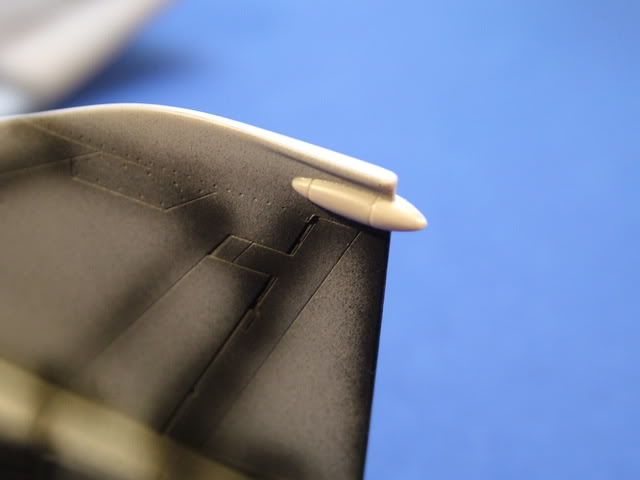
Installation of the tail fin antenna bump
PE Parts installation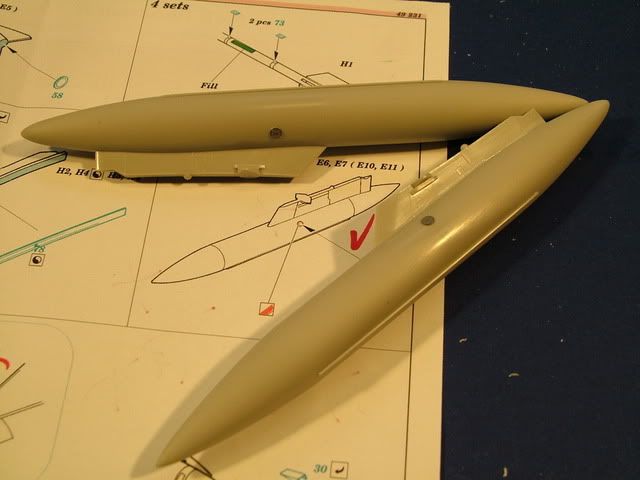

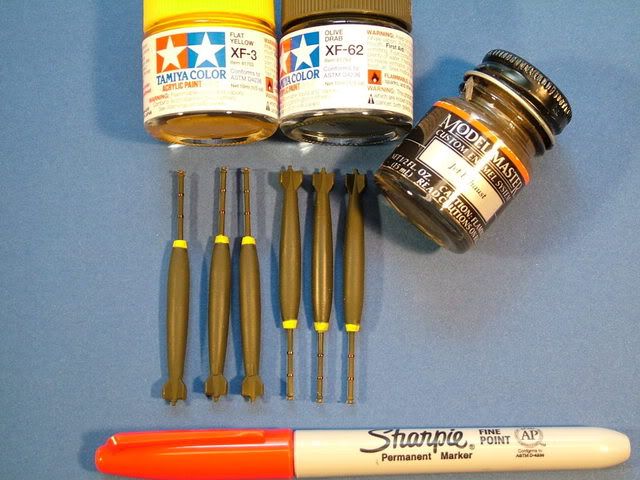
In order to not loose track of where I am in the build, I tend to use a red marker and mark off each part as I "find" them on the PE Sprue and locate them on the model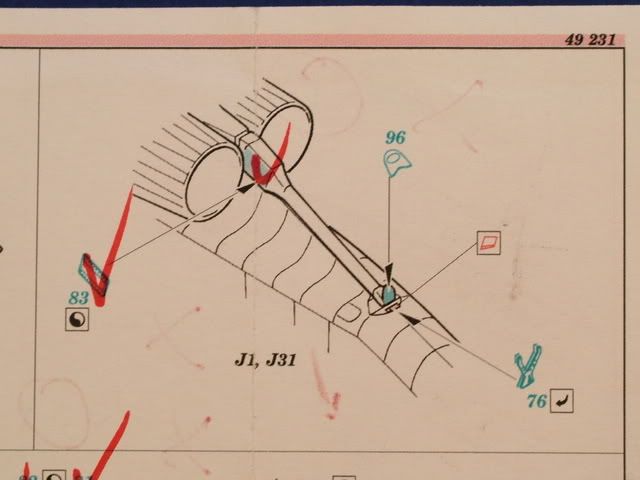
Tail Hook Detail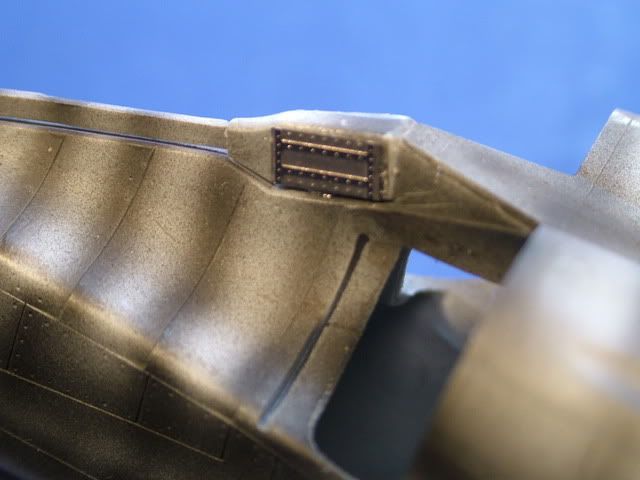
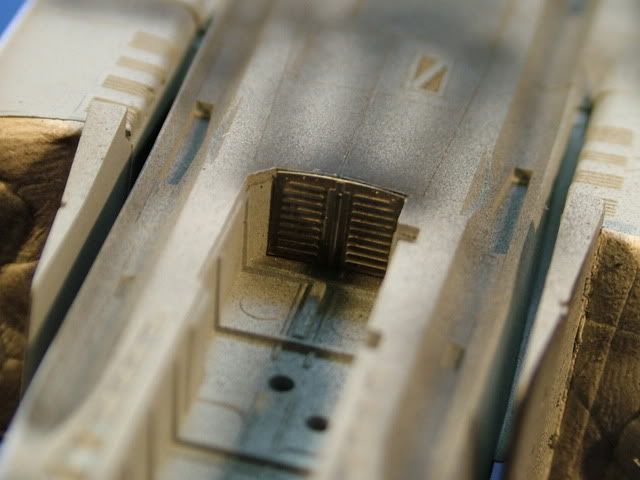
Nose Wheel Well detail for the back wall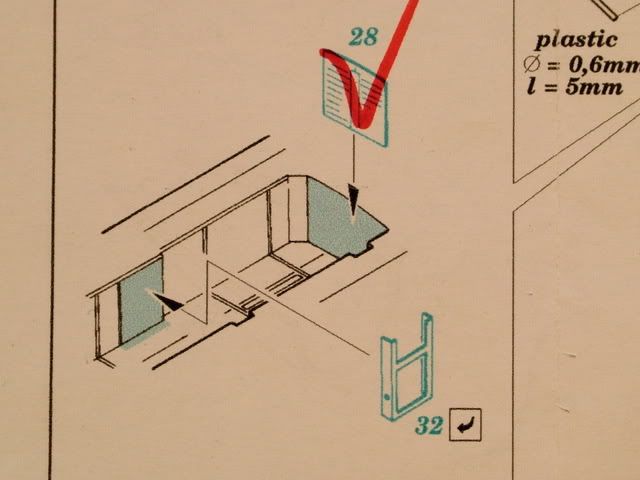
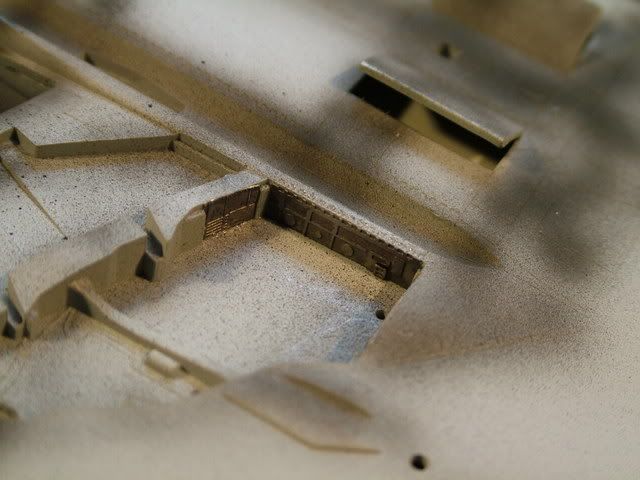
Main Wheel well detail for the side walls
Resin flaps installed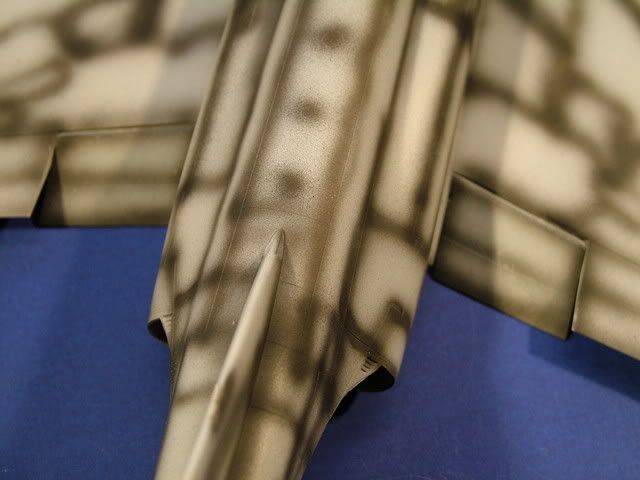

Sanded down the outboard wing tanks, re scribed them, then primered all the small parts and pre-shaded where possible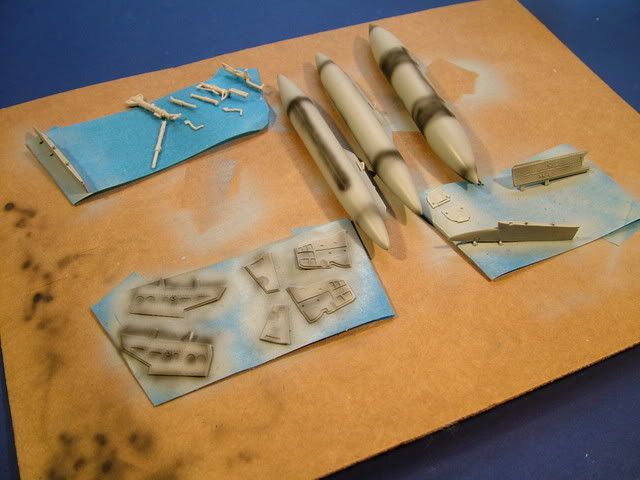
Air brakes painted Tamiya Flat Red,some nice shading coming through
Red Interior of the Air brake on the airframe
Primered up the FOD air intake covers, then shot a light coat of flat Black Tamiya XF-1 to pre-shade, then a light coat of Tamiya Flat Red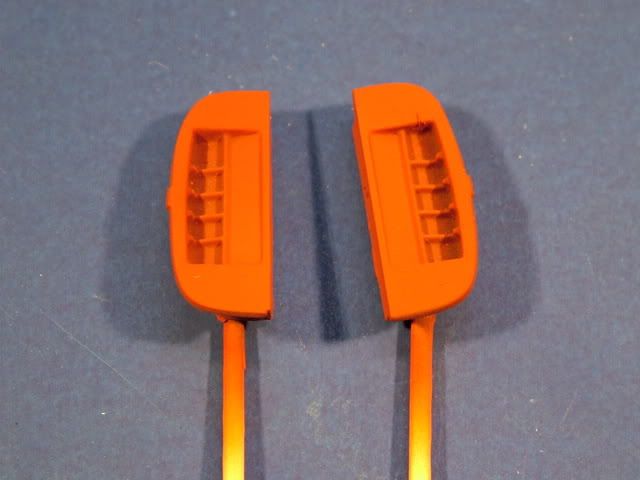
Painted up the elevators with some Alclad II Dark Aluminum and Aluminum to show some panel highlights
Airbrushed the bottom color, Mr Color 311
Wing Tanks, Center line Tank and In-board Armament Pylons airbrushed with Mr Color 311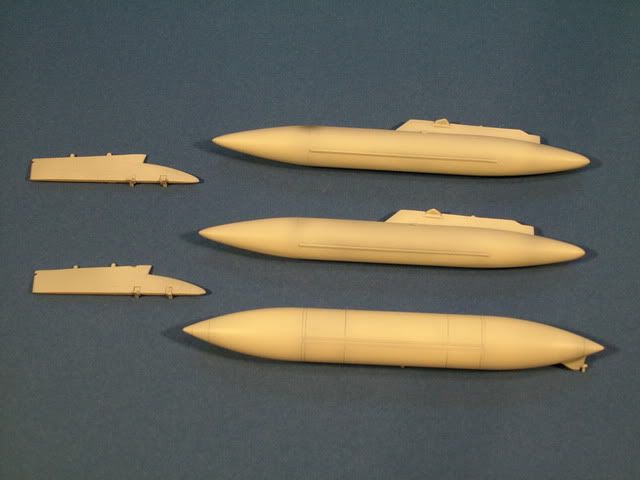
Worked the bombs, by sanding down the seam, filled in the seam, andthe locator holes with Tamiya White primer as they would not line up with the TER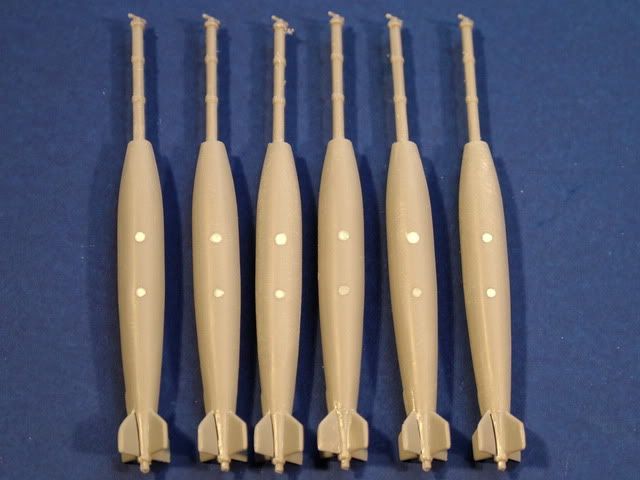
EJ Seats primered Black and the Aim 7E rockets painted up with Tamiya Flat White XF-2 then a coat of Model Master Super Gloss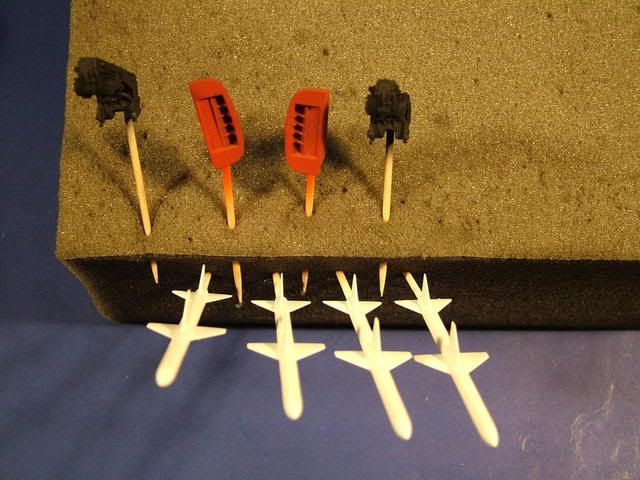
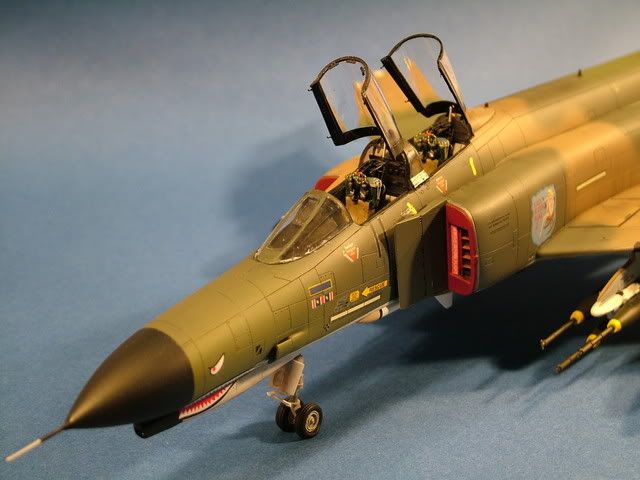
AirbrushedNose cone Gloss Black using Tamiya paint X-1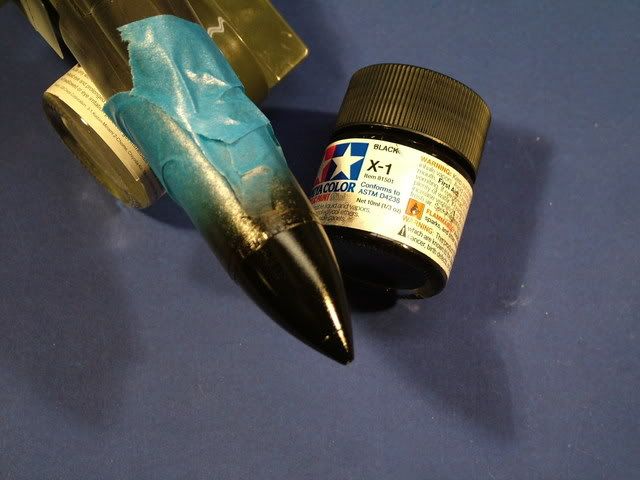
Finished up all the small bits. Completed the inboard Weapons station and installed the TER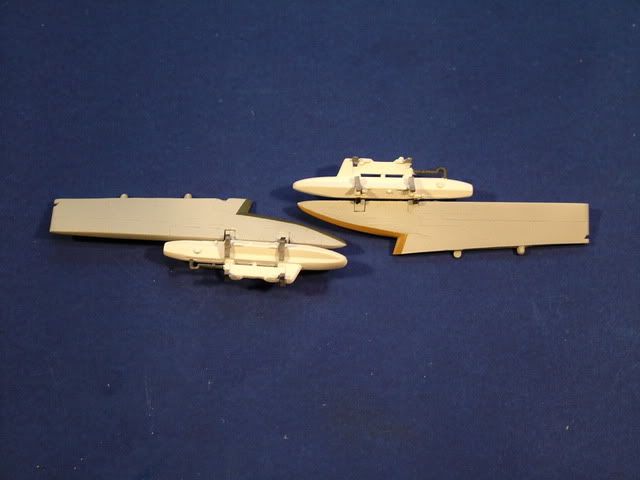
Completed the Mk 82 with fuse extender bombs, used the red marker to place the small red rings around the fuse extender.
Quite a bit of time was used to complete the Aim-7E Rockets

Free hand camo on the elevators. Still need to mask off one panel and get one darker shade of Aluminum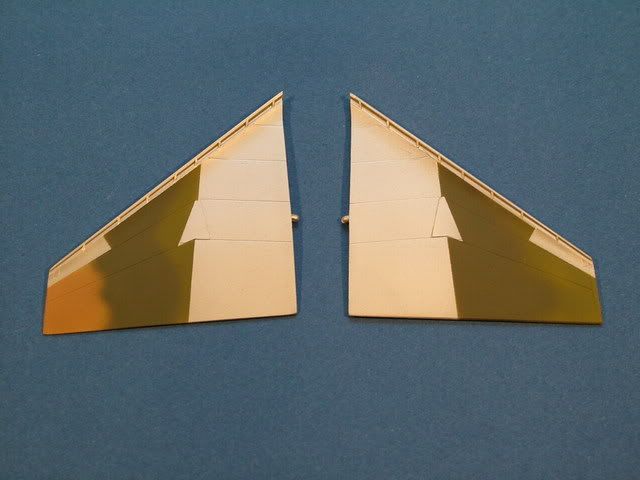
All the other "bits and bobs". The outer wing tanks are completed, all the landing gear, legs, oleo's struts, landing light, Gear Doors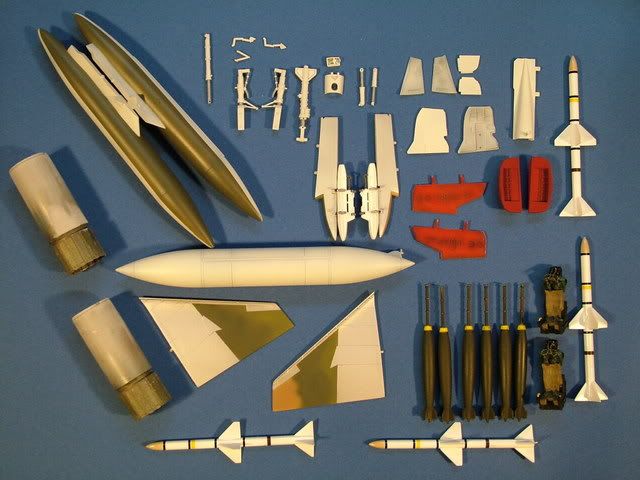
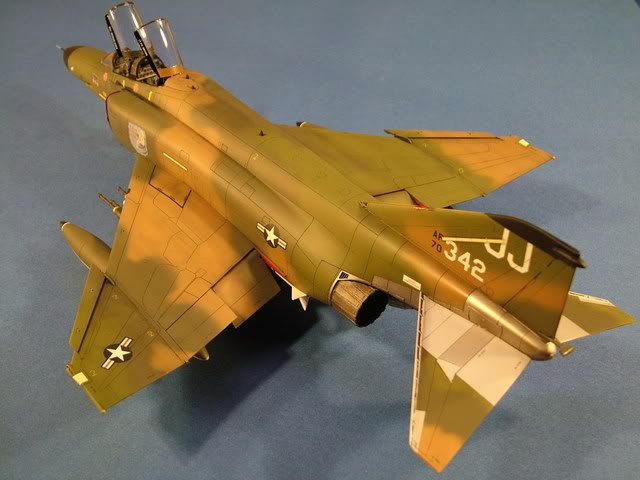
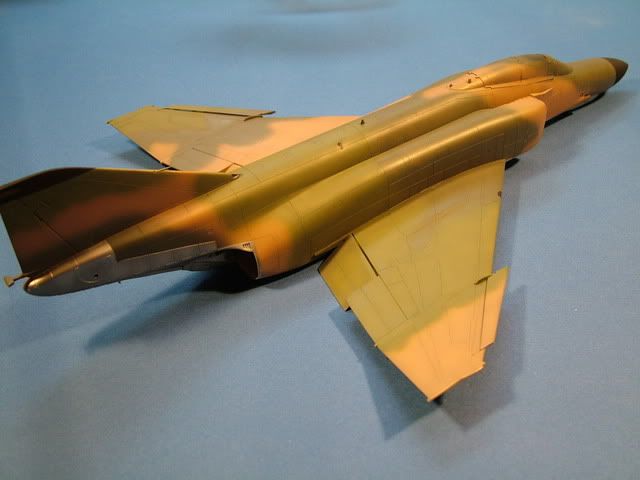
The complex Vietnam Camo job. It truly got some of that "patchy" appearance of a heavily flown bucket, which has been baking on the tarmac while awaiting it's final flight orders. I believe I got some pretty great results which are hard to see on the pictures. Pre-Shading is coming through on the brown and the light greens.Most of the metal work completed.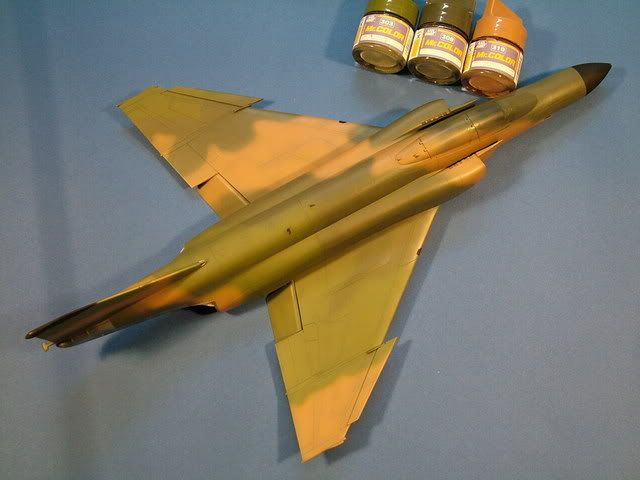


Airbrushed on several coats of Model Master Lacquer Gloss Clear in order to prep for the decalling process![]()
Installed the Aires Engines, painted some of the smaller details as well. The Black fin cap is the Unit's Designator![]()
Back end, most of the metal work is complete. Has a hint of shading and some Pale Yellow "burn" marks. Still need to simulate that "smoked" signature Phantom once we get to the final stages![]()
The bulged resin wheels from True Details 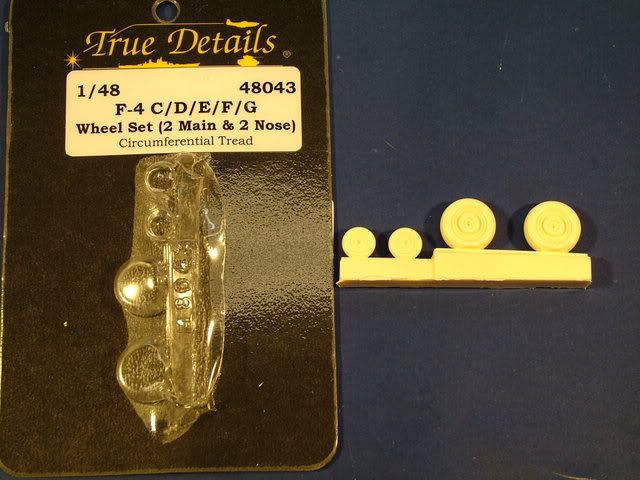
The front ones are a little overstated so they where sandeddown just a little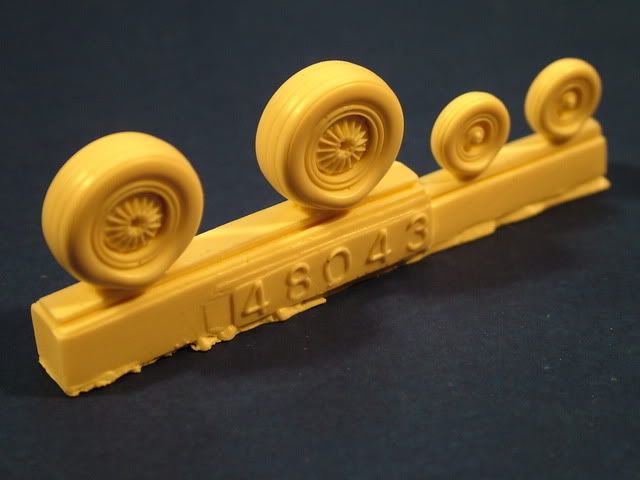
Wheels completed with some Tamiya Smoke. The rubber was simulated with Tamiya NATOBlack.![]()
Decaling Stage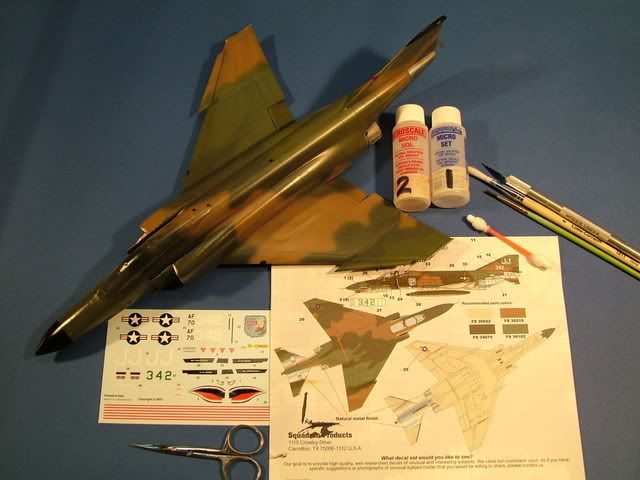
Tail completed, looks like I have a "little" Red to clean up, plus the formation light bar still needs to be applied.
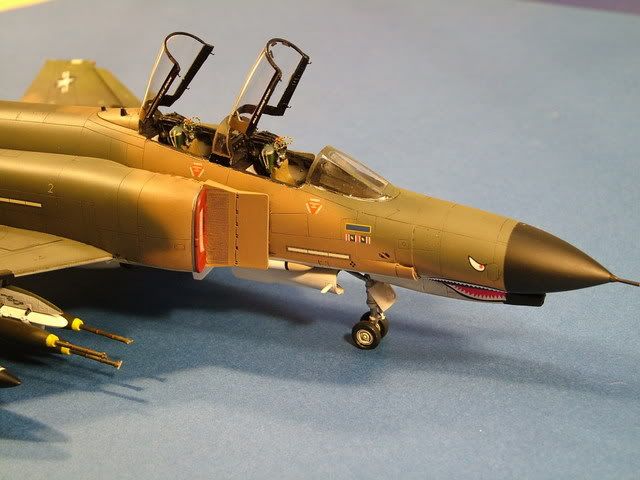
Famous Shark Mouth Completed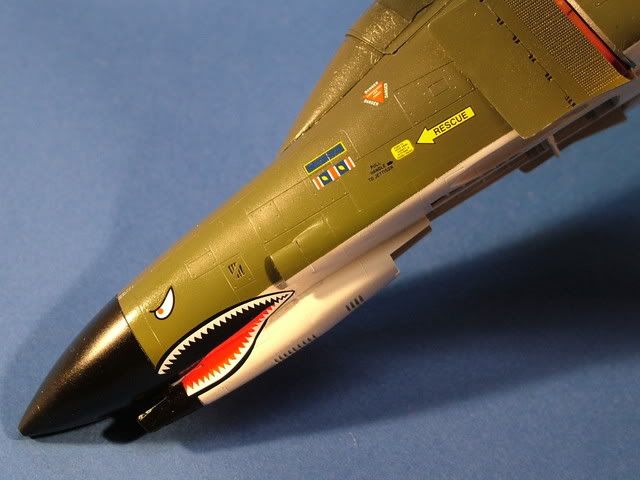
FOD Covers Installed, and bare metal silver edging around the intakes completed
Just about all the decals are on, the cartograph sheet behaved very well. Initially no Micro Sol or Set was used. The first application was let to dry for a couple hours, Then went in and followed the panel lines with a brand new blade across all decals and then applied Micro Sol. Let that dry for an hour, then a final light application of Set was used to "pull" in tightly the decals to get that "Painted Look"
Outboard Pylon wing tanks, applied a gloss Black to the tip, then applied the White Band decal. Also dirtied up the tanks with "spatterings" of bugs/tarmac tar etc to give that "flown" look
Final detail painting has been completed, such as the antenna's top and bottom, the navigation lights were painted with Tamiya Silver fist, then Tamiya Clear Red and Green was used to simulate the clear glass.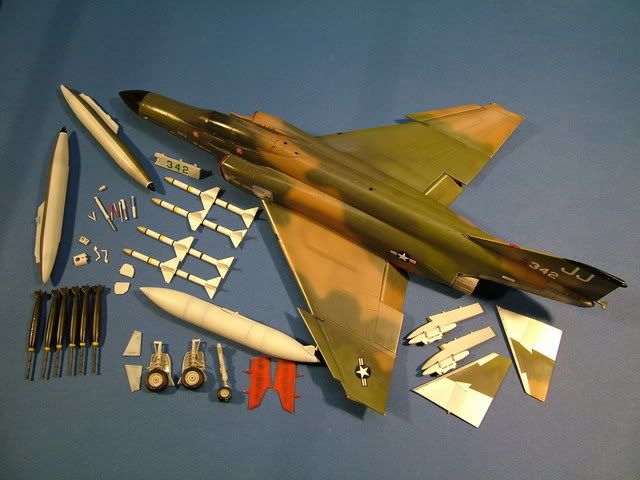
Here are some of the smaller details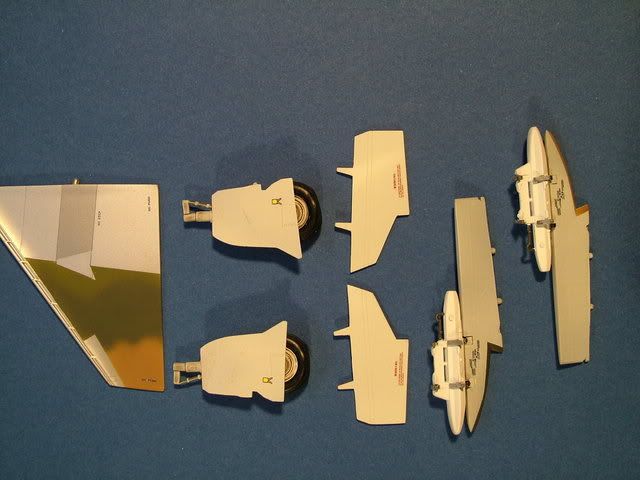
Finalized the "Slime Lights"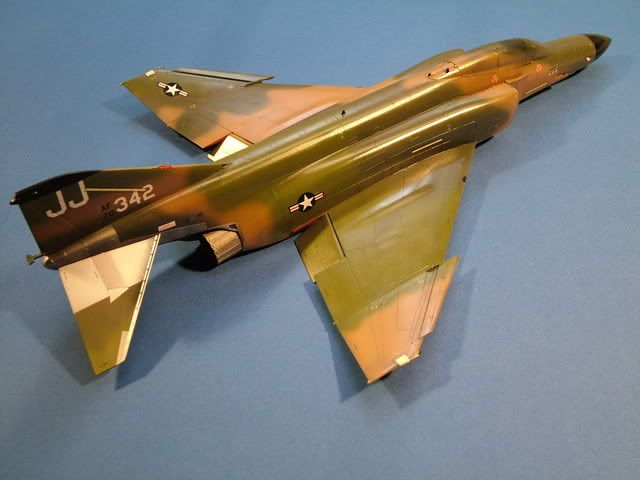
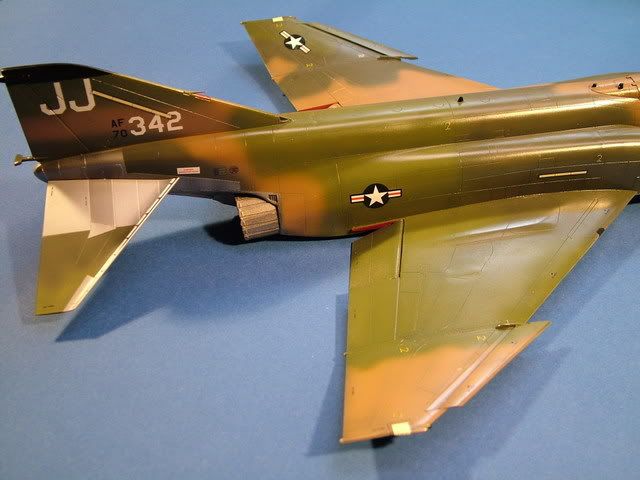
Top surfacestreated with the ProModeller Black Wash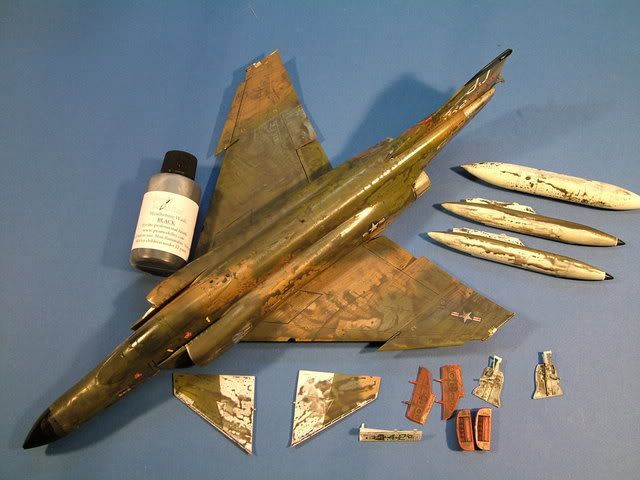
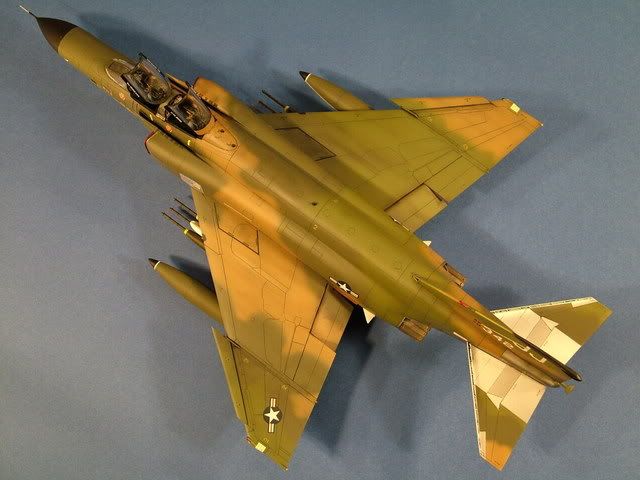
Bottom Surfaces with ProModeller Dark Dirt wash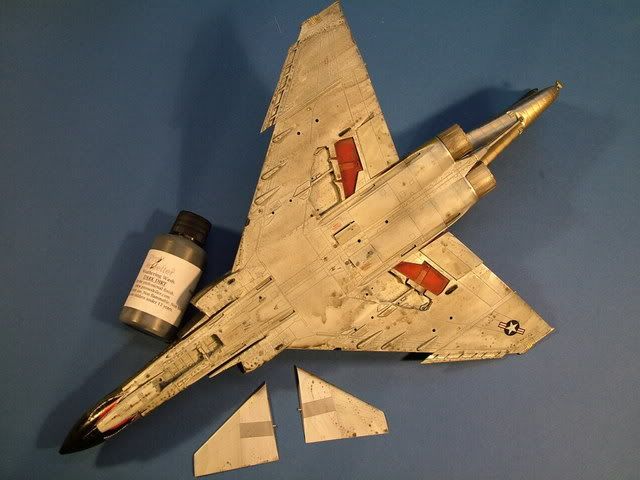
Wash removed from the top, leaving behind some nice panel line definition everywhere
Wash removed from the bottom and utilizing a cotton bud, left behind some great streaking on the normally dirty "back end" 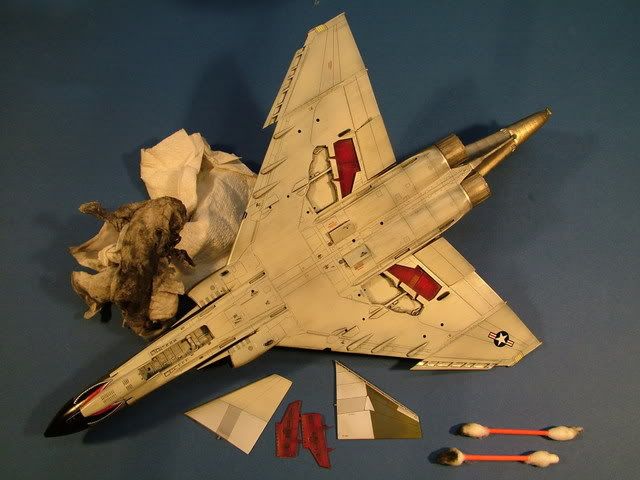
The Back End Detail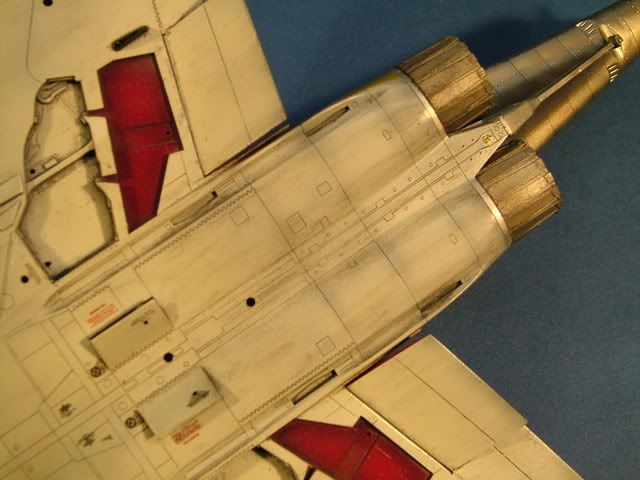
Here we have the Snake Eyes all installed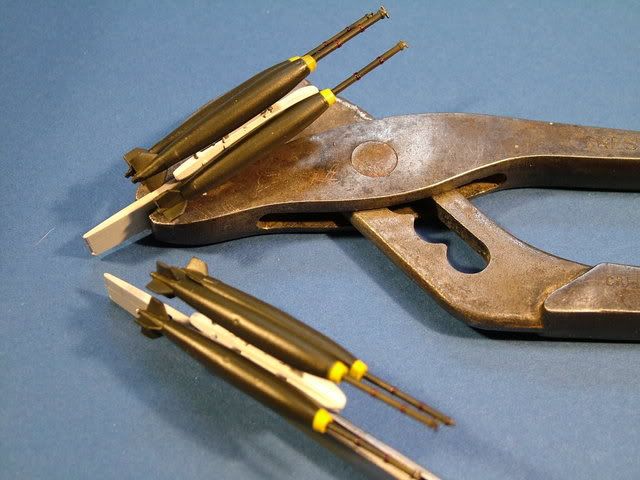
Cleaning up small details, extra weathering with some powders mainly on the Center fuel tank, some fuel, spillage, some drag marks over the top wings, gun staining, installed the pitot tube. Cleaned up the bang seats, installed all the armament, the elevators, flat coated the whole thing etc.
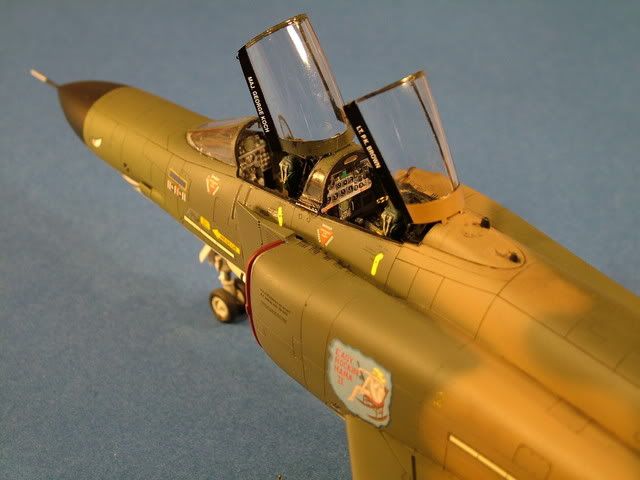
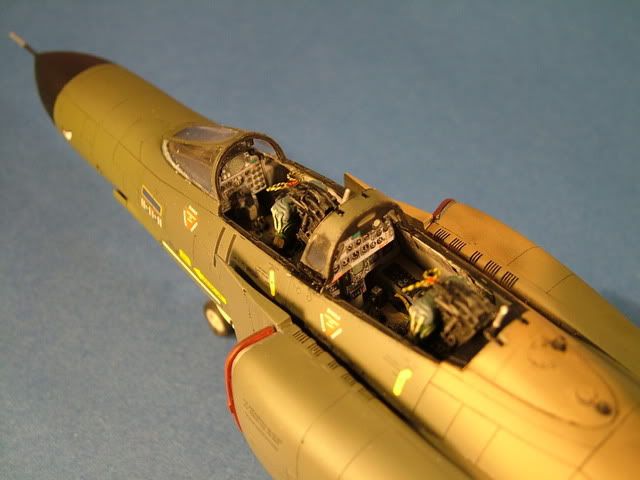
Finalized the cockpit with the Eduard PE, cockpit seal frames, mirrors etc.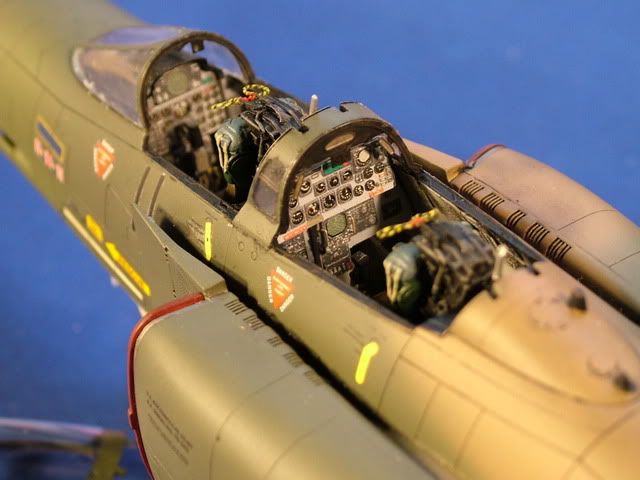
Bang seats finished
Over all bottom shot depicting the "Dirt and Grime"
Center line Tank Detail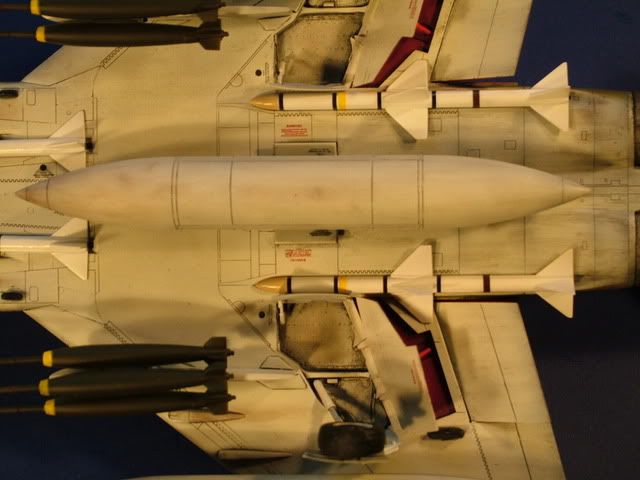
Front gear wheel Well and Snake - eye detail
Snake Mouth, and Gun staining from the gun vents: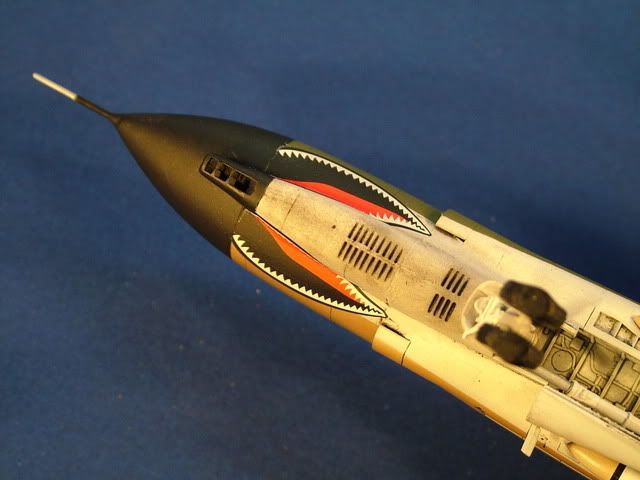
Landing Flap Detail and Rear end detail.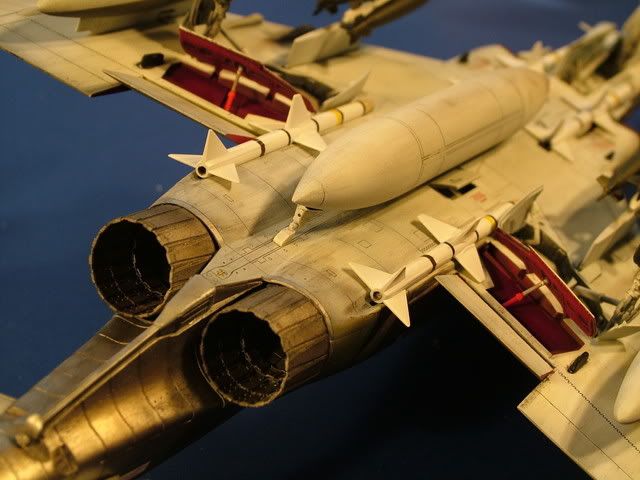
Some more Exhaust "staining"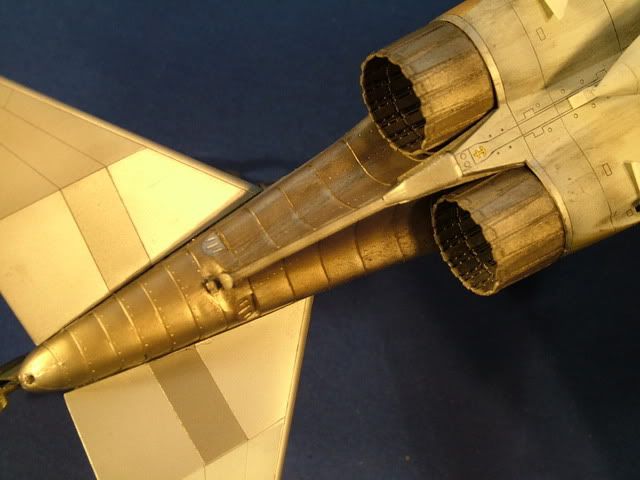
Wing Details.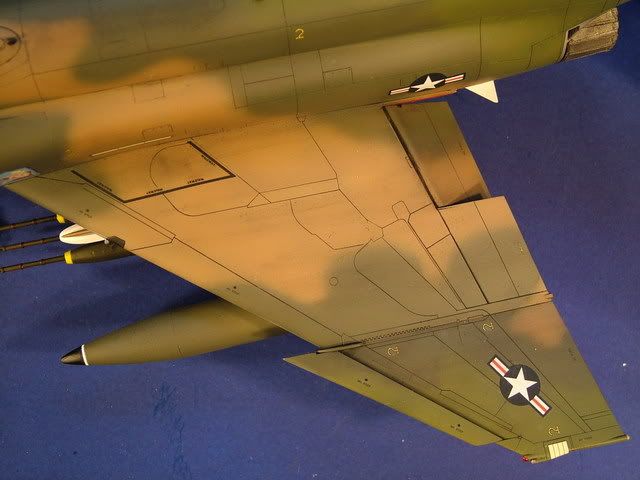
Last couple decals were added to the canopy sills and then installed.
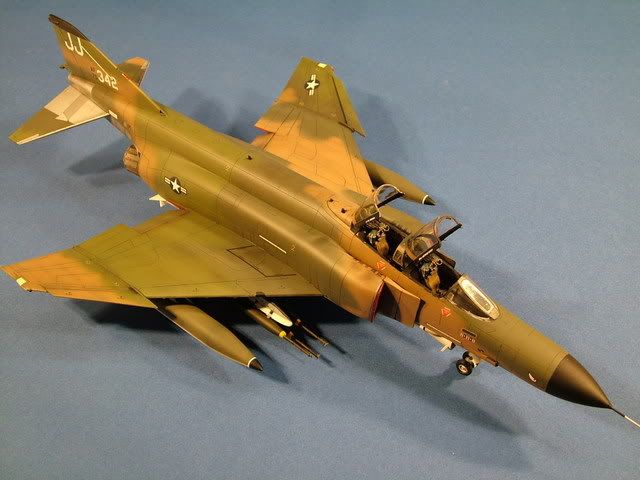
Final reveals