


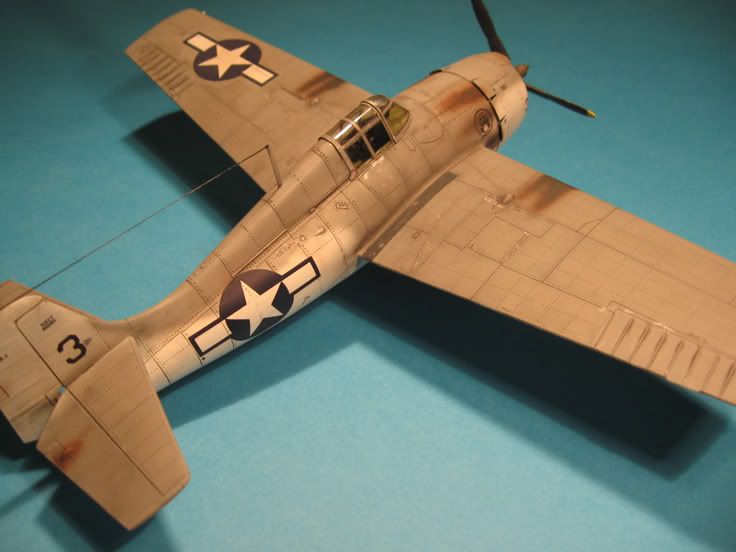
HobbyBoss 1:48 FM-1 Wildcat
By Tõnis Kuus
- Manufacturer - HobbyBoss
- Scale - 1:48
- Model - FM-1 Wildcat VC-12 USS CORE(CVE-13)
- Extras - None
- Paints - Tamiya, Model Air, Alclad II

Should be a interesting kit and also it's from my favorite section-WWII Pacific Theatre US naval planes.
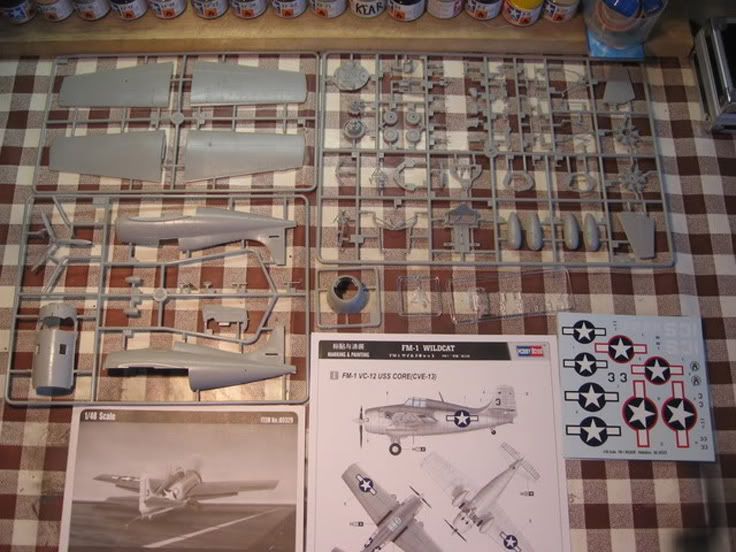
There's not much to this kit so hopefully should be a quick build.
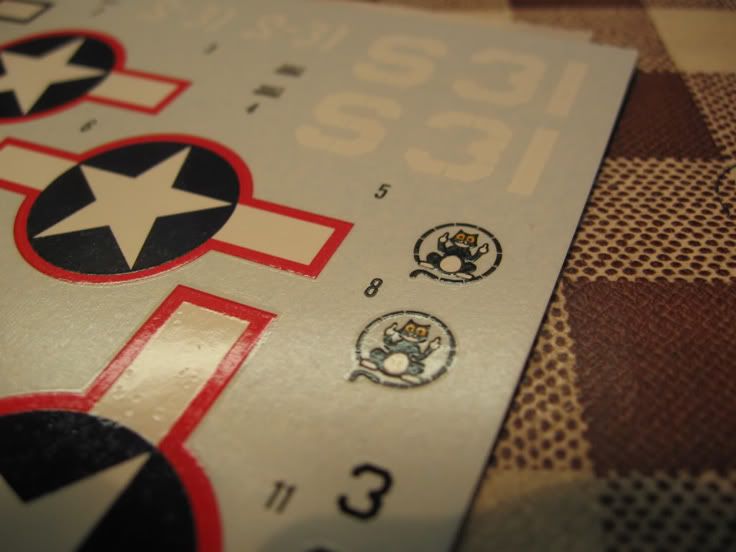
The decals are very nice indeed and will be used.

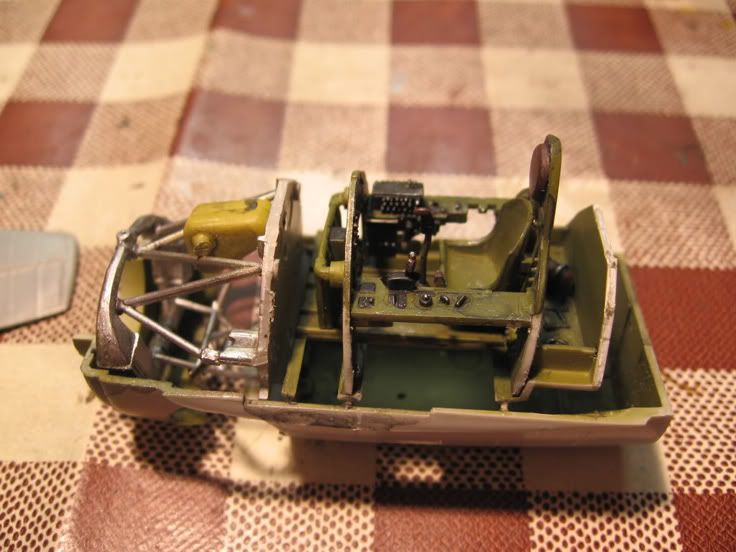
I assembled the pit in three pieces because it's easier to paint then.
Very good detail to be completely honest with you!

The gear supports and wheel bay were very fiddly to assemble but looked great when built.

All painted up with Model Air Interior Green, then washed and details picked out.

The dials were painted white and a few drops of clear added to liven them up.

Painted with XF-16 and washed with valejo sepia shade.
Behind there you can see a container which attaches to the wheel bay wall that's painted the XF-4.

Progress so far.

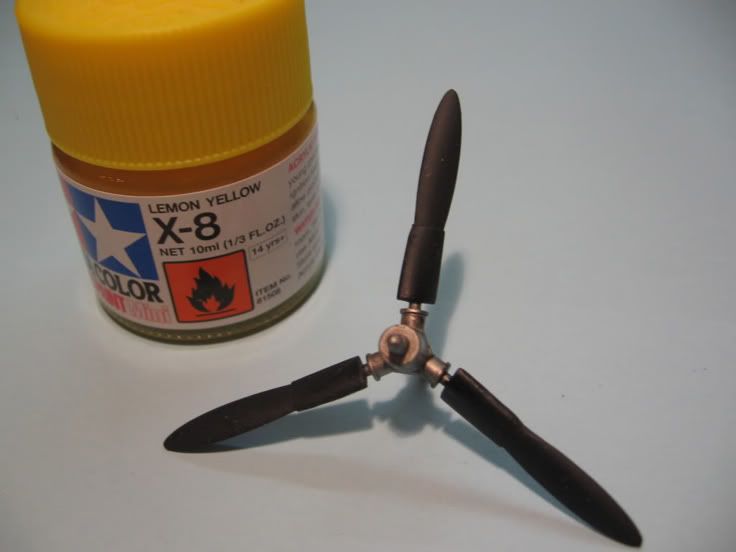
Engine parts mounted on tooth picks ready for painting.
I got the engine all painted up with Alclad II,and Valejo Black shade wash was airbrushed on so that the parts were flooded.
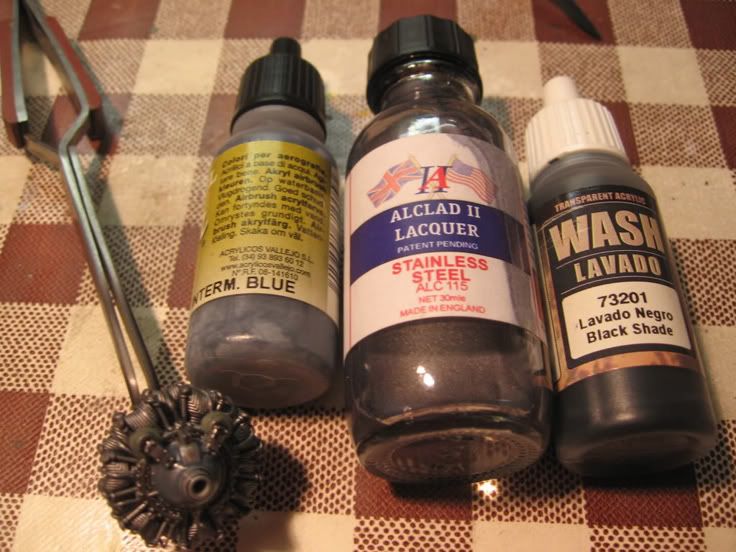
You can see the wash bringing out nicely the recesses. And also with it being a gloss coat it will protect the fragile Alclad. I attached lead wire to the cylinders with CA.


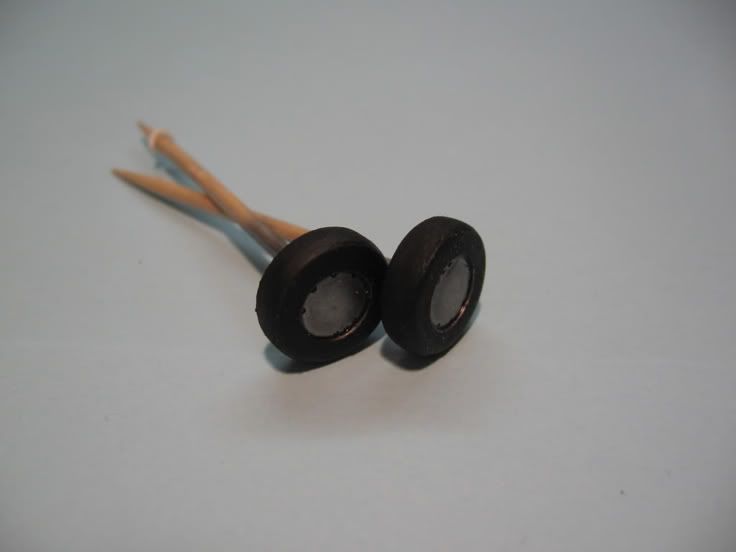
Because i'm going for a very used look i sanded (well more like grounded) the wheel on a rough sponge...
the wheel on a rough sponge... 

Leaving me with the effect i wanted!
Getting the pit and the bay in was fiddly to say the least getting it to line up..OUCH!
Using my newly arrived bottle of Xtra thin I got the seam with the fuselage pretty decent. Here i have already sanded it.
Also scribing was like hell! Of course i'm still missing a scriber
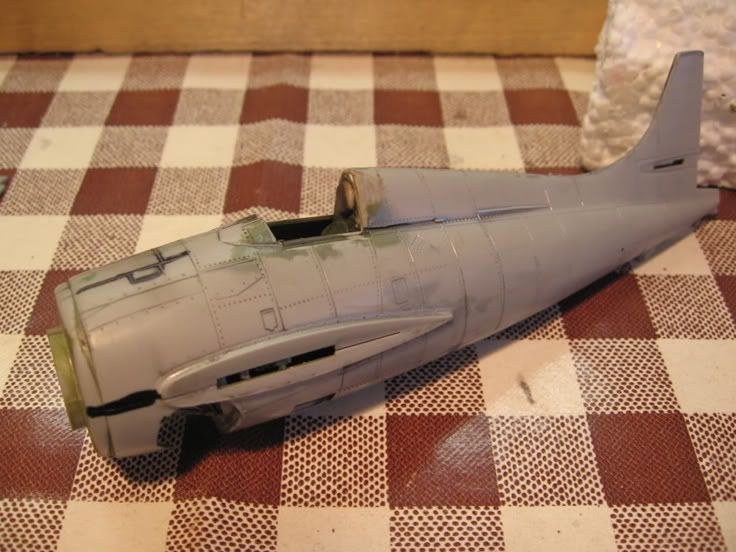

Wings assembled and joined with the body. A change of back ground because i didn't like my dirty desk in the shot.

While sanding the seams i had accidentally removed some of the wing join area, so out with the filler.


First "battle damage" broke of the arresting hook and the tail wheel.
Get that fixed later on.

Now a very fiddly part of the under carriage.

Wheels all painted up with that lovely effect.
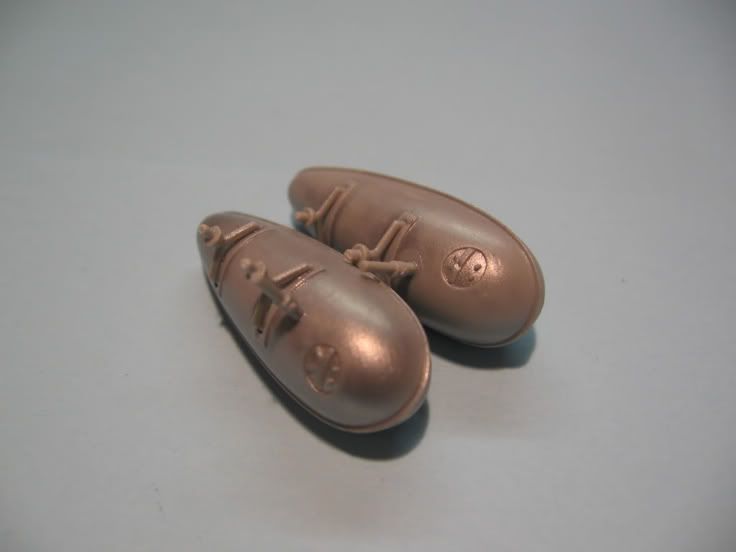
Drop tanks assembled. I liked these ones because they have that rib on the side taking care of a seam line.
Tail area done. Originally the plan was to move the rudder but due to complications caused by the ailerons that's cancelled.

The prop was painted and the yellow is X-8 with a dab of XF-4.


The join between the headrest and body needed filler with paint afterwards.


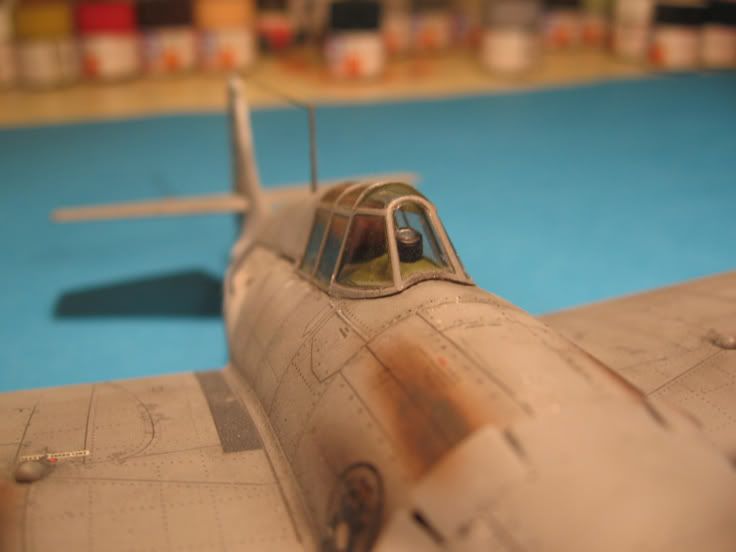
I masked the canopy the usual way Phil would.

Now to get to the "big" thing in this build for me.
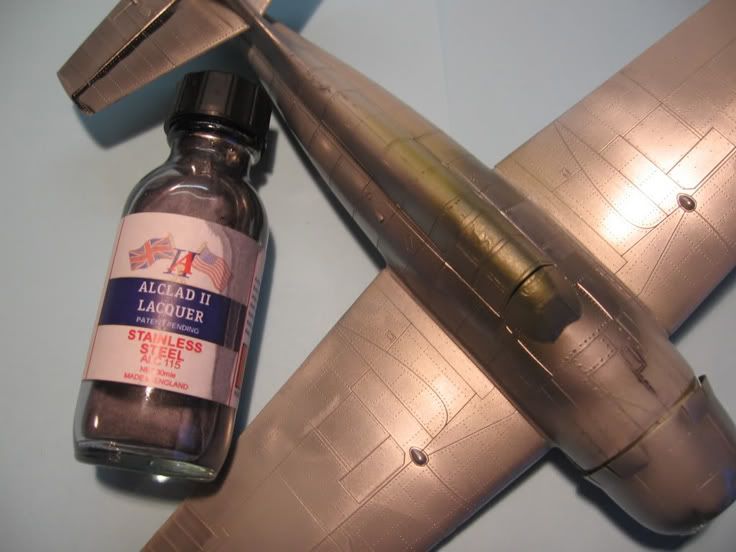
I've always been unhappy with brush paining paint chips so i'm going to give salt chipping a shot! The metal colour is applied and drying as i'm writing.
Now the "salt chipping experiment" so to say ,is well under way!
I applied a drop of water with a medium large brush, then sprinkled salt over it until it stuck to the surface...

I applied it in a random fashion and tried to keep the effect light and easy.
So far so good!

The reason i used alclad is i hope to have a "catch it in the light" effect.
However XF-16 is not that kind of paint ,also it has a flaky look to it.

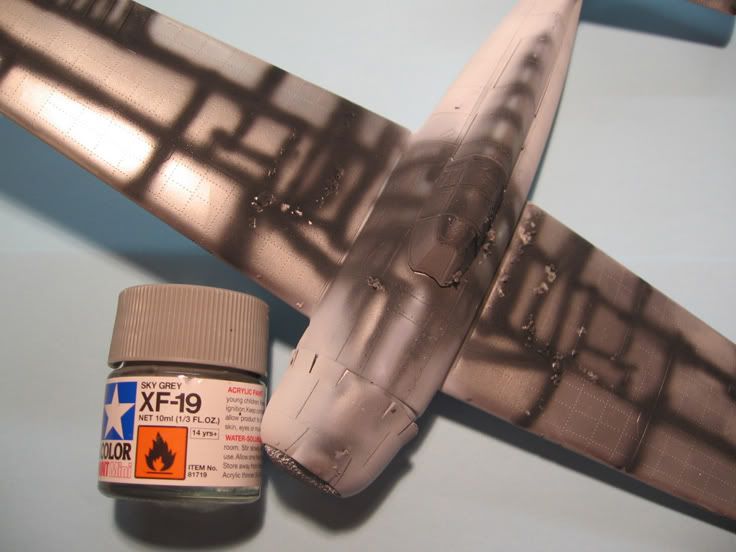
Listed above(and below) is the main paints used.
XF-1-For the pre shading.
XF-2-For the underside.
XF-19-For the top.

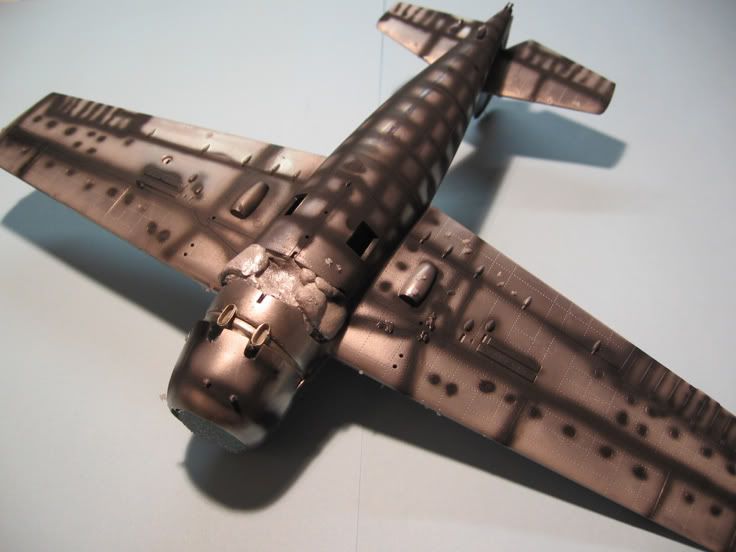
Pre shading done. On here you can also determine my airbrushing skill and conclude that I'm mad to try free hand on the camo lines.

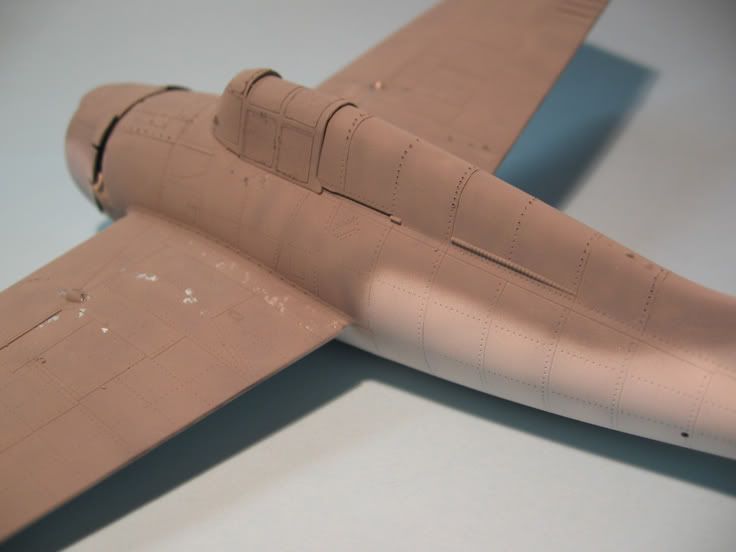
The white is painted and looking rather crisp. I think the shading isn't killed and is doing it's job nicely. I used a 30-70 thinner to paint ratio. Added in were two drops of retarder.

The top side got a 50% ratio paint. Here the retarder was replaced by a few drops of black.

Also i highlighted the centers of panel lines with a darker paint solution.
Now, about the salt... 
The effect is NOT worth the trouble. As soon as you lightly touch the salt it falls off and gets painted over. So I'm not happy with the method but the result is pleasing giving us the light effect we were looking for.
All so TIP: Mark the spots where you will put the salt to prevent wasting expensive paint.


Here's a little mess up. When painting my arm slipped and i over shot a bit.
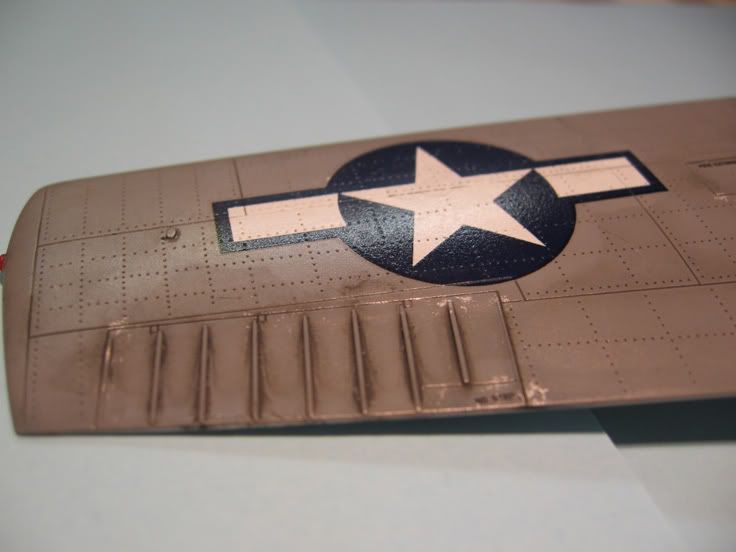
But it's all covered up by the decal so no need to go and tidy up.

Here Iv'e masked for the painting of the no slip pads on the wing roots.
Kinda of a two steps forward and one back situation. But using maskol as a cover.

After i had removed it i found a much better way of doing similar chipping but with maskol.
Here being a jerk to myself i touched up with XF-16 and ruined the effect.

I found that putting set directly under the decal increases the sol's power giving me panel lines in the decal.
Here you might be able to see a slight de-coloration when excess sol ruined on to the paint work.  No time to fix that though!
No time to fix that though! 


Wash on and looking sweet! Upon application the "Future" was still a little wet. Even though i waited 12 hours, but upon closer inspection it gave me a good texture to work on so next time up the anti by another 12 hours and it'l probably be magic!
Even though i waited 12 hours, but upon closer inspection it gave me a good texture to work on so next time up the anti by another 12 hours and it'l probably be magic! 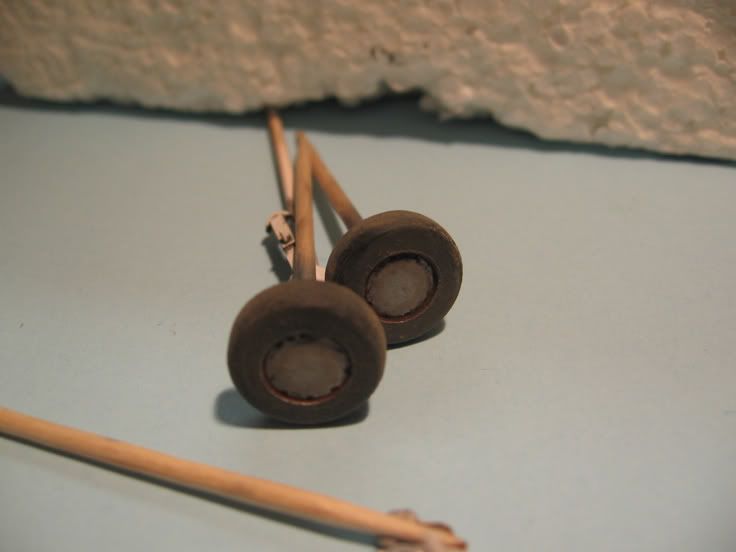
I weathered the wheels with various pigments to give them that 'grimy' look.

Final assembly pieces all ready.
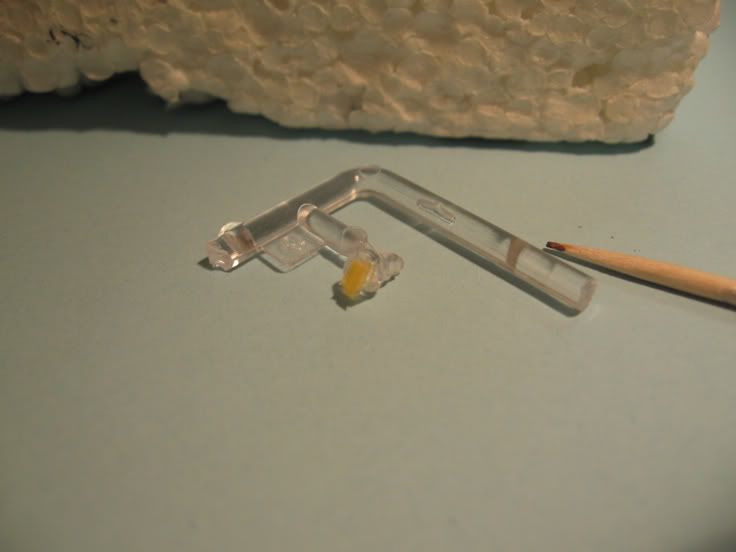
Gun sight masked to look neat.

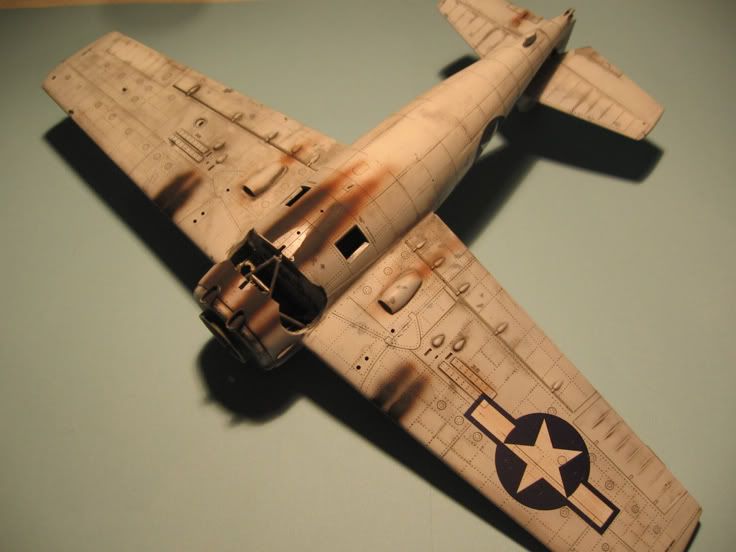
Here she is finally done and proud!


Tõnis 